
Sass is a seriously powerful web development tool. When it was first released, to install and use Sass required the command line and a Ruby framework. This was a big turn-off for many newcomers.
But what if I told you, today, you can start using Sass within minutes? What if I told you that you could do it without ever launching your command line? You can.
I’ll walk you through the process of setting up a Sass project with Prepros. Prepros is a tool for compiling Sass to CSS. (Prepros can also handle Jade, CoffeeScript, Less, Stylus and more .) In this tutorial we’ll create a responsive web design using Sass, with the help of Prepros.
 View Demo Download the Code OK, let’s get started!
Install Prepros
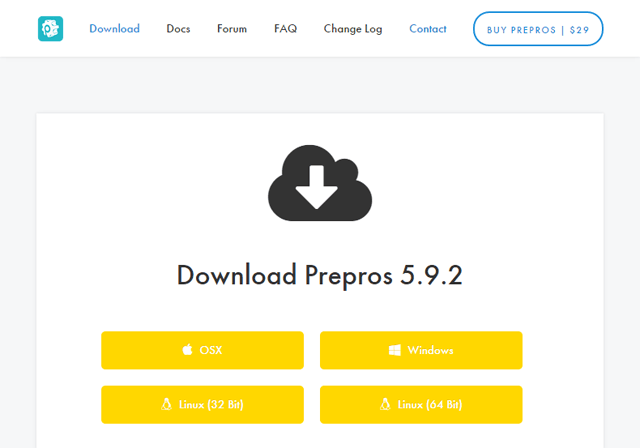
First step: Download Prepros. Prepros is available on Windows, Mac OS and Linux.
 After downloading Prepros, install it on your computer just like any other desktop software:
  Prepros is free to use. But whenever you launch Prepros — and every now and then, when you’ve been using it for hours — it will remind you to buy a license. Personally, the notifications don’t bother me. But if you derive a lot of value from Prepros, I encourage you to buy a license to support its developers.
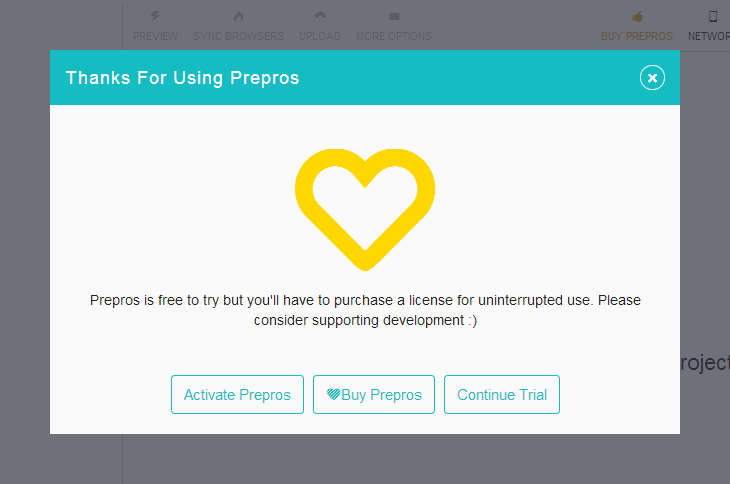 Sometimes Prepros will bug you to buy a license.
Set Up the Sass Project
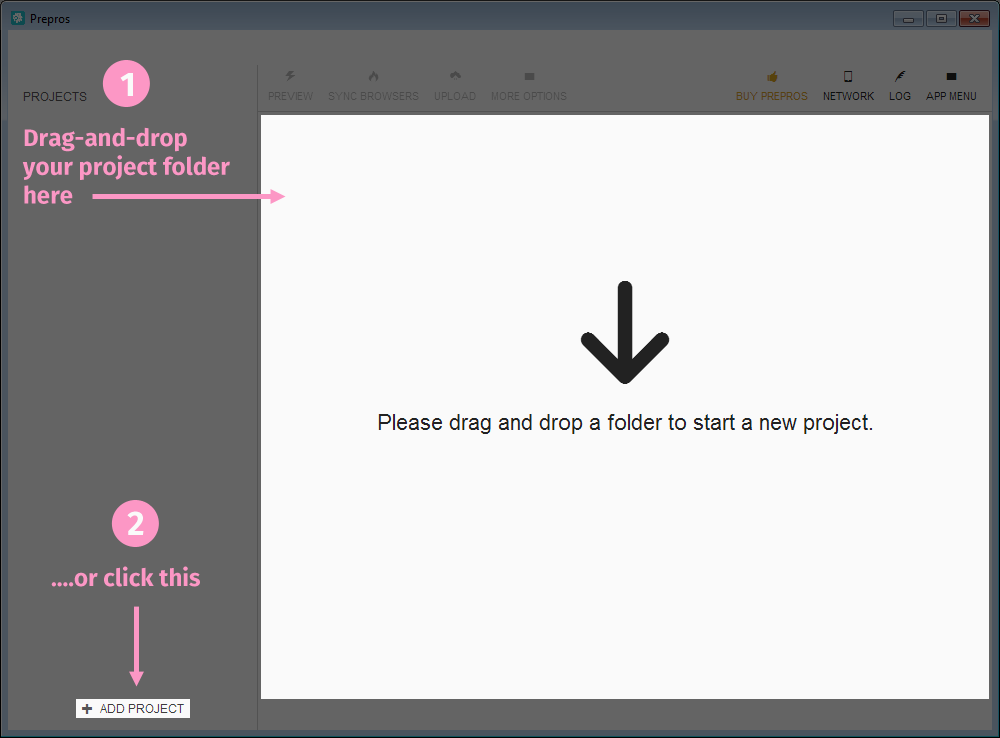
Let’s set up our Sass project in Prepros. You can do this one of two ways:
- Drag-and-drop your project folder into the Prepros window
- or click ADD PROJECT
 If you have no files in your project folder, Prepros will tell you that your “Project is empty.”:
 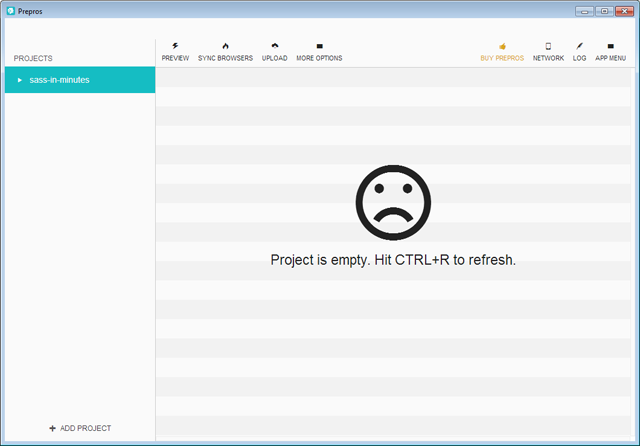 After adding a project, if you look inside your project folder, you’ll see Prepros created a new file. The new file is called
 prepros.cfg. If you’re curious: This file contains the configuration settings of your project.
Create the Project Files
Let’s create the files for our Sass project. Use your favorite code editor for this. Here’s the project’s initial file structure: 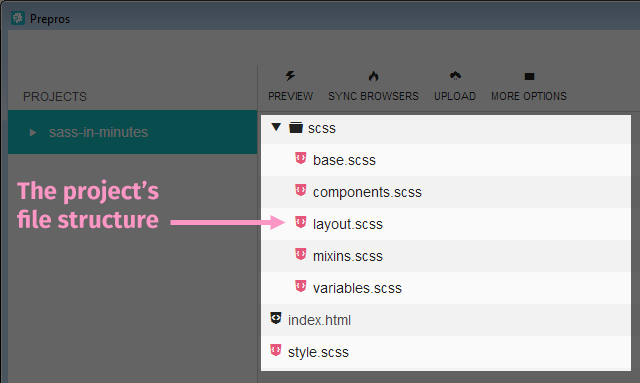 In the root of the project folder, we have 2 files:
index.html— this is our web page.style.scss— This file just imports our Sass files. Prepros will automatically compile this into a CSS stylesheet namedstyle.css.
Then we have a sub-folder called scss. This sub-folder contains our five Sass stylesheets:
variables.scss— contains Sass variables that we’ll reuse throughout our project.mixins.scss— contains our Sass mixins.base.scss— the default style rules for HTML elements.layout.scss— style rules for the web page’s layout.components.scss— reusable class and ID selectors.
The project files are structured in a modular way, even though we’re only building a simple landing page. This level of CSS modularization is most beneficial in complex, large-scale websites, though.
Import the Sass Stylesheets
We’ll import the five Sass stylesheets that are inside the scss folder into the stylesheet named style.scss.
This is the code that goes in style.scss:
@import 'scss/variables'; @import 'scss/mixins'; @import 'scss/base'; @import 'scss/layout'; @import 'scss/components'; After saving style.scss, a new file will be created. It will be called style.css — this is our project’s stylesheet. What you’ll notice later on is that whenever we update one of our Sass files, Prepros will also automatically update style.css.
Right now, style.css is empty only because our Sass files are also empty. You’re now ready to use Sass! If all went well, the whole process would’ve taken you just a few minutes. As promised.
Create a Web Design with Sass
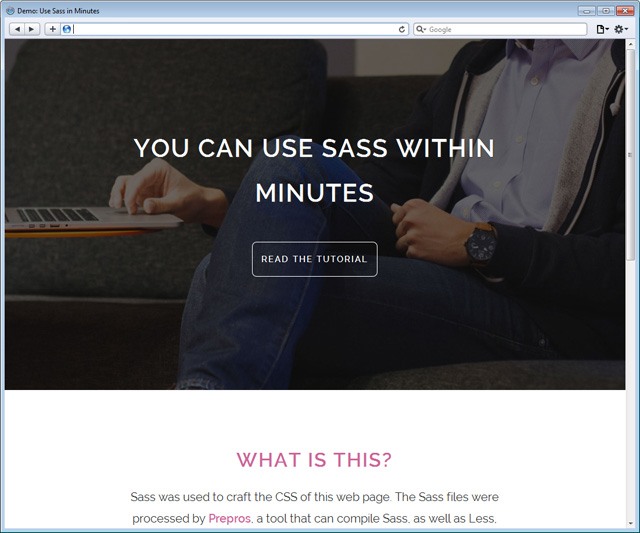
To make sure everything’s working properly, why don’t we create a web design? View Demo Download the Code
HTML
First, let’s work on our HTML. Place the following inside index.html:
<!DOCTYPE html> <html> <head> <meta http-equiv="X-UA-Compatible" content="IE=edge"> <meta charset="utf-8"> <title>Demo: Use Sass in Minutes</title> <meta name="viewport" content="width=device-width, initial-scale=1"> <link href="http://fonts.googleapis.com/css?family=Raleway:600,400,200" rel="stylesheet" type="text/css"> <!-- The project's stylesheet --><link rel="stylesheet" href="style.css"> </head> <body> <div class="page-header"> <div class="content"> <h1 class="headline">You Can Use Sass Within Minutes</h1> <a class="call-to-action-button" href="https://www.webfx.com/sass/use-sass-in-minutes/">Read the tutorial</a> </div> </div> <div class="description"> <div class="content"> <h2>What is This?</h2> <p>Sass was used to craft the CSS of this web page. The Sass files were processed by <a href="https://prepros.io/" target="_blank">Prepros</a>, a tool that can compile Sass, as well as Less, Stylus, Jade, CoffeeScript and more.</p> </div> </div> <div class="learn-more"> <div class="content"> <h2>Learn More</h2> <p><strong>Does Sass seem hard to set up?</strong></p> <p>Does it seem like it'll take you hours/days to get started? Are you afraid of the command line?</p> <p>You can use <strong>Sass in minutes</strong>, without ever stepping foot in a command line.</p> <a class="call-to-action-button" href="https://www.webfx.com/sass/use-sass-in-minutes/">Learn How</a> </div> </div> <div class="footer"> <div class="content"> <p>By <a href="https://www.webfx.com/">Six Revisions</a>. Photos from <a href="http://www.pexels.com/" target="_blank">Pexels</a>.</p> </div> </div> </body> </html> Notice that we’re referencing style.css. We’re not referencing any of our Sass files in the markup.
That’s because Prepros will automatically compile our Sass code into regular CSS and place it in style.css.
Write Some Sass
Now let’s write some Sass. I’ll go through the code for each Sass stylesheet now.
variables.scss
Sass variables are useful for CSS properties that you reuse throughout the project. Colors, the font stack, font sizes, and media query breakpoints are some typical variables we could define as Sass variables, because we end up using them over and over again. That way, when we need to change the values of these properties — say, if we wanted to change a color — we’ll only have to make the change in one place.
$color-foreground-default: #363636; $color-background-default: #ffffff; $color-black: $color-foreground-default; $color-white: $color-background-default; $color-dark-gray: #353d48; $color-medium-gray: #abb3be; $color-sass-pink: #c69; $color-var-2: #cccccc; $font-stack: "Raleway", sans-serif; $font-size: 17px; $font-weight-reg: 400; $font-weight-bold: 600; $line-height: 1.8; $margin: 30px; $padding: $margin; $screen-size-medium: 620px;
base.scss
I’ve declared some default styles for the HTML elements used in the web design.
body { margin: 0px; padding: 0px; font-family: $font-stack; font-weight: $font-weight-reg; @include set-font-size(1); background-color: $color-background-default; color: $color-foreground-default; } h1, h2 { margin: 0px; font-weight: $font-weight-bold; letter-spacing: 2px; text-transform: uppercase; } h1 { @include set-font-size(1.8); } h2 { @include set-font-size(1.5); color: $color-sass-pink; } p { margin: ($margin / 2) auto ($margin / 2) auto; } @media screen and (min-width: $screen-size-medium) { h1 { @include set-font-size(2.5); } h2 { @include set-font-size(2); } p { @include set-font-size(1.2); } } a { font-weight: $font-weight-bold; text-decoration: none; color: $color-sass-pink; @include transition("color"); &:visited { color: darken($color-sass-pink, 15%); } &:hover, &:active { color: lighten($color-sass-pink, 15%); @include transition("color"); } } strong { font-weight: $font-weight-bold; }
layout.scss
Our web page is laid out into four sections: .page-header, .description, .learn-more and .footer.
.page-header, .description, .learn-more, .footer { box-sizing: border-box; width: 100%; padding-top: $padding * 3; padding-bottom: $padding * 3; } .page-header { @include full-background-image("images/page-header-bg.jpg"); background-color: $color-black; color: $color-white; } @media screen and (min-width: $screen-size-medium) { .page-header { padding-top: $padding * 5; padding-bottom: $padding * 5; } } .learn-more { color: $color-white; background-color: $color-dark-gray; @include full-background-image("images/learn-more-bg.jpg"); } .footer { background-color: $color-sass-pink; & p { @include set-font-size(0.9); color: darken( $color-sass-pink, 30% ); text-transform: uppercase; } & a { color: darken( $color-sass-pink, 35% ); &:hover { color: darken( $color-sass-pink, 40% ); } } } .content { margin: 0px auto; width: 96%; max-width: 640px; text-align: center; }
components.scss
The components.scss stylesheet contains reusable classes.
Particularly, .call-to-action-button and .headline.
a.call-to-action-button { display: inline-block; width: auto; margin: ($margin * 1.5) auto ($margin * 1.5) auto; padding: $padding / 2; @include set-font-size(0.7); text-decoration: none; text-transform: uppercase; letter-spacing: 2px; color: $color-white; border: 1px solid $color-white; border-radius: 8px; background-color: transparent; @include transition("background-color"); &:hover { background-color: rgba($color-white, 0.1); @include transition("background-color"); } } @media screen and (min-width: $screen-size-medium) { a.call-to-action-button { @include set-font-size(0.9); } } .headline { color: $color-white; text-shadow: 1px 1px 2px $color-black; }
mixins.scss
There are three mixins in our Sass project. They help us set responsive full background images on a couple of the web page’s sections, uniformly set our font-size and line-height values and help us with property transition effects.
@mixin full-background-image($image-url) { background-image: url($image-url); background-position: center center; background-size: cover; background-repeat: no-repeat; background-attachment: fixed; } @mixin set-font-size($factor) { font-size: round( $font-size * $factor ); line-height: round( $font-size * $line-height * $factor ); } @mixin transition($property) { transition-property: $property; transition-duration: 0.3s; transition-timing-function: ease-in-out; }The Result
All of that Sass code is automatically compiled into one big stylesheet called style.css. For example, the Sass style rule for our a elements is:
a { font-weight: $font-weight-bold; text-decoration: none; color: $color-sass-pink; @include transition("color"); &:visited { color: darken($color-sass-pink, 15%); } &:hover, &:active { color: lighten($color-sass-pink, 15%); @include transition("color"); } }The Sass style rule was compiled to regular CSS, as such:
a { font-weight: 600; text-decoration: none; color: #c69; transition-property: "color"; transition-duration: 0.3s; transition-timing-function: ease-in-out; } a:visited { color: #ac3973; } a:hover, a:active { color: #df9fbf; transition-property: "color"; transition-duration: 0.3s; transition-timing-function: ease-in-out; }Advanced Settings
Let’s talk about a couple of useful Prepros project options.
Improve Cross-Browser Support with Auto Prefixing
If you use a lot of new CSS features that still need vendor-prefixing, you’ll want to turn on automatic vendor prefixing.
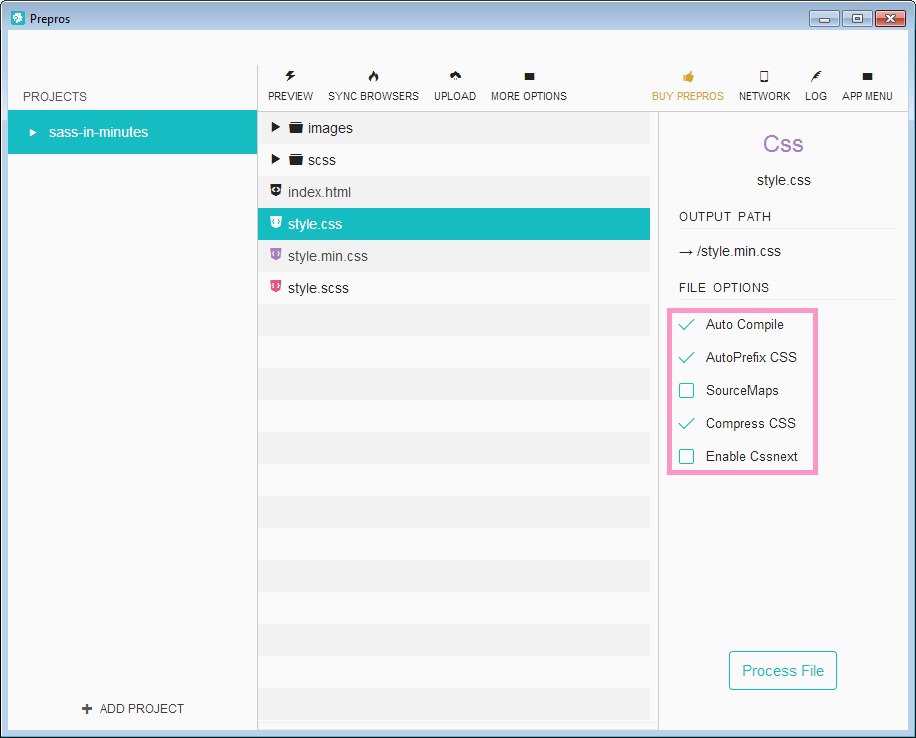
In the Prepros window, click on style.scss. A sidebar will show up. Check the AutoPrefix CSS option.
Click the Process File button to update your style.css file. 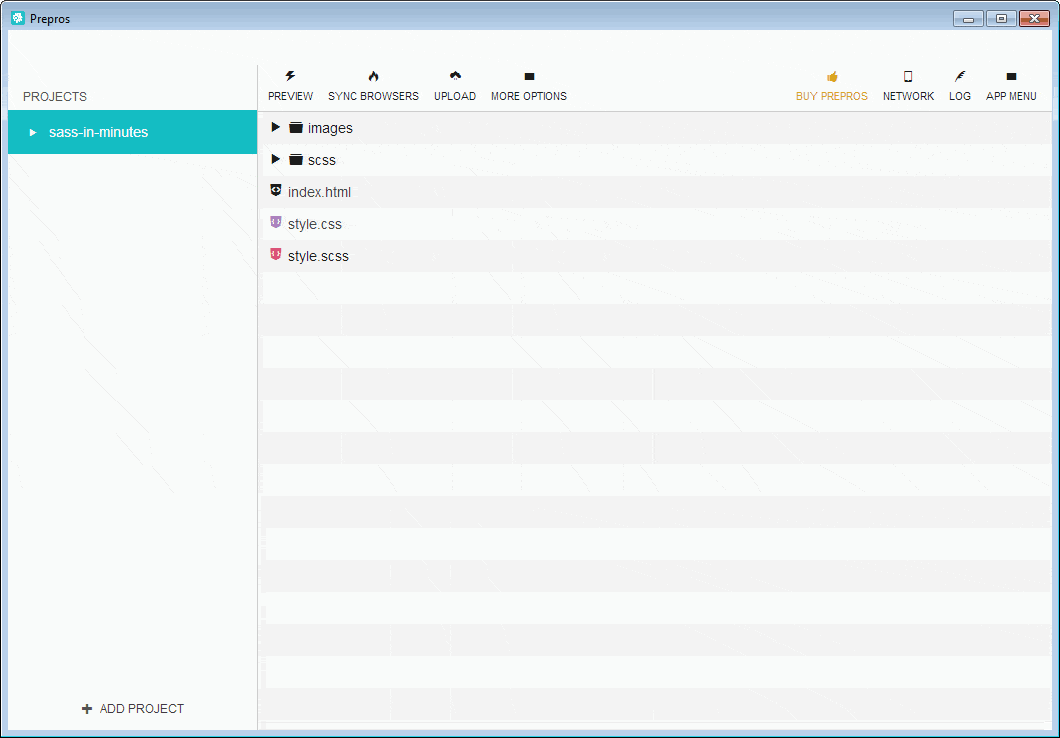 The next time you update your Sass stylesheets, Prepros will automatically watch out for CSS properties that need to be prefixed. For instance, in our project, we’ve used the
 transition property.
The property was prefixed like this:
-webkit-transition-property: "background-color"; transition-property: "background-color"; -webkit-transition-duration: 0.3s; transition-duration: 0.3s; -webkit-transition-timing-function: ease-in-out; transition-timing-function: ease-in-out;Improve Web Performance
You can improve the download speed of your CSS files by minifying them. Minification removes non-essential characters such as spaces, tabs, comments, and so forth. This will lower the file size of our style.css file.
Prepros can minify your stylesheets for you. Here’s how:
- Click on
style.css. The Prepros sidebar menu will appear. - Under Output Path choose the name and location of your minified stylesheet. In this project, it’s called
style.min.css. - Enable the Compress CSS option.
 You’ll have to update the link to the project’s stylesheet to
 style.min.css. In index.html, it would be:
<link rel="stylesheet" href="style.min.css">Just with this quick and easy change, we’re able to reduce the file size of our stylesheet by 21.4%.
What’s Next?
- Learn Sass. If you’re new to Sass, you’ll have to spend time learning how to write CSS with it. I highly recommend the Sass Basics Course at Treehouse. It’s taught by Hampton Catlin, the creator of Sass.
I’ve taken this course, and I’ve got nothing but great things to say about it. You can also check out the official Sass website if you prefer learning Sass “the hard way”.
- Explore Prepros settings. There are many options and features tucked away in Prepros. It’s worth the effort to explore and discover what Prepros has to offer. This tutorial barely scratches the surface of Prepros’s feature set.
Related Content
- The Best CSS Preprocessors (Right Now)
- Use Cutting-Edge CSS with the Help of Myth
- Why Use CSS Preprocessors?

-
 President of WebFX. Bill has over 25 years of experience in the Internet marketing industry specializing in SEO, UX, information architecture, marketing automation and more. William’s background in scientific computing and education from Shippensburg and MIT provided the foundation for MarketingCloudFX and other key research and development projects at WebFX.
 -

WebFX is a full-service marketing agency with 1,100+ client reviews and a 4.9-star rating on Clutch! Find out how our expert team and revenue-accelerating tech can drive results for you! Learn more
Make estimating web design costs easy
Website design costs can be tricky to nail down. Get an instant estimate for a custom web design with our free website design cost calculator!
Try Our Free Web Design Cost Calculator
Share this article


Web Design Calculator
Use our free tool to get a free, instant quote in under 60 seconds.
View Web Design CalculatorMake estimating web design costs easy
Website design costs can be tricky to nail down. Get an instant estimate for a custom web design with our free website design cost calculator!
Try Our Free Web Design Cost Calculator


