
Of course, photography and sharing images is one of the most used features of any social network. Indeed, research into social media has shown that photos get the most likes on Facebook and photos on Twitter get more retweets. This means that a large portion of our online social life revolves around photography.
For those of you who want to “up their photography game” on Instagram or Facebook or Twitter, keep these simple tips in mind to get the best photos possible.
1) Keep Your Lens Clean!
This seems like a no-brainer but it’s something that happens so often that we felt the need to mention it as the first tip. Your smartphone lens is ALWAYS – and we mean ALWAYS – dirty.
It’s in constant contact the oils in your hands, pocket lint, sweat, etc. which means your smartphone’s camera is always covered with that stuff.  Luckily, most current phone models have an easy to clean lens cover (recent iPhone models have a sapphire crystal that protects the actual camera lens) that can be relieved of dirt with just a quick swipe on a clean t-shirt or a sleeve.
Just remember to clean your lens before you shoot and you’ll immediately improve your photos with faster focusing, greater contrast, and better sharpness — just to name a few benefits.
2) Learn to Control Exposure.
Again, if you’re using your phone to take photos, you’ll know that precise control over exposure on smartphones is virtually impossible. However, there’s the AE/AF lock (Auto exposure/auto focus lock) function on most current phones and you can use it to sort of hijack your smartphone camera auto exposure settings.
On Apple’s current iOS 8, for isntance, holding your finger for a second or two on a portion of your frame will lock the exposure and focus on where you placed your finger. While the focus is locked, you are then able to swipe up to brighten the image or swipe down to underexpose the image before you take the photo. Some third-party apps like Camera+ will allow you to have slightly more control.
AE/AF Lock is useful when you want to specify what you want to keep in focus and lock in exposure settings. Also, AE/AF lock can be used as a creative tool for creating dark silhouettes or blowing out highlights and intentionally blurring your subject. Experiment with this feature to find the best way to use it in your photography.
An analysis of Instagram photos has shown that brighter images tended to get more likes than darker photos. This means that knowing how to properly expose an underexposed photo can be very beneficial.
3) Make Your Photo Adjustments Carefully.
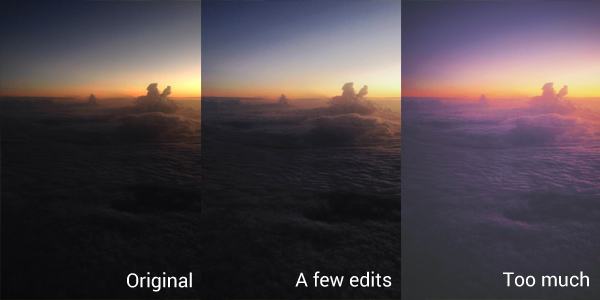
It’s very easy to over-adjust your photos on your phone.
You’ll add some contrast here, add a filter there, maybe push the highlights, and then maybe slide up the saturation a little. Voila! You’ve just created a yellow-tinged monstrosity in less than 30 seconds.
We’ve all been there and we’ve all seen these over processed photos in our Instagram feeds and our Facebook Timelines. While editing your photos can often feel very satisfying, it’s best to keep your edits to a minimum or as natural as possible. Think about what effect or look you’re going for before you even start.
Then slowly and methodically work towards getting your desired result. A few things to keep in mind when editing photos (See our favorite photo editing apps here):
- Adjusting contrast can also affect your photo’s saturation. More contrast = more saturation, vice versa.
- Adjusting highlights or shadows can affect your photo’s exposure levels.
- Adjusting black levels and white levels can affect your photo’s contrast.
- Making adjustments to exposure or brightness can affect highlights and shadows and saturation.
- Adding a fade effect can affect black levels, white levels, and contrast.
- In short, most of the adjustments you make to a photo are related to each other and affect one another. The key is to find the right balance between all your adjustments so you can avoid getting artificial or cartoon-y looking photos.
 In the same analysis done by social media researcher, Dan Zarella, it was found that photos that are less saturated and have no filters get the most likes on Instagram. Therefore, if you want to “up” your Instagram game, leave the filters at the door and keep your edits to a minimum.
4) In-Camera Raw Conversion + Wifi = Best Image Quality for Sharing
It’s true that smartphone cameras have the edge when it comes to convenience but a dedicated camera will always have an edge when it comes to performance (at least for the next few years).
We know what you’re thinking. You’re thinking that if you shoot with a digital camera then you’ll have to transfer all your files to a computer, edit them on your computer, and then transfer your files to your phone before you’ll be able to share them on social media or to your friends. That’s not necessarily true.
For those of you who want to easily edit and share the best photos possible without the need for a PC, we’ve found that having these two features in a camera is the ultimate “one-two” punch:
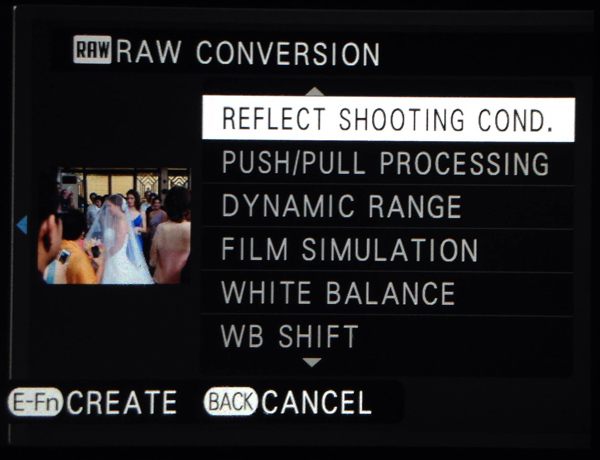
- In-camera raw conversion: Simply put, Camera Raw files contain unprocessed data straight from a digital camera’s image sensor. This contains all the information that is processed by your camera’s image processor in order to create the JPEG files that you see on your camera’s screen. Raw files are like the film in a film camera before it gets processed and developed in a dark room.
If your camera has in-camera raw conversion features, you are able to shoot Raw (and get the most out of your picture) and control (at least to some degree) how JPEG’s are processed and created by your camera. Maybe you want to push the shadows or increase the highlights or maybe adjust the white balance. Since camera raw files contain all that information, you can get some really great looking JPEG’s that you can then transfer to your phone.
- Which makes wifi connectivity another great feature to have in a camera. Once you’ve converted your camera raw files to JPEG’s, you can easily send the image files to your phone and continue your edits there. While in-camera raw conversion is nice to have, wifi connectivity is perhaps the more important feature to have for anyone who wants to be able to share their photos easily on their phone.
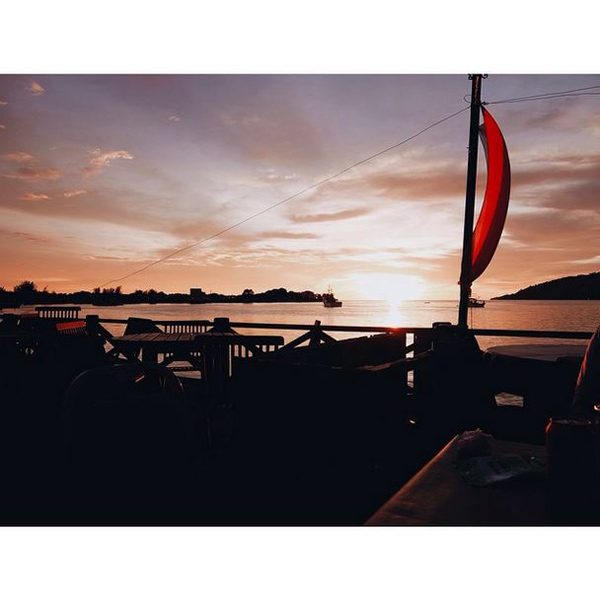
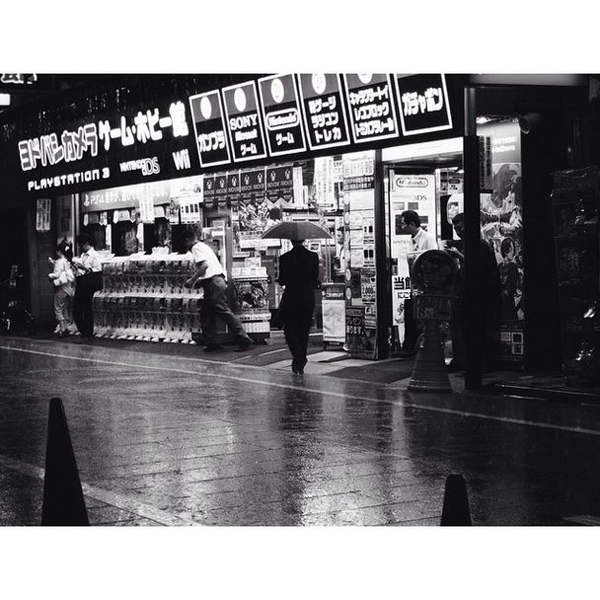
On recent trips to Kota Kinabalu and Tokyo, with no laptop (or desire to even use a laptop), we were able to post some pretty decent photos to our Facebook and Instagram accounts using nothing but our camera and our phone. Images below are from my personal Instagram feed. 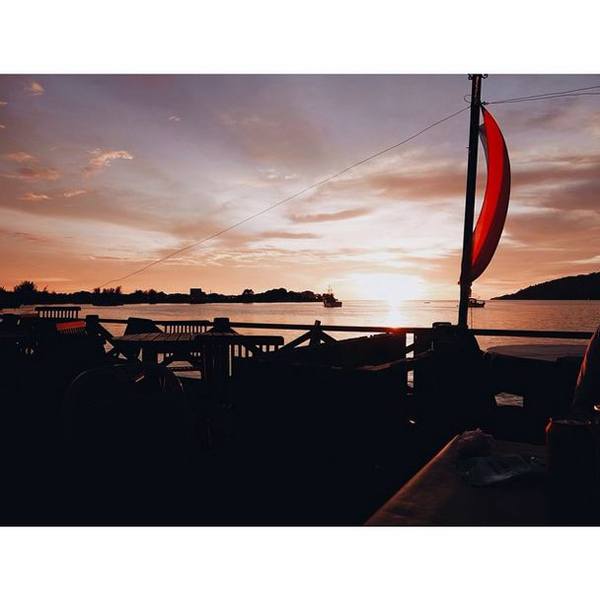
5) Tell a Story That Matters to You.
Photographers who find success on Instagram and other social media platforms do so because their photos are actually good and people are interested in their photos because of how they capture the world around them.
For example, adamsenatori is a pilot and he takes photos of beautiful aerial vistas and shares them with his 878k followers. Thiswildidea, which features photos of photographer Theron Humphrey’s dog, is shared with 767k followers. Both have a huge following online and it’s easy to see why.
They’re not only proficient at taking photos, they have a point of view; they have stories to tell; and they’re telling it with great photos. That’s what the art of photography has always been about. Whether your photos are seen in galleries or on small digital screens, at the end of the day, it’s all photography; it’s a way for us to express ourselves in a meaningful way.
Get to know your subject. Keep your photos in focus. Compose and expose your photo like it’s your last shot in a roll of film and make it mean something.
Share your thoughts with us in the comments section below.
-
 Trevin serves as the VP of Marketing at WebFX. He has worked on over 450 marketing campaigns and has been building websites for over 25 years. His work has been featured by Search Engine Land, USA Today, Fast Company and Inc.
 -

WebFX is a full-service marketing agency with 1,100+ client reviews and a 4.9-star rating on Clutch! Find out how our expert team and revenue-accelerating tech can drive results for you! Learn more
Make estimating web design costs easy
Website design costs can be tricky to nail down. Get an instant estimate for a custom web design with our free website design cost calculator!
Try Our Free Web Design Cost Calculator
Share this article


Web Design Calculator
Use our free tool to get a free, instant quote in under 60 seconds.
View Web Design CalculatorMake estimating web design costs easy
Website design costs can be tricky to nail down. Get an instant estimate for a custom web design with our free website design cost calculator!
Try Our Free Web Design Cost Calculator


