
Tutorial Preview

Step 1: Create the Background
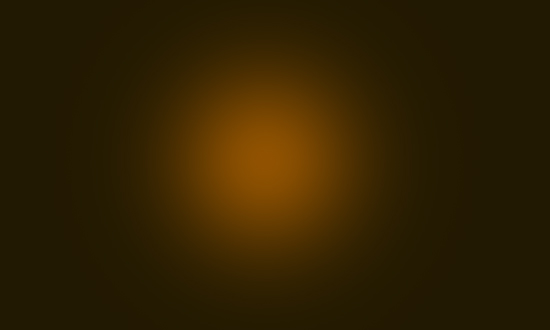
First, we’ll make a simple, complementary background for our gold text.
Open up Photoshop and create a new document by going to File > New (Ctrl+N/Cmd+N) with your desired image dimensions (mine is 1000x600px).
Fill the Background layer with a dark brown color (#211901).

Set your Foreground color to a yellow color (#fee86a).
Switch to the Brush Tool (B). Set up the Brush Tool with a large, soft brush (approximately 500px in size).
Apply the brush by clicking once at the middle of your canvas. Then change the layer’s Blend Mode to Vivid Light and set the layer’s Opacity to 50%.
Step 2: Add Text
Add some text using the Horizontal Type Tool (T).
I used Times Bold with the font size set to 200px and text color to black. However, this text effect will work on most fonts, so feel free to use your preferred font. (Check out some free fonts by going to Design Instruct’s Font Collection category.)

Next, let’s start creating our gold text effect by adding layer effects.
Step 3: Gradient Overlay Layer Effect
To create a layer style, double-click on the text layer in the Layers panel.
This will bring up the Layer Style dialog window.
Let’s set up the Gradient Overlay layer effect first. The settings I used are shown below.
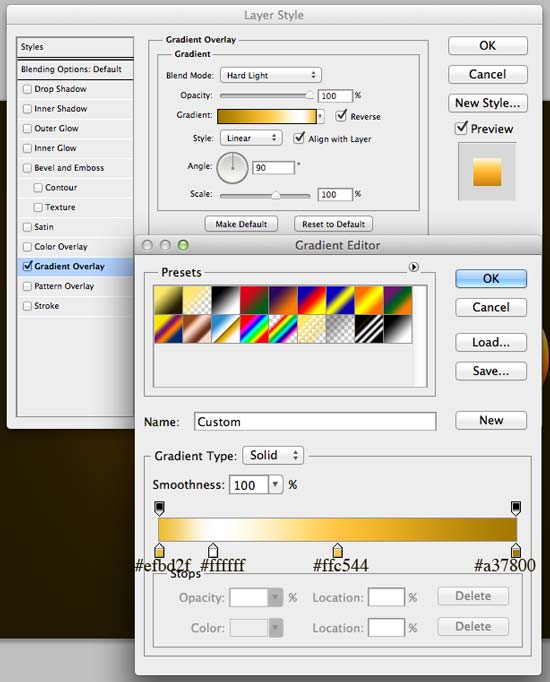
Here’s the result of the Gradient Overlay layer effect we applied:

Step 4: Color Overlay Layer Effect
Next up, we’ll add the Color Overlay layer effect to our layer style.
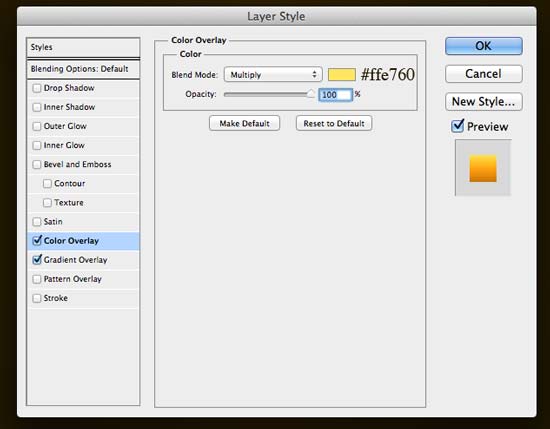
This is how our text looks with the Color Overlay settings we applied:

Step 5: Bevel and Emboss Layer Effect
To give our gold text some depth, we’ll use the Bevel and Emboss layer effect. You can use image below as a reference for your settings.
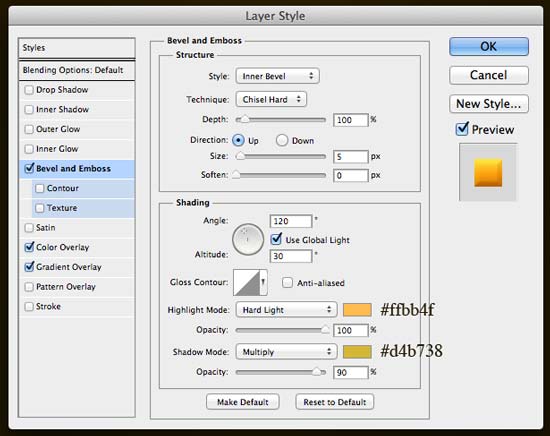
As you can see, we now have a nice bevel and emboss effect:

Step 6: Inner Shadow Layer Effect
Let’s apply the Inner Shadow layer effect now.
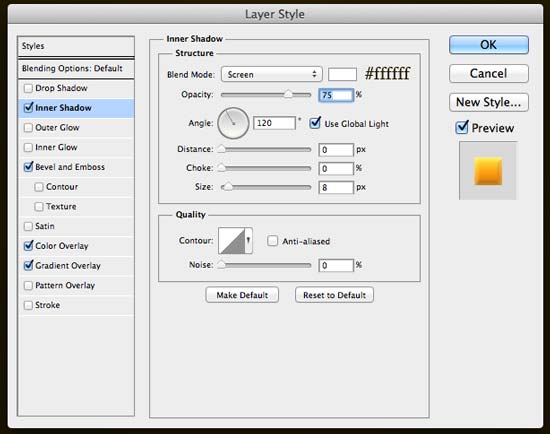
Here’s our work with the Inner Shadow layer effect:

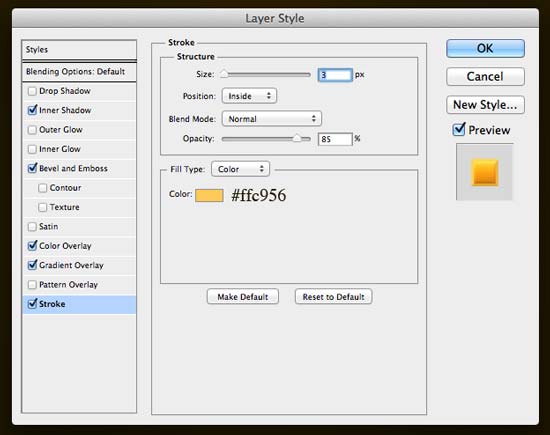
Step 7: Stroke Layer Effect
Next, to give the edges of our text some definition, we’ll add the Stroke layer effect.

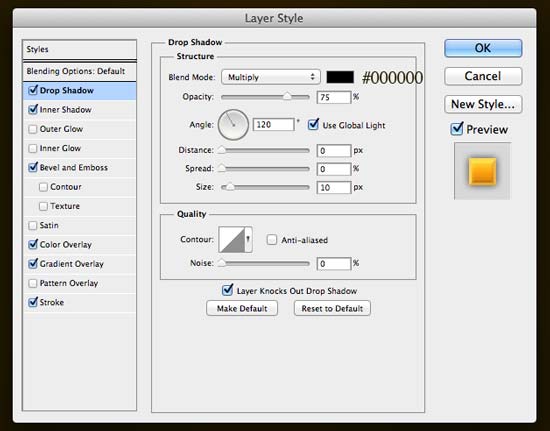
Step 8: Drop Shadow Layer Effect
Apply the Drop Shadow layer effect by following the settings shown below.

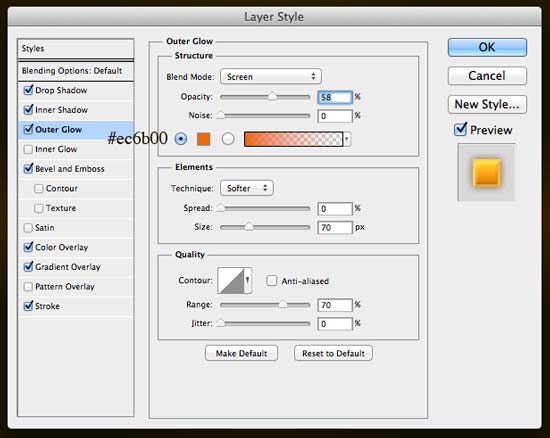
Step 9: Outer Glow Layer Effect
The final layer effect we’ll add to our layer style is the Outer Glow — this will give our text some more depth.

Step 10: Save the Gold Text Layer Style (If You Want)
This step is optional.
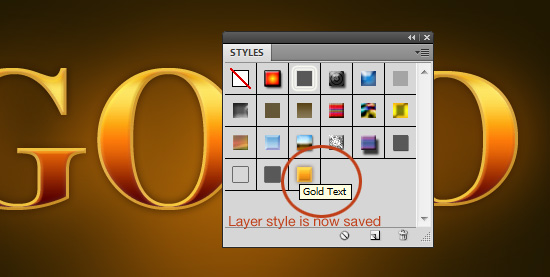
If you’d like to reuse this gold text effect layer style later on, you can save it in the Styles panel.
In the Layers panel, click on our text layer (which has the gold text layer style) just to make sure it’s the active layer.
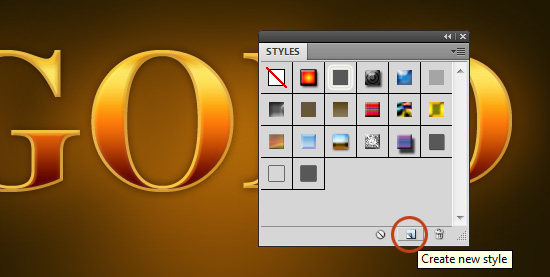
Then open up the Styles panel (if you can’t see it, go to Window > Styles).
In the Styles panel, click on the Create new style button (it’s at the bottom of the panel).
This should open the New Style dialog window. Give it a memorable Name (e.g., “Gold Text”) and make sure that the Include Layer Effects option is checked.
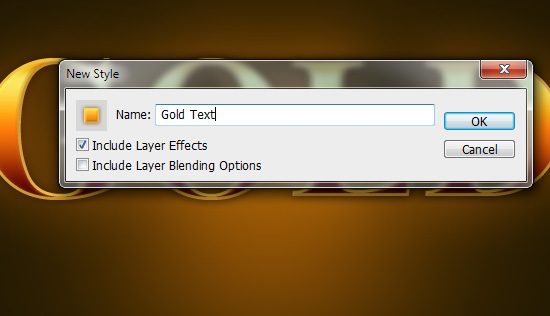
Click OK and this new layer style will now be available to you any time!
Tutorial Summary
This tutorial showed us how powerful Layer Styles are.
We produced gold text in a few minutes simply by applying layer effects. We also went through the process of saving your layer styles for use in other projects.
Here is the finished result:
Download Source Files
- gold_text_effect_photoshop (ZIP, 0.38 MB)
-
 Trevin serves as the VP of Marketing at WebFX. He has worked on over 450 marketing campaigns and has been building websites for over 25 years. His work has been featured by Search Engine Land, USA Today, Fast Company and Inc.
 -

WebFX is a full-service marketing agency with 1,100+ client reviews and a 4.9-star rating on Clutch! Find out how our expert team and revenue-accelerating tech can drive results for you! Learn more
Make estimating web design costs easy
Website design costs can be tricky to nail down. Get an instant estimate for a custom web design with our free website design cost calculator!
Try Our Free Web Design Cost Calculator
Table of Contents
- Tutorial Preview
- Step 1: Create the Background
- Step 2: Add Text
- Step 3: Gradient Overlay Layer Effect
- Step 4: Color Overlay Layer Effect
- Step 5: Bevel and Emboss Layer Effect
- Step 6: Inner Shadow Layer Effect
- Step 7: Stroke Layer Effect
- Step 8: Drop Shadow Layer Effect
- Step 9: Outer Glow Layer Effect
- Step 10: Save the Gold Text Layer Style (If You Want)
- Tutorial Summary
- Download Source Files
Share this article


Web Design Calculator
Use our free tool to get a free, instant quote in under 60 seconds.
View Web Design CalculatorMake estimating web design costs easy
Website design costs can be tricky to nail down. Get an instant estimate for a custom web design with our free website design cost calculator!
Try Our Free Web Design Cost Calculator


