
In this guide, I will be walking you through each individual layer effect and showing examples of each. Do keep in mind, however, that layer styles are about experimentation — some effects work perfectly in some designs, whereas they may look terrible in others. There are no set formulas, and it’s up to you to unleash your creativity once you have learned the fundamentals of using layer styles in Photoshop.
This is what we will discuss:
- What is a layer style?
- Applying layer styles
- The Layer Style dialog window
- Drop Shadow
- Inner Shadow
- Outer Glow
- Inner Glow
- Bevel and Emboss (Contour/Texture)
- Satin
- Color Overlay
- Gradient Overlay
- Pattern Overlay
- Stroke
- A few layer type tips
What is a Layer Style?
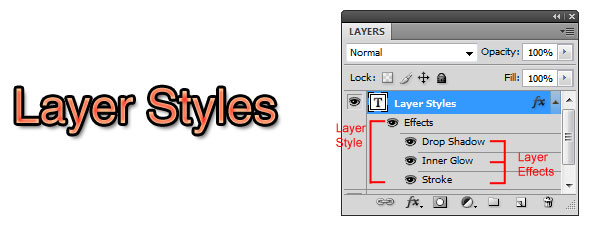
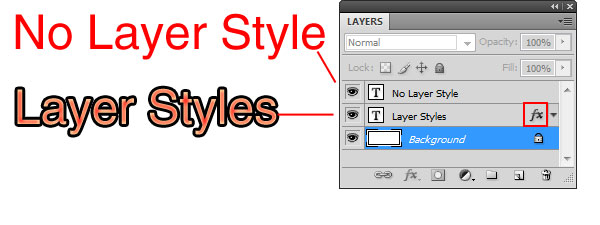
A layer style is simply one or more layer effects and blending options applied to a layer. Layer effects are things like drop shadows, stroke, and color overlays.
Here is an example of a layer with three layer effects (Drop Shadow, Inner Glow, and Stroke).
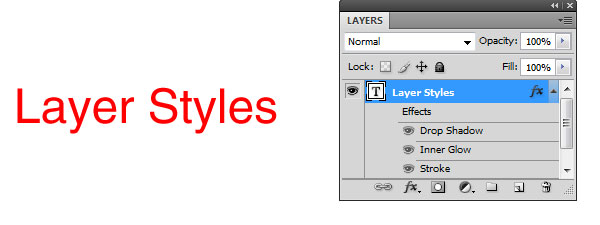
You can turn off a layer style by clicking on the eye icon beside Effects so that you can see how the original layer looks without its layer style.
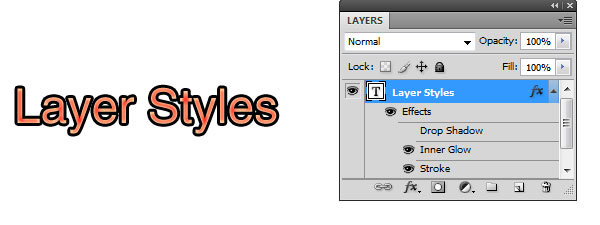
Similarly, you can turn off the visibility of each layer effect. In the following example, the Drop Shadow layer effect was disabled.
You can tell that a layer has a layer style because of the fx icon on its right side.
Applying Layer Styles
To set up a layer style, you will use the Layer Style dialog window.
There are various ways to access the Layer Style dialog window.
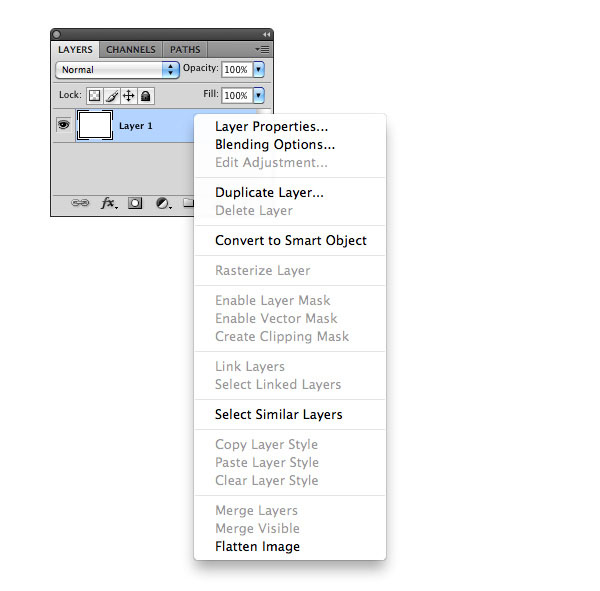
Right-Clicking on a Layer
By right-clicking on your layer, you can select Blending Options to open up the Layer Style dialog window.
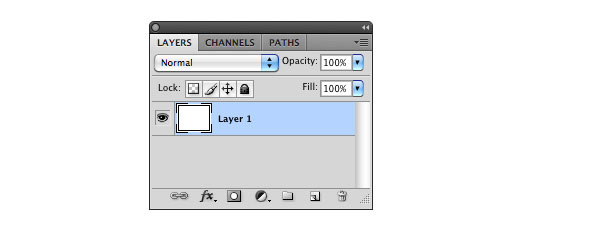
Double-Clicking on a Layer
By double-clicking on your layer’s thumbnail preview in the Layers Panel, you can open up the Layer Style window.
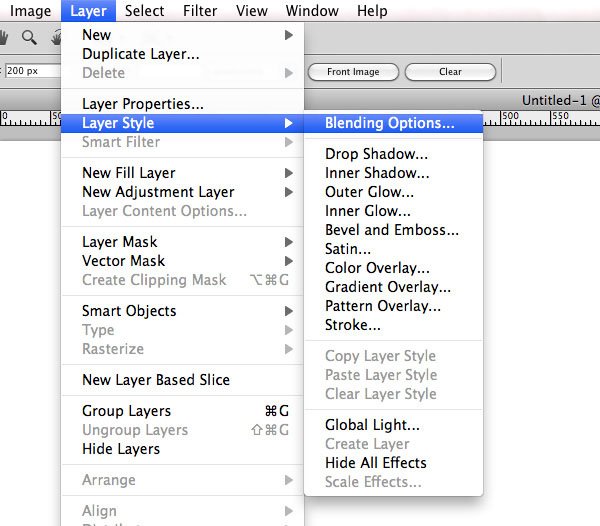
Application Bar Menu
Like most things in Photoshop, you can access the Layer Style dialog window through the Application Bar menu by going to Layer > Layer Style. You can find each individual layer effect (Drop Shadow, Inner Shadow, etc.), as well as an option to open up the Layer Style dialog window (Blending Options).
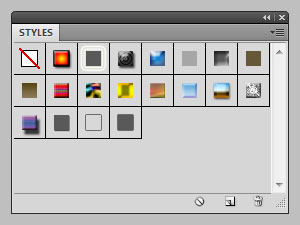
Use Preset Layer Styles Using Styles Panel
The Styles Panel features preset layer styles such as “Sunspots” or “Tie-Dyed Silk”. Just select a layer and click on the appropriate preset layer style to apply it.
You can view the Styles Panel by going to Window > Styles.
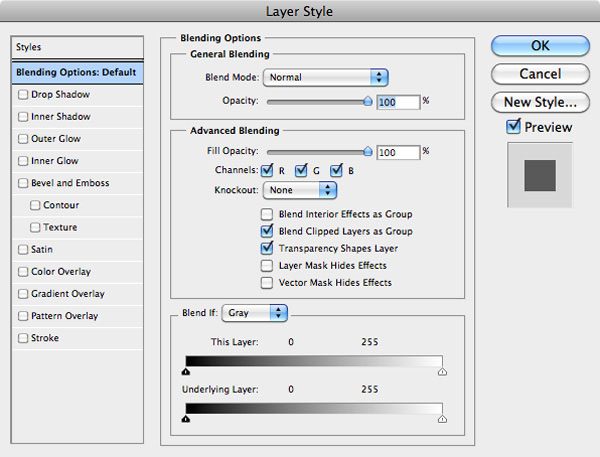
The Layer Style Dialog Window
When you first open the Layer Style window, you will see the Blending Options.
Here you can adjust the Blend Mode and layer Opacity, as well as some more advanced blending effects.
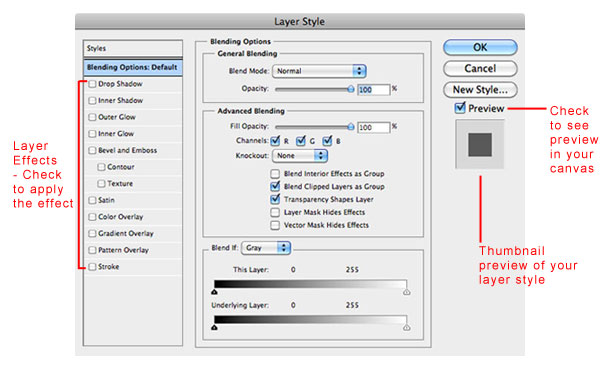
A layer style can have one or more different layer effects. To apply a layer effect, check the box beside it.
Be sure to enable the Preview option so that you can see your changes in real-time.
To quickly preview what your layer style looks like, there’s a thumbnail on the right side of the window to help remind you.
Let us go over each of the different layer effects, starting with the Drop Shadow layer effect.
Drop Shadow Layer Effect
The Drop Shadow is probably one of the most used layer effects.
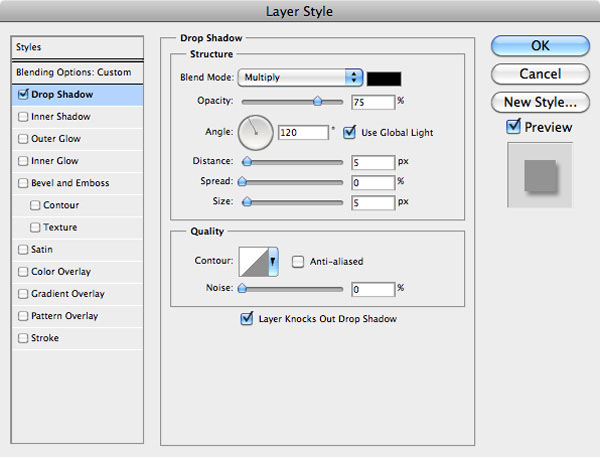
The Blend Mode allows you to blend the shadow into the background in different ways (Multiply, Overlay, etc.).
Lower the Opacity to increase the shadow’s translucence.
The Angle option of your drop shadow will affect the direction it drops when the Distance is set to 1 pixel or higher.
If the Distance is set to 0, the shadow will spread equally around the layer’s contents.
Spread allows you to make the shadow thicker/denser.
The Size is how big or small the drop shadow will be on each side of the object.
Changing the Quality set of options enables you to add noise to your shadow and alter the contours of your shadow.
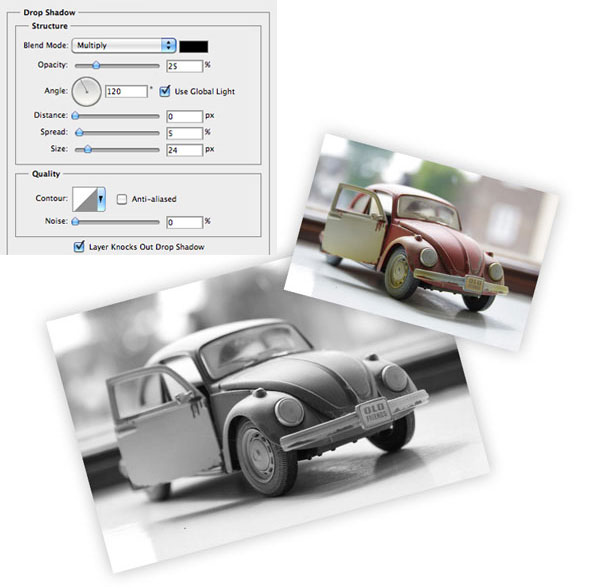
Drop Shadow Example 1
In this particular image, the direction of the shadow won’t matter because I had set the Distance option to 0, meaning that the shadow is centered. This can be used to bring images out of the background, and works especially well on light backgrounds (such as white or light gray).
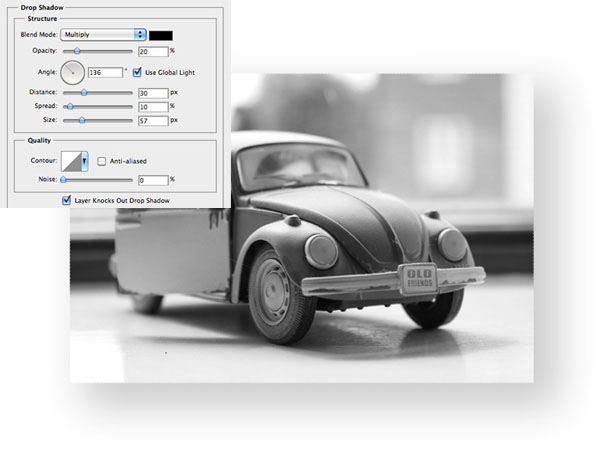
Drop Shadow Example 2
This next example uses similar settings, with a slightly lower Opacity, and increased Distance, Spread and Size.
As you can see, the drop shadow steers off below the bottom right side corner, giving the impression that there is a source of light coming from the upper left corner.
Inner Shadow Layer Effect
The Inner Shadow effect is very similar to the Drop Shadow. In fact, it’s just the inverse in that it’s applied inside the object instead of the outside of it.
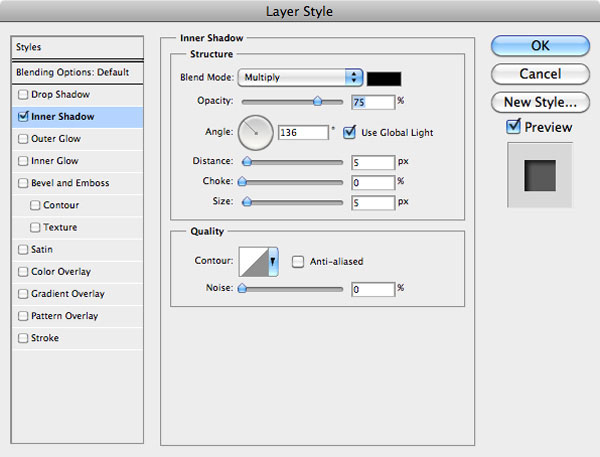
All of the options are the same as Drop Shadow. You may notice, however, that Spread has been replaced with Choke – the higher the Choke value, the thicker the shadow.
Inner Shadow Example 1
This example uses similar settings to the first example of the Drop Shadow layer effect so that you may compare and contrast. It makes the image appear as if it has been placed behind your background, like a window.
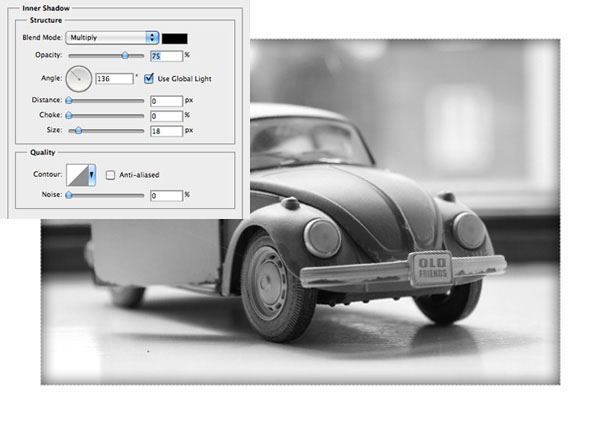
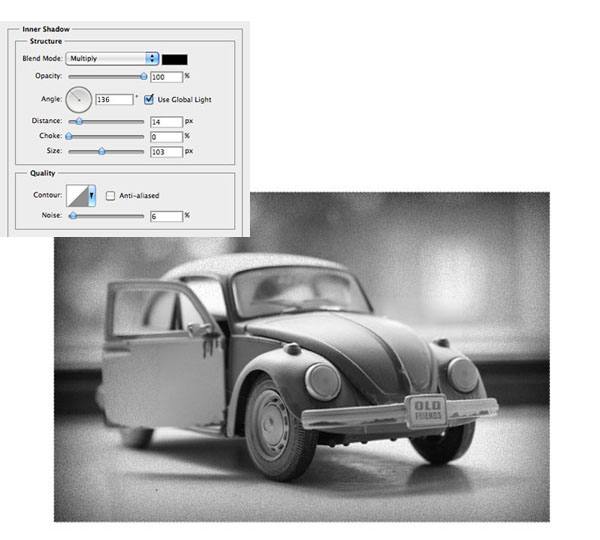
Inner Shadow Example 2
Inner Shadow can also be used to add a slight distressed, vintage effect to images by increasing the Noise option and using a big Size value.
Using such a simple style, you can make your image appear to have weathered, darkened edges and corners.
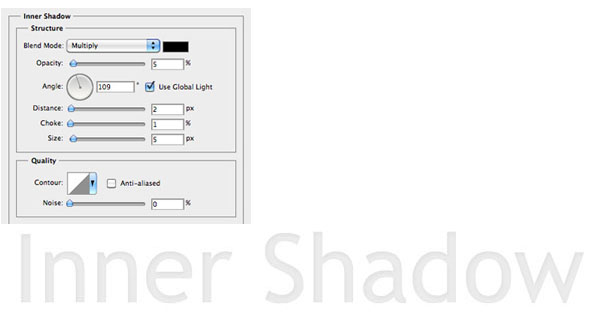
Inner Shadow Example 3
This layer style shows a common text effect: the letterpress text effect. The settings are very similar to the first Inner Shadow example, however it has a Distance of 2 so that the Angle option produces an effect.
Outer Glow Layer Effect
Glows are very similar to shadows in concept. Outer glows are often used to create subtle effects when an outer edge of an object needs a bit of a boost to get it to stand out from its background.
Outer glows usually work best on dark backgrounds.
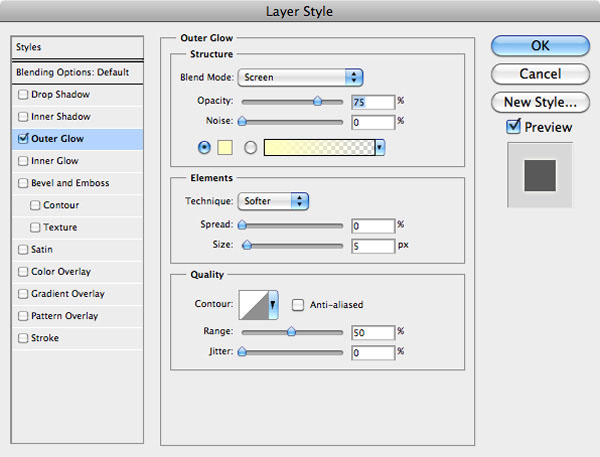
Like shadows, you can adjust the Blend Mode, Opacity and Noise of your glow, as well as the Spread and Size of it.
An option you have with glows that isn’t available with shadows is the Technique option, which can either be Softer or Precise.
Softer gives the edge of your glow a softer and more subtle edge, whereas Precise makes your glow stronger and bolder.
The Range option of your glow allows you to change its thickness — the lower the number, the thicker. Setting this at 1%, for example, will actually make your glow look like a stroke rather than a glow.
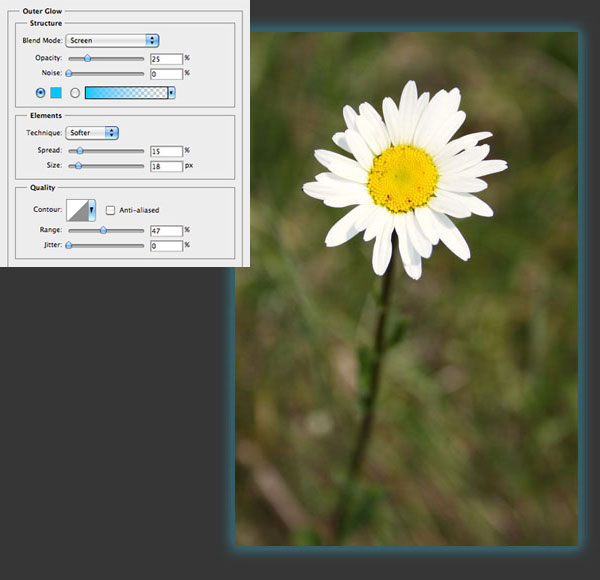
Outer Glow Example
Here is a blue outer glow.
Inner Glow Layer Effect
Like the Drop Shadow versus Inner Shadow, the Inner Glow versus the Outer Glow is similar, they are just the inverse of each other.
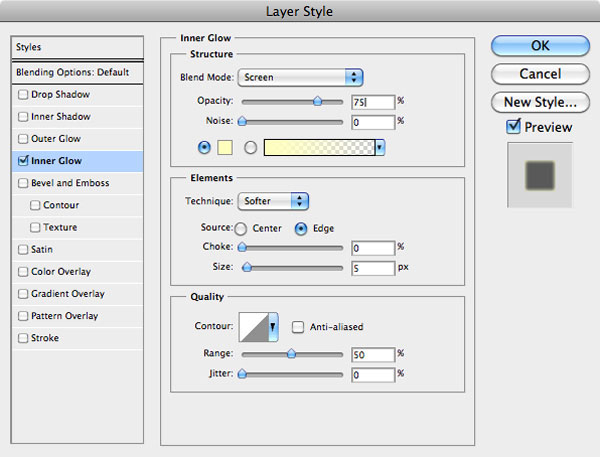
All the options are the same as Outer Glow, with one additional option: Source.
The Source allows you to make your glow appear from the Edge (default setting) or the Center.
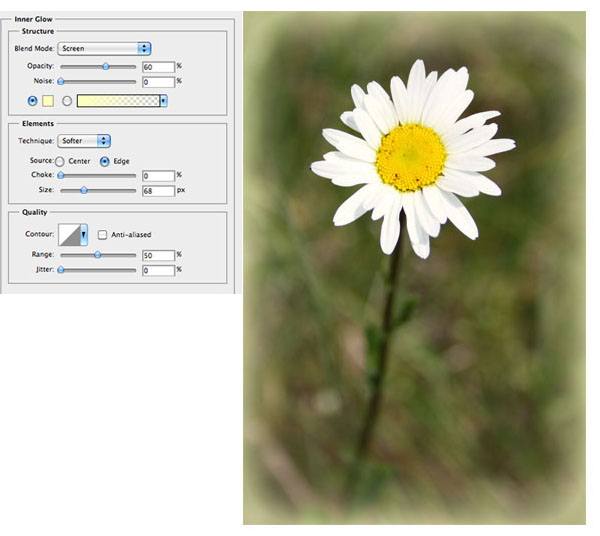
Inner Glow Example 1
This is an example of the Edge glow, which works in the same way an Inner Shadow does.
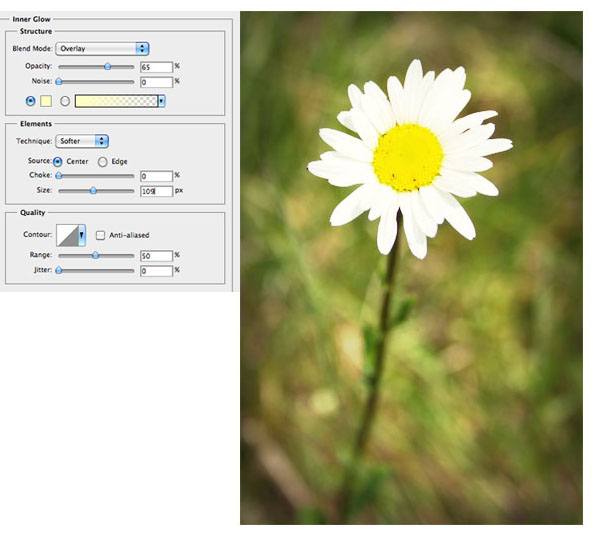
Inner Glow Example 2
This is an example of the Center glow using the Overlay blend mode to make the inner area of the photo appear more vivid with an increased level of contrast.
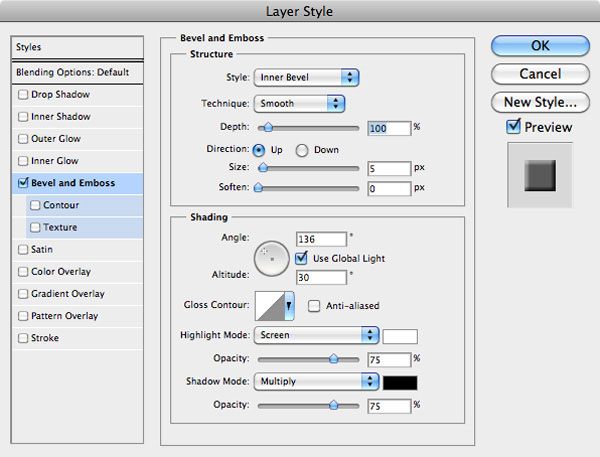
Bevel and Emboss Layer Effect
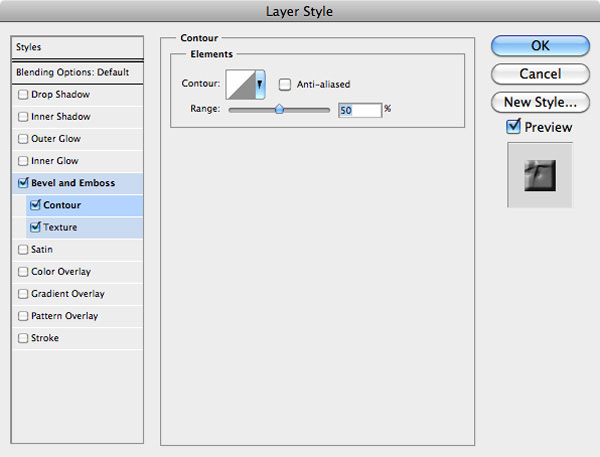
The Bevel and Emboss gives an object a raised (Bevel) or depressed (Emboss) look. The effect has two sub-effects, Contour and Texture.
Contour allows you to make your bevel/emboss sharper or softer.
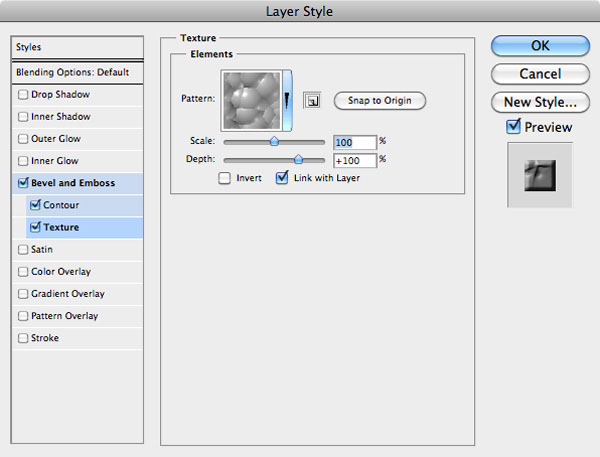
Texture gives you the option to add a pattern to your object.
There are a handful of different settings when it comes to using the Bevel and Emboss effect. The higher the Depth, the sharper the structure.
The higher the Size, the more center your bevel/emboss will be. The Shading set of options allow you to increase the Opacity of both the highlights and the shading, and also allows you to change the Angle (the source of light).
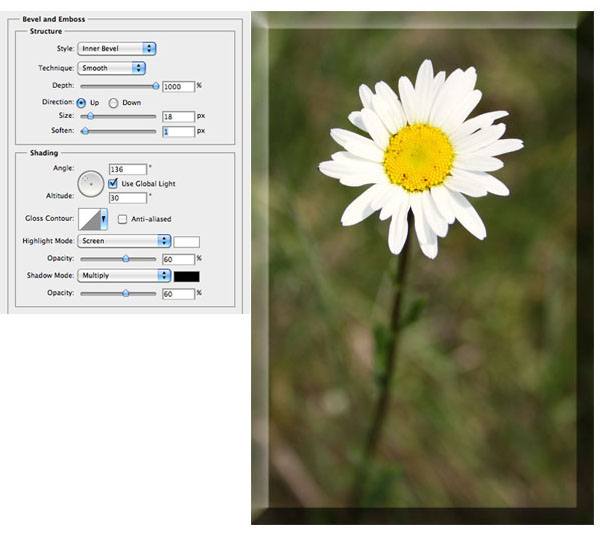
Bevel and Emboss Example 1
This example shows an exaggerated effect; because the Depth is so high (1000%) and the Size and Soften settings are very low, our bevel is very prominent.
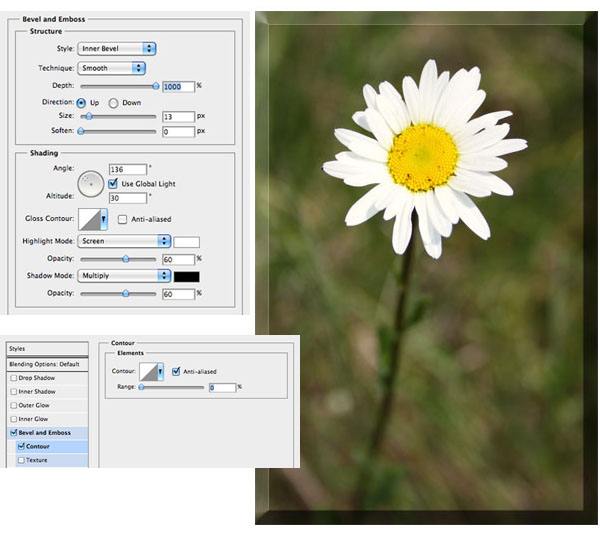
Bevel and Emboss Example 2
This is a very similar example as the one we just looked at, however, this time I have slightly decreased the bevel’s Depth and enabled the Contour effect. The Contour, as you can see, gives the bevel an even sharper edge; very close to a 1-pixel line.
It also removes a lot of the highlights around the left and top edges of our photograph.
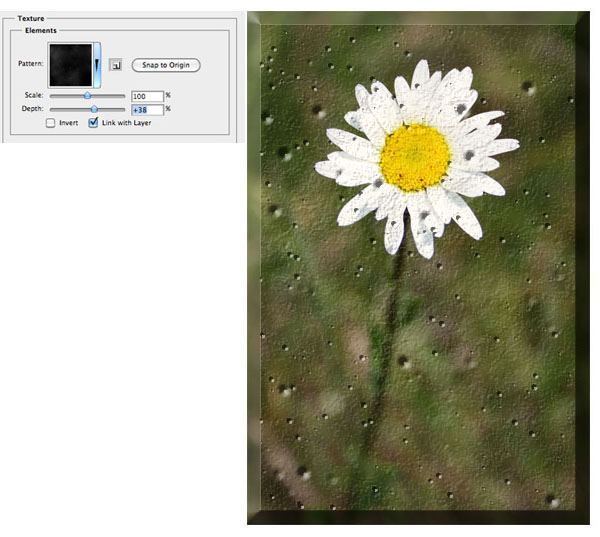
Bevel and Emboss Example 3
This example uses the exact same settings as the above example (including the Contour settings), however this time we have also checked our Texture effect. You can select one of Photoshop’s preexisting patterns, or install some of your own.
The sliders control the scale and depth of your pattern, and the Invert checkbox allows you choose between either embossed or beveled.
Satin Layer Effect
The Satin style, in my experience, is very rarely used. One use I have found for it in the past is for recreating vintage effects — although there are lots of different other ways to do that.
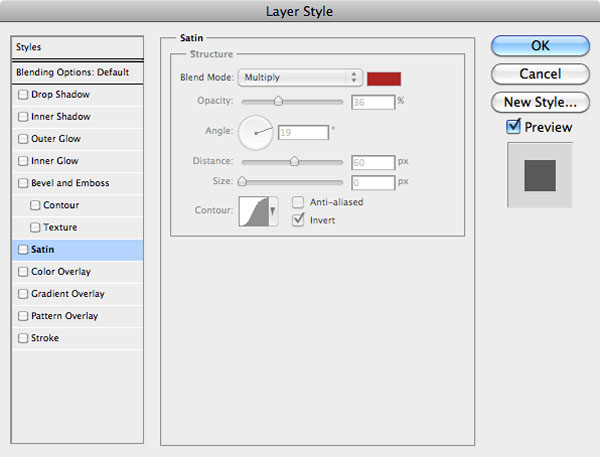
The Satin options are very simple, and similar to the others we have already looked at.
Satin Example 1
I have set the Color to red, the Distance to 72px and size to 0 to create the pattern on top of my image.
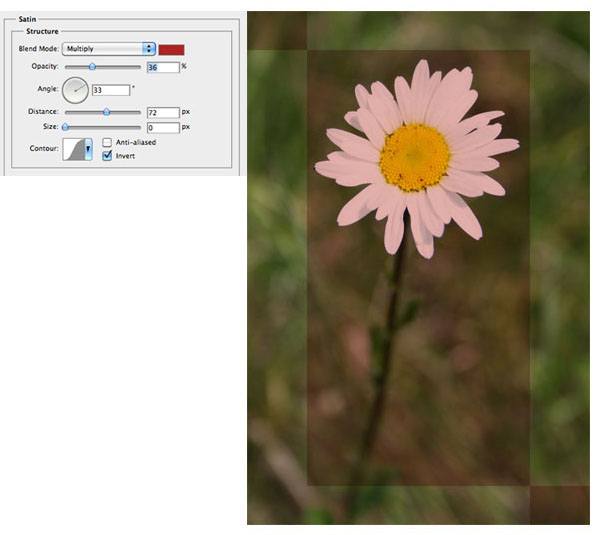
Satin Example 2
This example has near-identical settings as the one above; the only difference is that I increased the Size value.
As you have probably noticed, increasing the Size option creates a blurred effect.

Color Overlay Layer Effect
Color Overlay is an incredibly simple layer style, allowing you to completely cover the layer’s contents with a color.
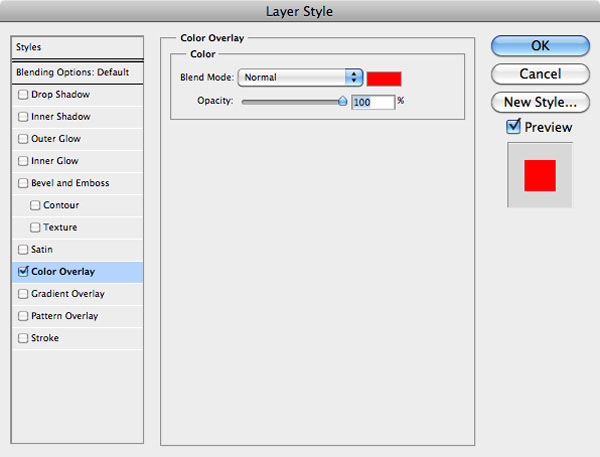
There are three settings: the Blend Mode, the Color, and the Opacity — they are pretty self-explanatory. This is a useful effect for quickly changing colors and is often used in web design variations, when alternative colors of things like text is desired.
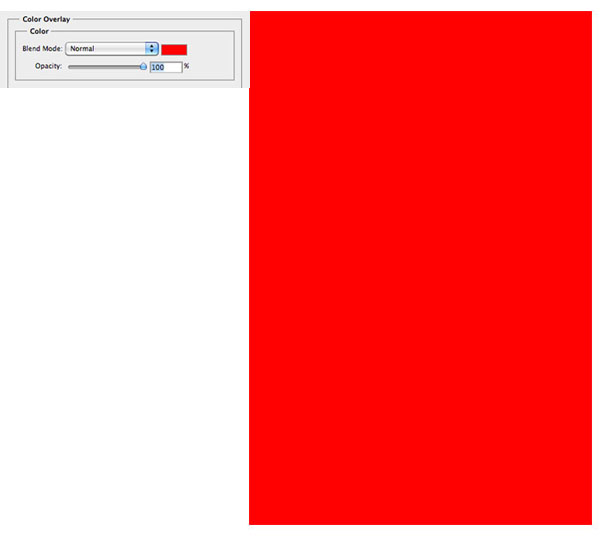
Color Overlay Example 1
This is the default settings you will be given when applying the Color Overlay layer effect.
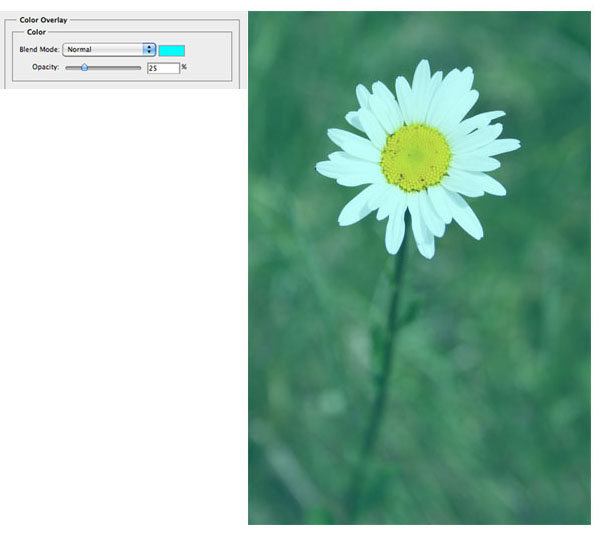
Color Overlay Example 2
One common use for the Color Overlay effect is to quickly apply colored tints to your images.
To do this, you just need to select your color and lower your Opacity enough so that your image can show through (although this is probably better done with an adjustment layer for better control).
Color Overlay Example 3
When using solid black alongside the Overlay blend mode and an Opacity of 100%, you can completely eliminate some colors within your image. This could be useful for isolating subjects from their background.

Gradient Overlay Layer Effect
The Gradient Overlay does the exact same thing as a Color Overlay, apart from that it overlays your objects with a color gradient rather than a color.
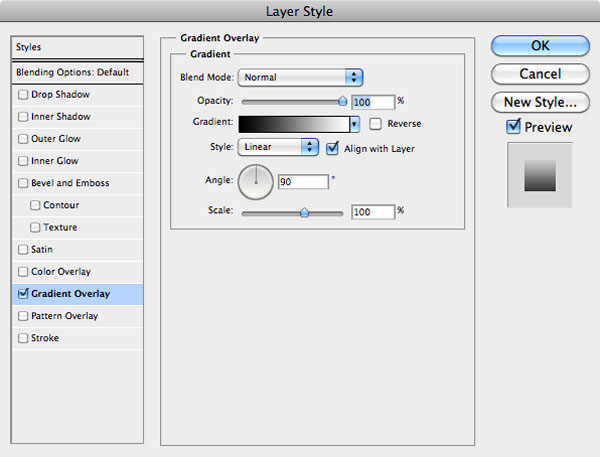
The Style of the gradient can be Linear, Radial, Angle, Reflected or Diamond.
The Scale of the gradient makes it smaller or bigger with respect to the size of your layer objects.
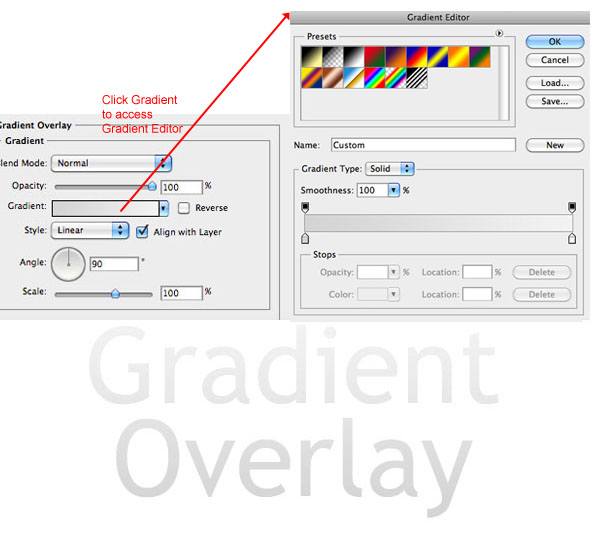
There is also a Reverse option, which allows you to quickly reverse the orientation of your colors, saving you from having to recreate a new gradient.
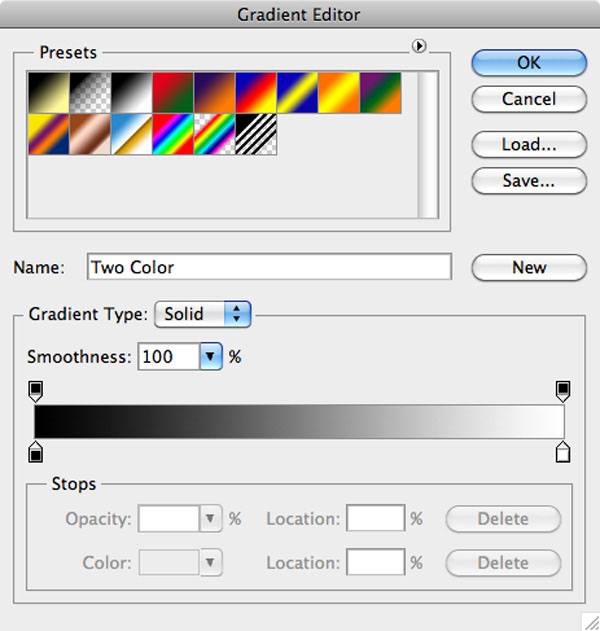
Clicking on the Gradient option presents the Gradient Editor where you can set your gradient’s colors and type.
Gradient Overlay Example 1
Simple grayscale gradients such as the one below are often used alongside inner shadow styles like we used earlier to create an even more realistic letterpress effect. All the standard settings have been used; the only thing that has been changed from the default settings is the color of the gradient itself.
Gradient Overlay Example 2
This effect again uses all the default settings except the Style of the gradient has been set to Radial rather than the default setting (which is Linear).

Pattern Overlay Layer Effect
Like the other overlay effects, the Pattern Overlay works in almost the same way.
This is actually very similar to the Texture setting we used under the Bevel and Emboss effect.
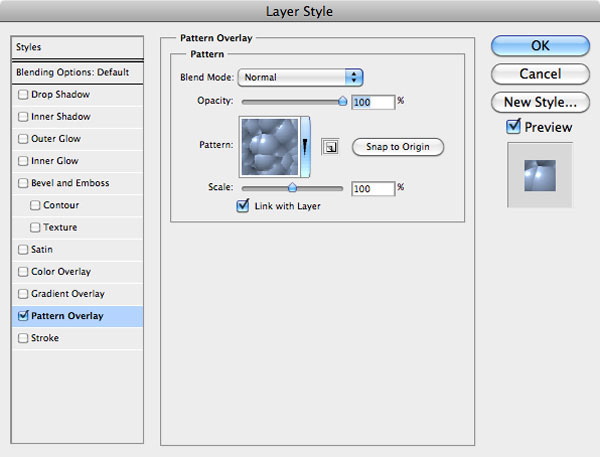
You can select from various built-in Photoshop patterns or create/install your own.
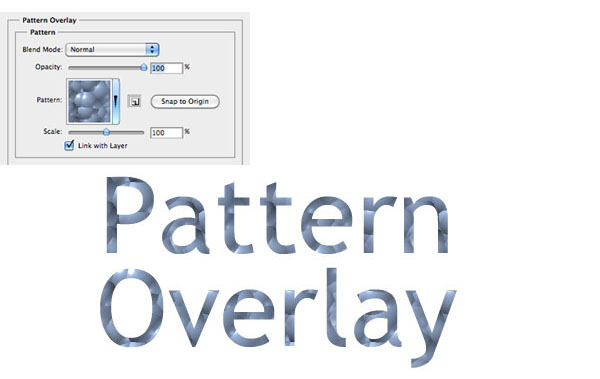
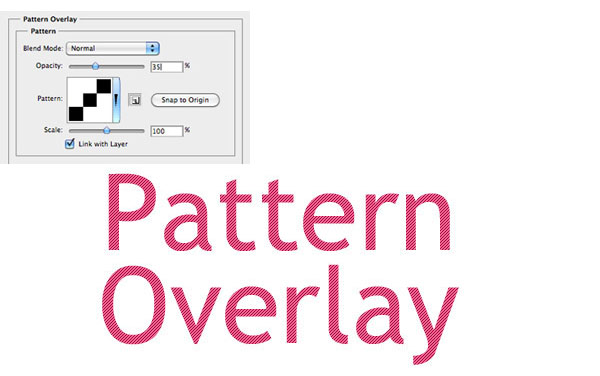
Pattern Overlay Example 1
This is the default setting for the Pattern Overlay style.
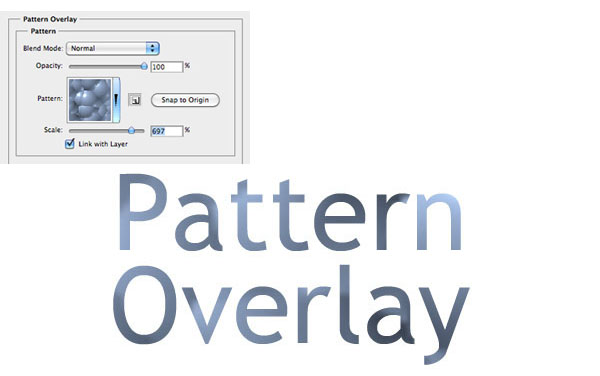
Pattern Overlay Example 2
By using the Scale option, you can increase or decrease the resolution of your pattern.
Pattern Overlay Example 3
Here is a custom pattern applied to the text. You can see that it tiles the pattern, producing a striped effect.
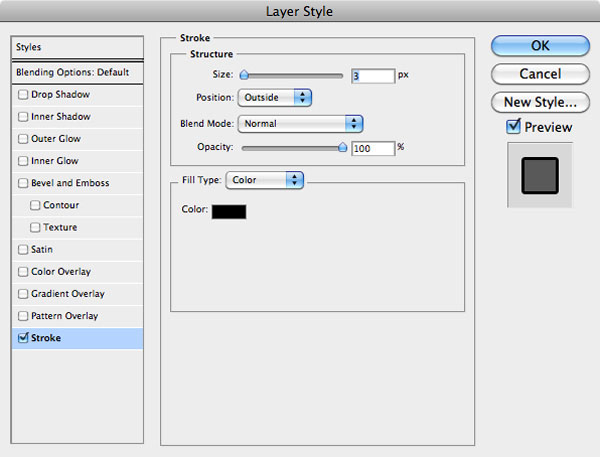
Stroke Layer Effect
This is the last layer effect we will talk about. The stroke effect simply places a border around your object.
The options are similar to the ones we’ve discussed earlier and are pretty self-explanatory (at least by now).
The Position option, which indicates where you want the stroke to be made, can be Inner, Outer, or Center. The size of your stroke determines how thick it is — you can adjust this in pixel units. The default is 3px, but the most common is probably 1px.
The Fill Type allows you to fill your stroke with different elements; you can either choose from a solid color, a color gradient, or even a pattern.
The default Fill Type is Color.
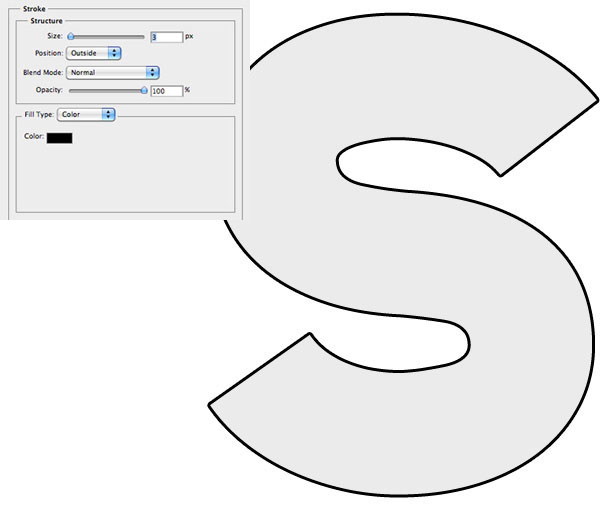
Stroke Example 1
These settings are the default settings, adding a simple and relatively thick stroke to anything on the layer you are applying it to.
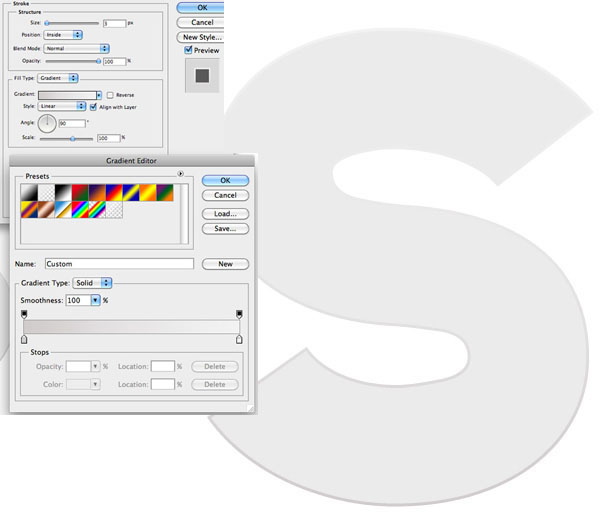
Stroke Example 2
As can be seen in the image below, a much more subtle gradient-based stroke looks interesting. The gradient merges from a color slightly darker than the letter itself, into the exact same color as the letter, making it seem like the top of the letter doesn’t have stroke at all.
Layer Style Tips
Here are some basic tips for working with layer styles.
Scope
Layer styles are automatically applied to anything new you place on that layer. If you don’t want it to take on the same style, you need to place it on a new layer.
Copying, Pasting, and Removing Layer Styles
If you have a layer style with a bunch of effects applied that you’d like to use on another layer, you can right-click on the layer, choose Copy Layer Style, right-click on your new layer and then choose Paste Layer Style.
This can save a lot of time!
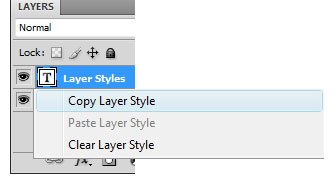
To remove a layer style permanently, right-click on the layer and then choose Clear Layer Style. If you just want to toggle the visibility, click on the eye icon beside Effects (as discussed earlier in the guide).
Don’t Overuse Layer Styles
Not all layer styles look good, so don’t go over the top.
Keep things looking relatively subtle to avoid making your work look amateurish. The layer style examples in this guide were done in an exaggerated fashion for the sake of illustrating each layer effect.
Experiment
It’s all down to experimentation. There are endless ways to use layer effects; see what works and what doesn’t.
-
 Trevin serves as the VP of Marketing at WebFX. He has worked on over 450 marketing campaigns and has been building websites for over 25 years. His work has been featured by Search Engine Land, USA Today, Fast Company and Inc.
 -

WebFX is a full-service marketing agency with 1,100+ client reviews and a 4.9-star rating on Clutch! Find out how our expert team and revenue-accelerating tech can drive results for you! Learn more
Make estimating web design costs easy
Website design costs can be tricky to nail down. Get an instant estimate for a custom web design with our free website design cost calculator!
Try Our Free Web Design Cost Calculator
Table of Contents
- What is a Layer Style?
- Applying Layer Styles
- The Layer Style Dialog Window
- Drop Shadow Layer Effect
- Inner Shadow Layer Effect
- Outer Glow Layer Effect
- Inner Glow Layer Effect
- Bevel and Emboss Layer Effect
- Satin Layer Effect
- Color Overlay Layer Effect
- Gradient Overlay Layer Effect
- Pattern Overlay Layer Effect
- Stroke Layer Effect
- Layer Style Tips
Share this article


Web Design Calculator
Use our free tool to get a free, instant quote in under 60 seconds.
View Web Design CalculatorMake estimating web design costs easy
Website design costs can be tricky to nail down. Get an instant estimate for a custom web design with our free website design cost calculator!
Try Our Free Web Design Cost Calculator


