

Preview
Click the preview image below to see the piece in full scale. 
Tutorial Resources
- PSD: Sofa PSD by GhostFight3r
- (Optional) EPS: illustrious.eps by Eric Vasquez (that’s me)
- Font: A script font (find your favorite from this list)
Step 1: Create a New Illustrator Document
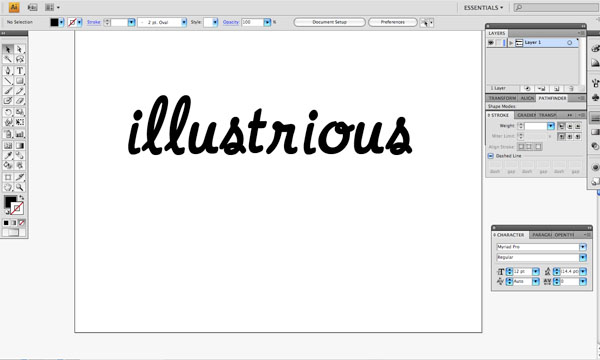
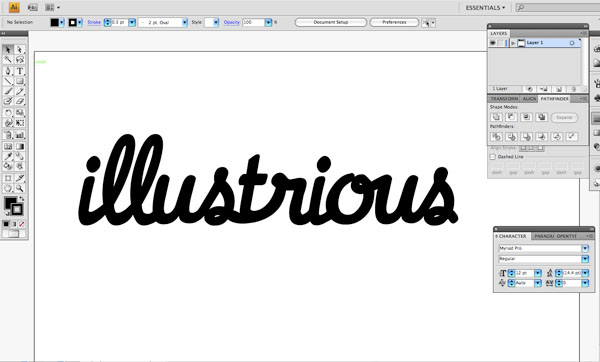
First, we are going to create a new Illustrator document, and this can really be any size you want it to be since vector graphics are scalable, but for the purposes of this tutorial, I have used 8×8 inches. Next, I used a font called Adorable Illusion (which is hard to find nowadays), to type out the word “Illustrious” on the artboard using the Type Tool (T); we want the font to be quite large as we can always reduce the size later if we need to. You can find a list of similar-looking script fonts at Font Squirrel free for download if you don’t have the font I used.
Alternatively, just use a script/cursive font that you already have installed. You could also type out any word other than “Illustrious” and use any typeface that you want, but I really like the cursive/script typeface for what we will be creating. In addition, the cursive L and S shapes work well when using these techniques.
Step 2: Create Outlines
What we want to do next is create outlines from our text so that we can control the positioning of each letter individually. To do this, select your text with the Selection Tool (V) and go to Type > Create Outlines (or you could use the shortcut Shift + Cmd/Ctrl + O). 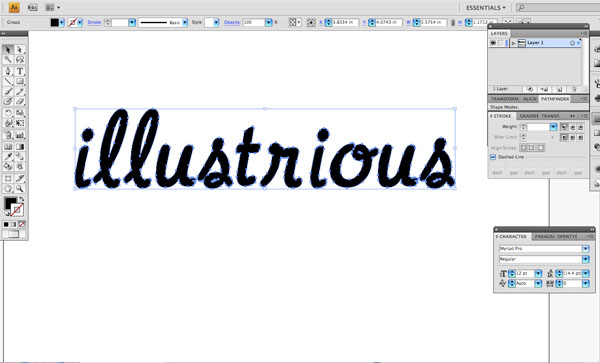
Step 3: Manual Kerning
Since we now have our outlined letters, we can select each one individually and move them around however we would like.
To do that, we would have to ungroup the text by selecting it with the Selection Tool and then choosing Object > Ungroup (Shift + Ctrl/Cmd + G). To achieve the desired result, we want to move each of these letters closer and later on join them together so that our text becomes one continuous shape. Use the following image as a guide and try to match it as best as you can.
Step 4: Bringing it Together
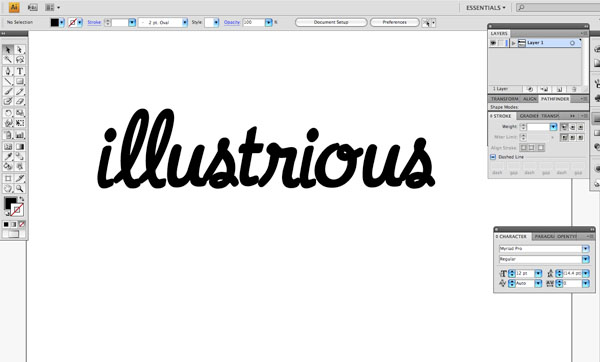
Once we have the letters almost touching, we will be using the Pen Tool (P) to join the letters together. If you are familiar with this tool, this step should be quite easy for you. If not, I would recommend checking out some of the great tutorials on the Web for using the Pen Tool (P) as it’s one of the most important tools in Illustrator.
The idea is to select a black fill with no outline, and try to follow along with the natural curvature of the script typeface to join the letterforms together. 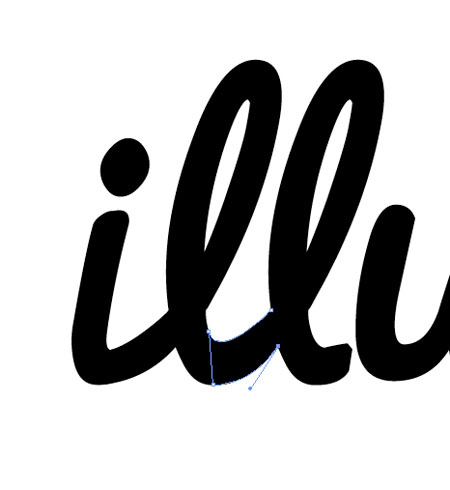 You can click an anchor point with the Pen Tool (P), and then after selecting another point, you can control the shape and size of the curve by holding down on the point before releasing the mouse.
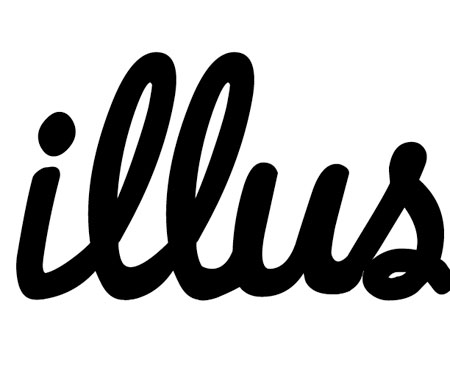
 We can now save our document either as an Illustrator file or as an EPS as we will be using this later on.
For your convenience, or just in case you have some difficulties with the Pen Tool (P), I have provided the final EPS file in the Tutorial Resources listing above so that you can use this rather than doing the previous steps up to this point. Tip: I would strongly encourage you to experiment on your own and try to become familiar with the Pen Tool (P), if you’re not already familiar with it.
Step 5: Jumping Over to Photoshop
Now that we have prepared the text that we will be using, we can begin to set up our Photoshop document.
Open up the Sofa PSD (our backdrop for our text) mentioned in the Tutorial Resources listing above so we can begin customizing this for our tutorial. 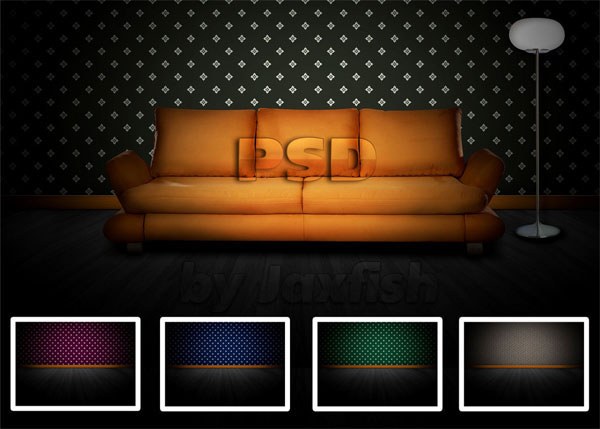
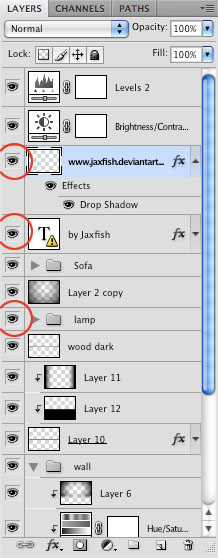
Step 6: Deactivating Some Layers
Once the Sofa PSD file is open, we want to turn off a few of its layers. I have circled the three layers that we want to turn off.
 This would be a good time to save the file in case you haven’t already. You can save over it, or do a File > Save As to preserve the original; completely up to you.
Step 7: More Tweaking of the PSD
Next, we want to take three layers (“Layer 6”, Hue/Saturation Adjustment Layer, and “Texture 3”) and bring them all up the layer stacking order in the Layers Panel so that they are above the “Wall” layer group.
Next, we will desaturate the texture layer by double-clicking on the Hue/Saturation adjustment layer. 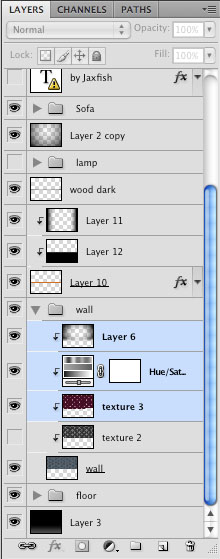 Once the adjustment layer dialog window opens up, we will drag the middle saturation slider all the way to the left to desaturate this layer.
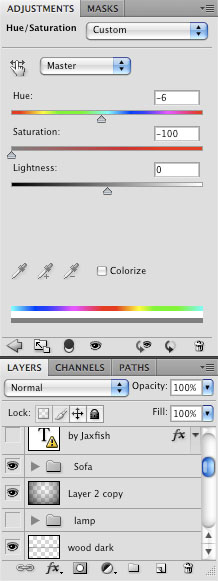
Step 8: Stripping the Wallpaper
You will notice now that some of the textured wallpaper layer is actually overlapping the floor underneath the wooden trim.
To rectify this, we will want to select parts of the “Texture 3” layer with the Rectangular Marquee Tool (M). Select the area that is overlapping and simply press Delete to remove the selected area. 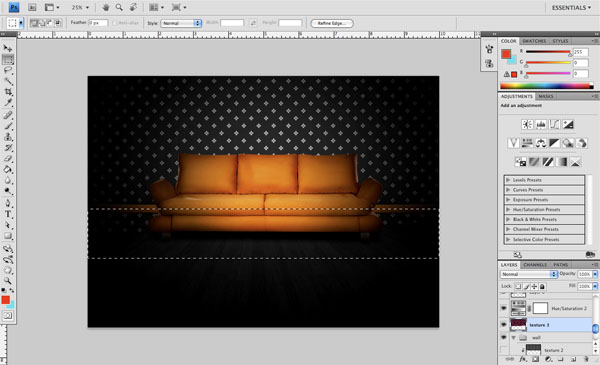
Step 9: Working on the Trim
Looking at our piece now, the couch and the trim along the floor are the highest contrast points in our work.
We want to tone this down a bit so that the “Illustrious” text will stand out the most. We will now select “layer 10” from the Layers Panel (circled in red) and go to Image > Adjustments > Hue/Saturation. 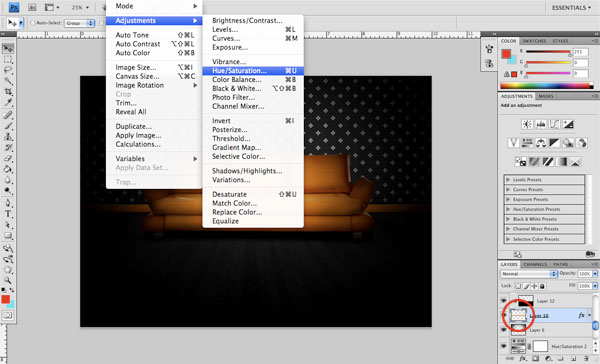 Next, we will once again drag the middle slider to the left, only to about -55.
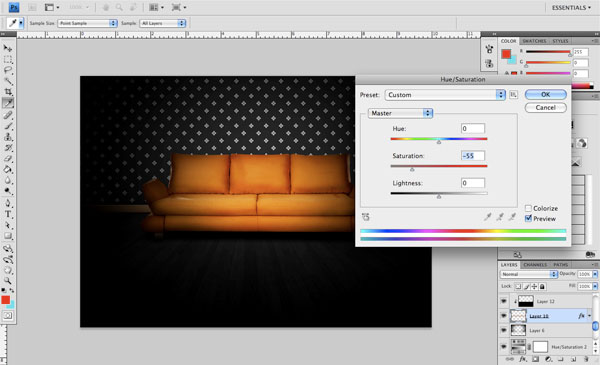
Step 10: Lower the Opacity
On the “Texture 3” layer with the wallpaper, we’re going to lower the opacity down to about 50%. 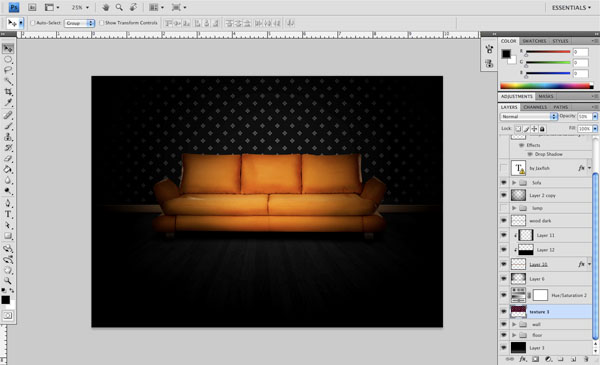
Step 11: Brand New Sofa
Next, expand the “Sofa” layer group in the Layers Panel to see all the layers within the folder. You will notice that there are several layers inside of this folder, including a Hue/Saturation adjustment layer.
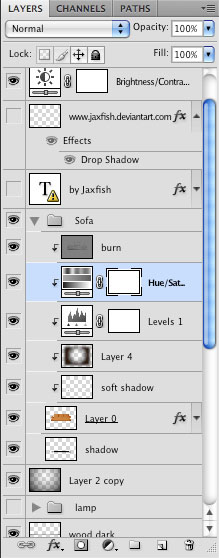 Double-click on the Hue/Saturation adjustment layer and slide the Saturation slider to -90 and the Lightness slider to -75.
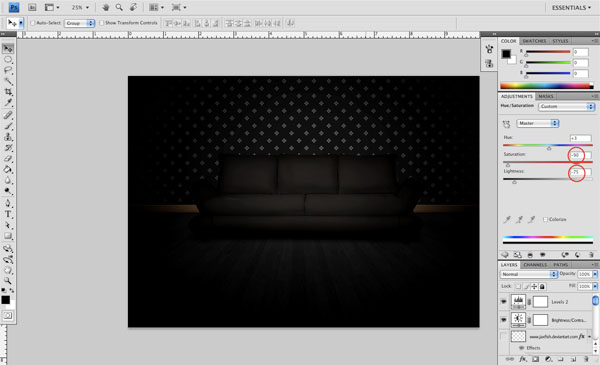
Step 12: Ready to Airbrush!
Up to this point, we have been mostly preparing and modifying the files. We can now flatten the image and save it. The quickest way to flatten the image (if you weren’t sure of how to do this before) is to right-click on a layer and choose Flatten Image from the menu.
There’s also the Layers Panel menu at the top (by the Opacity option) that’s indicated with a downward-pointing arrow; when you click on this, you will be presented with numerous commands, including Flatten Image. 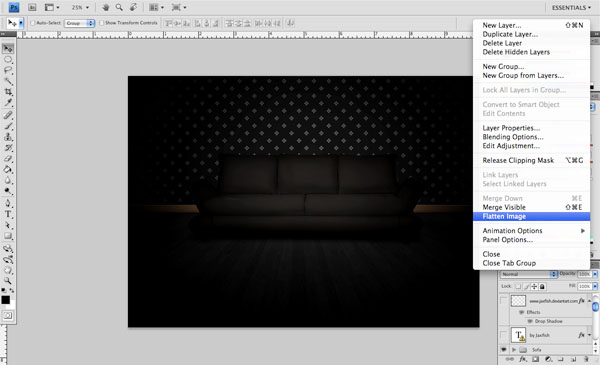
Step 13: Very Smart Object
Now we are going to open up the EPS file we created earlier in Illustrator (illustrious.eps) and simply select the text with the Selection Tool (V). Once you have selected your text, press Cmd/Ctrl + C to copy the text.
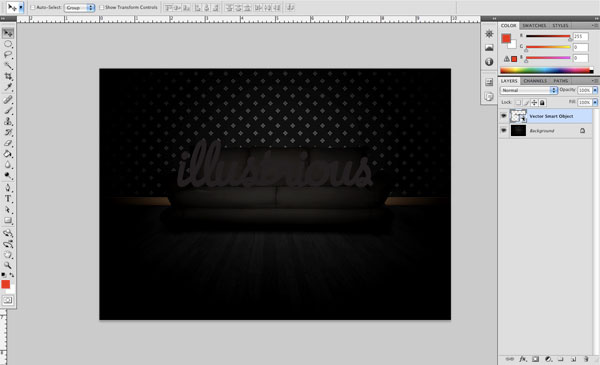
Head back over to Photoshop and press Cmd/Ctrl + V to paste the copied text into the Photoshop document. When you paste the text into Photoshop, you will be prompted by the Paste dialog window, which asks you if you want to paste the object as a Smart Object–say OK. You should now have the vector shape pasted just above the flattened image of the sofa.
Step 14: Color Me Bad
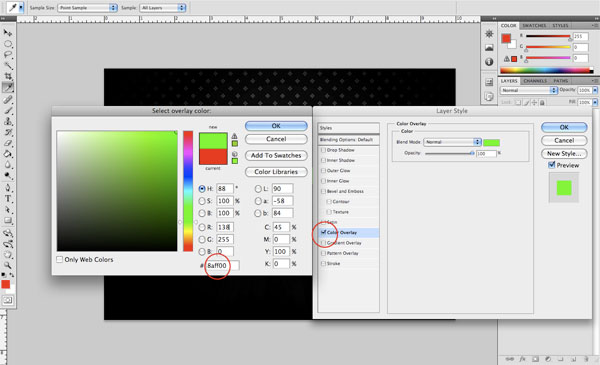
For the next step, we are going to begin coloring in our text by selecting a solid base color. To do this, double-click on the vector object layer in the Layers Panel and open up the Layer Styles dialog window. Choose Color Overlay, click on the small color swatch in the Color Overlay’s options, and then set the color overlay color to a bright, neon-ish green (#8aff00).
 At this point, we are going to want to save our work to prepare for the next step where the real fun begins. Checkpoint: your work should look like the image below.
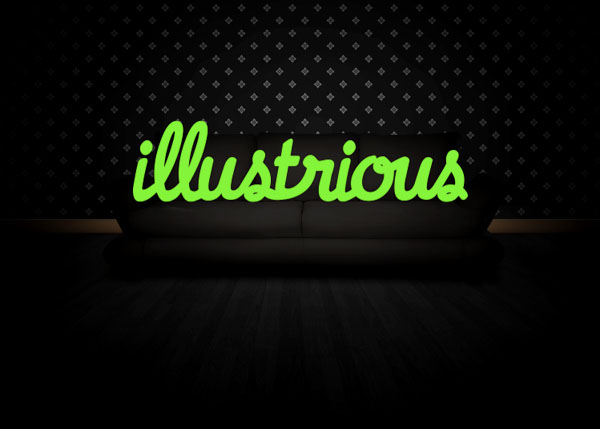
Step 15: Stay Inside the Lines!
Next, we are going to begin airbrushing the letters by first adding in some highlights.
To do this, select a mid-sized, soft round brush from the Brushes Panel (press F5 if you don’t see the panel) and lower the Opacity option of the brush down to about 20%. After that, make sure you have a solid white Foreground color for the brush. Now, hold down Cmd or Ctrl and click on the Smart Object layer that contains our text.
You should now have those marching ants around the text, indicating that you have selected around it. Create a new layer just above our text, while still keeping the selection active (if you accidentally deselected, just issue a Reselect command using Shift + Ctrl/Cmd + D). Begin brushing on the new layer along the edges of some of the letters.
By brushing along the edges, you should start to get some nice, smooth highlights indicating a light source. And by having the text selected, you can ensure that all of your brushwork stays inside the marching ants–just like a coloring book! Don’t worry too much about how far in you go with the highlights at this point, as we can always erase some of it later.
The main goal is to just get a feel for the technique. (and to have fun, of course). 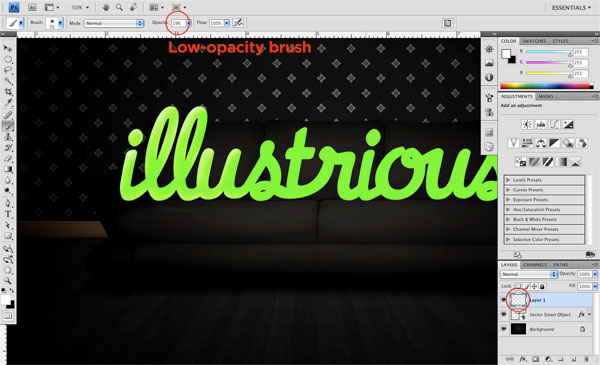
Step 16: Moving Along
Now at this point, I have continued working with a low-opacity brush and just trying to imagine that the outermost parts of our letters are a bit thinner as they taper off–this is where we would notice light shining through, almost as if it’s behind the letters.
By the way, I do this with a mouse and not a graphics tablet, which can be a bit tricky at times (more so if you’re naturally left-handed). If you have a graphics tablet, I would highly recommend using it because this process–with a tablet–should be easier. 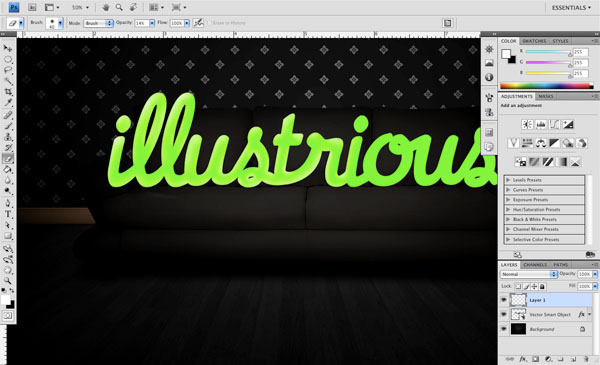
Step 17: Checkpoint
After working on this for a bit longer, you can now see the highlights on the entire word.
You will also notice that I’ve added highlights along the bottom curves of the joined letters as well. By playing around with this, and maybe erasing some parts with a low-opacity eraser, you can start to see where this is going. I encourage you to experiment with this as it can be quite fun.
The arrows serve as an indicator to show the suggested direction of the light source. 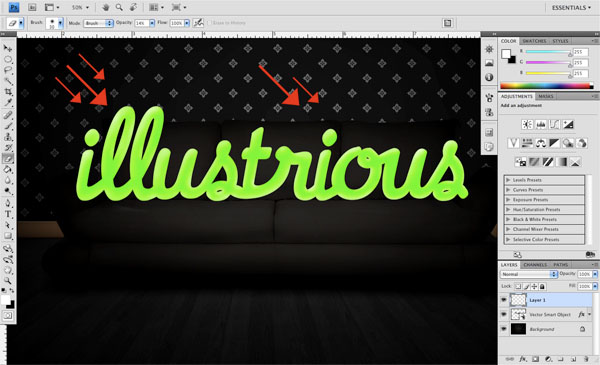
Step 18: On to the Next One
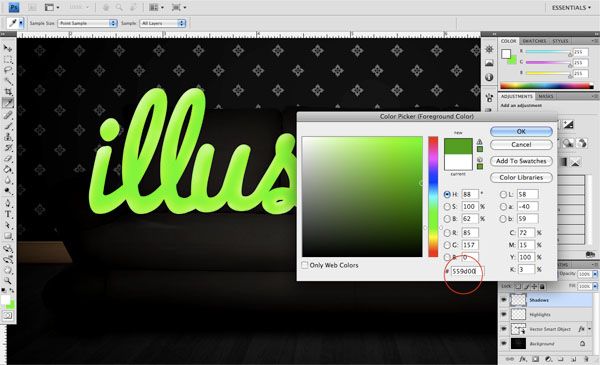
Before moving on to the next step, name the layer we just completed as “Highlights” just to keep things organized. Now, create a new layer above this “Highlights” layer and call it “Shadows”. We will be using a similar technique to what we used in the previous steps, but rather than using a solid white color, we will use something that is just a few shades darker than our original green color (#8aff00). I have selected #559d00 as it seems like a good, slightly darker shade of green. The reason we don’t want to go too dark is that we want the shading to be subtle and gradual to make a more believable shift in color value.
Step 19: In the Shadows
Using this darker shade of green, we will again hold down the Cmd/Ctrl and then click on our smart object layer to make a selection around the object with the original text. And after we have the active selection made, go on the “Shadows” layer and begin brushing inside of the letters to add subtle shadows. You may not notice a huge difference at first, but by turning this layer on and off, you can see the difference between having the shadows, and not having them.
At this point, I would recommend saving your work once again–just to be safe. 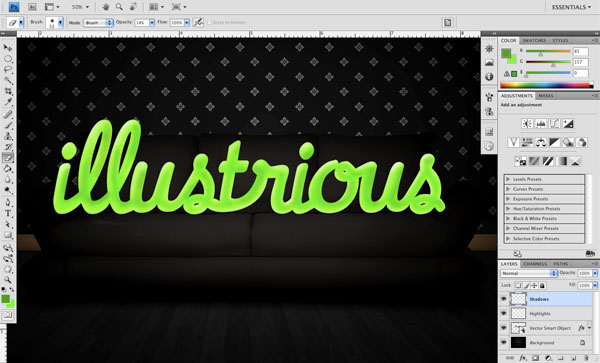
Step 20: Extra Shadows
Once you have saved your work, create one more layer on top of the previous “Shadows” layer and call this one “Extra Shadows”. Just as the name of the new layer implies, we are going to want to add one additional layer of even darker shading. Using the same soft brush, pick a slightly darker shade of green (#498601) and repeat the same technique that we used in the previous step when applying these shadows. This will help in adding a bit more variation and depth to the letterforms.

Step 21: Add an Outer Glow Layer Style
Now what we will do is double-click on the Smart Object layer to bring up the Layer Styles dialog window so that we can add an Outer Glow layer style. For the color of the glow, use a bright green (#88f05a) and apply the settings shown in the image below. 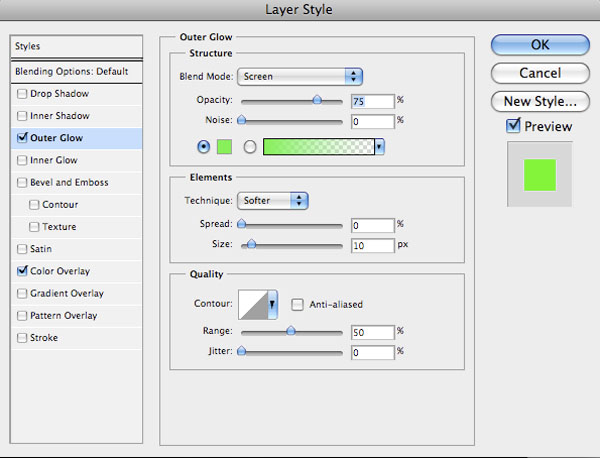 This layer style will help to add a bit of a diffused fuzziness around the letters and can also help them appear softer and more rounded.
Step 22: Add a Drop Shadow Layer Style
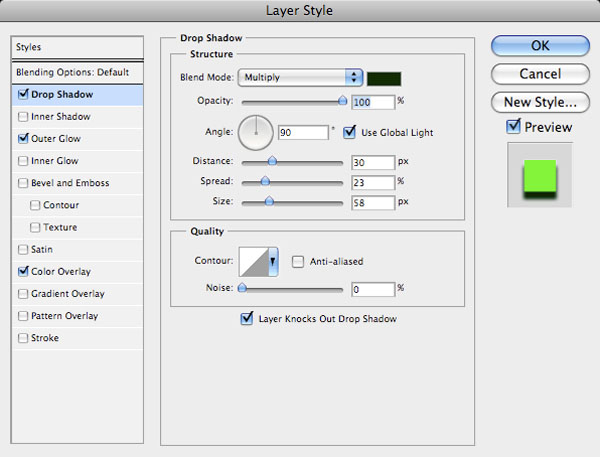
Next, we will add a bit more styling from the Layer Styles dialog window. Check off Drop Shadow to apply this layer style, and use the color #012c03, which is a very dark shade of green (close to black). Apply the settings shown below in the image and click OK to apply both the glow and the shadow.
Step 23: Almost There!
You should now have something that looks like the image below. We are close to finishing this up and only have a few more steps to get through, so let’s keep going! Check your work against mine: 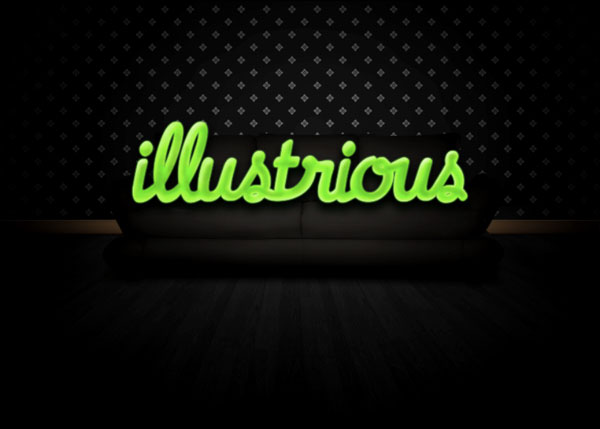
Step 24: Grouping the Type
Next up, we are going to group the Smart Object along with the highlights and shadows that we have added by placing them in a layer group.
One way to do this is to click on the small folder icon at the bottom of the Layers Panel next to the Add new layer icon. Drag it up the layer stack to the very top and also name the layer group as “Type”. Now that we have this layer group created, simply drag the layers related to the text into the group. By doing this, we can move the type and all of the highlights/shadows around just by moving the layer group. 
Step 25: Reduce and Angle
Now that we have our type all grouped nicely together inside of the “Type” layer group, we are going to select the folder in the Layers Panel and drag it down to the new layer icon to make a copy of the group and all of the layers contained within.
Once you have a copy of the group, click the small “eye” icon to turn off the visibility of the original group. Click on the newer copy of the “Type” layer group in the Layers Panel folder that we just duplicated and then press Ctrl/Cmd + T to enter Free Transform command (or choose Edit > Free Transform). While holding down Shift to keep the dimensions proportional, reduce the size of the type so it becomes a bit smaller.
Also, angle the type a bit more so that the right of it is pointing upwards. This will make the type a bit more dynamic rather than having it sit perfectly straight across the sofa. Until now, we have left it straight so that we could airbrush the highlights and shadows easier (it would be more difficult to do them with angled type).
Once you’re happy with your free transformations, just press Enter to commit the changes. 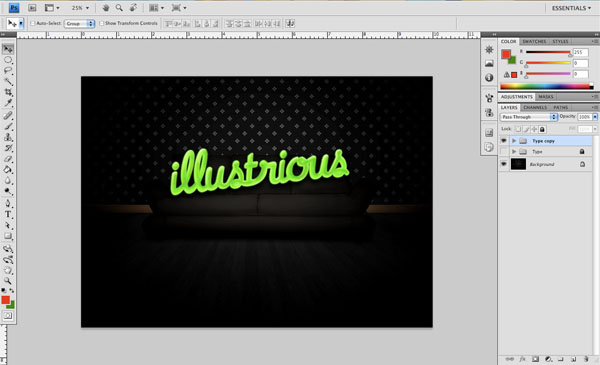
Step 26: Reflected Light
Next, create a new layer just above the Background layer and underneath both “Type” layer groups. Choose a light green color (#6bff67) and pick the Gradient Tool (G) from the Tools Panel.
Choose a radial gradient that fades from the solid green color we have just picked to completely transparent (set these options in the Options Bar of the Gradient Tool). On the new layer we have created, click and drag from the center and outwards to create the radial gradient. Change the Blend Mode of this layer to Overlay and position it behind some of the first few letters so that it appears to be ambient light reflecting on the cushions of the couch.
Duplicate this layer a few times and spread them out behind the letters to enhance the effect. 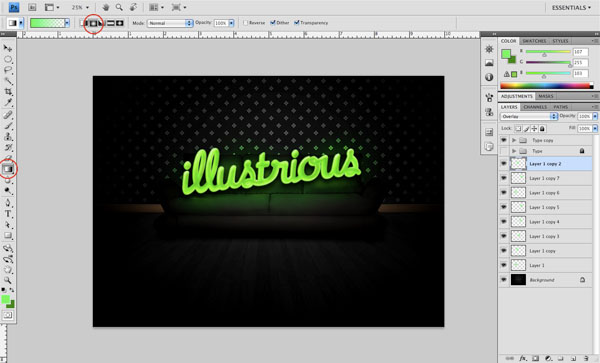
Step 27: Merging the Layers
Select the topmost gradient layer that you have created in the previous step and while holding Shift, select the very bottom gradient. This should select all of the radial gradient layers that you made.
Just press Shift + E to merge them down to one layer, just like we did earlier in the tutorial. Note: Once you merge the layers, you will have to once again change the blending mode of the merged layer to Overlay. 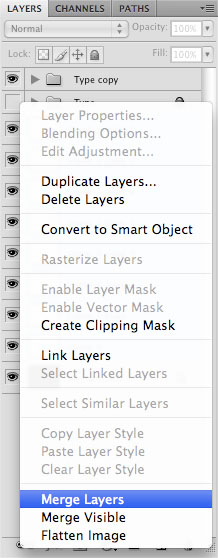
Step 28: Enhancing the Light
Alright, final step!
Now that we’ve merged the gradients that created the ambient light, duplicate that layer one more time by pressing Cmd/Ctrl + J while it’s selected in the Layers Panel. Next, lower the opacity of the duplicated layer to about 50%. As a finishing touch, grab the Eraser Tool (E) and use a low-opacity setting with a round soft brush selected.
With the Eraser Tool, erase some of the reflected light spilling on the wallpaper so that it doesn’t look quite as harsh and prominent; we just want to tone this down a bit to keep the focus on the type and the couch. 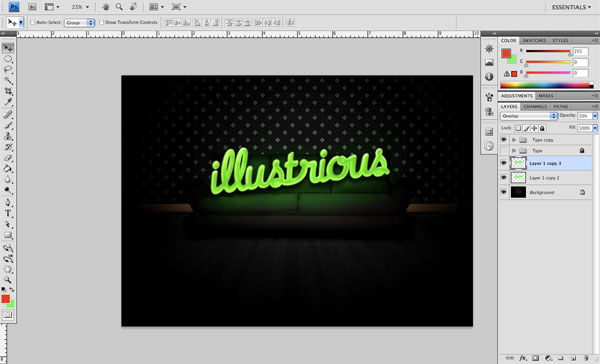
Tutorial Summary
You have successfully completed this tutorial! We’ve covered quite a lot, but I hope that you have found some useful tips from this that you can use in some of your own work.
Airbrushing can take a bit of time to get down, but as they say, it’s not so much the destination as it is the journey getting there.
Download Source Files
- illustrious_type_airbrushing (ZIP, 12.8 MB)
-
 Trevin serves as the VP of Marketing at WebFX. He has worked on over 450 marketing campaigns and has been building websites for over 25 years. His work has been featured by Search Engine Land, USA Today, Fast Company and Inc.
 -

WebFX is a full-service marketing agency with 1,100+ client reviews and a 4.9-star rating on Clutch! Find out how our expert team and revenue-accelerating tech can drive results for you! Learn more
Make estimating web design costs easy
Website design costs can be tricky to nail down. Get an instant estimate for a custom web design with our free website design cost calculator!
Try Our Free Web Design Cost Calculator
Table of Contents
- Preview
- Tutorial Resources
- Step 1: Create a New Illustrator Document
- Step 2: Create Outlines
- Step 3: Manual Kerning
- Step 4: Bringing It Together
- Step 5: Jumping over to Photoshop
- Step 6: Deactivating Some Layers
- Step 7: More Tweaking of the PSD
- Step 8: Stripping the Wallpaper
- Step 9: Working on the Trim
- Step 10: Lower the Opacity
- Step 11: Brand New Sofa
- Step 12: Ready to Airbrush!
- Step 13: Very Smart Object
- Step 14: Color Me Bad
- Step 15: Stay Inside the Lines!
- Step 16: Moving Along
- Step 17: Checkpoint
- Step 18: on to the Next One
- Step 19: in the Shadows
- Step 20: Extra Shadows
- Step 21: Add an Outer Glow Layer Style
- Step 22: Add a Drop Shadow Layer Style
- Step 23: Almost There!
- Step 24: Grouping the Type
- Step 25: Reduce and Angle
- Step 26: Reflected Light
- Step 27: Merging the Layers
- Step 28: Enhancing the Light
- Tutorial Summary
- Download Source Files
Share this article


Web Design Calculator
Use our free tool to get a free, instant quote in under 60 seconds.
View Web Design CalculatorMake estimating web design costs easy
Website design costs can be tricky to nail down. Get an instant estimate for a custom web design with our free website design cost calculator!
Try Our Free Web Design Cost Calculator


