

Preview
Note: This tutorial features a nude subject, and thus, this tutorial contains nudity for artistic purposes. Click on the image below to view its full size. 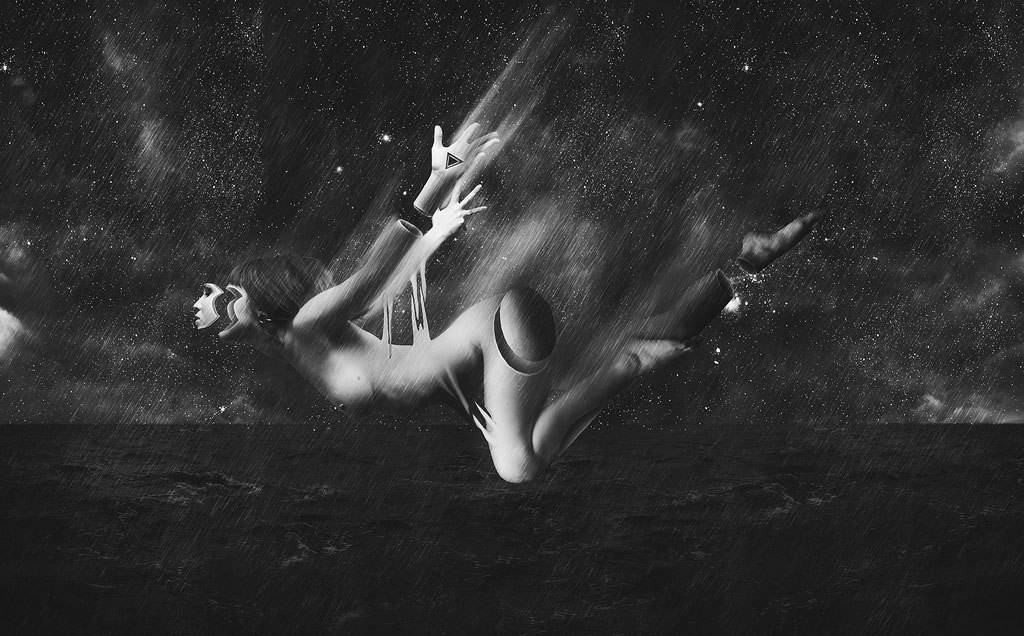
Tutorial Resources
- Woman by mjranum-stock (read personal stock rules)
- Woman1 by mjranum-stock (read personal stock rules)
- Stormy sea by darkrose42-stock (read personal stock rules)
- Clouds by Tash-stock (read personal stock rules)
- Space image by Roh-stock (read personal stock rules)
- Starfield by Matkraken (read personal stock rules)
- Rain Brushes by koolkidd77 (read personal stock rules)
Step 1: Import the composition’s subject
Open model and model1 in Photoshop. Make a new document (Ctrl/Cmd + N) with Width at 3858px, Height at 2398px and 180 dpi. Paste both images into this new document.
Select the first stock image in the Layers Panel and click on Edit > Transform > Rotate 90o CCW. Resize the image a little with the Free Transform command (Ctrl/Cmd + T) and place it right in the middle of the canvas with the Move Tool (V). Now select the second image and choose Edit > Transform > Flip Horizontal.
Use the Eraser Tool (E) to erase everything roughly with a soft brush tip except the subject’s legs. Resize and place this over the body of the first image. Take the Eraser Tool again and erase (with a soft brush) the hips of the second image to blend both images together.
The most important thing is that you don’t miss the proportions to make it look realistic. 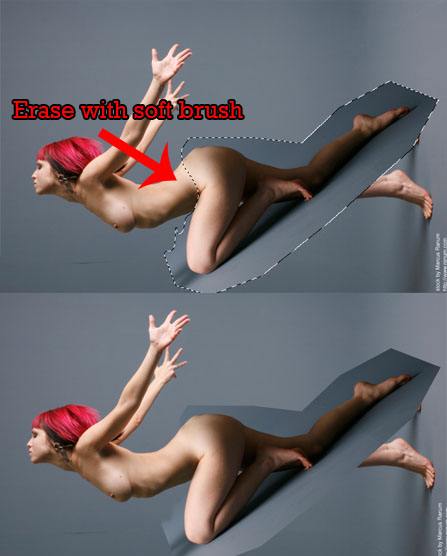 Next, render out the model with the Lasso Tool (L) or the Pen Tool (P). You don’t need to do this perfectly.
Step 2: Cut out several sections of the subject
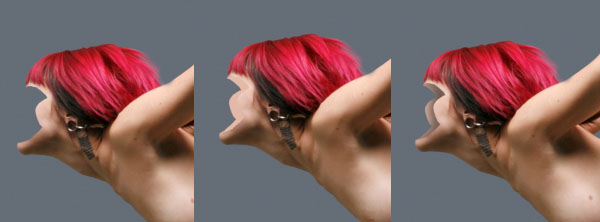
Take the Lasso Tool (L), select an area of the model’s head and remove it (hit the Delete key). Make a new layer behind this image, try to select the same shape with the Lasso Tool, pick a skin color of her face with the Eyedopper Tool (I) and fill the selection with your chosen color using the Paint Bucket Tool (G). Make a new layer.
Apply a clipping mask to this new layer (Ctrl/Cmd + Alt + G). Select a soft brush and brush with black on the inside of your shape. Reduce the Opacity if needed, and if you want to, you can give the layer a Gaussian Blur filter to soften up rough edges.
 Do the same thing with her arm, hand, and other body parts. You can use any shape and erase any part you want to. The exception here is that I didn’t erase parts of her hips: instead, I selected the lips with the Lasso Tool (L), right-clicked on the selection in the canvas and then chose Layer via Cut from the contextual menu.
I then displaced it a little using the Move Tool (V). 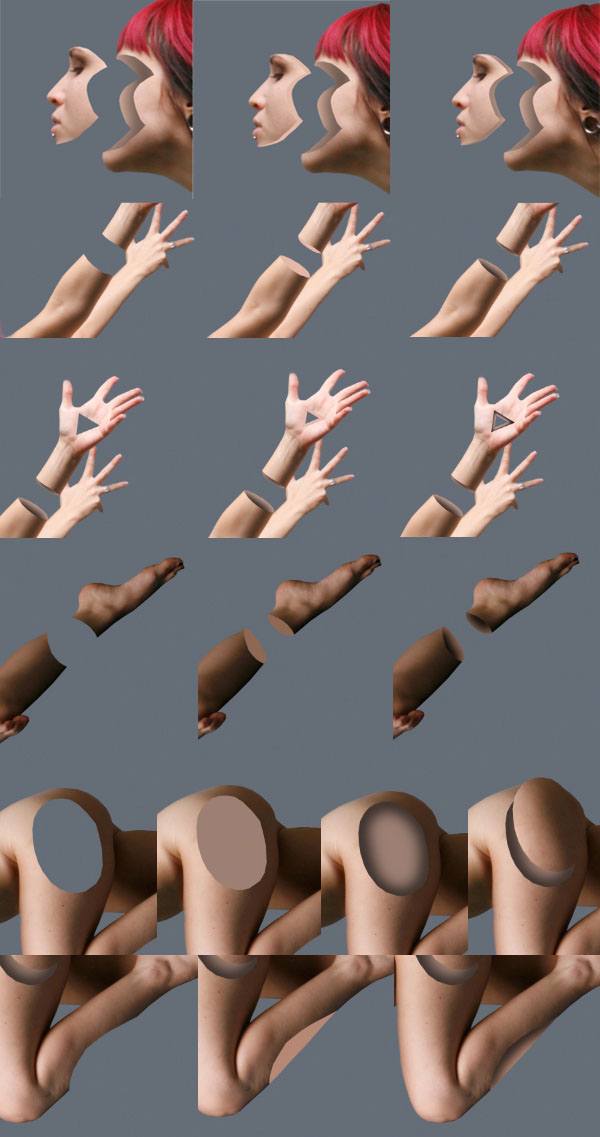 Here’s our subject now.
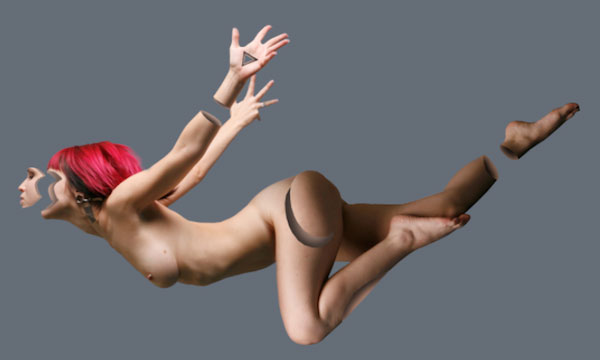
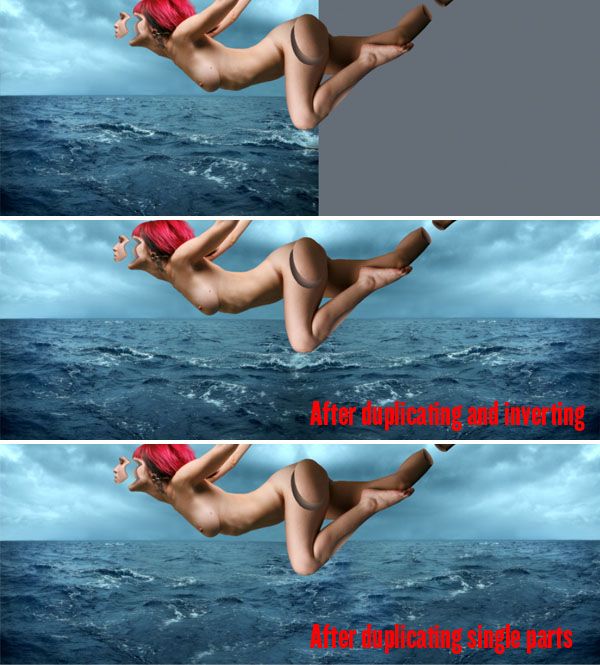
Step 3: Work on the subject’s background
Open the image of the stormy sea and place it into our canvas behind our subject.
Duplicate the stock image’s layer (Ctrl/Cmd + J) and flip it horizontally (Edit > Transform > Flip Horizontal). Take the Lasso Tool and select some parts of the sea, copy (Ctrl/Cmd + C) the selected regions, paste (Ctrl/Cmd + V) it, and move it around a bit so it doesn’t look too mirrored anymore. Take the Eraser Tool with a soft brush and erase the edges of these parts to blend them together.
Step 4: Add clouds to the background
First make a new layer and fill it with black. Set the new layer’s Opacity to 50%. Next, open the cloud image, duplicate and flip it horizontally just like we did in the previous step.
You can copy and paste parts of the clouds here, too. Set the Blend Mode of the cloud layer to Overlay. Insert the first and second space image and set the layer’s blend modes to Lighten.
Erase the bits where the space images are too bright for your tastes. 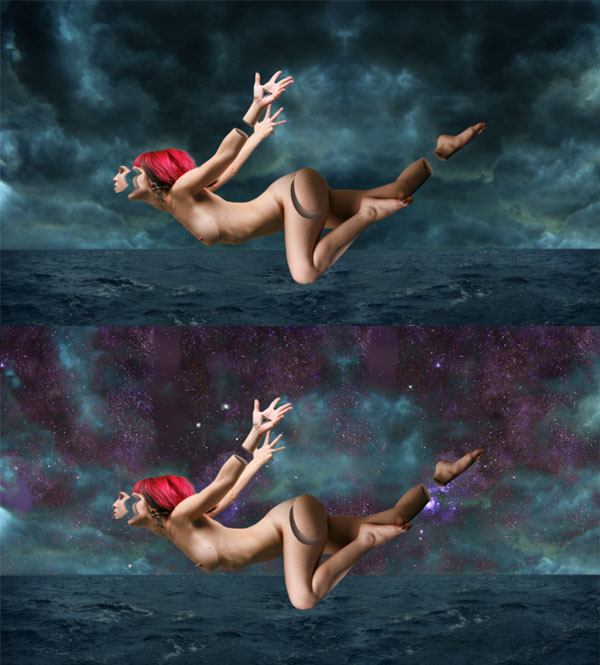
Step 5: Further adjustments on the body
First duplicate our subject on a new layer (Ctrl/Cmd + J). Use the Liquify filter (Filter > Liquify or Shift + Ctrl/Cmd + X) and simply smudge around.
Again, duplicate that layer and give it a Motion Blur filter (Filter > Motion Blur) — set the Angle to about 53o and the Distance to about 500px. Move that layer upwards in the Layers Panel so that the image with the Motion Blur is only above the body, making it look like our subject is falling into the sea. 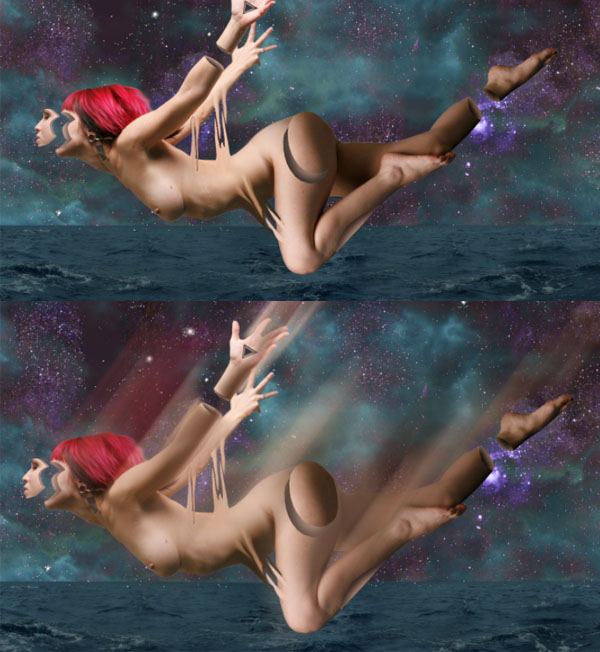 Tip: If you want, you can take a soft and small white brush and brush on the edges of parts of the body you edited in Step 2. Set the layer’s Blend Mode to Soft Light and set the layer Opacity to around 50%. This looks especially better on brighter areas, giving the edges a slight bevel effect.
Step 6: Make it rain
Download and install the rain brushes and brush around the canvas until the whole scene is covered with rain.
Reduce the Opacity of the layer if you want the rain to be more subtle — in my case, around 51% does the trick. 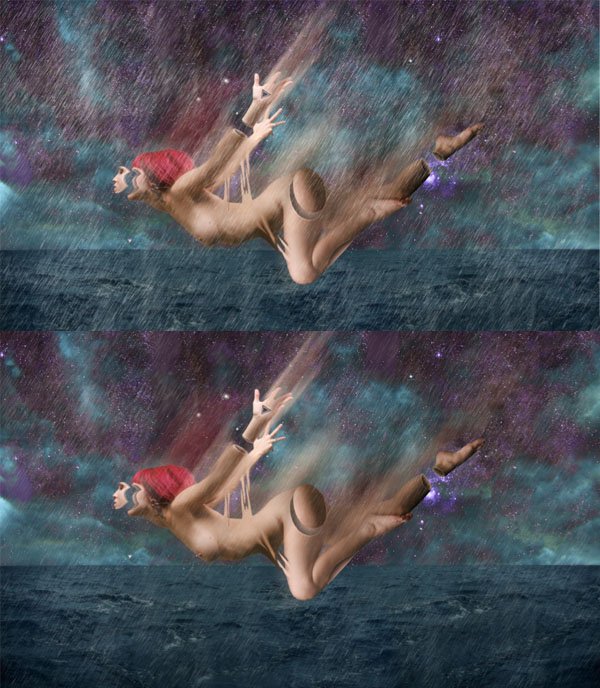
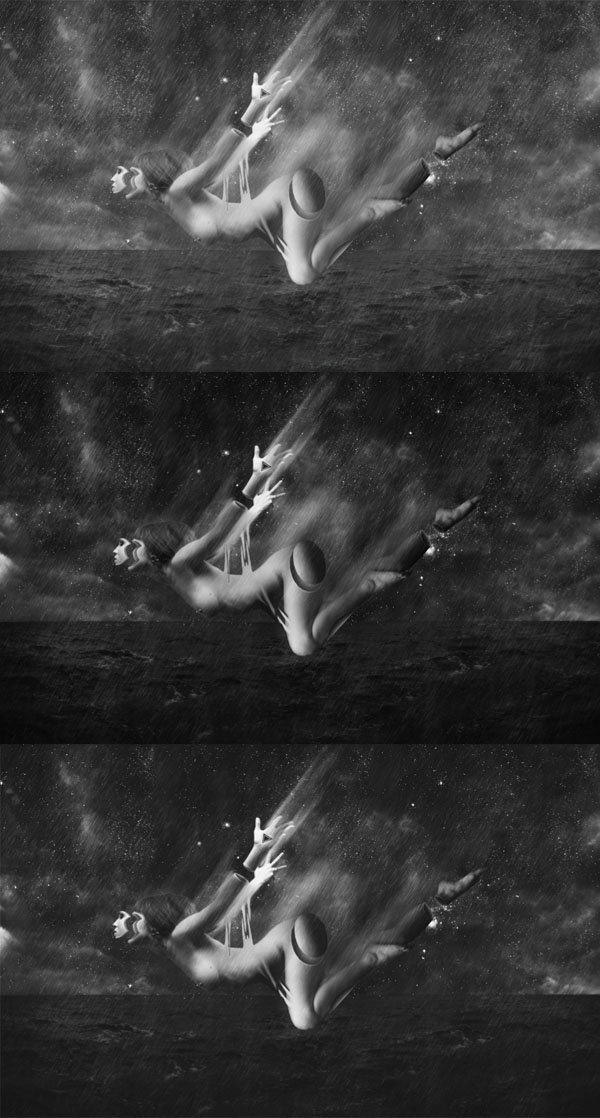
Step 7: Color adjustments and sharpening
Create three black and white gradient map adjustment layers by clicking on the Create a new fill or adjustment layer icon at the bottom of the Layers Panel. Leave the first one as it is (default setting), set the second one’s Blend Mode to Multiply and Opacity to 71% and set the third one’s Blend Mode to Luminosity.
Now would be a good time to save your work or create a layer comp. Merge all layers by right-clicking on any layer in the Layers Panel and choosing Flatten Image. Finally, run the Sharpen filter by clicking on Filter > Sharpen > Sharpen and you are finished with the tutorial!
Tutorial Summary
In this digital art tutorial, you have learned how to create a realistic falling scene by merging images together, adding a motion blur and using rain that flows into the same direction. I hope you found this tutorial useful and look forward to your questions and comments.
Download Tutorial Source Files
- dark_falling_scene (ZIP, 9.27 MB)
-
 Trevin serves as the VP of Marketing at WebFX. He has worked on over 450 marketing campaigns and has been building websites for over 25 years. His work has been featured by Search Engine Land, USA Today, Fast Company and Inc.
 -

WebFX is a full-service marketing agency with 1,100+ client reviews and a 4.9-star rating on Clutch! Find out how our expert team and revenue-accelerating tech can drive results for you! Learn more
Make estimating web design costs easy
Website design costs can be tricky to nail down. Get an instant estimate for a custom web design with our free website design cost calculator!
Try Our Free Web Design Cost Calculator
Table of Contents
- Preview
- Tutorial Resources
- Step 1: Import the Composition’s Subject
- Step 2: Cut out Several Sections of the Subject
- Step 3: Work on the Subject’s Background
- Step 4: Add Clouds to the Background
- Step 5: Further Adjustments on the Body
- Step 6: Make It Rain
- Step 7: Color Adjustments and Sharpening
- Tutorial Summary
- Download Tutorial Source Files
Share this article


Web Design Calculator
Use our free tool to get a free, instant quote in under 60 seconds.
View Web Design CalculatorMake estimating web design costs easy
Website design costs can be tricky to nail down. Get an instant estimate for a custom web design with our free website design cost calculator!
Try Our Free Web Design Cost Calculator


