
Preview
Here is the ad poster design we will create. This then can be used online for banner ads as well. 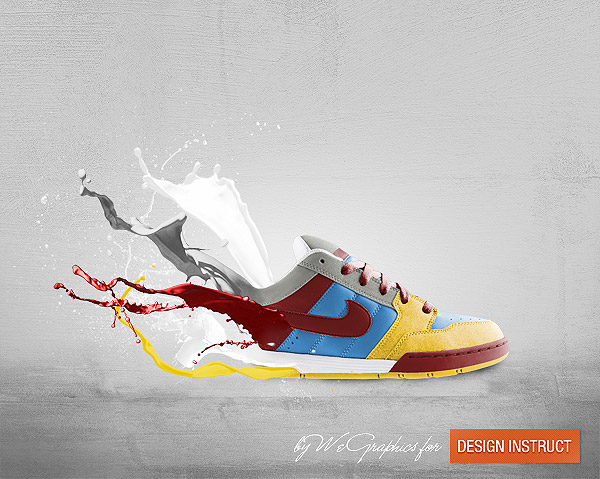
Tutorial Resources
- Paint Tossing Pack by MediaMilitia (free)
- Grunge Grab Bag: Texture Pack by Design Instruct (free)
Step 1: Preparing the Product
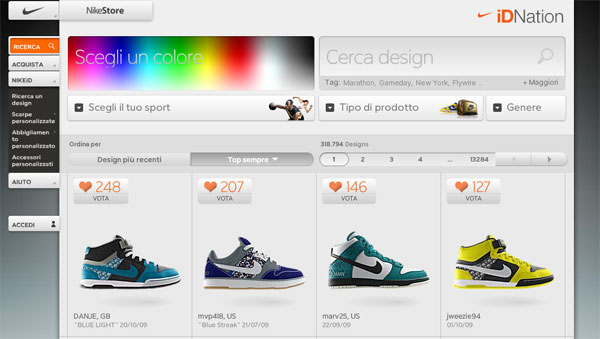
For this tutorial, I’ve chosen the classic Nike shoe. You can use any kind of product image and create the same effects. If you want to work with a similar image, go to NikeiD and create your own pair of shoes to feature in your poster, or you could even use your own favorite sneakers.
 Once you’ve decided on the poster design’s subject (i.e. what shoe or product you’ll be featuring), Use the Pen Tool (P) in Paths mode to select around the edges of the shoe. Press Ctrl/Cmd + Enter to make a selection (or, in your canvas, right-click inside the path and then choose Make Selection in the menu that appears), invert the selection (Select > Inverse) and hit Delete to remove its background.
This process should isolate and prepare our subject for our product ad.
Step 2: Create a New Photoshop Document and Place the Subject
Create a new document (Ctrl/Cmd + N) in Photoshop. Mine is 1000x800px with a white background.
Once your new PSD is created, paste in the shoe. 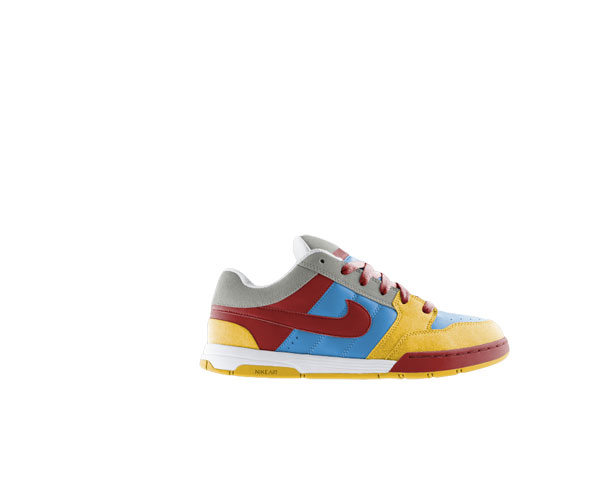
Step 3: Add the Background Texture
The focus of our work is the product (the shoe); this is why we will create a soft, unobtrusive background with the goal of making the piece focus into the subject. Download the Grunge Grab Bag: Texture Pack (I used Grunge Grab Bag Texture 02) and open it in Photoshop (Files > Open).
Press Ctrl/Cmd + T to activate the Free Transform command and reduce grunge texture’s image size to fit our canvas. Place the texture’s layer between the shoe layer and the default white Photoshop Background layer. 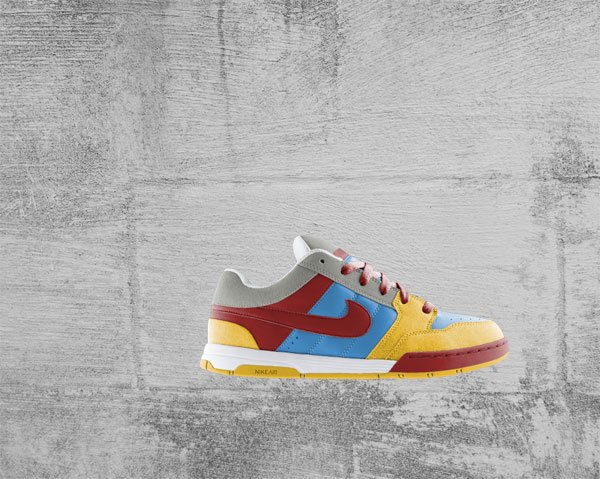
Step 4: Enhance the Background Texture
Desaturate the texture by selecting its layer in the Layers Panel and pressing Shift + Ctrl/Cmd + U (or choosing Image > Adjustments > Desaturate).
After desaturating the texture, switch its layer’s Blend Mode to Overlay. The background will now become completely white because it’s overlaid into the white Background layer, but don’t worry: we will fix this using blending options. Right-click on the Background layer in the Layers Panel and select Blending Options.
The Layer Styles dialog window will pop up. Here, add a grey (#b5b5b5) Color Overlay. 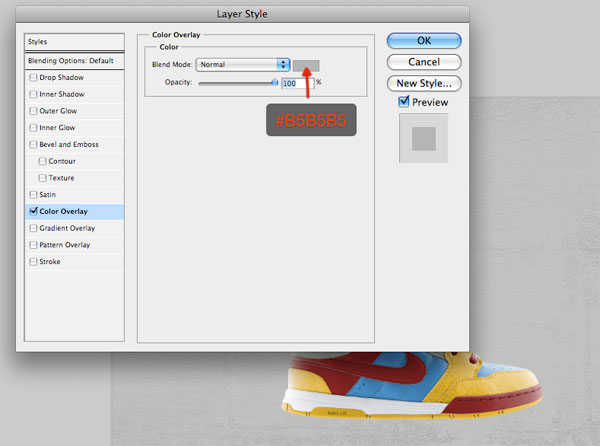 After you have added the Color Overlay layer style, reduce texture layer’s Opacity to around 30%.
Tip: When you resize a texture, lots of small details will be lost. To enhance details on your texture, you can use the Sharpen filter (Filter > Sharpen > Sharpen) if you want.
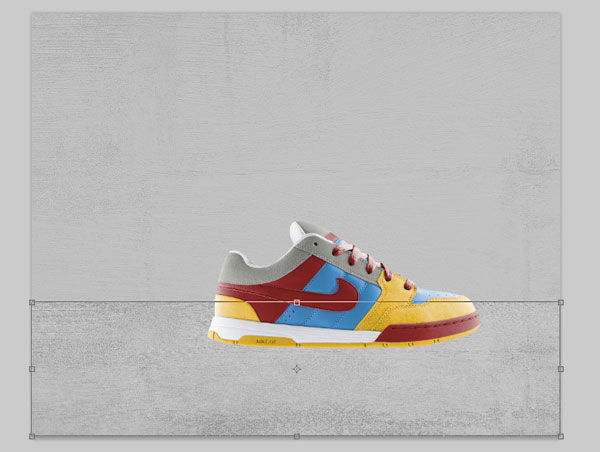
Step 5: Create the Floor
Now that we have a nice grungy background, let’s create the floor for our subject.
Duplicate the texture layer by right-clicking on its layer in the Layers Panel and choosingDuplicate Layer in the menu that appears. Since the Blend Mode of the original texture layer is set to Overlay, we need to set the Blend Mode of the duplicated layer back to Normal. Afterwards, Press Ctrl/Cmd + T to activate Free Transform and then drag down the top-center transform control to reduce the texture’s height as if we are squashing it down — in this way, we are creating the idea of perspective.
 Next, grab the Burn Tool (O) from the Tools Panel to darken parts of the floor; in particular, we want to darken the bottom corners.
 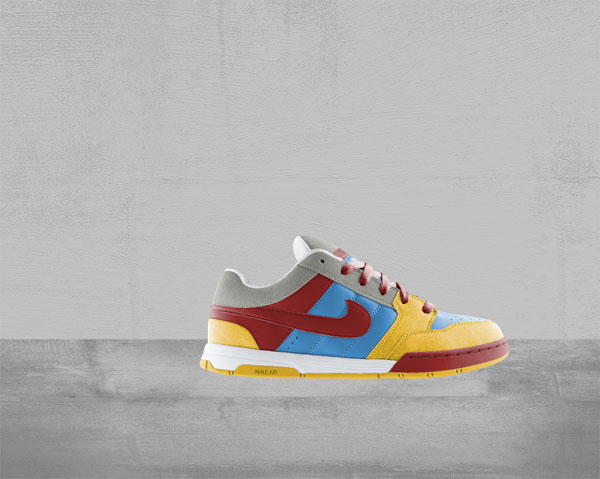 The floor is still too prominent — we want it to be more blended with the textured background. In this way, we give depth to the image and the floor looks less distracting.
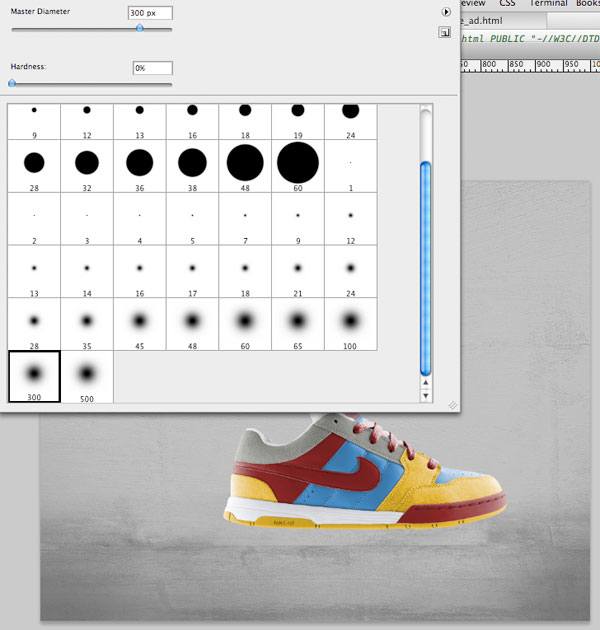
Use the Eraser Tool (E) to remove the top horizon (the top edge of the floor). Choose a large, soft brush with Hardness at 0% for your Eraser Tool. Tip: If you prefer, use a layer mask and a black brush on the floor layer to achieve the same result.
To complete the floor, create a new layer on top of it, select a black, large, soft brush and paint over the corners to darken them. Afterwards, reduce the Opacity of this layer to 10%. The aim of this step is to drive the viewer’s attention to the center of our canvas where we’ve placed the product.
Step 6: Create a Light Effect Behind the Shoe
The background is almost complete. The last touch is a light effect behind the shoe. It’s my habit to enhance subjects with light effects — it’s a way to embellish the product and draw even more attention to it.
Don’t forget that the aim of an ad poster is to sell, so we have to do our best to increase the customer’s desire to buy it. Even just a few details can make the difference between them looking longer or looking away quickly. For the light effect, start by creating a new layer that is immediately above the background layers.
Then use a big, white soft brush and click once on the canvas with the Brush Tool (B) to create the light effect. 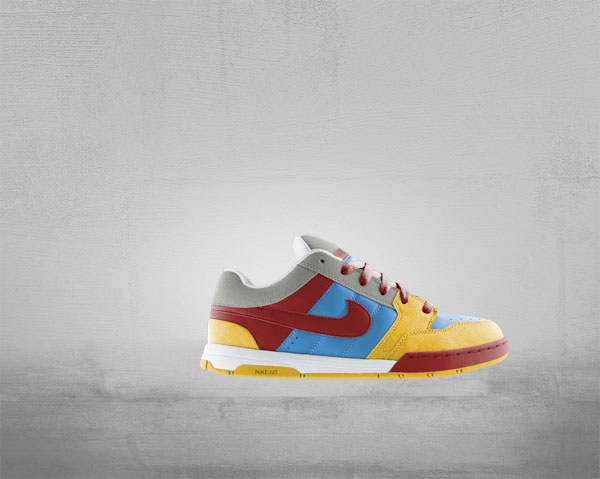
Step 7: Create a “Toxic Paint” Effect
We will now integrate paint effects into our composition. We will place them on the back portion of the shoe, making it look like as if paint is melting the shoe (hence, “toxic paint”).
In order to achieve this result, we need to determine what colors to use by sampling parts of the shoe with the Eye Dropper Tool (I) and we also have to play with their colors to match shoe colors. 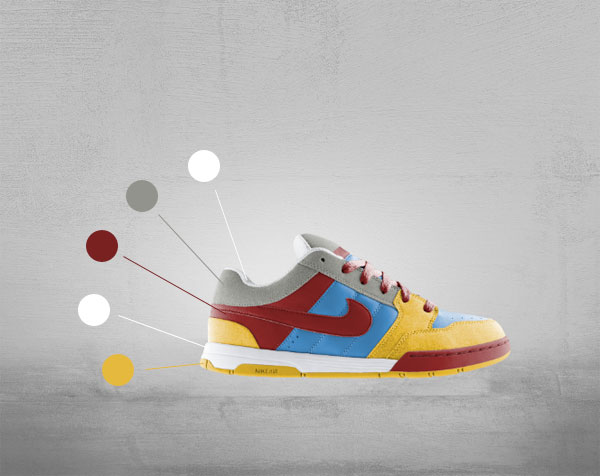 For this effect, you will need to download the Paint Tossing Pack from Media Militia. Let’s start from the bottom of the shoe (the yellow area).
The best option would be to find a paint effect with a simple horizontal-oriented shape. This one (which is part of the Paint Tossing Pack) is perfect for our needs: 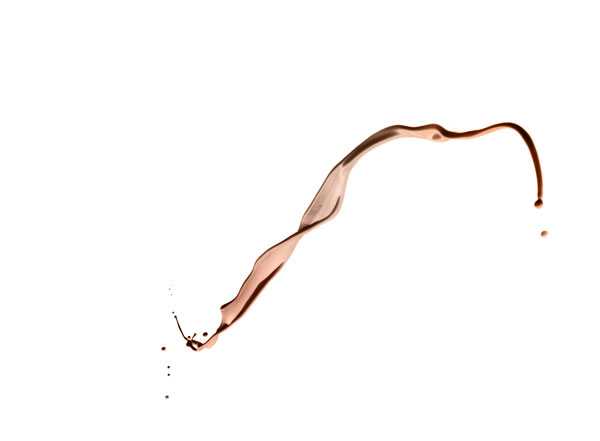
Prepare the Yellow Paint Shape
Open this texture in Photoshop and double-click on the default white Background layer to unlock it. Grab the Magic Wand Tool (W), select the white area by clicking on a white area in the canvas (which should automatically select all white areas), and hit Delete to remove the background.
Drag the prepared shape into the main canvas. 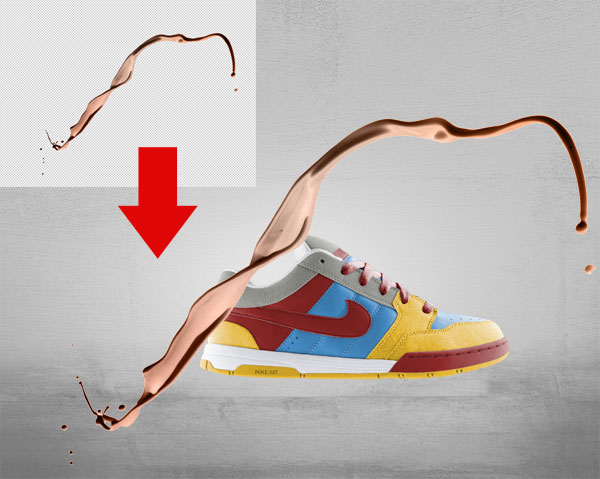 Activate the Free Transform command (Ctrl/Cmd + T) to rotate and resize the paint shape. Position it on the yellow sole of the shoe.
 Now we have to make the paint shape yellow; we will use two adjustment layers for this. With the paint shape layer as the active layer in the Layers Panel, choose Layer > New Adjustment Layer > Gradient Map. In order to affect only the paint (and not all the layers that are below the Gradient Map adjustment layer), create a clipping mask (Layer > Create Clipping Mask) on the adjustment layer.
Set a color gradient going from a dark yellow (#e9c603) to a lighter one (#f3df71). 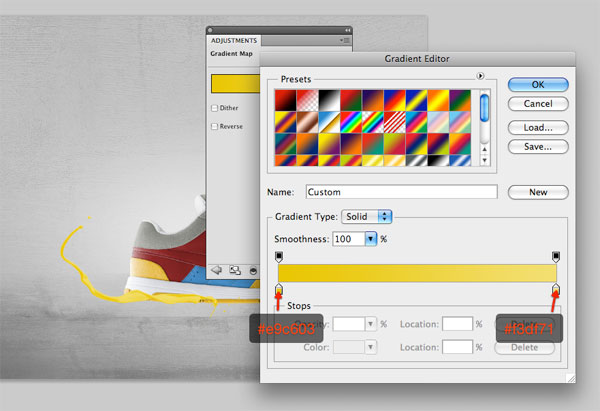 The paint’s color is still too light, so use a Curves adjustment layer (Layer > New Adjustment Layer > Curves) to darken it a little bit so that it matches the yellow color of the sole of the shoe.
 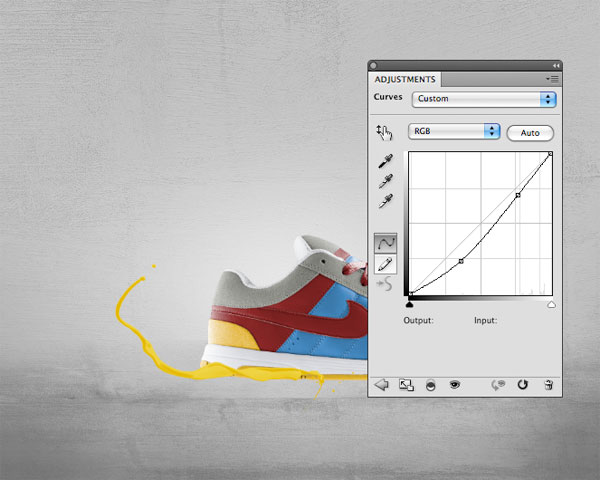 Finally, create a layer mask on the paint shape, grab a soft, black brush and then use the Brush Tool (B) to erase a small area on the right side of the paint shape so that it looks as if it belongs to the shoe.
Bottom White Paint
Other “toxic paint” effects are created using the same method, but applying different adjustment layers. For the white paint shape, I’ve applied a Black & White adjustment layer to desaturate the shape and a Gradient Map adjustment layer going from a light grey (#d7d7d7) to white (#ffffff) to color it. 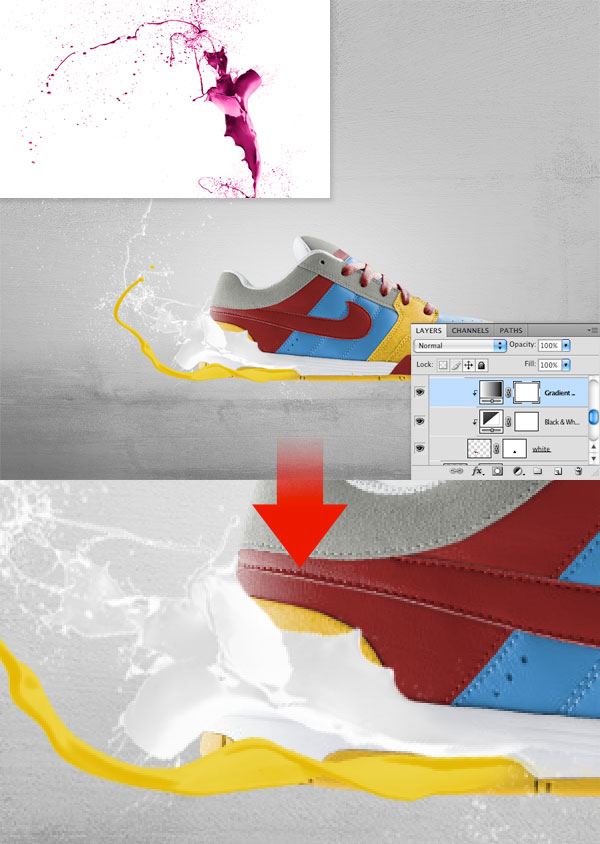
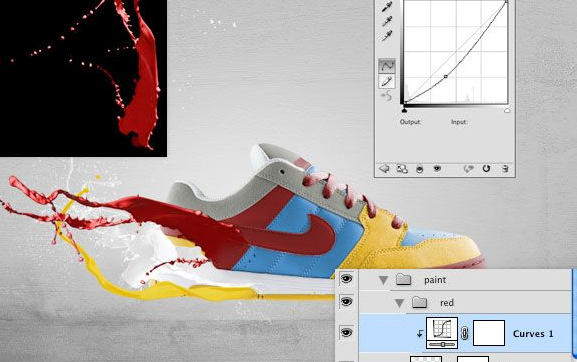
Red Paint
For the red paint, I’ve chosen a red paint shape from the Paint Tossing pack that’s rotated horizontally with Free Transform.
To darken its color, I’ve applied a Curves adjustment layer. 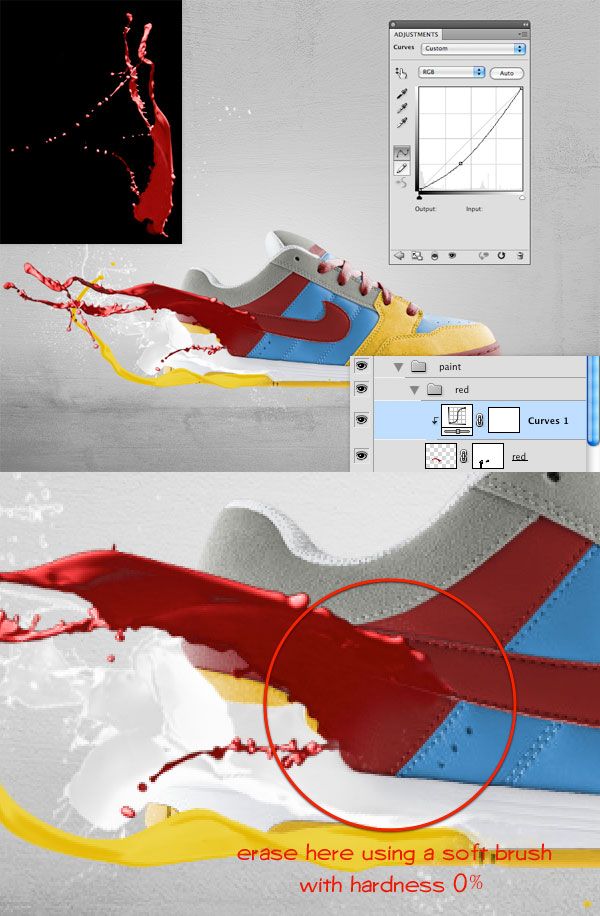
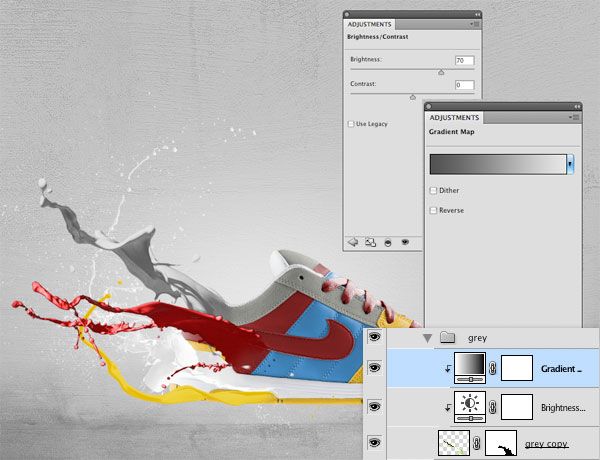
Grey Paint
For the grey paint, I’ve increased its brightness to 70 using a Brightness/Contrast adjustment layer (Layer > New Adjustment Layer > Brightness/Contrast). Secondly, I’ve added a Gradient Map adjustment layer going from a dark grey (#525252) to a lighter grey (#e6e6e6).
Top White Paint
Finally, for the last paint effect, I’ve applied the same adjustment layer used for the Bottom White Paint. 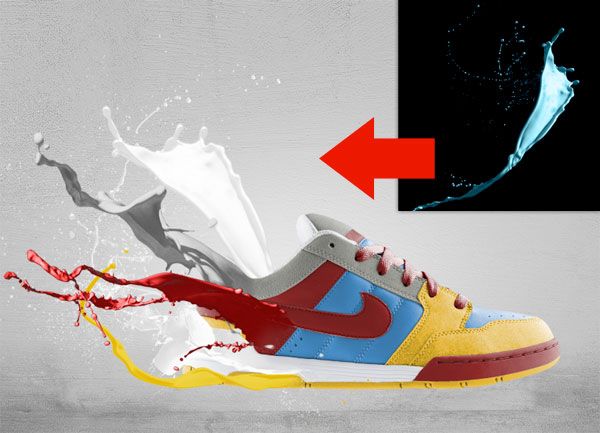
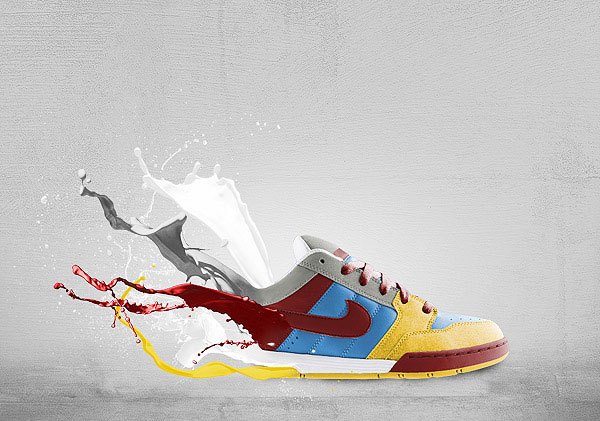
Step 8: Refine and Enhance the Shoe with a Layer Mask
Select the shoe layer and create a layer mask on it by clicking on the Add layer mask button at the bottom of the Layers Panel. Once the mask is created, you can use a black, soft brush for the Brush Tool (B) to erase parts of the shoe without losing any pixels (which is great if you want to modify your work, go back to its original state, or if you make a mistake — just delete the layer mask).
This will create the illusion of the paints being continuously connected to the shoe. 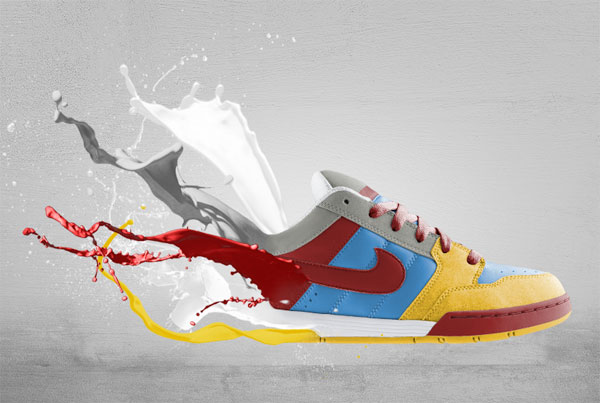
Step 9: Add Shadows on the Shoe
Create a new layer below the shoe layer; we will add a soft shadow effect for the shoe on this layer. The best way is to grab a soft, black brush and paint at the bottom of the shoe.
Once you have painted the areas where the shadows are, decrease the layer’s Opacity to reduce the shadow’s prominence. Create more shadows, but don’t just use a single layer to create shadows. I suggest creating different spots on different layers.
In this way, you have more control, you can create depth, and you can tweak individual shadow layers to produce interesting outcomes. For example, you can reduce the Opacity of each layer at different values so that the shadow looks more realistic. 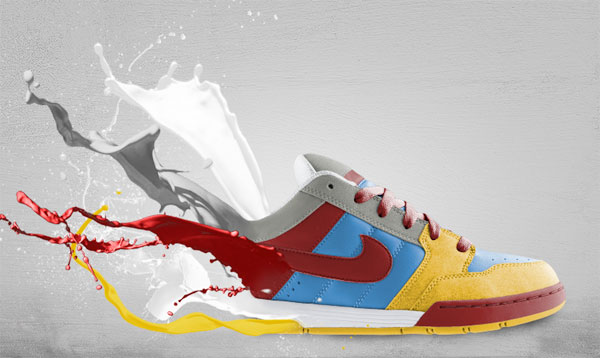
Step 10: Perform Final Refinements
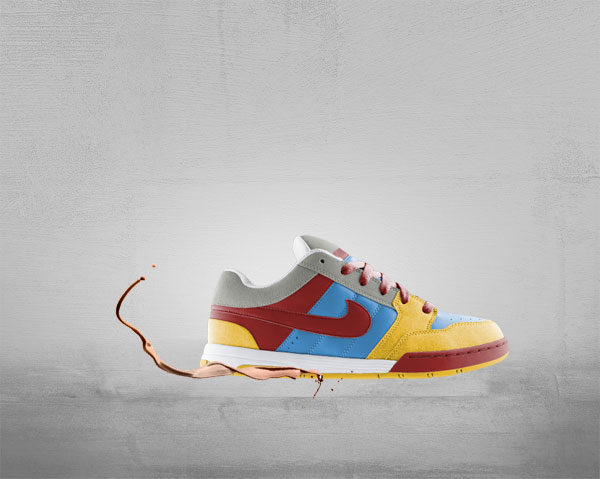
The ad poster is almost complete.
Colors interact in a way that I like. It’s simple but vivid at the same time. It’s also directed and focused, as a product ad design needs to be.
Observing the current composition, I think there’s nothing left to change. What we can do better, though, is increasing the poster’s color contrasts. To do this, create a new Gradient Map adjustment layer on top of all the other layers.
Set a gradient going from black (#000000) to white (#ffffff) and then switch the adjustment layer’s Blend Mode to Overlay. Finally, reduce the layer Opacity until you’re satisfied with color contrasts in your composition. I’ve entered an Opacity value of 30%, which seems to work well.
 To style it a bit, I just added the Design Instruct logo and some cursive text for my site’s name (WeGraphics) on the bottom right part of the scene.
 ![]()
Tutorial Summary
In this Photoshop graphic design tutorial, we went over a method for creating a lightly-grunged product ad poster featuring a colorful Nike shoe (which you can replace with your own product). You saw a wat for creating a “toxic paint” effect, techniques for focusing the viewer’s eyes towards the product by modifying its surroundings, taking advantage of adjustment layers, and more.
These skils will help you awe you clients as a web designer. Although this tutorial is tailored to a shoe edit, editing images like this are a skill that is great to know. It can be used for anything from billboards to online banner ads for businesses over a wide variety of industries, from hotels to a car parts dealer.
Download Tutorial Source Files
- grunge_shoe_ad (ZIP, 9.40 MB)
-
 Trevin serves as the VP of Marketing at WebFX. He has worked on over 450 marketing campaigns and has been building websites for over 25 years. His work has been featured by Search Engine Land, USA Today, Fast Company and Inc.
 -

WebFX is a full-service marketing agency with 1,100+ client reviews and a 4.9-star rating on Clutch! Find out how our expert team and revenue-accelerating tech can drive results for you! Learn more
Make estimating web design costs easy
Website design costs can be tricky to nail down. Get an instant estimate for a custom web design with our free website design cost calculator!
Try Our Free Web Design Cost Calculator
Table of Contents
- Preview
- Tutorial Resources
- Step 1: Preparing the Product
- Step 2: Create a New Photoshop Document and Place the Subject
- Step 3: Add the Background Texture
- Step 4: Enhance the Background Texture
- Step 5: Create the Floor
- Step 6: Create a Light Effect Behind the Shoe
- Step 7: Create a “Toxic Paint” Effect
- Step 8: Refine and Enhance the Shoe with a Layer Mask
- Step 9: Add Shadows on the Shoe
- Step 10: Perform Final Refinements
- Tutorial Summary
- Download Tutorial Source Files
Share this article


Web Design Calculator
Use our free tool to get a free, instant quote in under 60 seconds.
View Web Design CalculatorMake estimating web design costs easy
Website design costs can be tricky to nail down. Get an instant estimate for a custom web design with our free website design cost calculator!
Try Our Free Web Design Cost Calculator


