

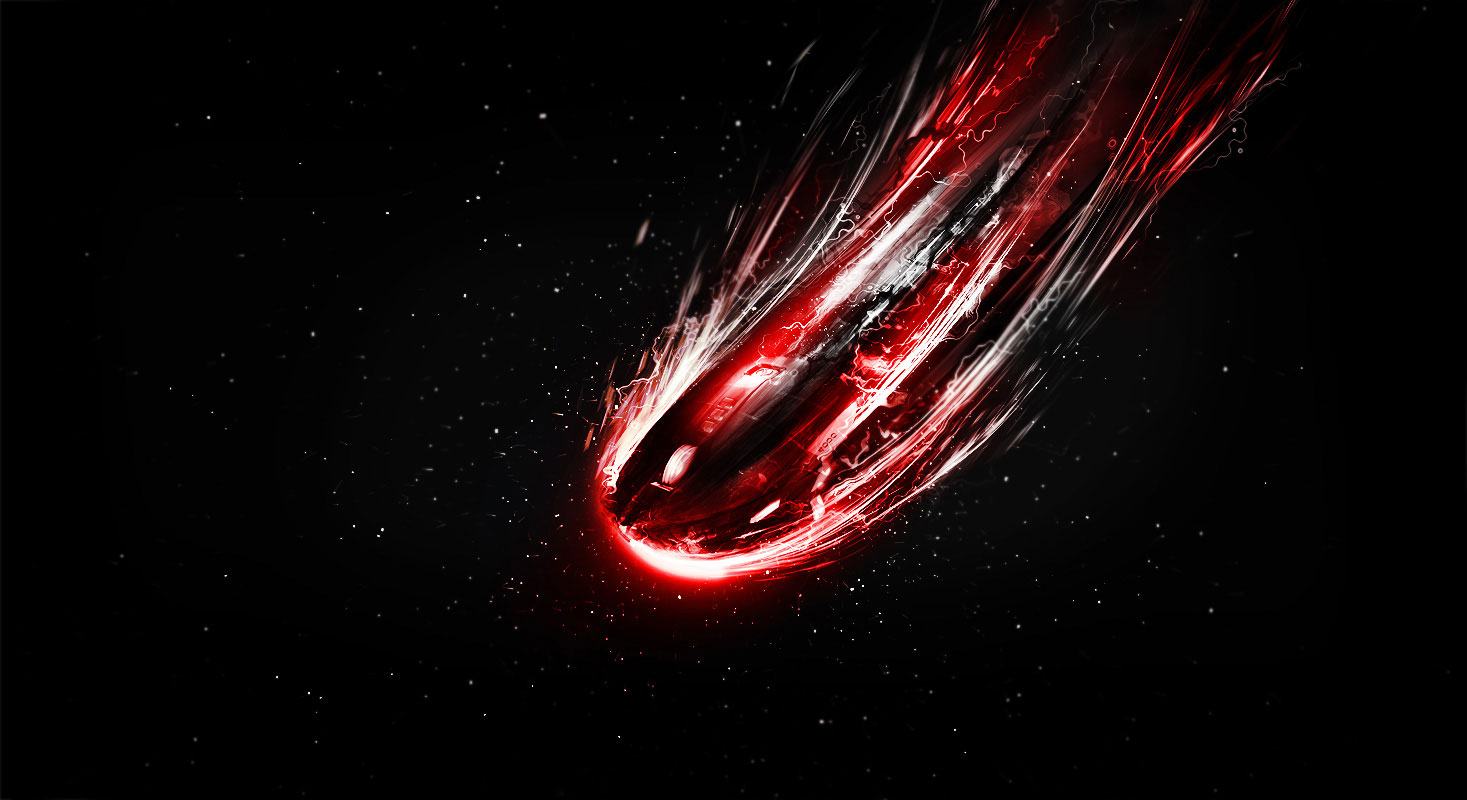
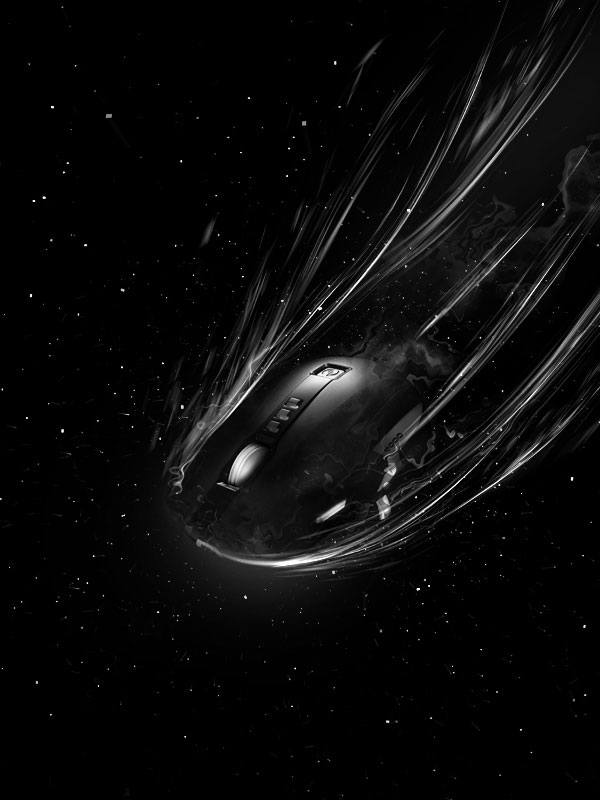
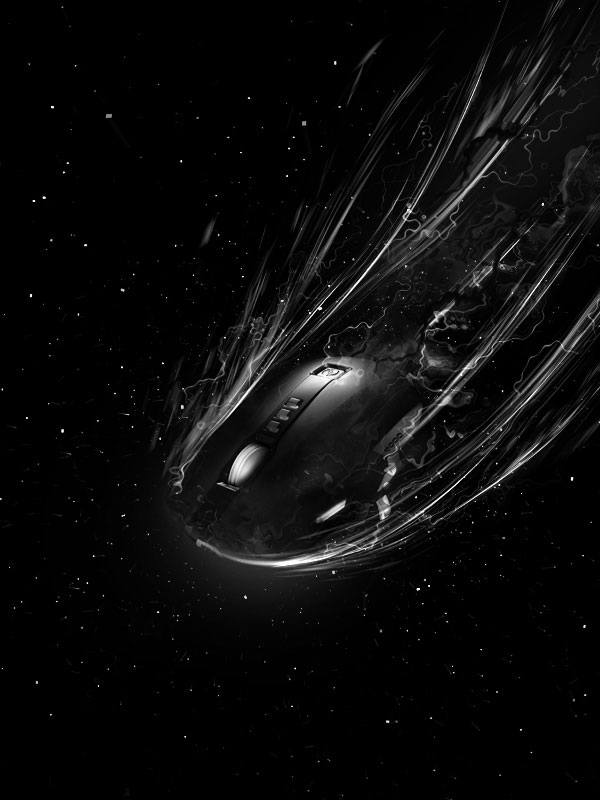
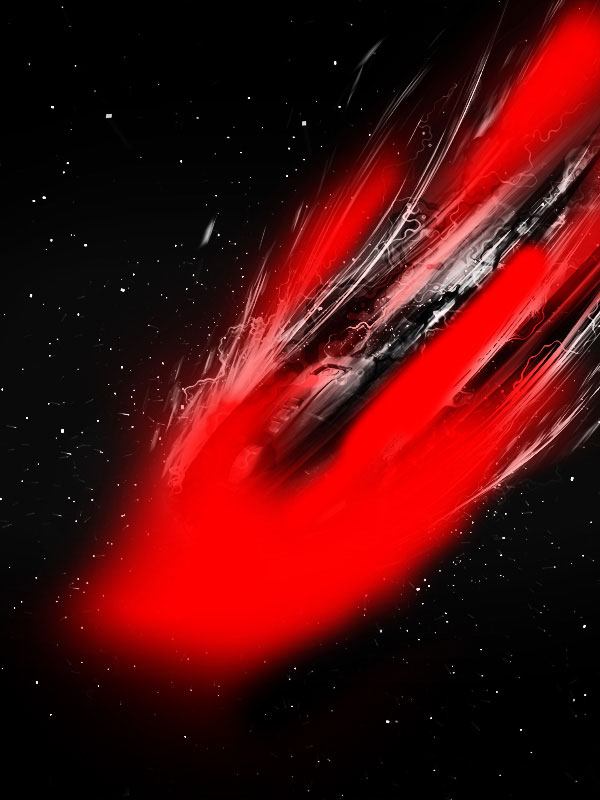
Preview
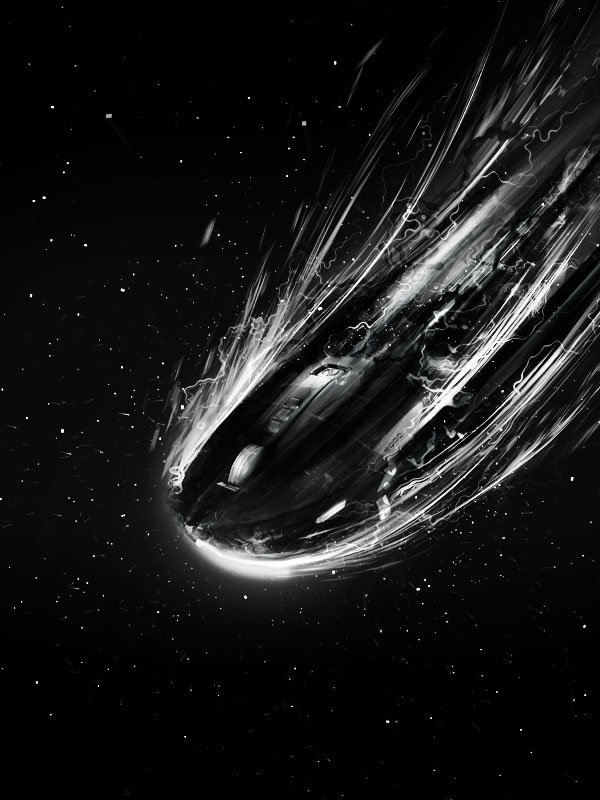
You may click on the image below to see the full scale of the image we will build.
Tutorial Resources
- Stock Image: Microsoft SideWinder X8 Mouse
- Stock Image: Dark Render
Step 1: Create the Stars in Cinema 4D
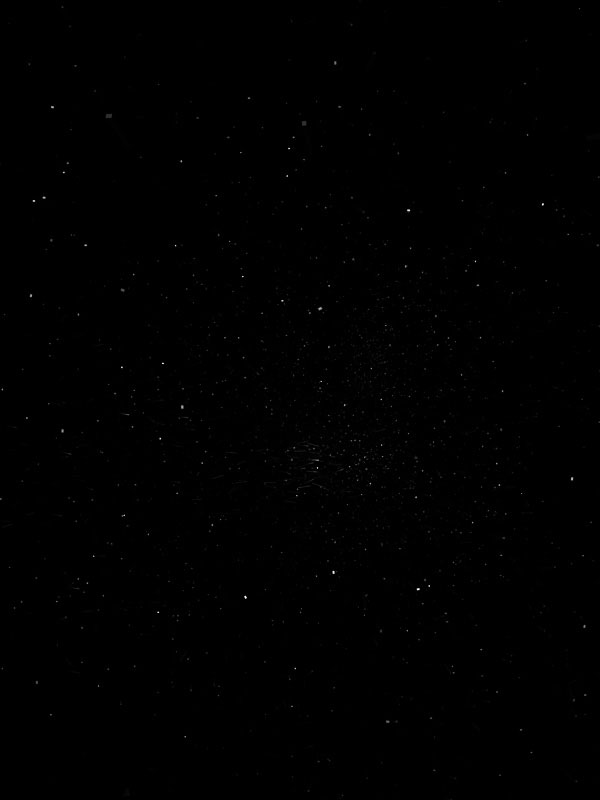
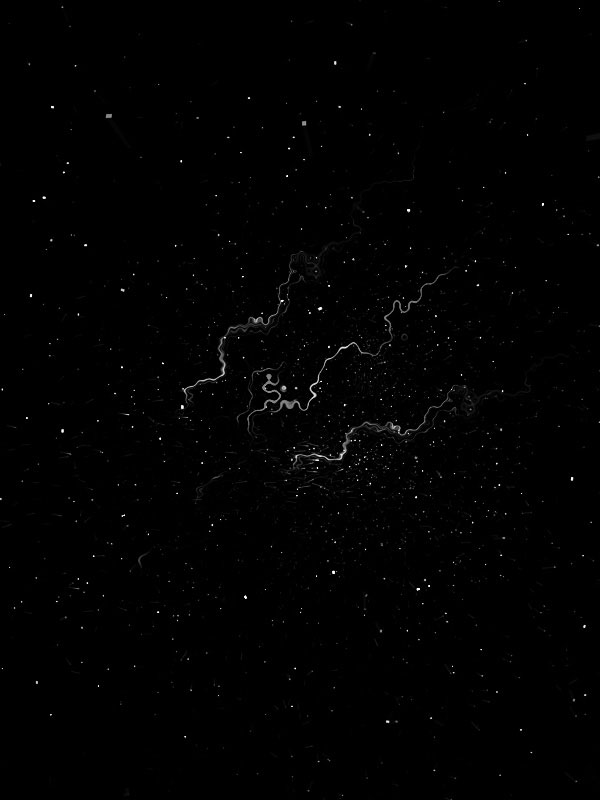
Our background will be pitch black with stars dotting it. There are many ways to create stars and you could make them using other software — even Photoshop — but the advantage of doing this in Cinema 4D is the speed in which you are able to create them.
Note: If you don’t want to do this part or if you don’t have access to Cinema 4D, that’s fine, it will not affect the rest of the tutorial. Just use a plain black background and skip to Step 3.
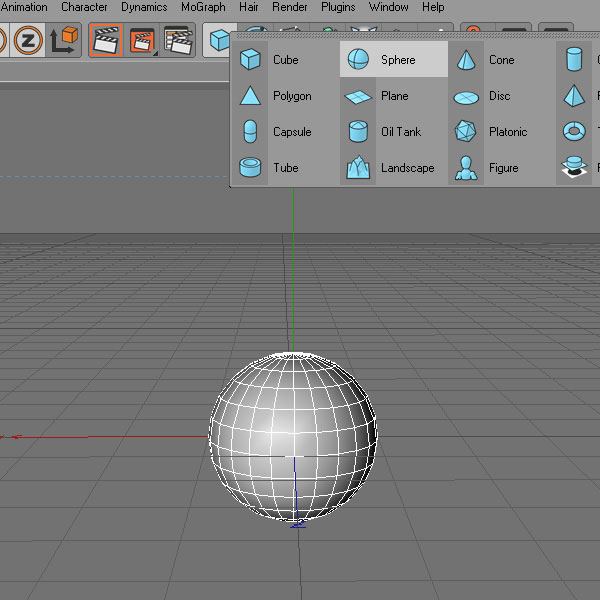
In Cinema 4D, create a sphere.
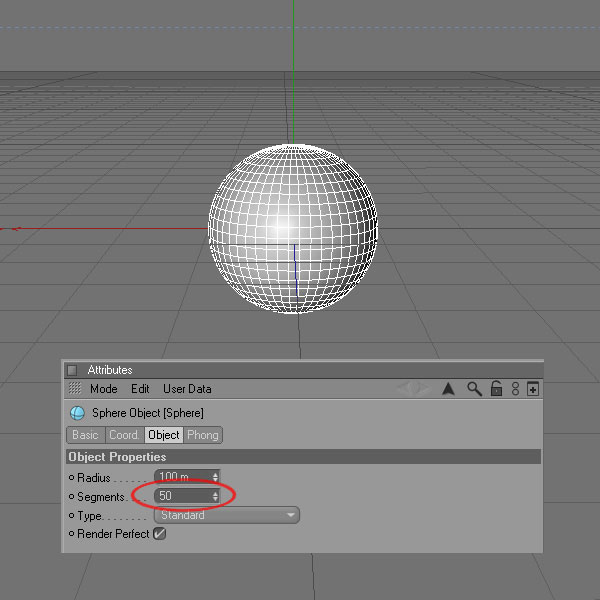
In the right panel (Attributes tab), change the number of segments.
I set the number to 50, but feel free to experiment with this value.
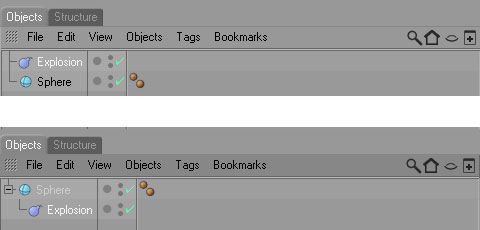
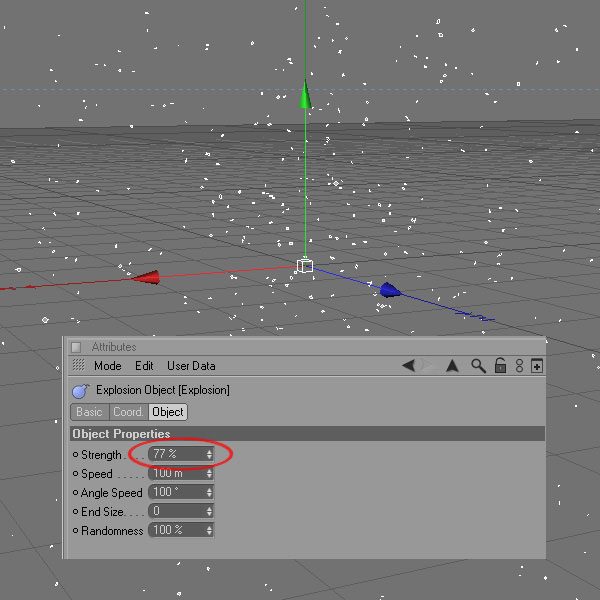
Next, add an Explosion modifier that will scatter the sphere.
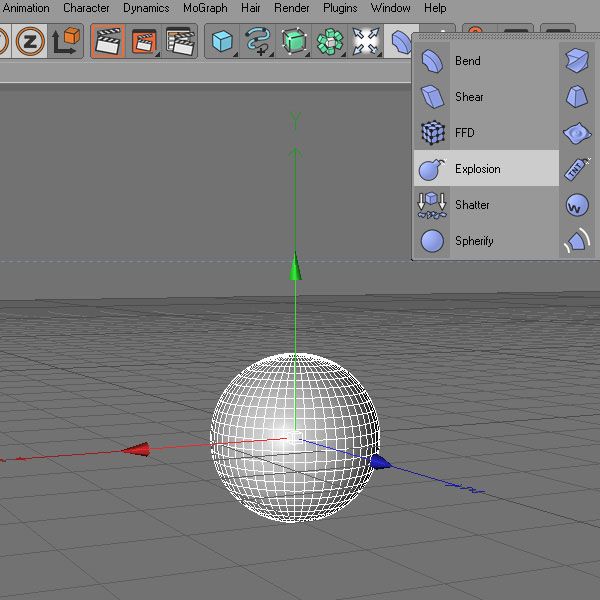
Drag and drop the Explosion modifier onto sphere.
In the Attributes tab for the Explosion modifier, change the Strength. I set it to 77%, but again, feel free to experiment with this value.
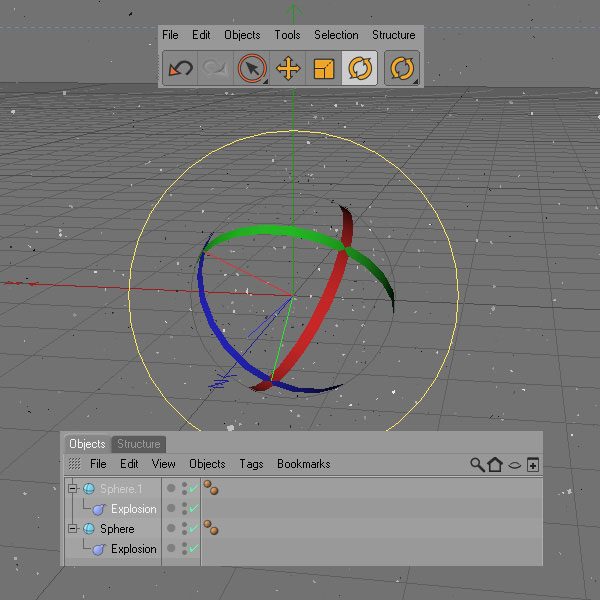
If you want more stars, just copy and paste and then rotate using the Rotate Tool to add randomness and variations in your stars. You can also change the perspective by pressing Alt + click, and then move the mouse to modify the angle.
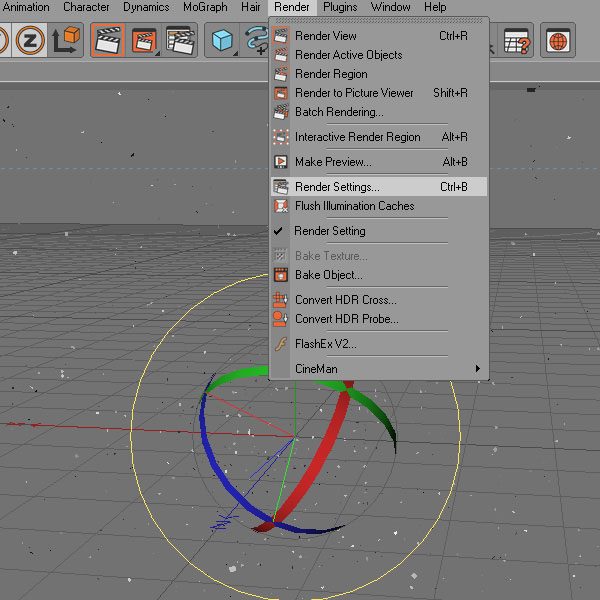
Time to render our stars; go to Render > Render Settings.
Personally, I always do big renders because you can always reduce the size later.
Remember though that the bigger it is, the longer it will take to render depending on your computer’s capabilities. You can see the settings of my render below.
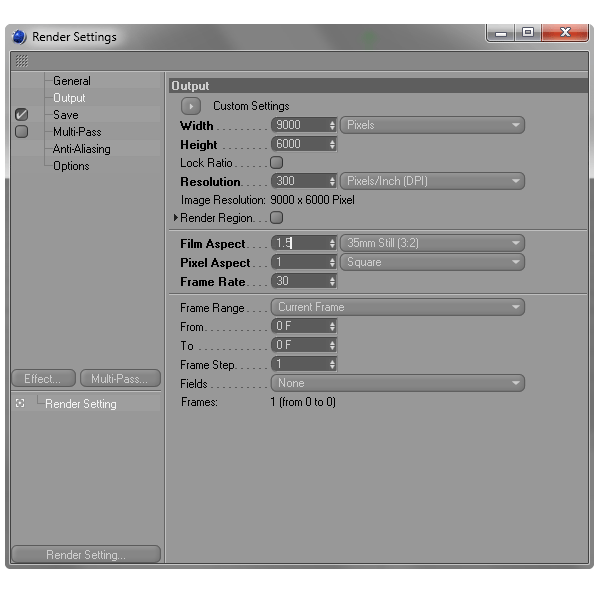
To render, just press Shift + R.
Step 2: Open and Tweak the Stars in Photoshop
Now we need to move our stars into Photoshop. Open the rendered file in Photoshop.
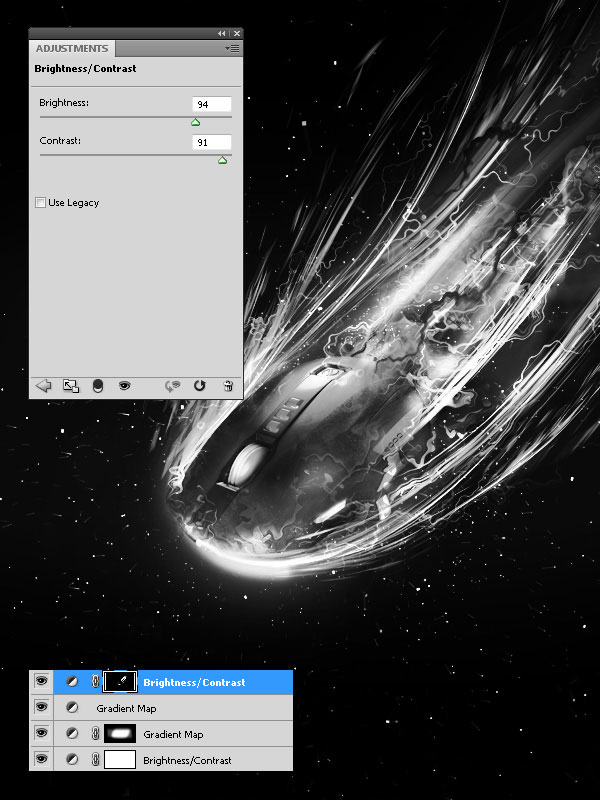
Let us make the stars more vivid by adding a Brightness/Contrast adjustment layer.
You can add an adjustment layer in Photoshop by clicking on the layer you want to add it on, and then clicking on the Create new fill or adjustment layer icon (it looks like a circle which is half filled with black and half filled with white) at the bottom of the Layers Panel.
When you click the icon, you will be presented with a menu; just select the fill or adjustment layer you want to add — in this case, we want to select Brightness/Contrast.
We will be adding several adjustment layers throughout this tutorial, and the process for adding them will be the same as above.
Just experiment with the Brightness/Contrast value until you arrive at something that you like.

Step 3: Add the Subject into Photoshop
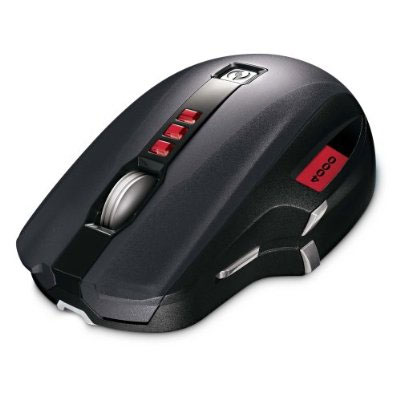
I used the Microsoft SideWinder X8 Mouse as the subject of our scene, which you can find in many places if you use Google Image search or a popular e-store such as Amazon or Newegg.
Alternatively, just pick a product that you would like to feature; the steps will be similar regardless of what subject you pick.
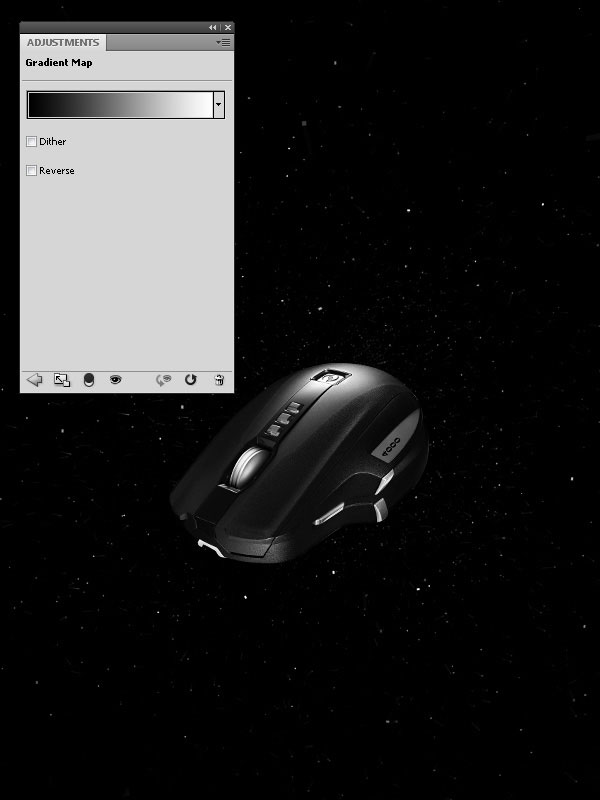
Step 4: Convert the Subject into Black and White
Add a Gradient Map adjustment layer on the mouse to convert it to grayscale by choosing Layer > New Adjustment Layer > Gradient Map (this is another way of adding an adjustment layer). You have to use a black to white gradient.
Step 5: Darken the Edges
Now we darken the edges of our subject using the Burn Tool (O) with soft paint brush tip.
Set up the Burn Tool’s other options in the Options Bar such that:
- Range: Midtones
- Exposure: 50%
- Protect Tones is unchecked

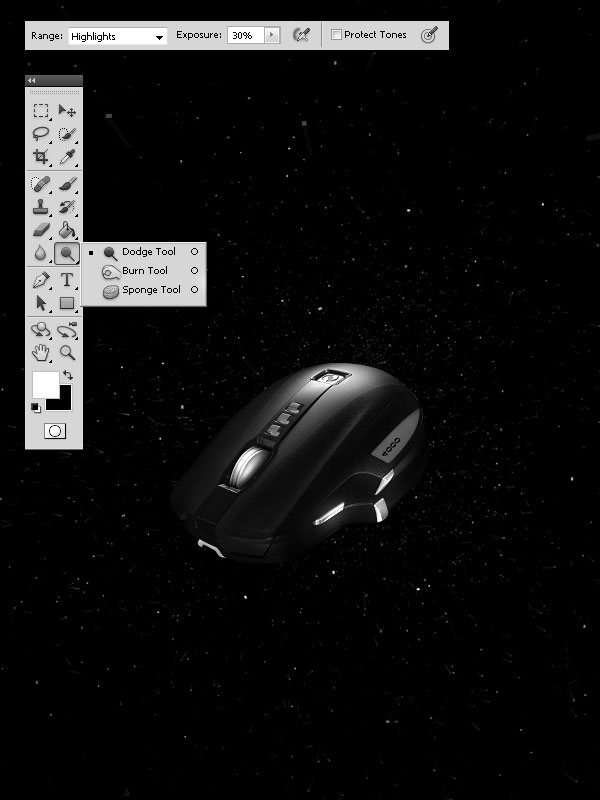
Step 6: Brighten Up the Mouse Buttons
Now we will make the buttons a bit brighter; use Dodge Tool (O) with a soft paint brush for this part. Set up the Dodge Tool’s other options such that:
- Range: Highlights
- Exposure: 30%
- Protect Tones is unchecked
Note: Duplicate the layer with the mouse on it because you’ll need it later.
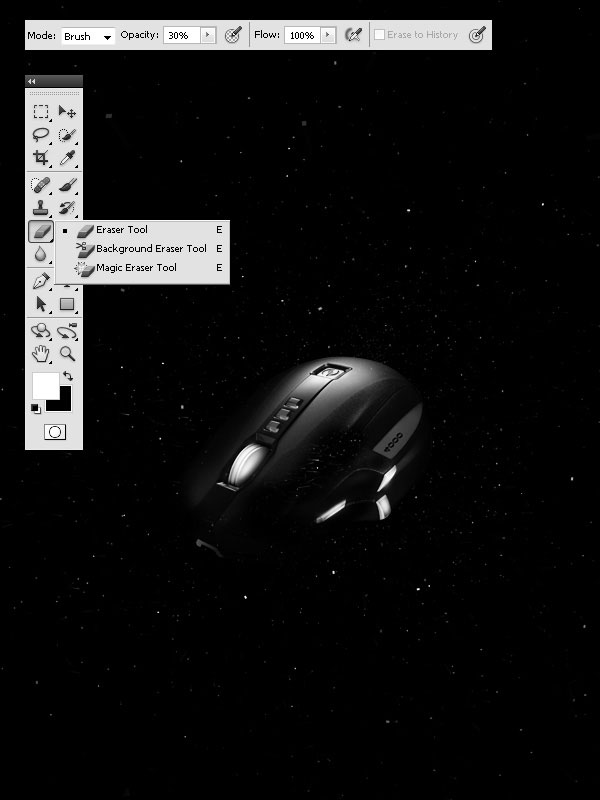
Step 7: Erase Parts of the Subject
Now we will erase a few parts of the mouse to make it blend better with the starry background. Use the Eraser Tool (E) with a soft brush tip for this with the options:
- Mode: Brush
- Opacity: 30%
- Flow: 100%
Step 8: Create a Smoke Effect
Duplicate the layer with the mouse on it again. We will modify this layer to become sort of like smoke that seems to steam out off our mouse. Go to Edit > Free Transform (Ctrl/Cmd + T), which will show you transform controls bordering the mouse.
Right-click inside the borders of the transform controls, and then choose Warp in the menu that appears. Warp the mouse so that its front is pointing diagonally downwards.
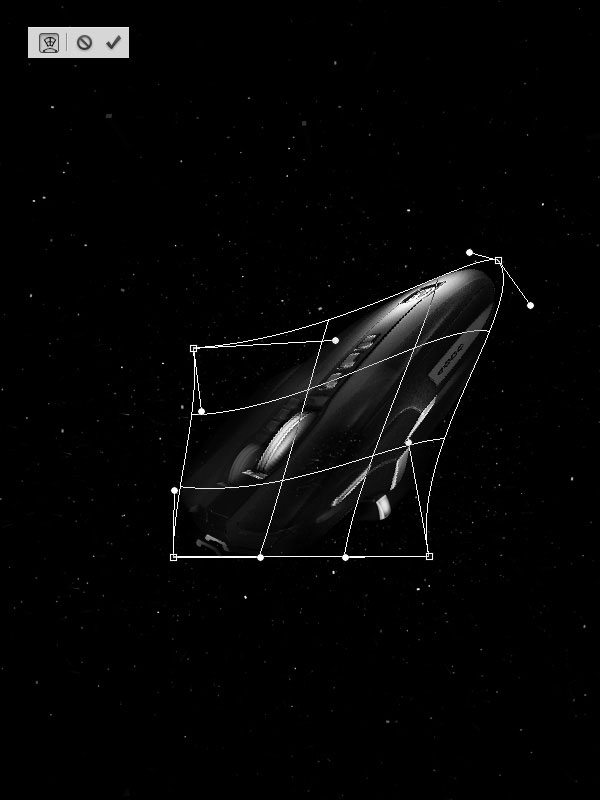
Go to Filter > Distort > Wave. At this stage, it all depends on the shape of the object and the resolution of graphics you used, so you have to play with the values until you get something that you are happy with.

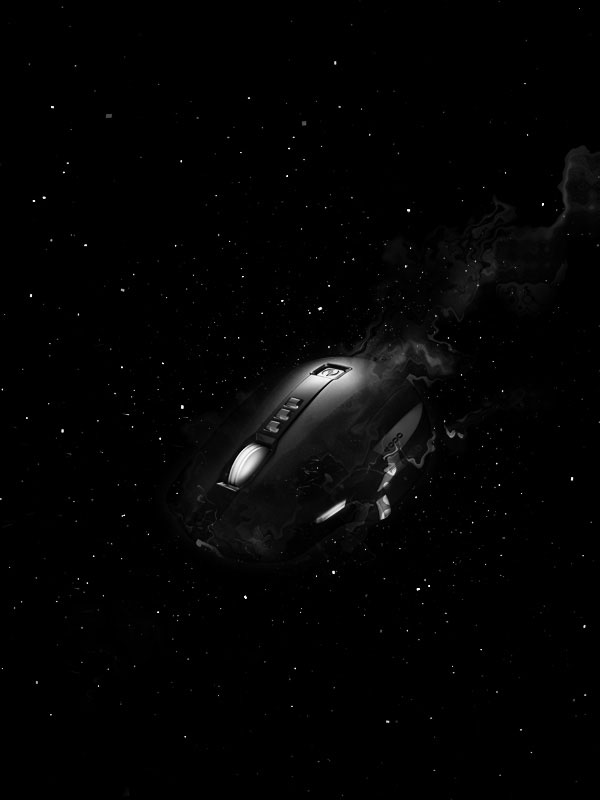
Next, blend this smoke effect layer with the original mouse layer.
You can do this using the Eraser Tool (E) and erasing parts of it so that it looks like it is seamless with the mouse.
Step 9: Create a Light Source Under the Subject
We will add a simple light source under the mouse. We will just use the Brush Tool (B) with a soft white brush tip. Use the following options for the Brush Tool:
- Mode: Normal
- Opacity: 10%
- Flow: 100%
Create a new layer that is below all of the mouse layers. On this new layer, just click once or twice to apply the brush stroke beneath our subject.
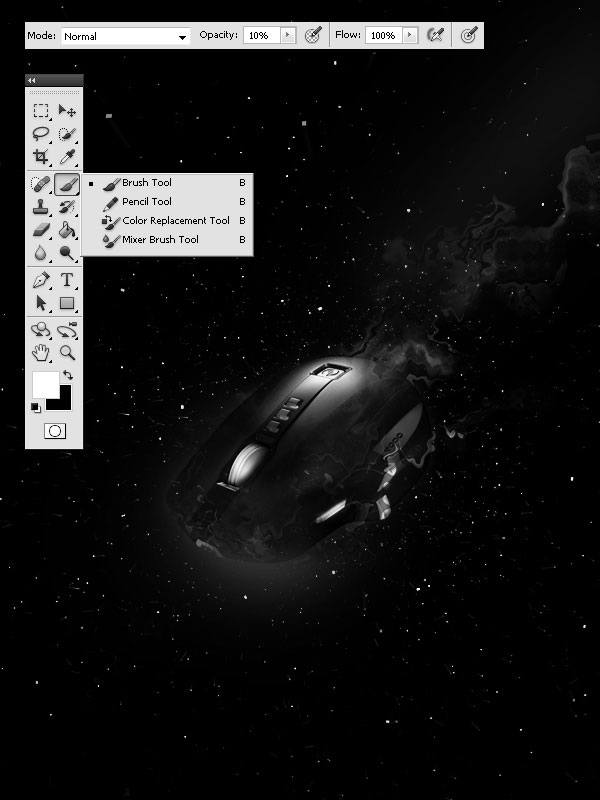
Step 10: Create “Wiggly Worm” Shapes
We will create a sort of wiggly worm shape in this step. We will use this shape to create the light streaks emanating from our meteoric mouse.
Start by creating a series of shapes in the middle of our piece using your Brush Tool and a flat brush tip.
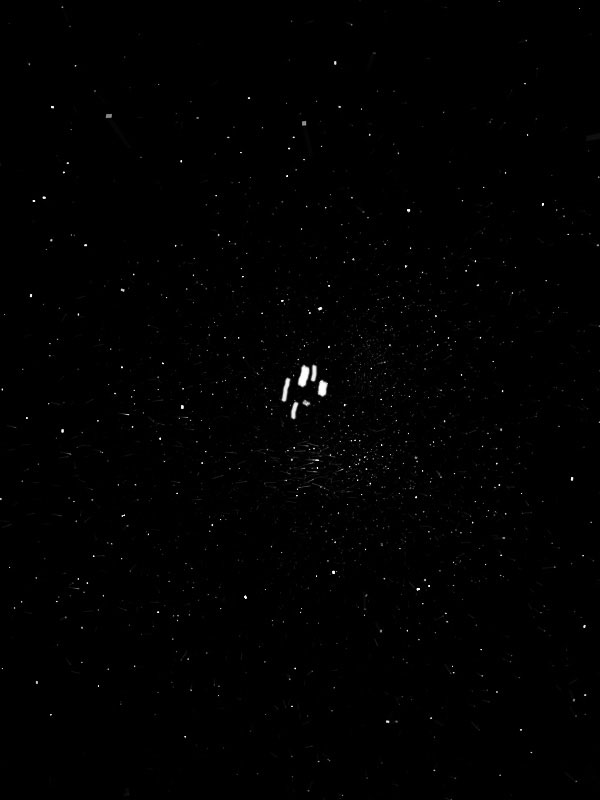
Transform your brush strokes to make them tall and skinny using Free Transform (Ctrl/Cmd + T) — pull up and push in.
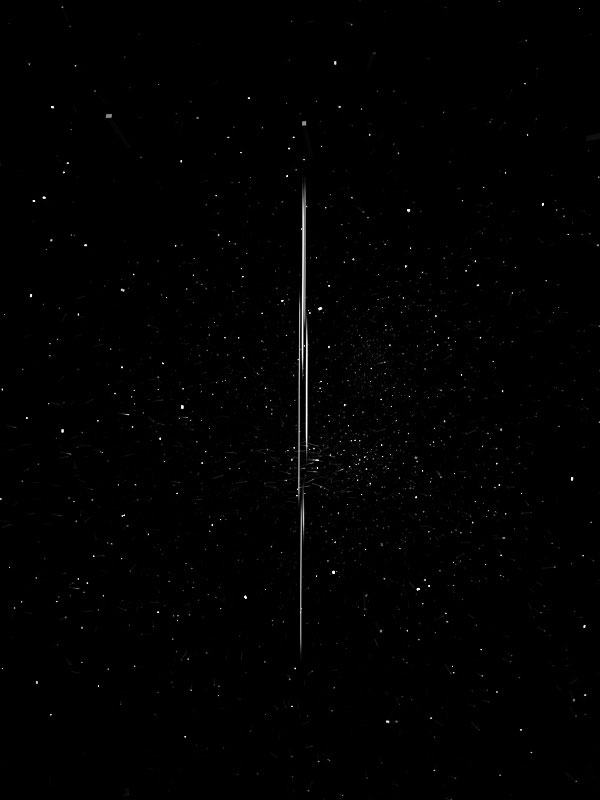
Next, angle it diagonally by again using Free Transform.
Now we want to give our shape a curve using Warp Transform.
Just Press Ctrl/Cmd + T to enter Free Transform mode again, right-click inside the transform control box, and choose Warp in the menu. Use the Warp transform controls to give the shape a curve in the middle.
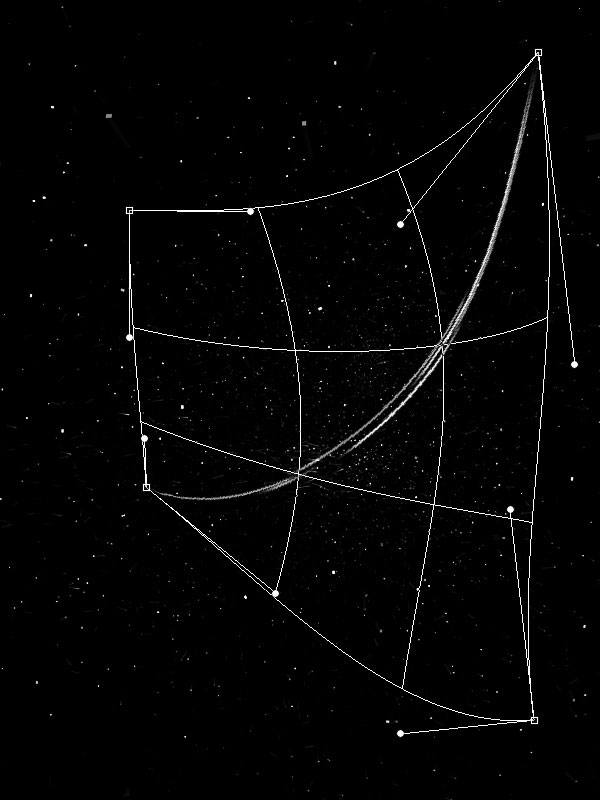
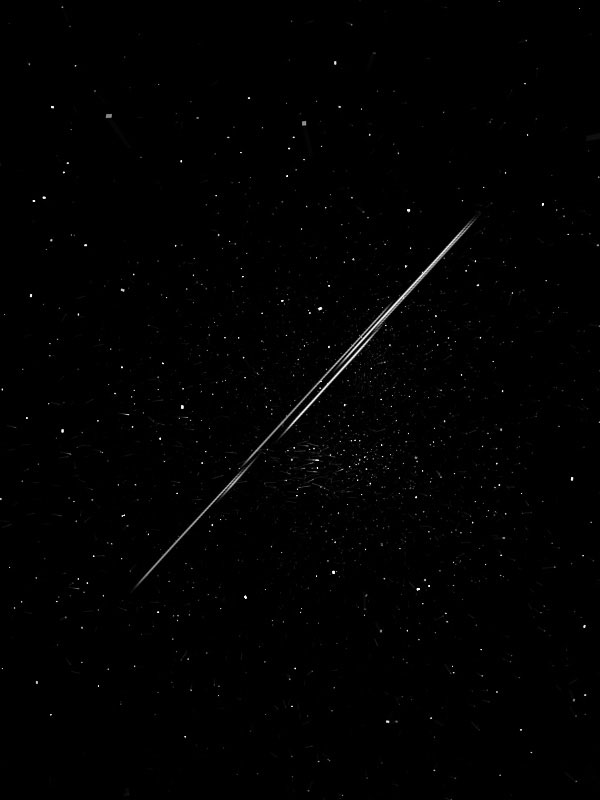
We will again use the Filter > Distort > Wave filter to finish our wiggly worm shape. Play around with the settings of the Wave filter so that the lines are not too thick.
Step 11: Make Meteor Friction Lights
When a meteor speeds downwards because of gravitational pull, friction is caused around it, which in turn creates sparks.
We will give our subject this fiery light effect.
Use the Filter > Motion Blur filter on our wiggly worm shapes, angling the motion blur so that it is consistent with the direction that our mouse is heading.
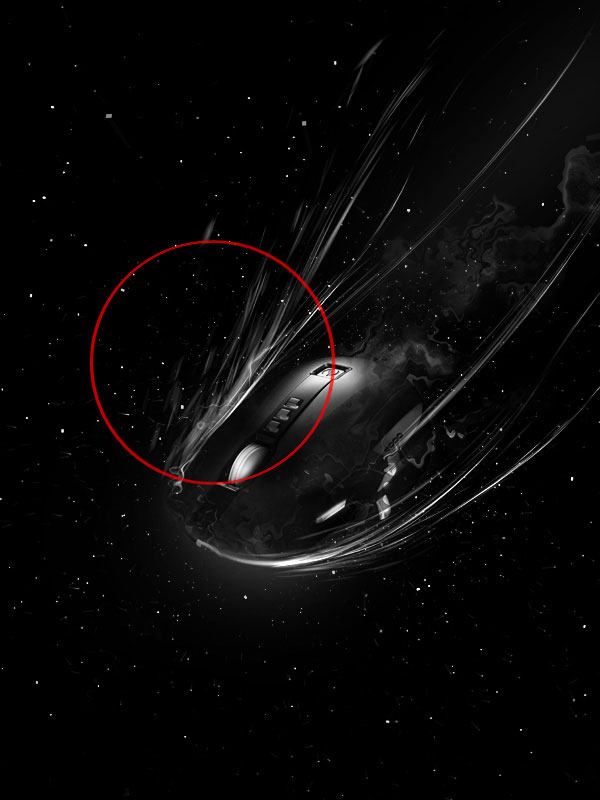
To add more light streaks, just duplicate this layer.
Let us make some darker lights. Just duplicate the meteor lights layer and use Image > Adjustments > Invert to change the color of the copy.
Step 12: Manual Painting of Lights
We will need to paint in some light streaks manually using the Brush Tool with a soft brush tip and these options:
- Mode: Normal
- Opacity: 10%
- Flow: 100%
- Color: #464646
Create a new layer for our manual brush strokes, setting the layer’s Blend Mode to Linear Dodge after you are done painting.
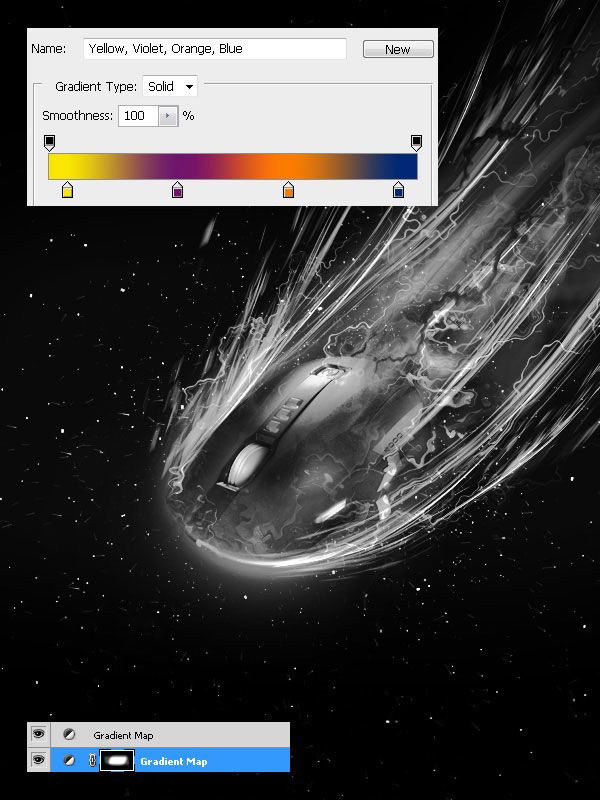
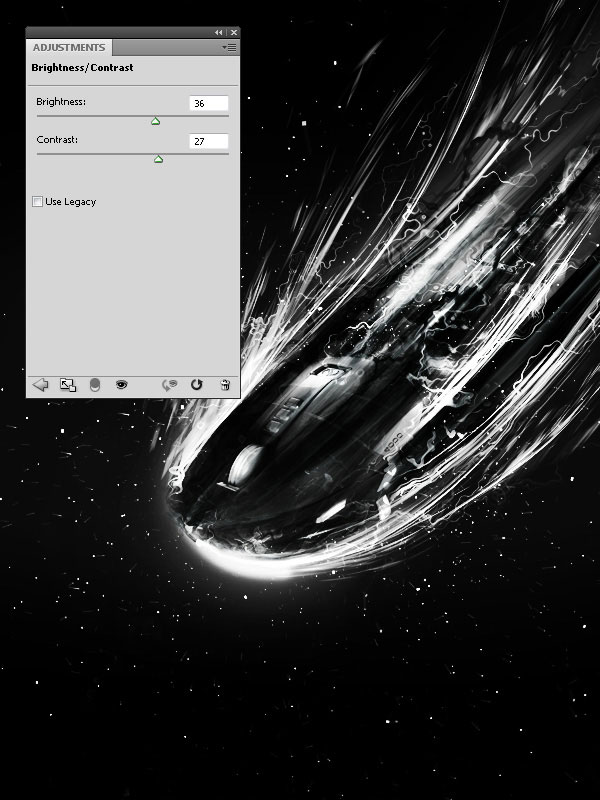
Step 13: Fine-Tune the Scene with Adjustment Layers
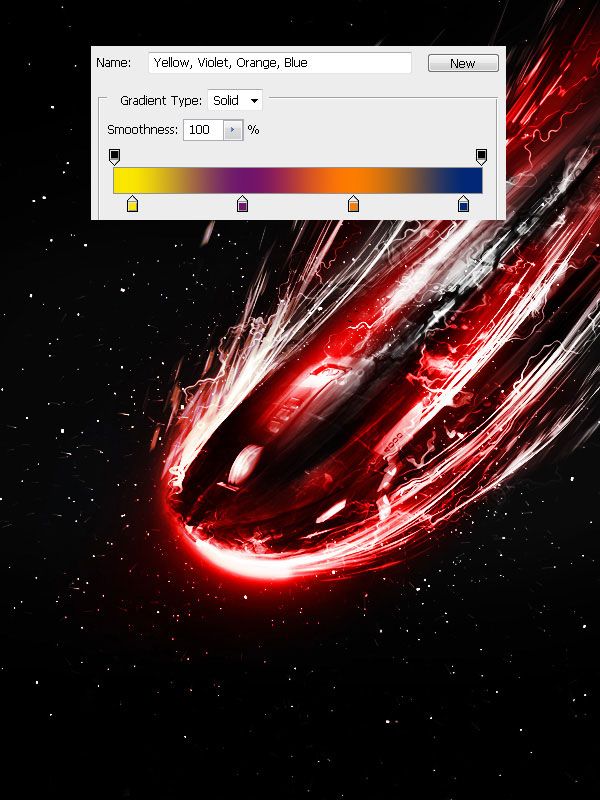
On the first Gradient Map adjustment layer we created earlier, I added another Gradient Map adjustment layer using the Yellow, Violet, Orange, Blue gradient preset. I then set the adjustment layer’s Blend Mode to Linear Dodge and lowered the Opacity to 50%. This gives us some light intensity adjustments.
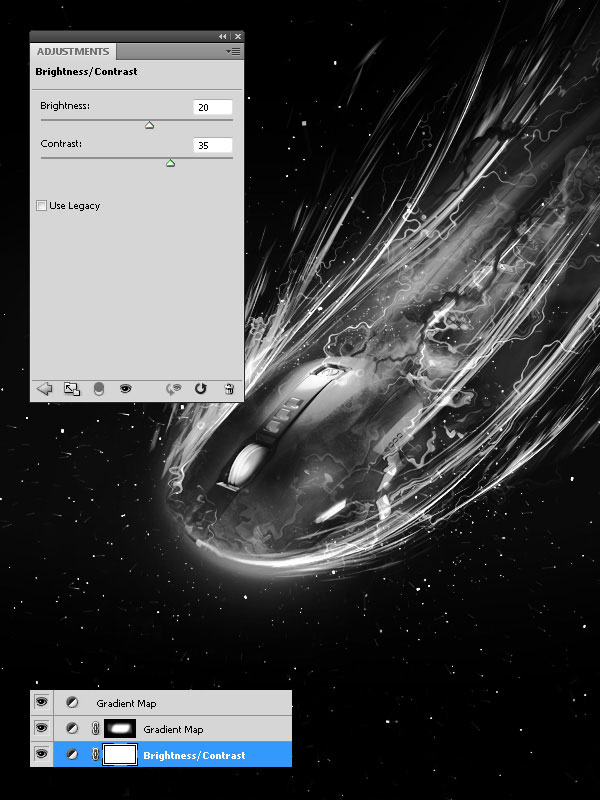
Then I added a Brightness/Contrast adjustment layer under the Gradient Map adjustment layer that we just created.
And then, create another Brightness/Contrast adjustment layer, but this time, it should be on top of all three adjustment layers. On this adjustment layer, I added a layer mask and filled with black color.
I used the Brush Tool (B) with a white soft brush and painted parts of the light streaks that I wanted to be brighter.
Step 15: Apply a Custom Render
I used a custom-made render (which you can download from the Tutorial Resources listings) to enhance the scene.
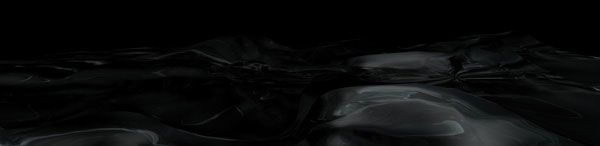
Add the dark render into your work then go to Edit > Transform > Warp to modify the render to your liking. Duplicate this layer as many times as you want.
Add a Brightness/Contrast adjustment layer on top of the renders to intensify the lights.
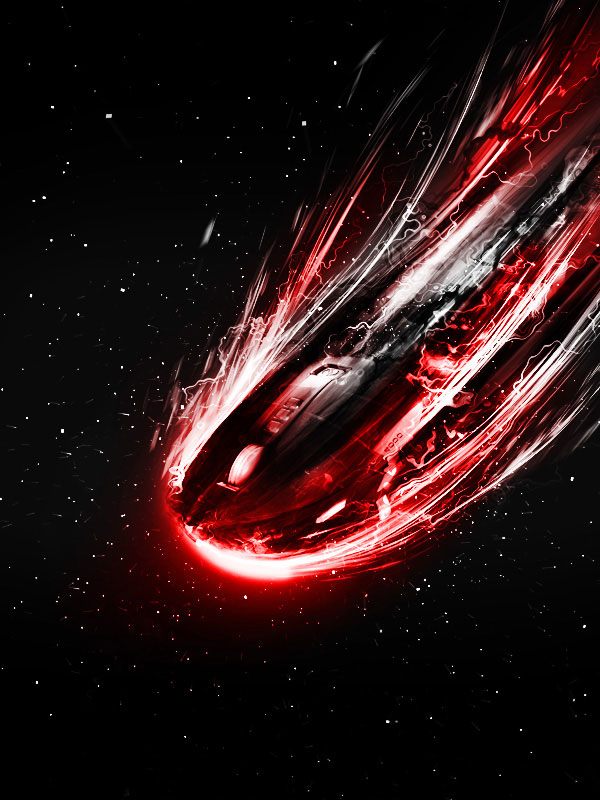
Step 16: Applying Colors and Color Adjustments
We now need to add colors to our piece.
Start by creating a new layer. Use the Brush Tool to paint red brush strokes (#fe0000) onto parts of the meteor mouse.
Switch this layer’s Blend Mode to Color to give the light streaks a red tint.
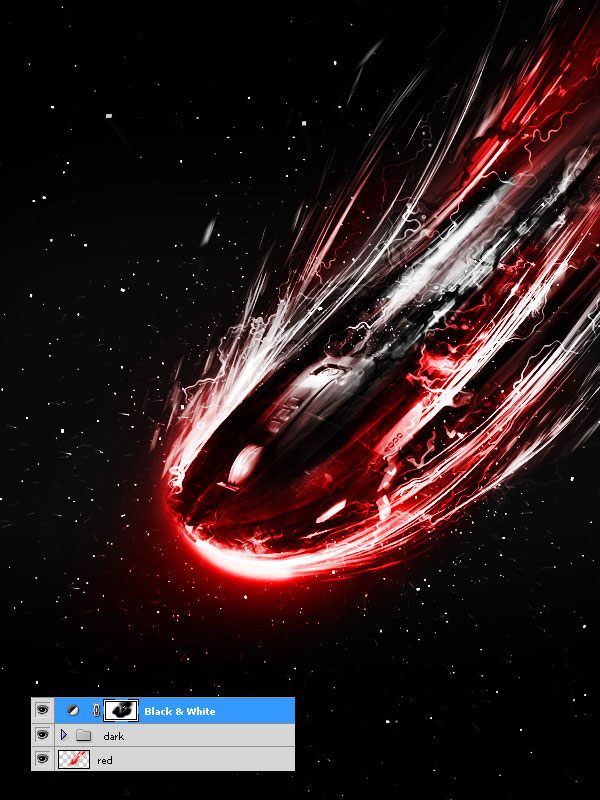
Create a Black & White adjustment layer on top of the paint strokes layer to reduce the saturation of the color. Alternatively, you can use the Eraser Tool (E) and a layer mask to erase the saturated areas.
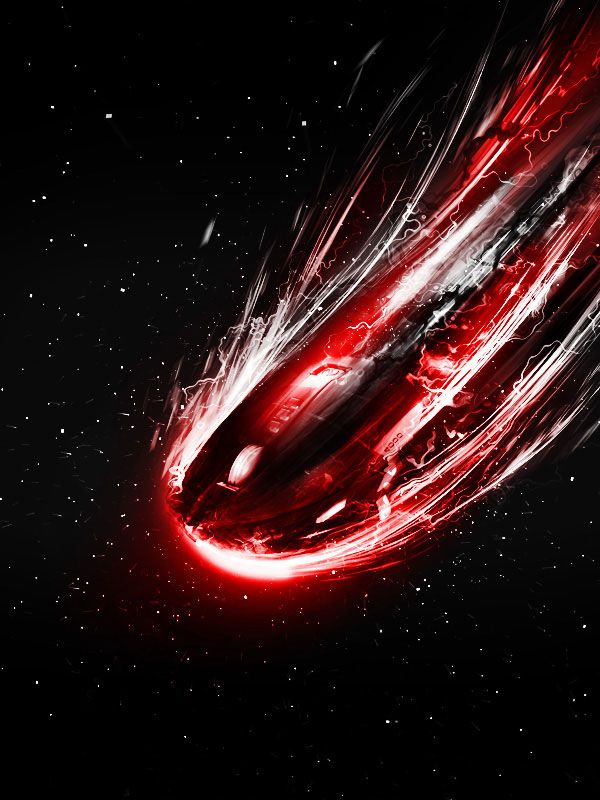
Create a new layer, and again, use a soft red (#fe0000) brush to paint more areas of the light that you want to have a red tint.
To create variation between our red tint layers, this time, switch the Blend Mode of the layer to Color Dodge.
Create a Gradient Map adjustment layer using the Yellow, Violet, Orange, Blue gradient preset. Switch the Blend Mode of this adjustment layer to Overlay and reduce its Opacity to 40%. This layer reduces the light at the front of the mouse.
This is the last adjustment layer we will create, I promise.
Step 17: Soften the Scene
As the final step in the process, we will soften our entire scene. To start, save our composition as a TIFF by going to File > Save As and picking TIFF from the Format dropdown menu.
Open the saved TIFF file in Photoshop as another document. Duplicate the layer with our image on it (Ctrl/Cmd + J).
Apply the Filter > Blur > Gaussian Blur on this duplicated layer.

Add a layer mask.
Use the Brush Tool (B) with a soft, black brush to erase some of the blur layer (which will reveal the original layer).

Tutorial Summary
This tutorial covered the composition of a scene in space. The central part of the piece is the lights emanating from the subject, which is a computer mouse. We used Cinema 4D to make quick and easy stars, Warp Transform and the Wave filter to make interesting shapes, adjustment layers to make non-destructive image enhances, manual painting with the Brush tool, and more.
Download Source Files
- meteoric_light_effects (ZIP, 153 MB)
-
 Trevin serves as the VP of Marketing at WebFX. He has worked on over 450 marketing campaigns and has been building websites for over 25 years. His work has been featured by Search Engine Land, USA Today, Fast Company and Inc.
 -

WebFX is a full-service marketing agency with 1,100+ client reviews and a 4.9-star rating on Clutch! Find out how our expert team and revenue-accelerating tech can drive results for you! Learn more
Make estimating web design costs easy
Website design costs can be tricky to nail down. Get an instant estimate for a custom web design with our free website design cost calculator!
Try Our Free Web Design Cost Calculator
Table of Contents
- Preview
- Tutorial Resources
- Step 1: Create the Stars in Cinema 4D
- Step 2: Open and Tweak the Stars in Photoshop
- Step 3: Add the Subject into Photoshop
- Step 4: Convert the Subject into Black and White
- Step 5: Darken the Edges
- Step 6: Brighten Up the Mouse Buttons
- Step 7: Erase Parts of the Subject
- Step 8: Create a Smoke Effect
- Step 9: Create a Light Source Under the Subject
- Step 10: Create "Wiggly Worm" Shapes
- Step 11: Make Meteor Friction Lights
- Step 12: Manual Painting of Lights
- Step 13: Fine-Tune the Scene with Adjustment Layers
- Step 15: Apply a Custom Render
- Step 16: Applying Colors and Color Adjustments
- Step 17: Soften the Scene
- Tutorial Summary
- Download Source Files
Share this article


Web Design Calculator
Use our free tool to get a free, instant quote in under 60 seconds.
View Web Design CalculatorMake estimating web design costs easy
Website design costs can be tricky to nail down. Get an instant estimate for a custom web design with our free website design cost calculator!
Try Our Free Web Design Cost Calculator


