

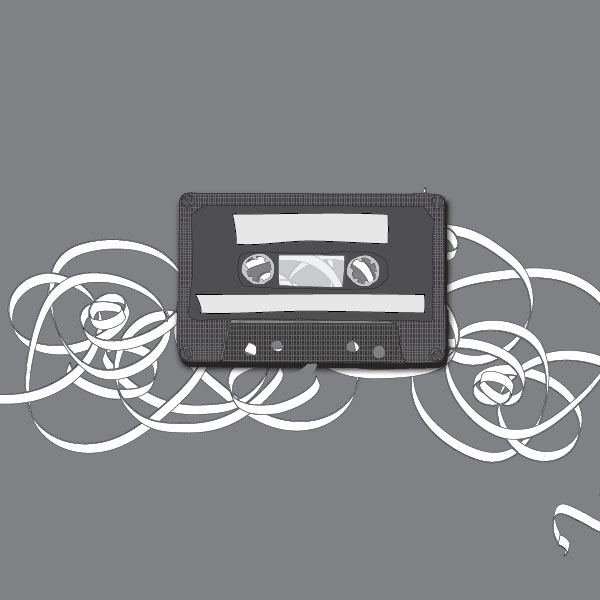
Preview
Click the image below to see the final product in full scale. 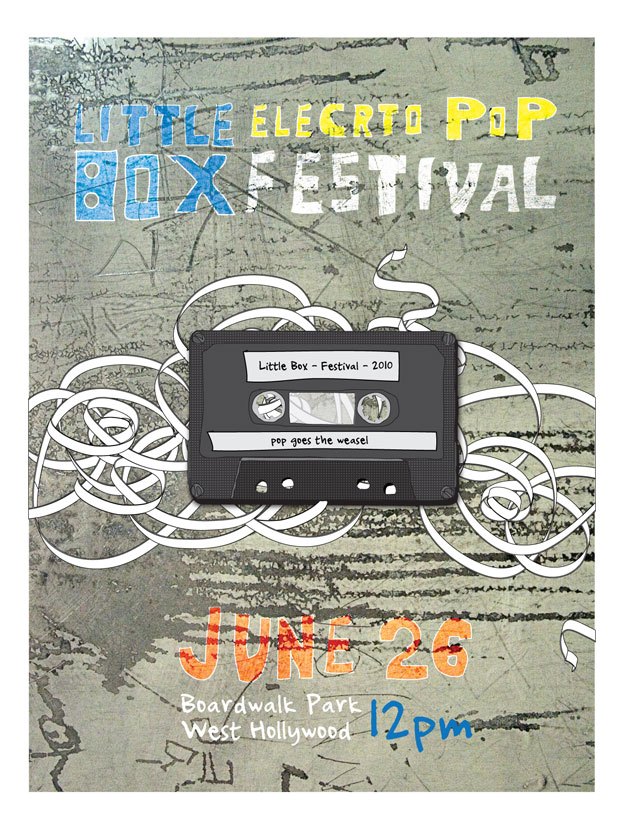
Tutorial Resources
- Compact Cassette Image
- Grunge Texture Image (Alternatively, check out our Grunge Grab Bag: Texture Pack for more options)
Step 1: Getting Started
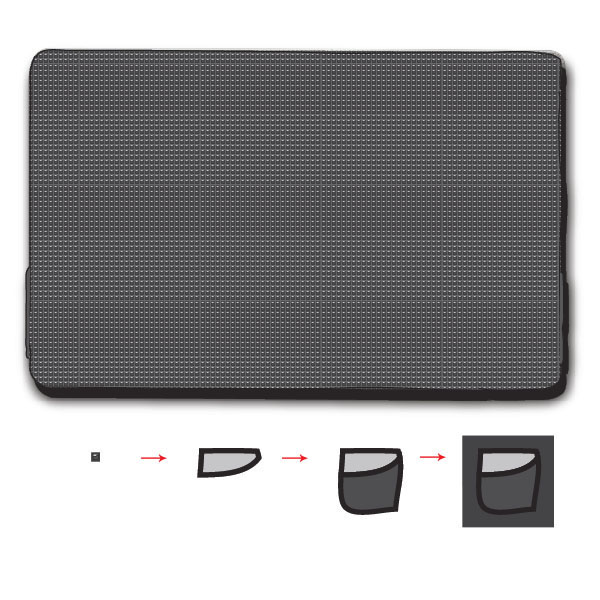
Create a new document document in Illustrator. Go to File > Place and select the cassette image mentioned in the Tutorial Resources listings. Put the cassette tape image on a new layer and then double-click the layer to open the Layer Options dialog window.
Choose the Dim Images option and set it to 35%. Once done, lock the layer so you don’t accidentally move the image. 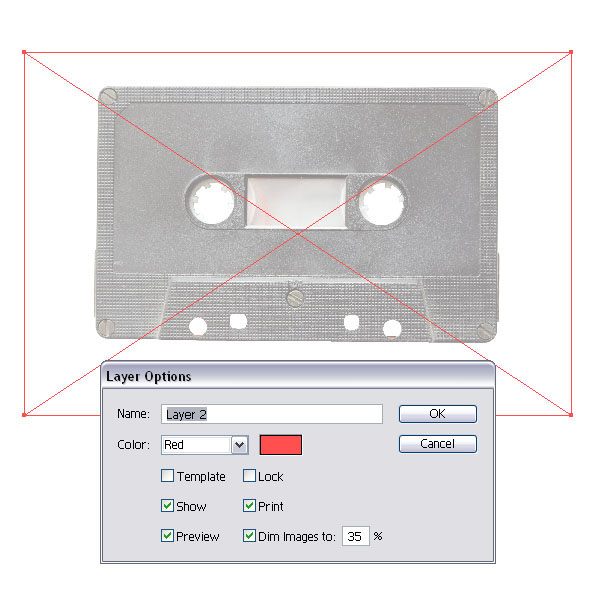
Step 2: The Pencil Tool Will Be Your Best Friend
Create a new layer on top of the cassette image and select the Pencil Tool (N).
Set the stroke color to black, 1pt. I used the Pencil Tool for all shapes because it gives the design elements a whimsical look. If you’re not very good with a graphic tablet or mouse, don’t stress, the lines shouldn’t be perfect so that we can keep the grungy/organic feel in our poster.
Start drawing the outline of the tape with the Pencil Tool.  Draw the small pieces on the side and make sure that the stroke is set to black and the fill to a dark gray.
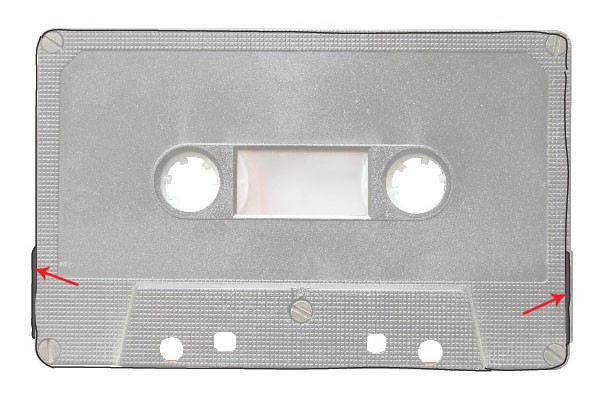
Step 3: The Back Part
Make a copy of the outline and join the path points in case they are separated because the Pencil Tool can be tricky and will leave paths open a lot of times.
Even if they are open, the fill would still work. Fill the copied shape with a dark gray and apply the Outer Glow Effect (Effect > Stylize > Outer Glow). Place this copy behind the first shape.
This is the backing of the cassette tape. 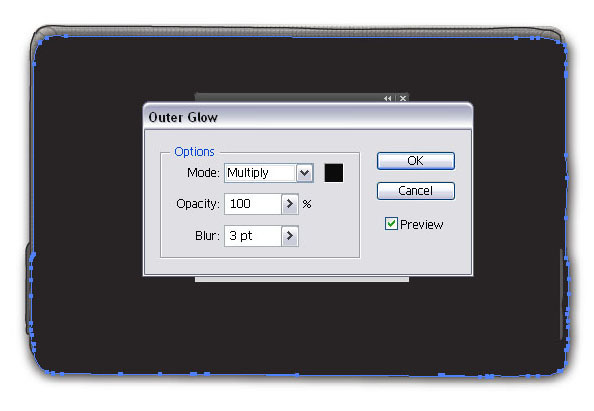
Step 4: A Nifty Pattern Creation
Make another copy of the shape (make sure you remove the outer glow style from the copy). I created a fast and simple pattern to simulate the texture of the cassette.
Create a small, whimsical triangle (Pencil Tool) with the stroke set to black and the fill set to light gray. Then add a bottom part with a darker gray as the fill and the place a square (Rectangle Tool) behind it. The pattern has to be fairly small in comparison to the tape.
Once you’ve scaled it down with the Free Transform Tool (E), you can then drag and drop it into the Swatches Panel. That’s it for the pattern. Select the shape with the Selection Tool (V) and fill it with the pattern by clicking on the pattern’s swatch in the Swatches Panel.
Step 5: Adding the Details
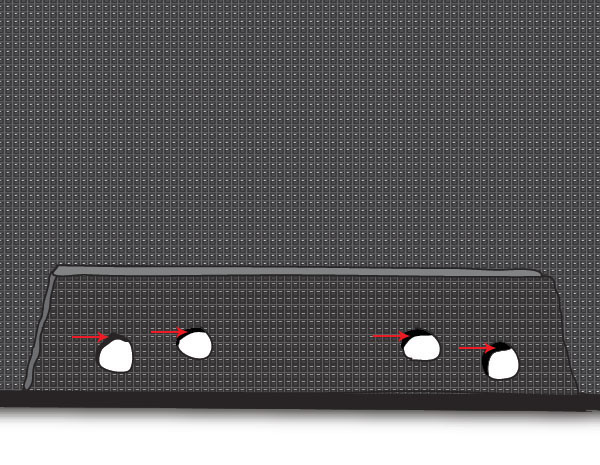
Keep adding the small details that you can see on the cassette photo. For example, the holes at the bottom. Create circles filled with white to simulate the Capstan openings, set the stroke to black and then add small shapes at the circles’ top left to give it depth.
 Draw the screws at each corner. Again, this is all done with the Pencil Tool and very loosely drawn.
 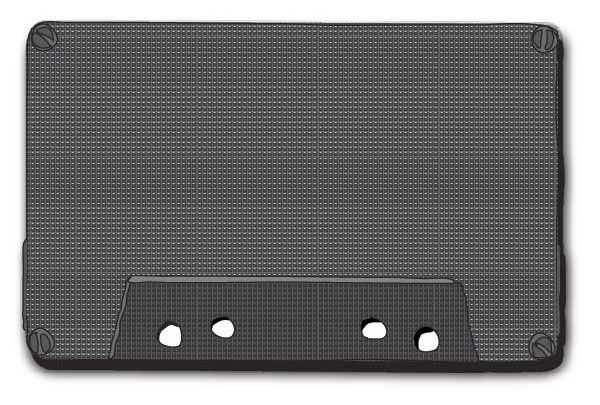 Add the middle shape and fill it with a gray.
 Then add the tape reels.
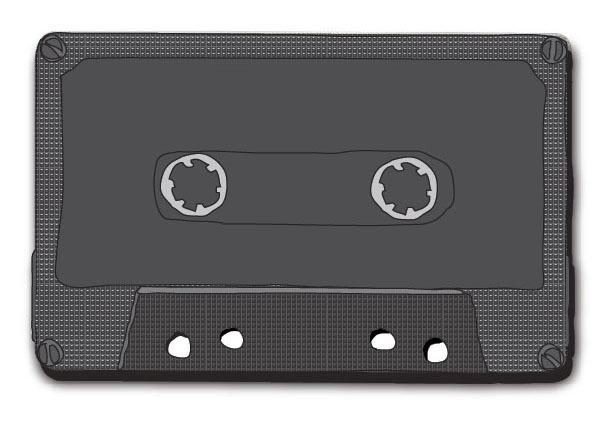
Step 6: Finishing Up the Cassette Tape
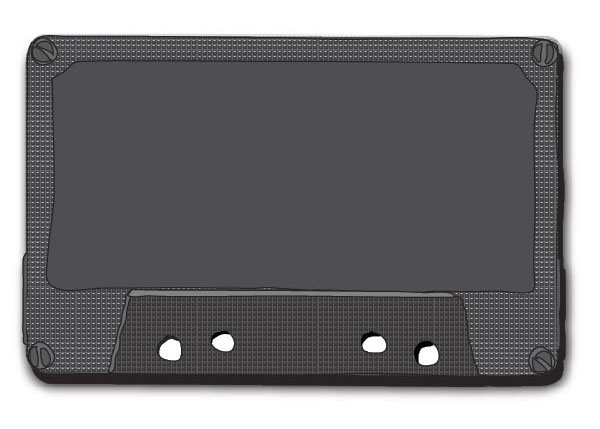
This is the cassette with all the shapes. I added some paper strips where we can later on place some text, which serves as the label for the casette tape and also ties into our organic/hand-sketched theme.
I also added a window where we usually see the tape band, but for now, I left it opaque. 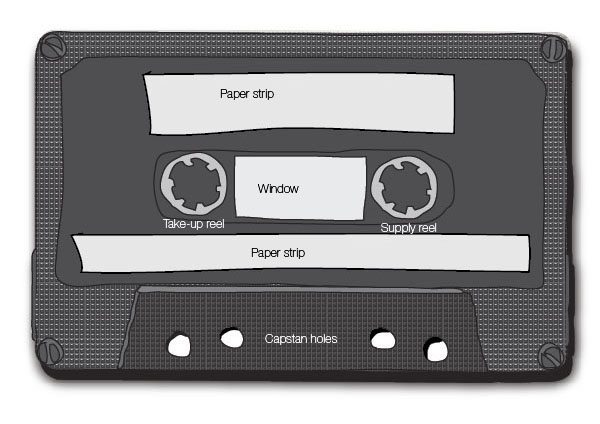
Step 7: Creating a Neat Tape Effect
Let’s create a tape (or ribbon-like shape) with the help of the 3D Extrude & Bevel Effect. Draw up a crazy path with the Pencil Tool and set the stroke of it to white.
 Select the path and apply the 3D Extrude & Bevel Effect (Effect > 3D > Extrude & Bevel) to it. Make sure you use No Shading for the Surface option.
 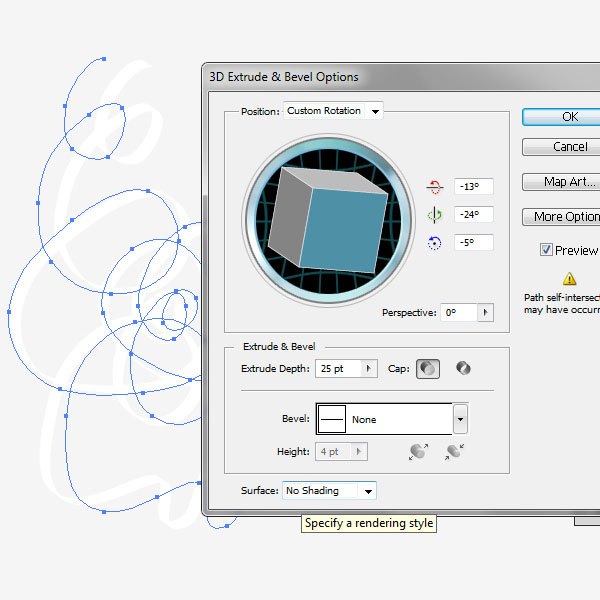 Then expand the appearance (Object > Expand Appearance) and set the stroke to 0.5pt black.
Unfortunately, we will have intersections (highlighted in red) that shouldn’t be there if the tape band overlapped. We need to fix this to make our tape continuous. 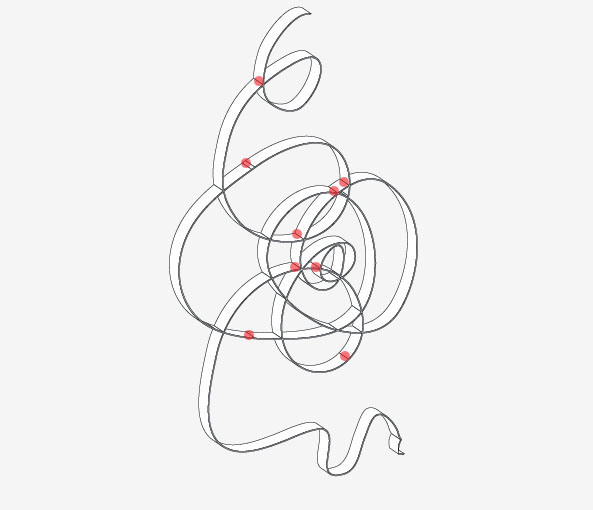
Step 8: Refining the Tape
Select the pieces with the Direct Selection Tool (A) and start joining them with the Unite command in the Pathfinder Panel.
Make sure they overlap or the Unite command won’t work (modify and extend the shapes if you need to). 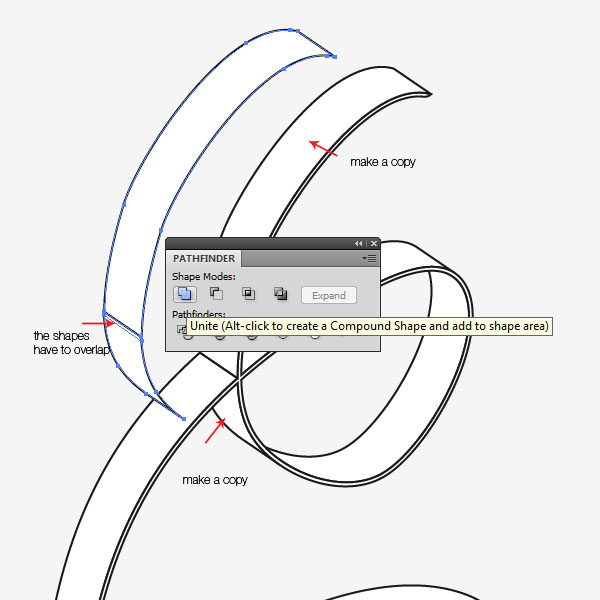
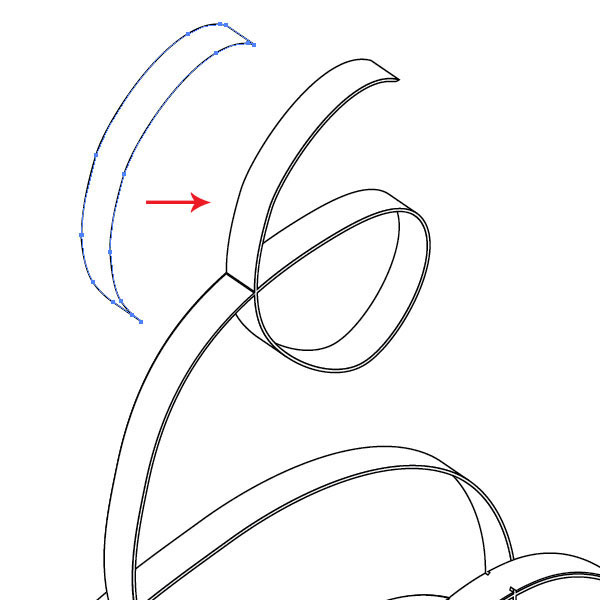 Then place the united shape over the piece that should overlap.
  Now the tape band looks like it loops and this will give a more realistic look.
Repeat this step with all the parts that intersect. When done, group all of the tape shapes together by first selecting them and then choosing Object > Group (Cmd/Ctrl + G).
Step 9: Positioning the Tape
Place the tape behind the cassette.
Duplicate and rotate it. 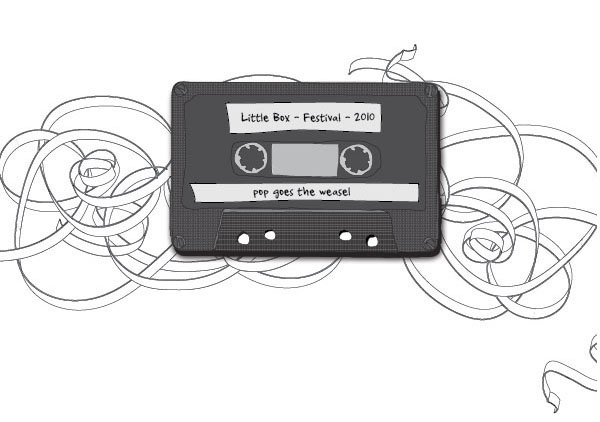
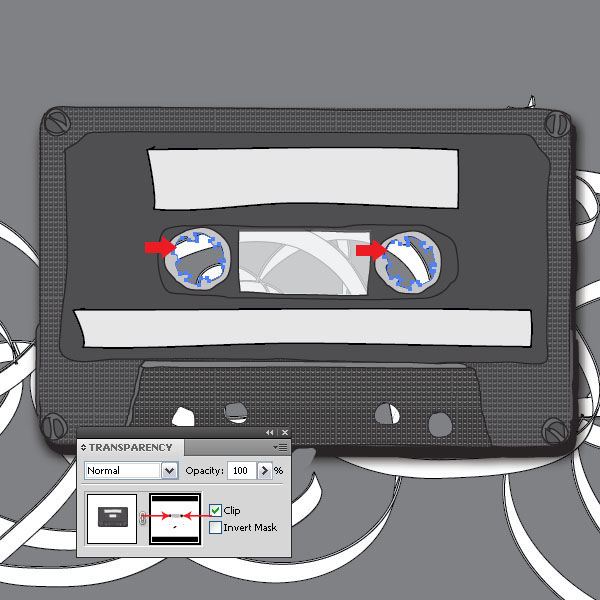
Step 10: The Opacity Mask
I placed a background behind all the objects so that we can see where we need to hide certain parts better. The cassette has holes and we need to make certain shapes hidden so the background shows through.
I don’t want to cut shapes out, so one way of achieving this is to use an opacity mask (access this in the Transparency Panel). I highlighted the parts that need to be hidden with red arrows. 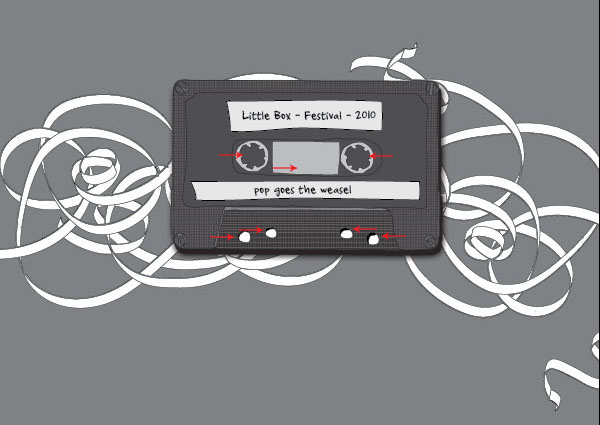 Below, you can see the opacity masks in action.
 We need to place a rectangle object that is bigger than the cassette on top of it and fill it with white. This will reveal all the black cassette parts. I make copies of the holes we made before (all you have to do is select the hole, press Cmd/Ctrl + C and deselect them again) before applying the opacity mask.
Select the cassette shape and apply an opacity mask (Transparency Panel). Make sure you are on the Opacity Mask (right window), then add the white rectangle using the Rectangle Tool (M). Now press Cmd/Ctrl + V for pasting the hole shape copies.
Then fill the shapes with black and place them exactly where the holes are. You’ll see that the background will now be revealed. 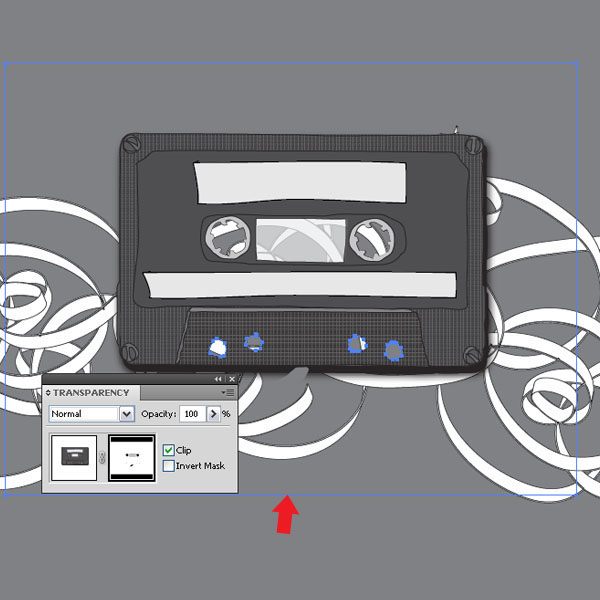
Step 11: More Transparency
We are still on the mask.
In order to make the window semitransparent, we just need to paste the window shape into the mask and set the fill to a light gray. Since white reveals 100% and black hides 100%, gray will make it semitransparent. 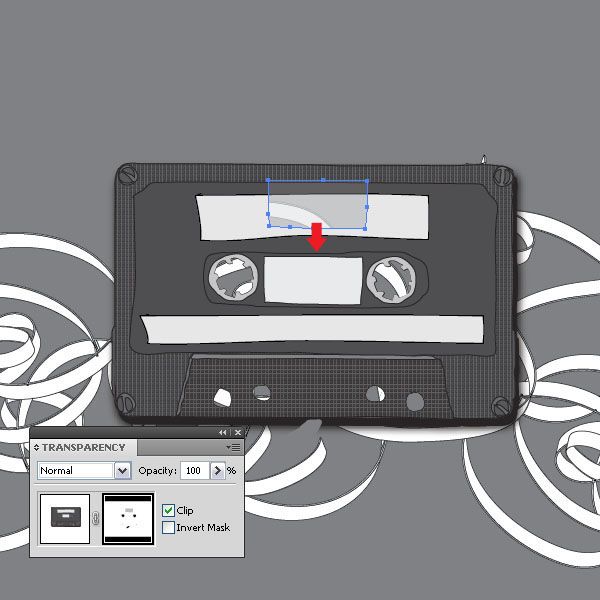
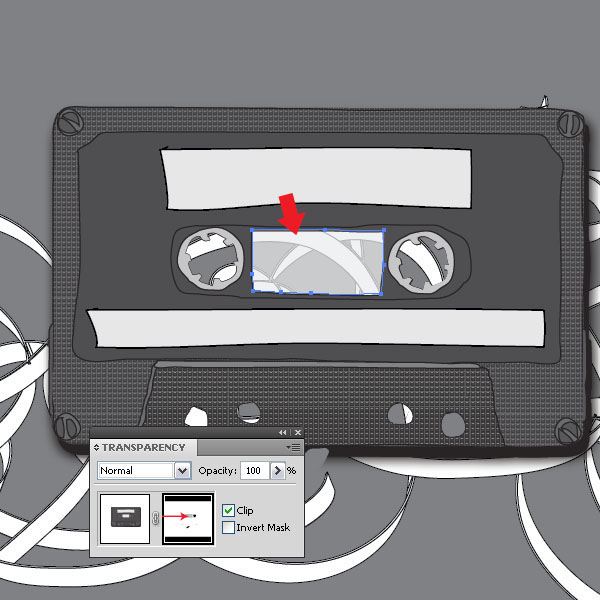 Repeat the same with the reels.
 Don’t forget to leave the opacity mask mode by clicking on the left window in the Transparency Panel.
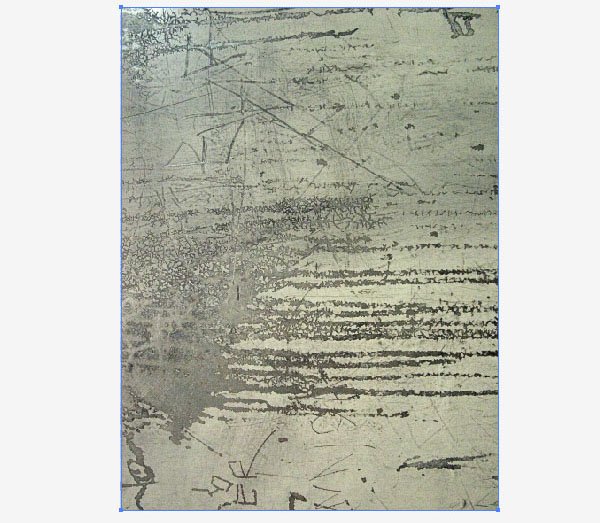
Step 12: The Grungy Part
Let’s add a cool grunge image. I picked one that you can download here.
Alternatively, check out the Freebies section for other options like the Grunge Grab Bag: Texture Pack. Place the texture image onto a new layer and move the layer below all other layers. Lock the layer so you don’t move it accidentally.
 Select the cassette and the tape bands and place them approximately into the middle. To see the Opacity Mask in full action, move the cassette around and see how no matter where you place it, it will reveal the background.
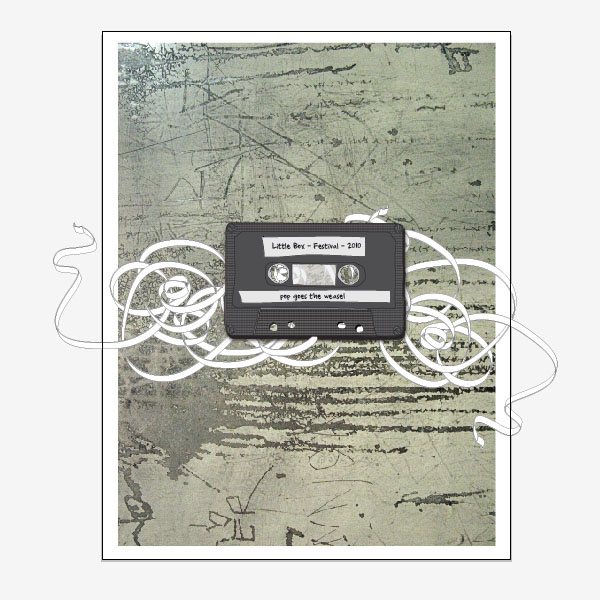
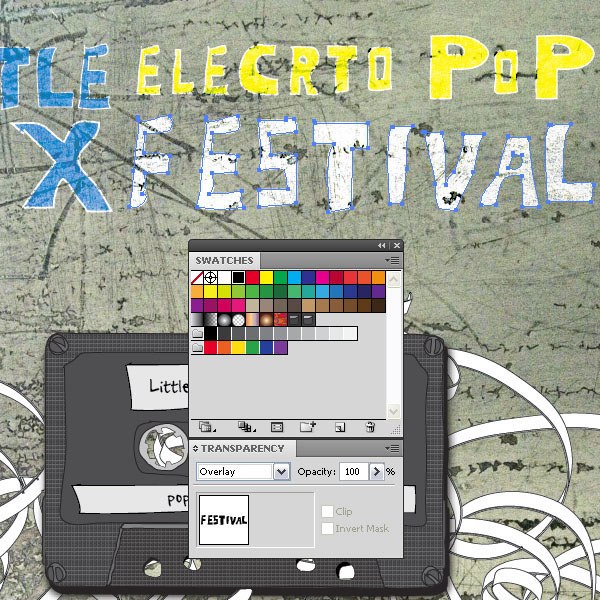
Step 13: Adding Some Text
I added some text that I drew with the Pencil Tool (N).
Then I filled it with blue and set the stroke to white. I selected all the letters and set their layer’s Blend Mode to Overlay so that a bit of the grungy texture shows through them. 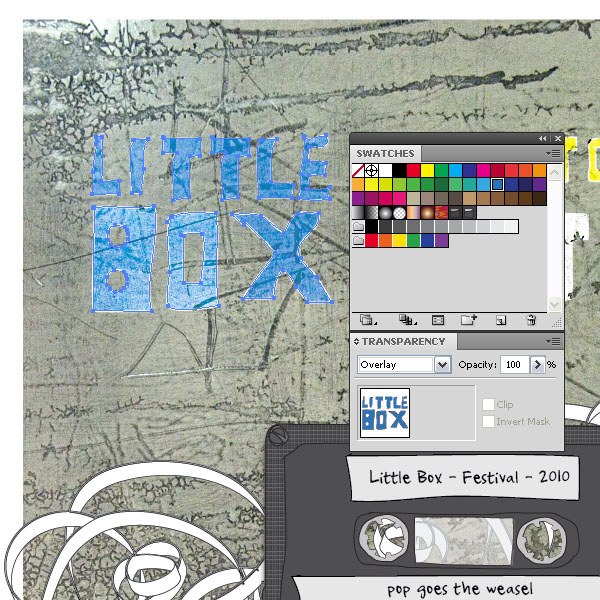
Step 14: Add Some More Text
Add more text using the same technique to finish off the composition of our poster.
Tutorial Summary
That is it. I added more text elements, chose different colors (the white text is actually filled with black and set to Overlay) and placed them above and below the cassette design. There is much more you can do regarding typography, and also maybe more hand-drawn objects (like a mic or a boombox).
So don’t hold back. This tutorial covered a simple technique for creating hand-drawn elements using Illustrator, as well as effective use of opacity masks (which can be tricky at first, but practice makes perfect).
Download Source Files
- grungy_drawn_poster (ZIP, 2.60 MB)
-
 Trevin serves as the VP of Marketing at WebFX. He has worked on over 450 marketing campaigns and has been building websites for over 25 years. His work has been featured by Search Engine Land, USA Today, Fast Company and Inc.
 -

WebFX is a full-service marketing agency with 1,100+ client reviews and a 4.9-star rating on Clutch! Find out how our expert team and revenue-accelerating tech can drive results for you! Learn more
Make estimating web design costs easy
Website design costs can be tricky to nail down. Get an instant estimate for a custom web design with our free website design cost calculator!
Try Our Free Web Design Cost Calculator
Table of Contents
- Preview
- Tutorial Resources
- Step 1: Getting Started
- Step 2: the Pencil Tool Will Be Your Best Friend
- Step 3: the Back Part
- Step 4: a Nifty Pattern Creation
- Step 5: Adding the Details
- Step 6: Finishing Up the Cassette Tape
- Step 7: Creating a Neat Tape Effect
- Step 8: Refining the Tape
- Step 9: Positioning the Tape
- Step 10: the Opacity Mask
- Step 11: More Transparency
- Step 12: the Grungy Part
- Step 13: Adding Some Text
- Step 14: Add Some More Text
- Tutorial Summary
- Download Source Files
Share this article


Web Design Calculator
Use our free tool to get a free, instant quote in under 60 seconds.
View Web Design CalculatorMake estimating web design costs easy
Website design costs can be tricky to nail down. Get an instant estimate for a custom web design with our free website design cost calculator!
Try Our Free Web Design Cost Calculator


