
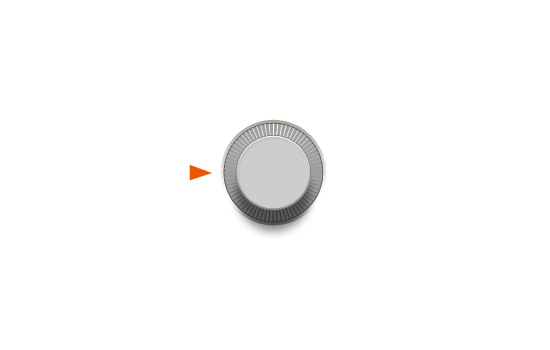
Tutorial Preview
Step 1: Set Up the Photoshop Document
Launch Photoshop. Start to create a new document by going to File > New. In the New dialog window, set the Background Contents option to White.
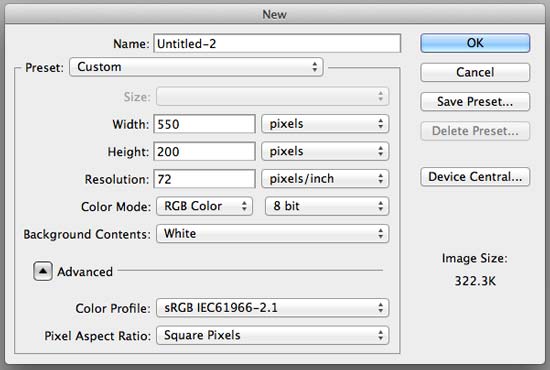
Press the OK button to create the new Photoshop document.
Step 2: Create the Base Shape
Click on the Ellipse Tool (U) in the Tools panel.
In the Options bar (located at the top of Photoshop), make sure that you’re using the Shape layers mode and also set the Color option to gray (#9f9f9f).
Draw a gray circle with the Ellipse Tool by holding Alt + Shift (Mac users: Option + Shift) to make sure you create a perfect circle.

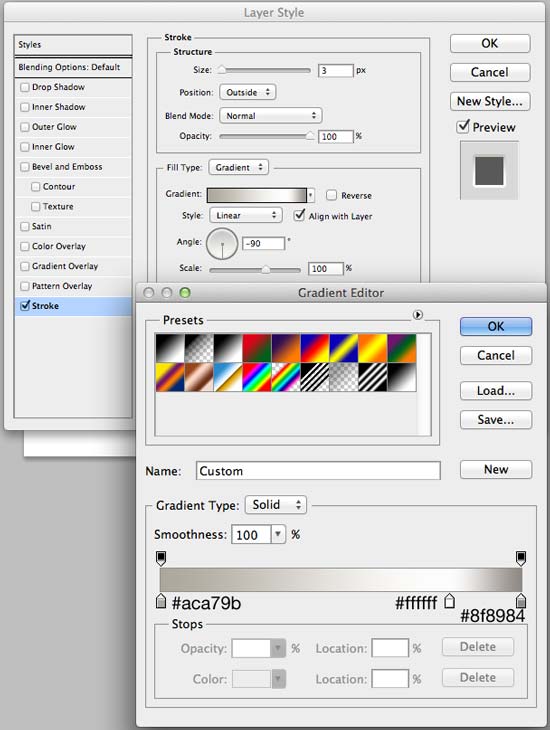
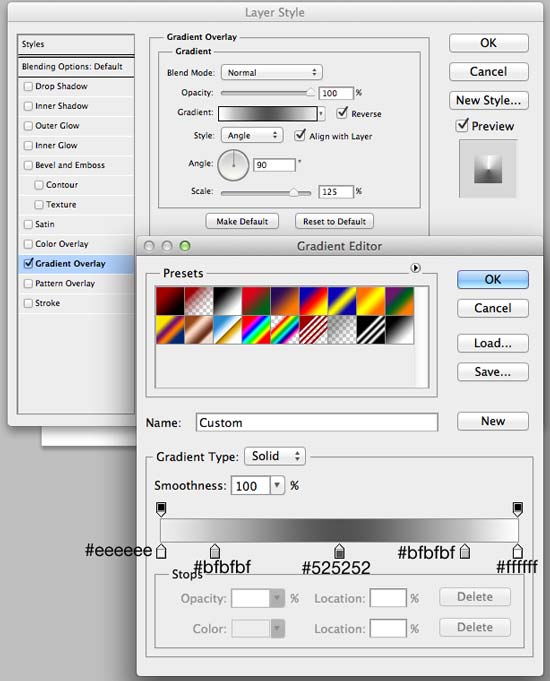
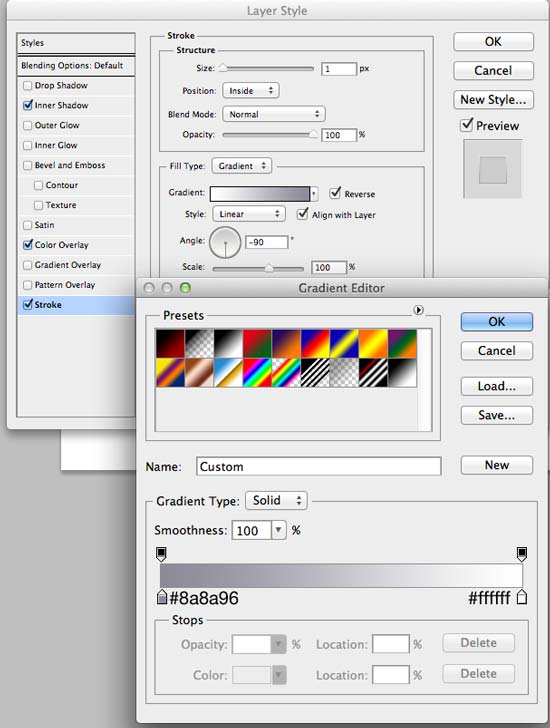
In the Layers panel, double-click on the circle shape layer to open the Layer Style dialog window. Apply the Stroke layer effect to the gray circle using a Fill Type set to Gradient. Use the image below to guide you.

Duplicate the shape layer.
Double-click on the duplicate layer to open the Layer Style dialog window.
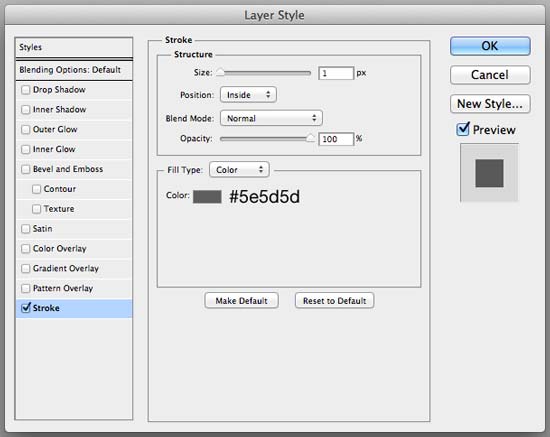
Modify the Stroke layer effect settings so that the Fill Type is set to Color. You can use the image below as a reference.

Step 3: Create Lines on the Circle
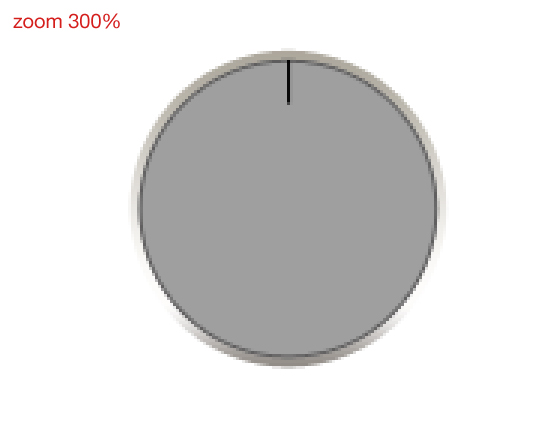
Use the Zoom Tool (Z) to zoom in closely (e.g., zoom in to 300%). This will enable us to work more precisely.
Click on the Line Tool (U) in the Tools panel.
In the Options bar for the Line Tool, set the Weight option to 1px and the Color option to black (#000000). Draw a vertical black line as shown below.
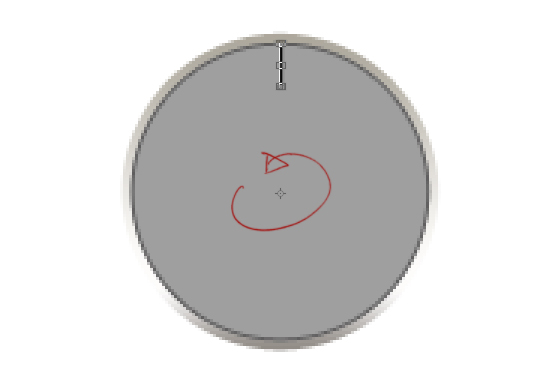
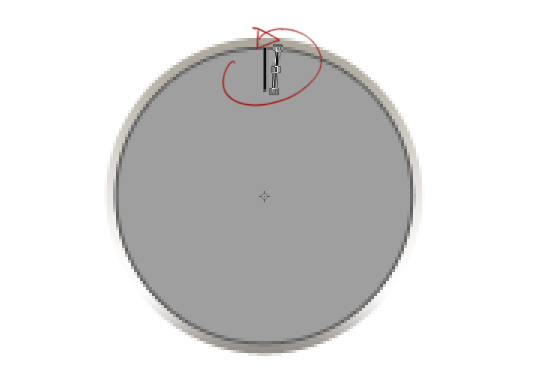
Press Ctrl + Alt + T (Mac users: Command + Option + T) to duplicate the line on the same layer as the first line.
Hold down Alt (Mac users: Hold down Option) to allow you to relocate the center point of the vertical black line to the middle of the gray circle.
This will allow us to rotate the line according to the circle’s center point instead of the line’s center point.
Rotate the shape by 5o by going to Edit > Transform Path > Rotate and then inputting 5 for Rotate option in the Options bar.
Repeat the transformation and duplication until the circle is filled with lines.
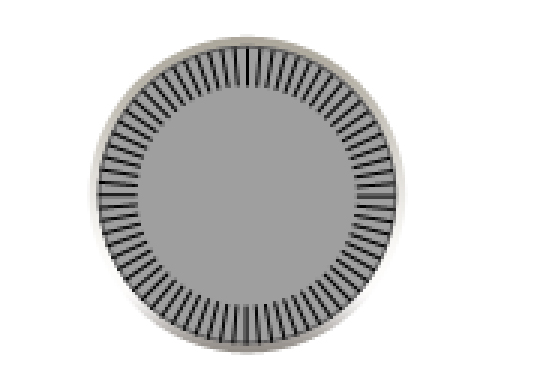
Give the lines layer a Gradient Overlay layer effect using the Layer Style dialog window.

Step 4: Create the Top of the Knob
In this step, we’ll create the top our knob.
Use the Ellipse Tool (U) to draw a circle like on the image below (use any color you want).

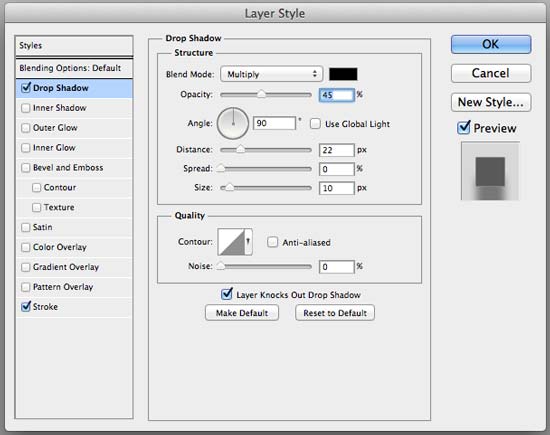
Double-click on the new shape layer in the Layers panel to open the Layer Styles dialog window. We will give this circle a Drop Shadow layer effect and a Stroke layer effect, as well as modify its Fill Opacity.
Drop Shadow
Stroke

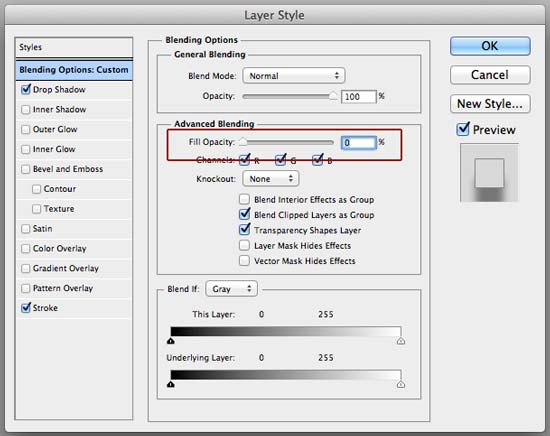
You can set the Fill Opacity to 0% via the the Blending Options section.
By having a Fill Opacity of 0%, the fill color of the circle will be transparent, but the layer effects (Drop Shadow and Stroke) will remain.

Duplicate the circle. In the Layers panel, right-click on the duplicate layer and then choose Clear Layer Style in the menu that appears.

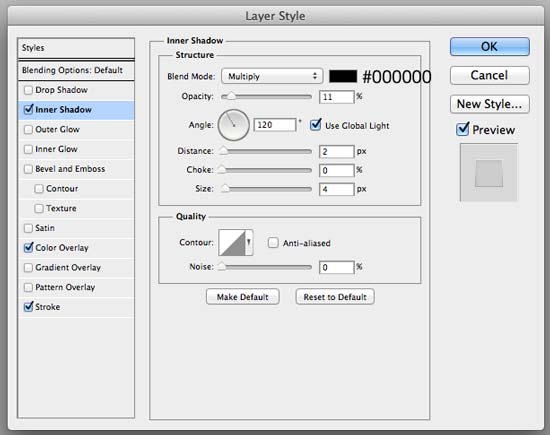
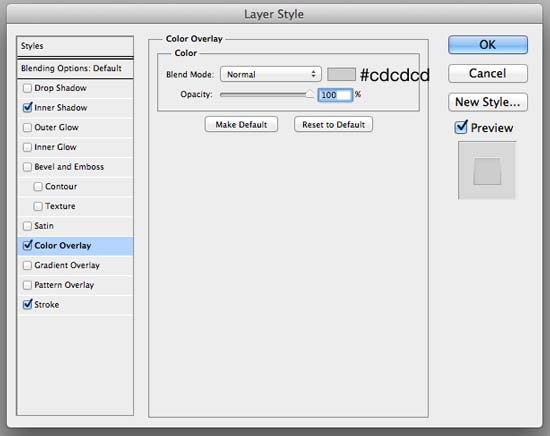
Open the Layer Style dialog window for the duplicate layer and then apply the following layer effects: Inner Shadow, Color Overlay, and Stroke. Use images below as a reference for each layer effect’s settings.
Inner Shadow
Color Overlay
Stroke
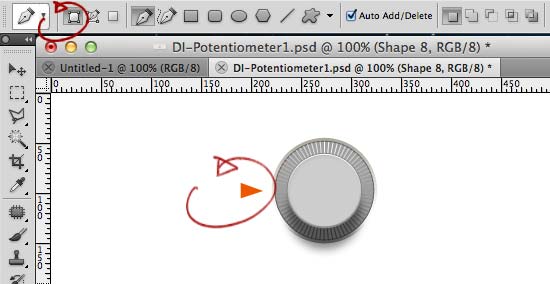
Let’s take a look at our knob now.
Looks pretty realistic, right?

Step 5: Final Touch
This is the final step in this tutorial, and it’s optional. In this step, we’ll add triangle mark/indicator to the left our knob.
Click on the Pen Tool (P), make sure that Shape layers is selected in the Options bar, and then draw a rectangle like on the image below. For the color, I used orange (#ed5700).
That’s it!
Tutorial Summary
Many people would say that this is much easier to do in Adobe Illustrator.
I guess drawing the basic vector shapes would indeed be easier (Illustrator has a more robust set of vector drawing tools). But applying the effects would be a pain, if not impossible, to do in Illustrator. And, as this tutorial showed us, we can do it in Photoshop super quickly and easily.
We made a knob/dial user interface whose aesthetics was inspired by the Braun minimalist industrial designs.
Using only basic Photoshop tools like shape layers, layer styles, the Ellipse Tool and the Line Tool, we were able to create a semi-realistic-looking knob/dial user interface.
Download Source Files
- knob_dial_ui_tutorial_photoshop (ZIP, 0.03 MB)
-
 Trevin serves as the VP of Marketing at WebFX. He has worked on over 450 marketing campaigns and has been building websites for over 25 years. His work has been featured by Search Engine Land, USA Today, Fast Company and Inc.
 -

WebFX is a full-service marketing agency with 1,100+ client reviews and a 4.9-star rating on Clutch! Find out how our expert team and revenue-accelerating tech can drive results for you! Learn more
Make estimating web design costs easy
Website design costs can be tricky to nail down. Get an instant estimate for a custom web design with our free website design cost calculator!
Try Our Free Web Design Cost Calculator
Share this article


Web Design Calculator
Use our free tool to get a free, instant quote in under 60 seconds.
View Web Design CalculatorMake estimating web design costs easy
Website design costs can be tricky to nail down. Get an instant estimate for a custom web design with our free website design cost calculator!
Try Our Free Web Design Cost Calculator


