
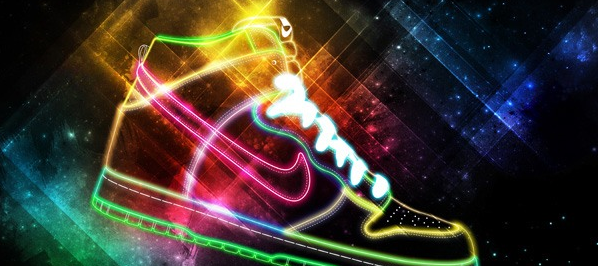
Preview
Tutorial Resources
- Stock Image: Deep space by Static-ghost (deviantART)
- Brushes: Free Hi-Res Watercolor Photoshop Brushes by Sandy (Brusheezy)
- Brushes: Sparklies Photoshop & GIMP Brushes by Obsidian Dawn
Step 1: Obtaining the Vector Artwork
For the purposes of this tutorial, I did not include the vector creation process because I want to focus on the Photoshop effects. So you can either use the vectors I’ve already imported into Photoshop from Illustrator, or you can use one of your own vectors and import them into Photoshop. The goal of the tutorial is to share with you the vibrant/cosmic light effect techniques.
If you choose to use the artwork I’ve prepared for you, download and open the following Photoshop PSD file. It contains a background, and a layer group called “Nike Shoe Layers” that has the different components of the Nike shoe I created in Illustrator and imported as raster objects into Photoshop one component at a time, similar to the process I shared with you in one of my previous tutorials. The shoe that was used as a reference, by the way, is called Nike Dunk High 08. For the purposes of this tutorial, I’ll be referencing the PSD I’ve provided; and if some instructions don’t apply to you because you’re using your own artwork, just tweak the steps as necessary. 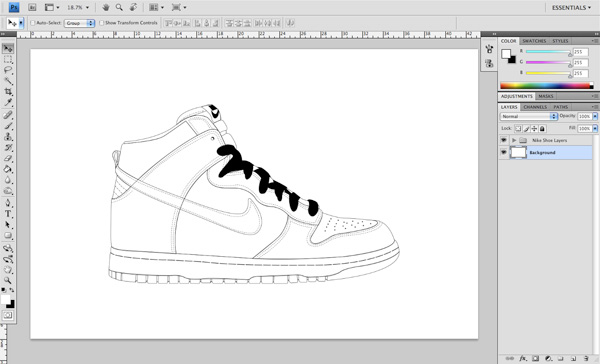
Step 2: Adding Layer Styles
To start, click on the small arrow next to the “Nike Shoe Layers” layer group in the Layers Panel to expand the layer group and reveal all of the layers inside it. Double-click on the first layer to bring up the Layer Style dialog window.
Next, check Color Overlay on the left pane of the dialog window. For the color of the color overlay layer effect, select white (#FFFFFF). After you have done this, click OK to accept the changes to apply the layer style to the layer.
 Right-click on the layer and then select Copy Layer Style from the menu that appears. Make sure that this layer is highlighted/active and, while holding down Shift, scroll down the Layer Panel and then click on the very bottom layer inside the “Nike Shoe Layers” (which should be a layer called “Loop Mid”). You should now have all of the layers inside of the layer group selected.
Next, right-click on any of the selected layers and choose Paste Layer Style from the menu that appears, which will apply the white color overlay layer style to all of the selected layers. 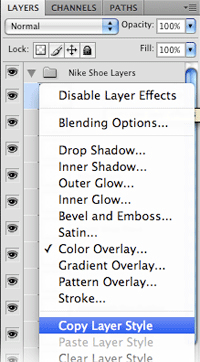
Step 3: Fill In the Background
The entire canvas will appear to be white — don’t be alarmed! We haven’t lost anything here, we simply cannot see the shoe because all of the parts happen to be the same color as the background (we are going to change that now).
Double-click on the Background layer to open up the Layer Style window again, check off Color Overlay and use black (#000000) for the color overlay. 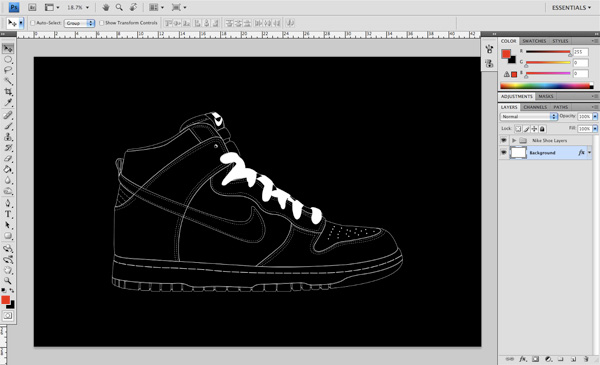
Step 4: Apply a Glow Effect
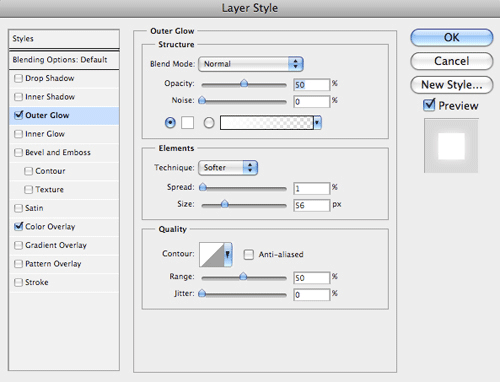
Double-click on the first layer inside of the “Nike Shoe Layers” layer group (which is the “Stitching” layer). Once the Layer Style window opens, apply the Outer Glow layer effect with these settings:
- Blend Mode: Normal
- Opacity: 50%
- Noise: 0%
- Fill: #FFFFFF
- Technique: Softer
- Spread: 1%
- Size: 56px
 Click OK to apply the layer style. Right-click on this layer, choose Copy Layer Style, right-click on the layer below it (its name is “Large Stitching”), and then choose Paste Layer Style; this will apply the layer style we gave the “Stiching” layer above it.
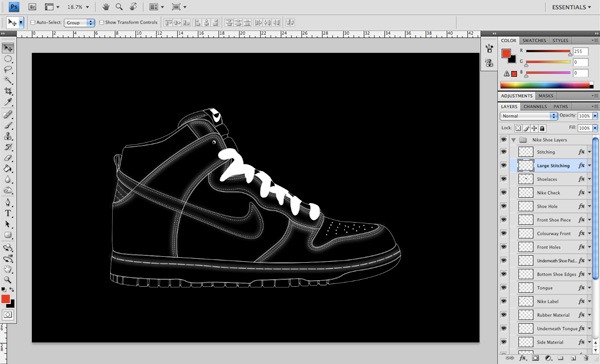
Step 5: Make the Shoe Laces Glow
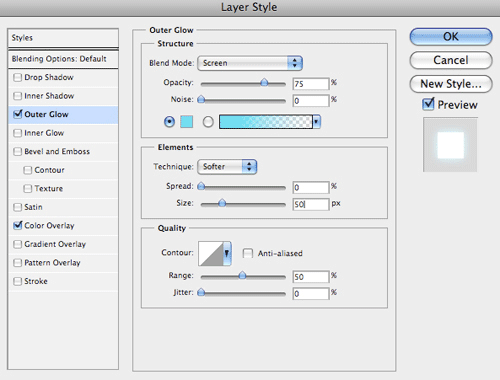
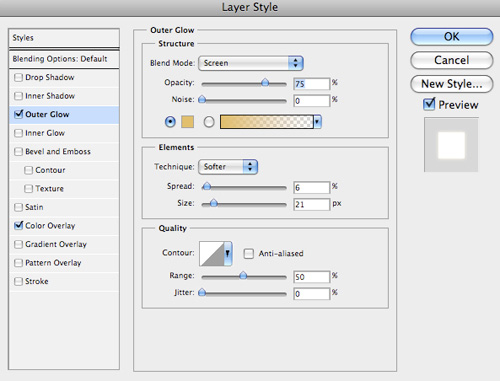
Working our way down the layers in the “Nike Shoe Layers” layer group, we are now going to double-click on the “Shoelaces” layer and give it an Outer Glow with the following settings:
- Blend Mode: Screen
- Opacity: 75%
- Noise: 0%
- Fill: # #23DBF1
- Technique: Softer
- Spread: 0%
- Size: 50%
 Click OK to apply the layer style.
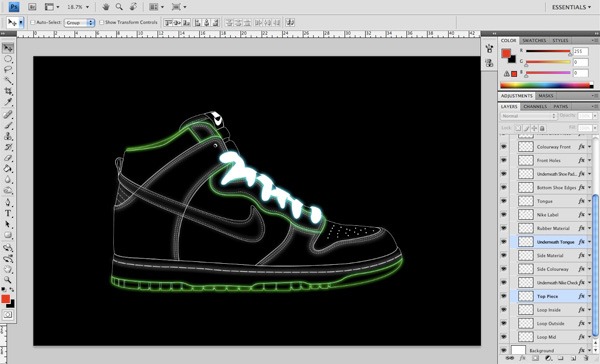
Step 6: Applying the Neon Green Color Using Drop Shadow
We are going to jump down a few layers and focus on the “Underneath Shoe Padding” layer. Double-click this layer to bring up the Layer Style window, check Drop Shadow, and then use the following settings:
- Blend Mode: Normal
- Fill: #00FF1E
- Opacity: 75%
- Angle: 0o (and choose the Global Light option)
- Distance: 0px
- Spread: 17%
- Size: 40%
Just click OK to apply the layer style to the layer. 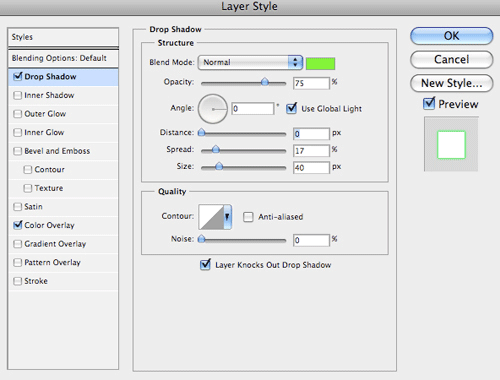 Copy the layer style from the “Underneath Shoe Padding” layer from the previous step (you know the drill by now). Select both the “Underneath Tongue” and “Top Layer” layers in the Layers Panel, right-click on one of them, and choose Paste Layer Style.
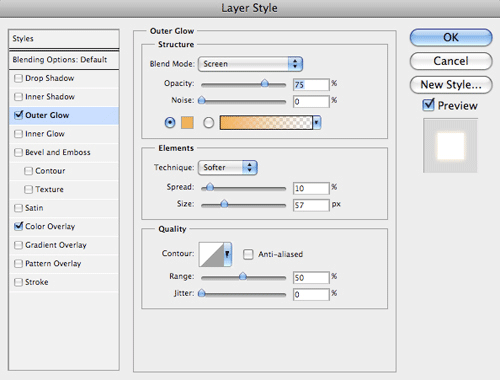
Step 7: Applying the Orange Glow Color
We will continue to apply layer styles to various pieces of the sneaker. The next component we’ll give color to is the “Side Colourway” layer. Give this layer an Outer Glow layer style with the following settings:
- Blend Mode: Screen
- Opacity: 75%
- Noise: 0%
- Fill: #F8B45C
- Technique: Softer
- Spread: 10%
- Size: 57px
Step 8: Applying the Mellow Yellow Color
Copy the layer style from the previous step and paste it into the layer named “Colourway Front”. We’ll need to tweak the copied layer style though, so go ahead and double-click on the “Colourway Front” layer to access the Layer Style window. All of the settings here will remain the same except for the Fill color; change it to a shade of yellow (#F1E41C). 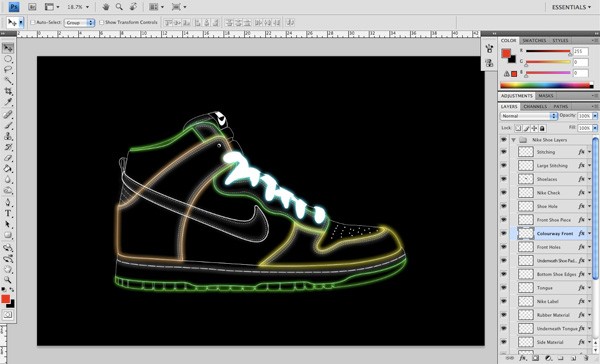
Step 9: Styling the Nike Logo
Double-click on the “Nike Check” layer to open up the Layer Style dialog box.
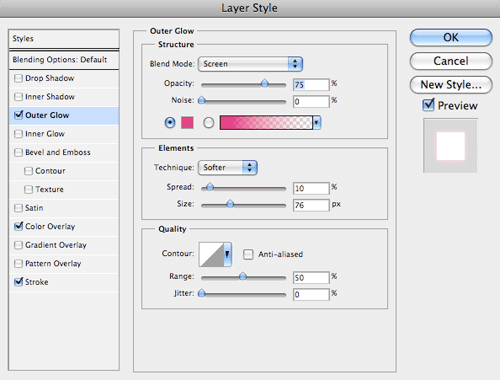
For this layer, we want to make it really pop and have the contrast be pretty high compared to its surroundings, so I have selected a vibrant magenta color that we are going to apply using the Outer Glow layer effect with the settings listed below:
- Blend Mode: Screen
- Opacity: 75%
- Noise: 0%
- Fill: #FD0083
- Technique: Softer
- Spread: 10%
- Size: 76px
 We’re also going to use the Stroke layer effect on this layer with the following settings:
- Size: 2px
- Position: Outside
- Blend Mode: Normal
- Opacity: 100%
- Fill: #FFFFFF
Just click OK to apply the settings to the “Nike Check” layer. 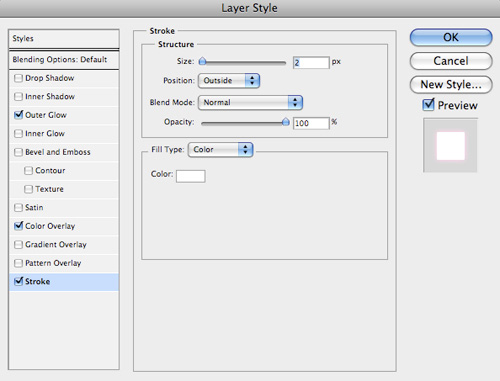
Step 10: More Layer Styles
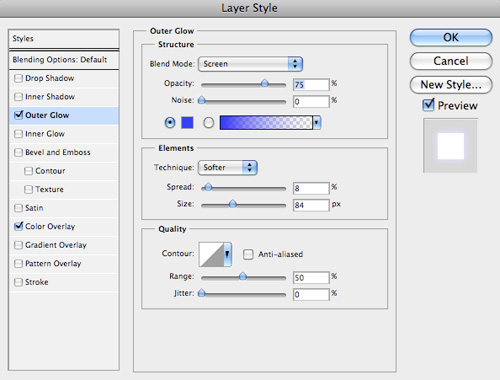
We’re going to continue applying more layer styles to various layers in this step. Double-click on the “Side Material” layer and give it an Outer Glow with the following settings:
- Blend Mode: Screen
- Opacity: 75%
- Noise: 0%
- Fill: #3232F5
- Technique: Softer
- Spread: 8%
- Size: 84px
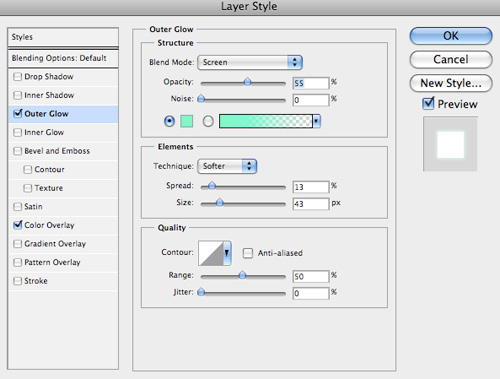
 Double-click on the “Rubber Material” layer and give it an Outer Glow with the following settings:
- Blend Mode: Screen
- Opacity: 55%
- Noise: 0%
- Fill: #00FFC6
- Technique: Softer
- Spread: 13%
- Size: 43px
 Double-click on the “Tongue” layer and give it an Outer Glow with the following settings:
- Blend Mode: Screen
- Opacity: 75%
- Noise: 0%
- Fill: #E1BF6D
- Technique: Softer
- Spread: 6%
- Size: 21px
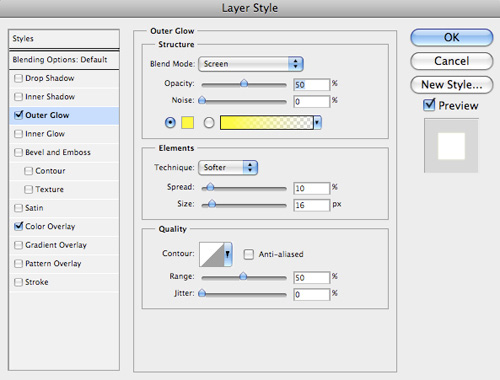
 Click OK to accept the changes, copy the layer style from this layer and paste it into the “Front Shoe Piece” layer. Double-click on the “Underneath Nike Check” layer to open up the Layer Style window and apply the following settings for Outer Glow:
- Blend Mode: Screen
- Opacity: 50%
- Noise: 0%
- Fill: #FFFF00
- Technique: Softer
- Spread: 10%
- Size: 16px
Step 11: Duplicate the Shoes
We have now applied light/glow effects to almost every part of the shoe with the exception of a few small pieces. I hope you are still with me; I know the previous steps were a bit repetitive. Now that it is complete, however, we can move along.
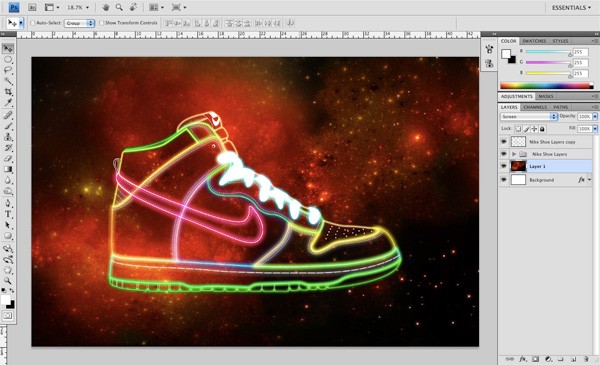
Click on the small arrow next to the “Nike Shoe Layers” layer group to collapse it. Click-hold-and-drag the layer group down to the Create a new layer icon at the bottom of the Layers Panel to duplicate the layer group. 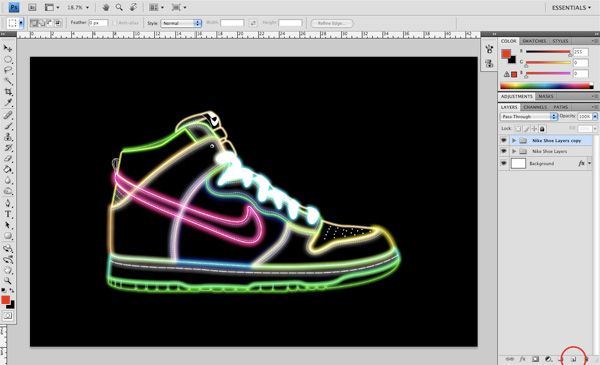 Right-click on the duplicate layer group and choose Merge Group to flatten it into a single layer that should be the topmost layer in the Layers Panel.
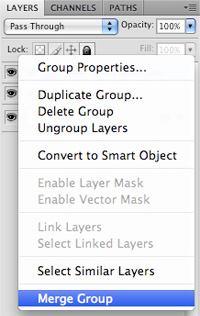 Because we have flattened the duplicate layer group into a single layer, we can now change the Blend Mode of the layer to Overlay, which will intensify the colors of the various glow effects that we have applied to other layers in the previous steps. Feel free to play around and try some of the other layer blend modes; Hard Light, for example, looks pretty nice as well (it’s just a bit more vibrant and extreme than Overlay).
Step 12: Add a Deep Space Background
Download and open the Deep space stock image in Photoshop.
Place this image above the Background layer in our main Photoshop document. Press Ctrl/Cmd + T for Free Transform and, while holding Shift, drag one of the corners outwards to stretch the image and make it fit our canvas. Set the Blend Mode of the “Deep space” layer to Screen.
 Next, press Ctrl/Cmd + Alt/Option + U to bring up the Hue/Saturation image adjustment dialog window, and drag the Saturation option slider all the way to the left to desaturate the space image.
 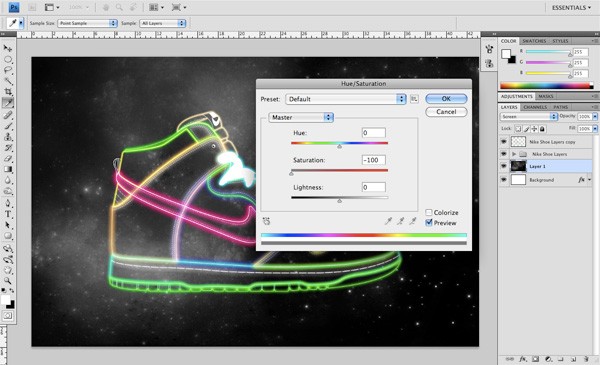 Once the image has been desaturated, click on the Create new fill or adjustment layer icon at the bottom of the Layers Panel (shown in the image below); choose Levels from the menu that appears.
  When the histogram panel for the Levels adjustment layer appears, slide the middle gray slider to the right so that it is set to 0.57 or so.
This will darken up the piece and bring out some of the contrast. We don’t want the background image to dominate the scene, and we are going to be adding additional elements on top of this layer to bring some color back in shortly. Before we continue, I just want to clean up a few of the layers.
This isn’t a requirement, but keeping things grouped together will make it easier later on should you need to make any further changes. To do this, select the Background layer, the “Deep space” layer, and the Levels image adjustment layer, then press Ctrl/Cmd + G to put these layers into a layer group (that you can then rename to something like “Background”).
Step 13: Adding Vibrant Colors to the Deep Space Background
Now that we have grouped our background layers into a layer group, we are going to create a new layer (Shift + Ctrl/Cmd + N) above their layer group.
Choose the Gradient Tool (G) and, in the Options Bar, set the tool to the Radial Gradient option and choose the Foreground to Transparent gradient preset. ![]() This part is subjective, as you can decide which colors and where you wish to place them; but I will give you the basic technique that will allow you to add color to the desaturated background. With the Gradient Tool already set up, set your Foreground Color to start off with; preferably colors that are rich and saturated.
This part is subjective, as you can decide which colors and where you wish to place them; but I will give you the basic technique that will allow you to add color to the desaturated background. With the Gradient Tool already set up, set your Foreground Color to start off with; preferably colors that are rich and saturated.
On a new layer above the “Background” layer group, create a mid-sized radial gradient and set the new layer’s Blend Mode to Color, then switch over to the Move Tool (V) to position the gradient wherever you think it will look best. Create another new layer and select a different color, and repeat the above step. Each of these gradients should be on their own layers so that you can move them around to see how the colors blend together.
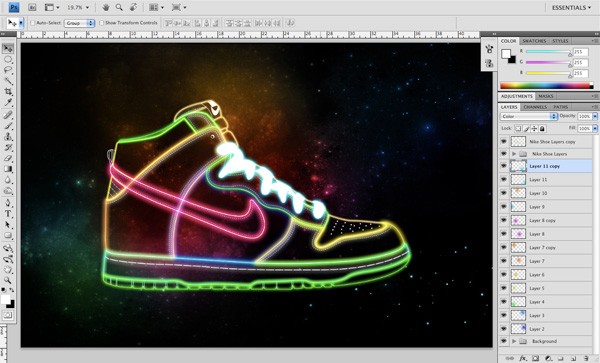 Once you are happy with the background colors, select all of the layers with radial gradients and press Ctrl/Cmd + G to put them all into a layer group (name the group something that will make it easy to identify, such as “BG Color”).
Step 14: Rotate the Shoe
I want to make this piece more dynamic so that it isn’t just a sneaker sitting on a horizontal plane; so we will tweak its orientation a bit. In the Layers Panel, select the “Nike Shoe Layers” layer group and the merged layer above it.
Then use Free Transform (Ctrl/Cmd + T) while holding Shift to rotate the shoe (we hold down Shift to rotate in 45o increments). 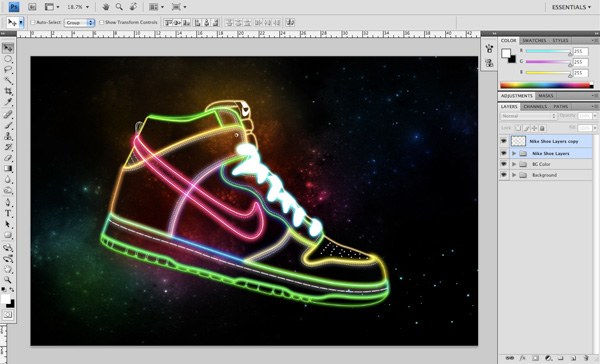
Step 15: Add Light Streaks
Create a new layer at the very top of the Layers Panel. On this new layer, we want to use the Rectangular Marquee Tool (M) to create a tall, vertical selection.
Next, choose the Gradient Tool (G), making sure you keep your marquee selection active, and set the options of the Gradient Tool to a linear gradient that goes from a vibrant blue color (#08AFFD) to transparent. Hold down Shift and drag across the active selection to create the gradient. 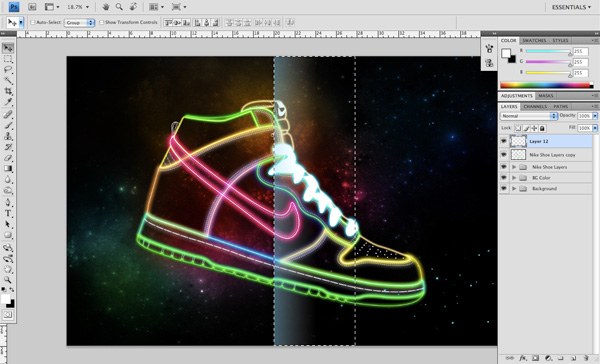 Use Free Transform while holding down Shift to rotate the gradient counter-clockwise.
Switch to the Move Tool (V) and position it to the left and underneath the shoe. 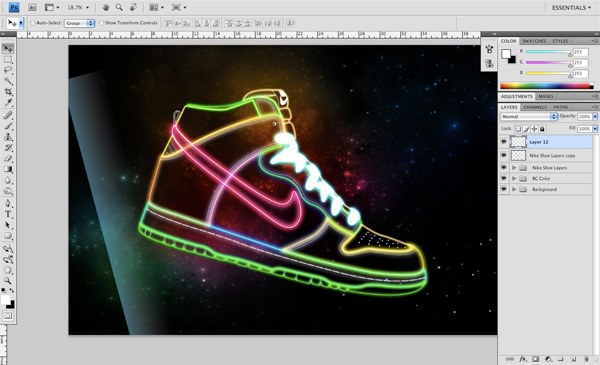 Switch the Blend Mode to of the layer to Overlay and duplicate it by pressing Ctrl/Cmd + J. By duplicating this layer, we will intensify the effect and make it appear brighter.
We can now select both of these layers and then press Ctrl/Cmd + E to merge them together. 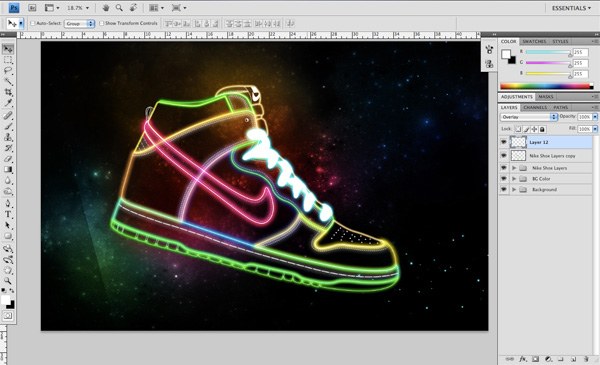 We have now added just a single light streak underneath the shoe in the bottom-left corner. What we want to do next is duplicate this layer several times, and each time we do that, we are going to change the angle and/or positioning of the light streak using Free Transform and the Move Tool.
The goal here is to move them around the design and see where they work best; but also by doing this, we are making our image even more dynamic by introducing these light streaks. After doing this about 8 times, here is what I have come up with: 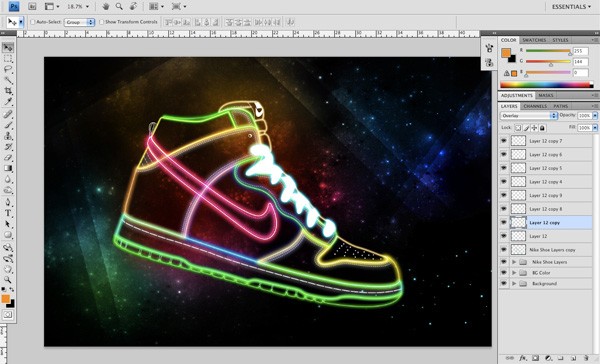 Once you are happy with the light streaks, select them in the Layers Panel and press Ctrl/Cmd + G to throw them all into a layer group (which you could name “Light Streaks”).
Step 16: Apply Watercolor Brushes
Next, we want download and load these Free Hi-Res Watercolor Photoshop Brushes in Photoshop.
Create a new layer above the “BG Color” layer so that it is underneath both the “Nike Shoes Layer” and the duplicated image. Using the largest brush size possible in Photoshop CS (2500px), select a solid white color and paint on the new layer using one of the watercolor brushes. Change the Blend Mode to Overlay and move or rotate the brush to a position that works well within the composition.
Continue to create new layers and paint a single watercolor stroke, changing the Blend Mode to Overlay and playing around with the positioning of the watercolor brush strokes. There is no right way to do this part and it is up to you to decide what looks best. The goal is to add texture to the piece, and that can be achieved in a variety of ways.
I have only used three watercolor brush stroke layers here, but you can see that it adds a nice tactile feel to the design. 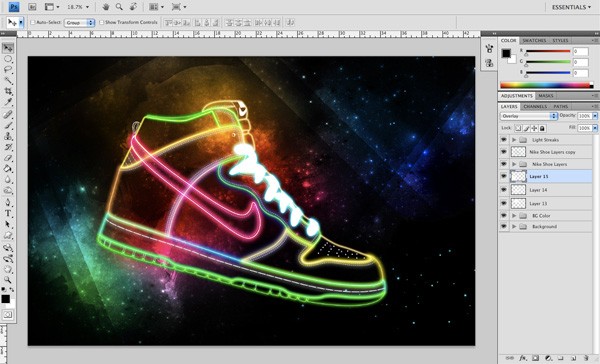 Once you are happy with the results, select all the watercolor brush stroke layers and press Ctrl/Cmd + G to put them into a layer group that can be named “Watercolor Brushes”.
Step 17: Finishing Touches
At this point, it is a good idea to take a step back and observe the work that we have done so far. Looking at the design, I really want to make the diagonal lines more apparent and kind of play this up even more than its current state. To do this, we could use the Sparklies Photoshop & GIMP Brushes (by Obsidian Dawn).
Load these up in Photoshop and create a new layer at the top of our Layers Panel. Using white (#FFFFFF) as our Foreground Color, choose one of the fantasy brushes. Enlarge the size of the brush to the largest diameter (2500px) and click once to apply it on our new layer, switch the Blend Mode to Overlay, and then duplicate the layer (Ctrl/Cmd + J).
Position both layers so the lines overlap the shoe and fall somewhere in the area of the colorful space background. Do this several times in separate layers and we’re done!
Tutorial Summary
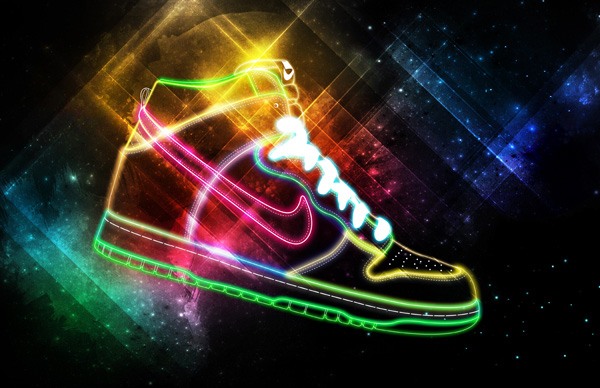
This tutorial involved creating vibrant and colorful light effects using Photoshop’s layer styles.
We also created a space-themed backdrop for our main element (the Nike shoe) using stock imagery and Photoshop brushes. We created interesting light streaks quickly and easily with the help of the Rectangular Marquee Tool, Free Transform, and the Gradient Tool. The final result is presented below.
Download Source Files
- vibrant_cosmic_effect (ZIP, 112.00 MB)
-
 Trevin serves as the VP of Marketing at WebFX. He has worked on over 450 marketing campaigns and has been building websites for over 25 years. His work has been featured by Search Engine Land, USA Today, Fast Company and Inc.
 -

WebFX is a full-service marketing agency with 1,100+ client reviews and a 4.9-star rating on Clutch! Find out how our expert team and revenue-accelerating tech can drive results for you! Learn more
Make estimating web design costs easy
Website design costs can be tricky to nail down. Get an instant estimate for a custom web design with our free website design cost calculator!
Try Our Free Web Design Cost Calculator
Table of Contents
- Preview
- Tutorial Resources
- Step 1: Obtaining the Vector Artwork
- Step 2: Adding Layer Styles
- Step 3: Fill in the Background
- Step 4: Apply a Glow Effect
- Step 5: Make the Shoe Laces Glow
- Step 6: Applying the Neon Green Color Using Drop Shadow
- Step 7: Applying the Orange Glow Color
- Step 8: Applying the Mellow Yellow Color
- Step 9: Styling the Nike Logo
- Step 10: More Layer Styles
- Step 11: Duplicate the Shoes
- Step 12: Add a Deep Space Background
- Step 13: Adding Vibrant Colors to the Deep Space Background
- Step 14: Rotate the Shoe
- Step 15: Add Light Streaks
- Step 16: Apply Watercolor Brushes
- Step 17: Finishing Touches
- Tutorial Summary
- Download Source Files
Share this article


Web Design Calculator
Use our free tool to get a free, instant quote in under 60 seconds.
View Web Design CalculatorMake estimating web design costs easy
Website design costs can be tricky to nail down. Get an instant estimate for a custom web design with our free website design cost calculator!
Try Our Free Web Design Cost Calculator


