
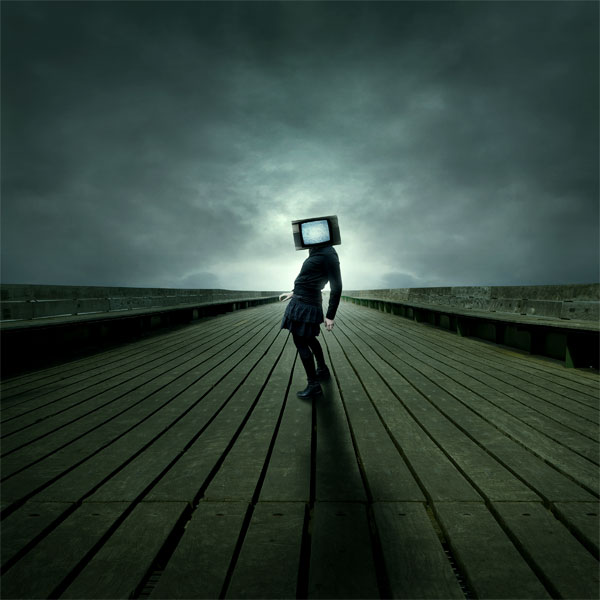
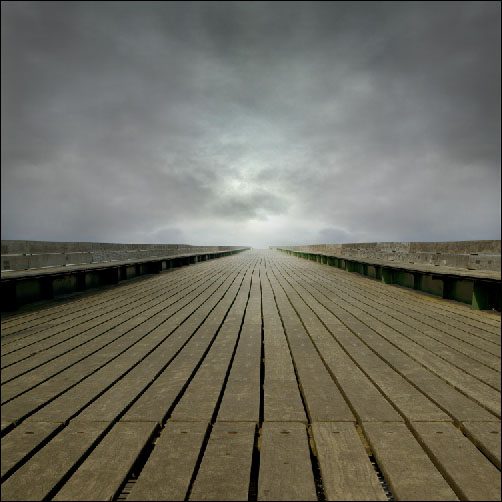
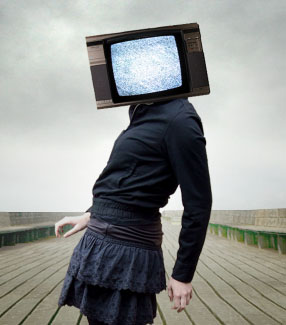
Preview
Click on the image to see the full 3000 by 3000px composition we’ll be creating today.
Resources
- Update: This stock photo is no longer available. See explanation in the comments.
Premade background 15 by Julia Starr (Creative Commons License) - Clevedon Pier by John Page (Royalty Free License)
- Update: This stock photo is no longer available. See explanation in the comments.
New Boots.Side pose by mansongothic-stock (Creative Commons License)
- Old Tv by dazzle-textures (Creative Commons License)
- White Noise 2 by Falln-Stock (Creative Commons License)
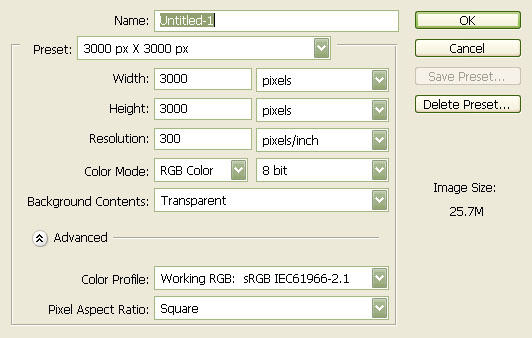
Step 1: Create a new file
Create a new file with a width of 3000 px and a height of 3000 px at 300 dpi (Dots per Inch). Background Contents should be Transparent.
Step 2: Create the sky
First off, let’s open the Premade background 15 stock in Photoshop. (Update: This stock photo is no longer available.
See explanation in the comments.) We will be using the clouds on this stock image so we will need to transfer it to our main canvas.
Click the Premade Background 15 and press V to activate the Move Tool. Left-click the image and drag the image to the main canvas.
Once you have it there, press Ctrl/Cmd + T to activate the Free Transform command and scale the image so that it’s the same size as our canvas.
Now we’re going to duplicate that layer to make it look more like a stormy sky where the light comes from only one direction. Press Ctrl/Cmd + J to duplicate the layer.
Then we are going to flip this layer horizontally to erase the overcast part of the sky.
Making sure the duplicated layer is the layer you’re currently on in the Layers Panel, choose Edit > Transform > Flip Horizontal.
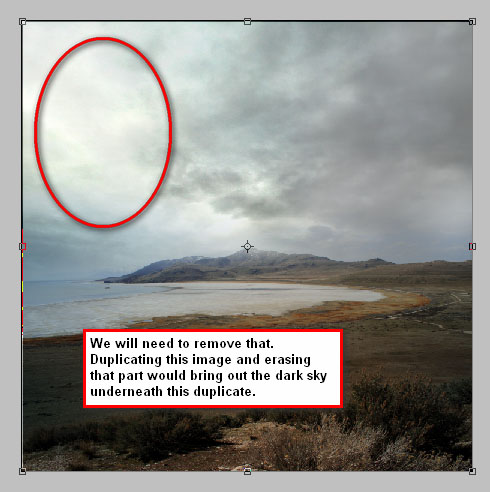
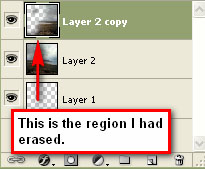
After transforming, click on the duplicate layer and erase the overcast sky.
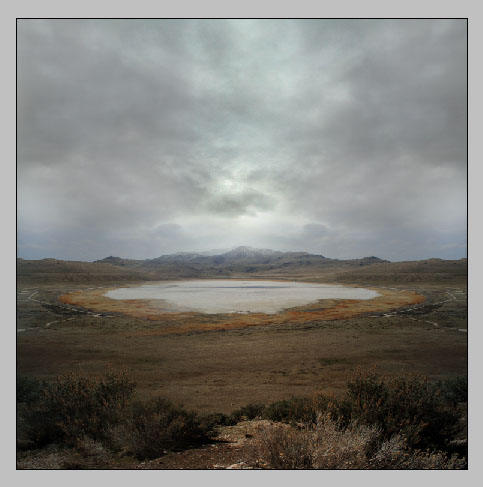
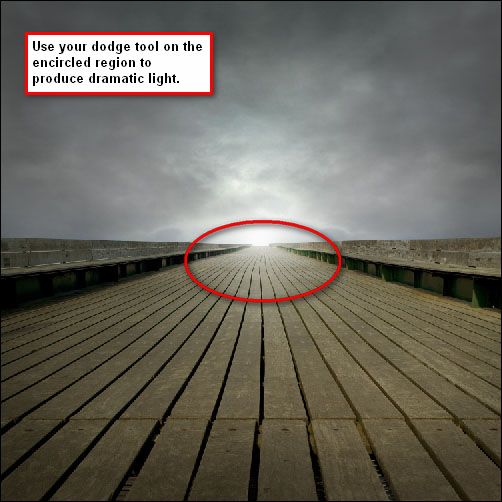
Step 3: Retouch the sky to make it look more tempestuous
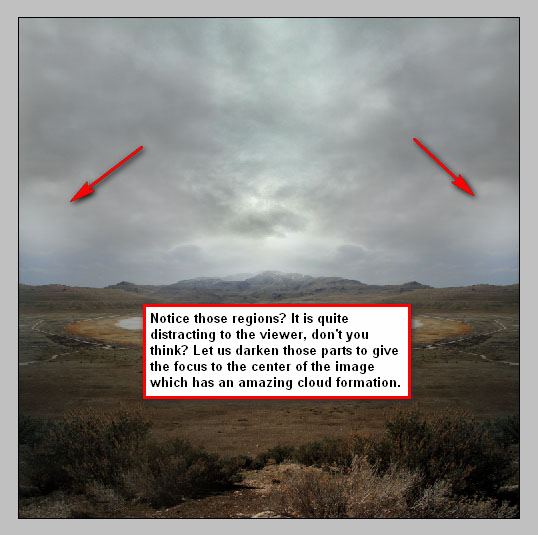
In this step, we will be creating a sky scene that’s dark and gloomy—”tempestuous” is the best way I can describe it. But first, we should fix the viewer’s focus on the center of the image because that will be our source of light and where our subject will be placed. Additionally, the cloud formations here greatly resemble that of a stormy sky.
Let’s create a new layer by pressing the shortcut combination, Ctrl/Cmd + Shift + N, or by clicking on the Create a new layer button in the Layers Panel.
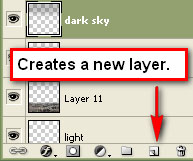
Be sure that the newly created layer is above all the existing layers.
Name that layer “black1” for organization purposes.
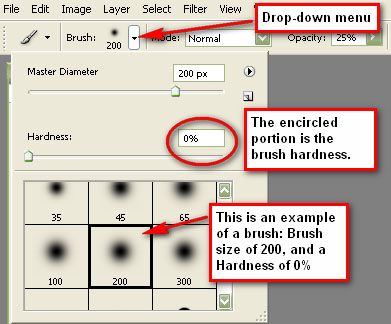
To paint the sky, press B to activate the Brush Tool (B).
Set its Brush options to the following:
- Master Diameter: 1200 px
- Opacity: 15%
- Flow: 100%
- Hardness: 0%
Note that the brush’s hardness can be found on the Option bar, in a drop-down menu.
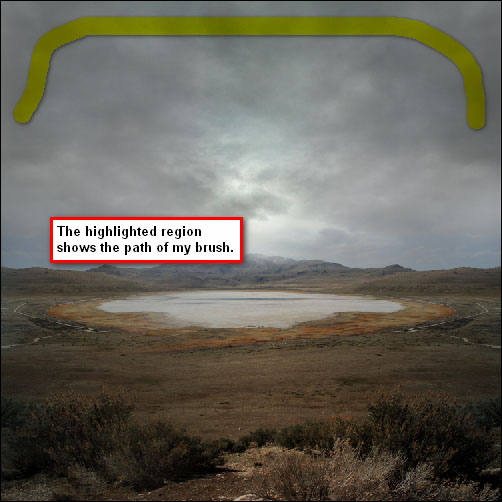
Paint the regions that are outside of our main source of light. The effect is like a vignette, but only applied to the top portion of the scene where the sky is.
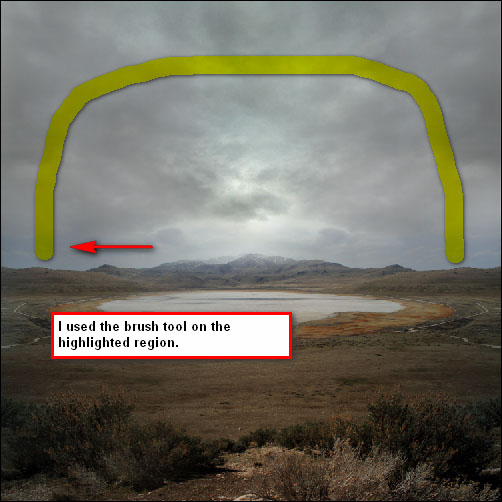
If you’re into photography, you’re probably familiar with the Graduated Neutral Density (GND) Filter that is used to darken the sky, while leaving the brightness of the foreground unchanged. We will mimic that effect here.
Create a new layer for our GND effect and name it “GND“.
We shall brush the top region of the sky once again. Set your brush options to the following:
- Master Diameter: 1200 px
- Opacity: 25%
- Flow: 100%
Tip: If the darkness isn’t to your liking, change it by adding another brushing layer. Create a new layer (name it “black2” to keep our work organized), then apply another stroke or two on the top part of the sky.
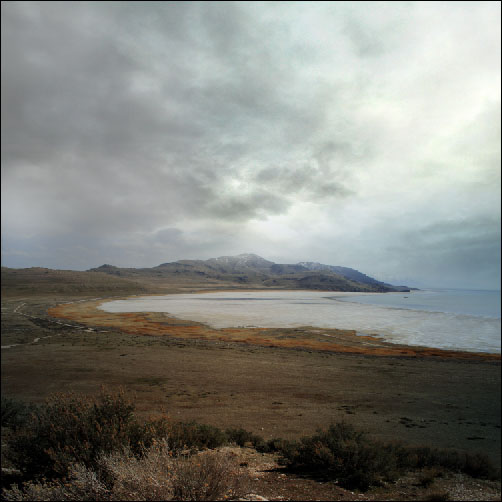
Step 4: Create the foreground
For our foreground, we will be using the Clevedon Pier image. Download it, open the file and move it to our main canvas.
We need to remove the lampposts and the image’s sky.
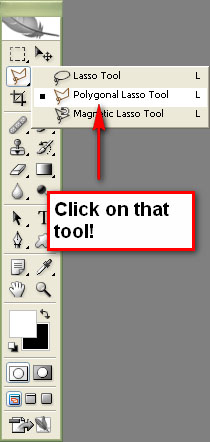
To do that, we will be using the Polygonal Lasso Tool (L).
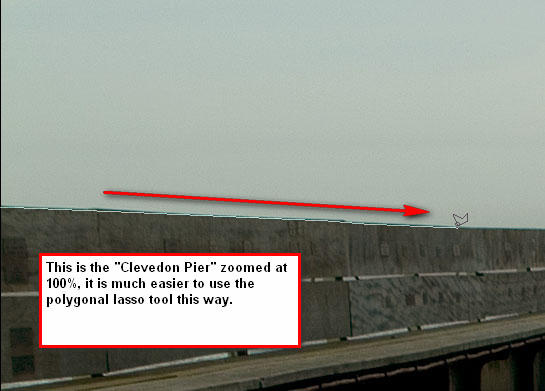
To accurately separate the sky and the lampposts from the pier, we can zoom in to the image by pressing Ctrl/Cmd + + (to zoom out, press Ctrl/Cmd + -) and use the Polygonal Lasso Tool to precisely select the section that we need. I would recommend setting the zoom level to 100%; the higher the zoom level, the more accurate it is to cut out the area that we need.
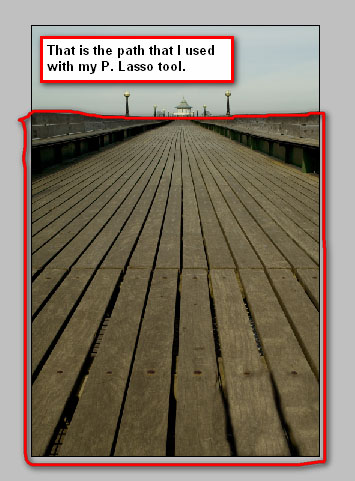
After creating the lasso selection, use the Move Tool (V) to drag the pier without its sky and lampposts to the main canvas.
Press Ctrl/Cmd + T to activate the Free Transform command and then scale the object to make it fit our canvas.
Step 5: Fix the viewer’s focus
Earlier we talked about altering the image to fix our viewer’s focus, we’ll continue to work on that in this step.
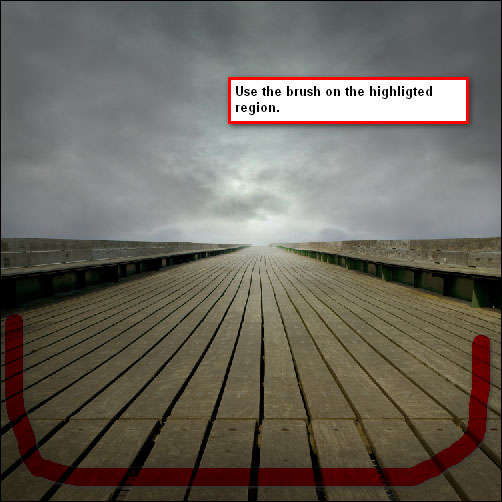
Start by creating a new layer and name it “black on floor“.
We will be creating a half-vignette for our floor. Activate your Brush Tool (B) and set its values to:
- Master Diameter: 700 px
- Opacity: 23%
- Flow: 30%
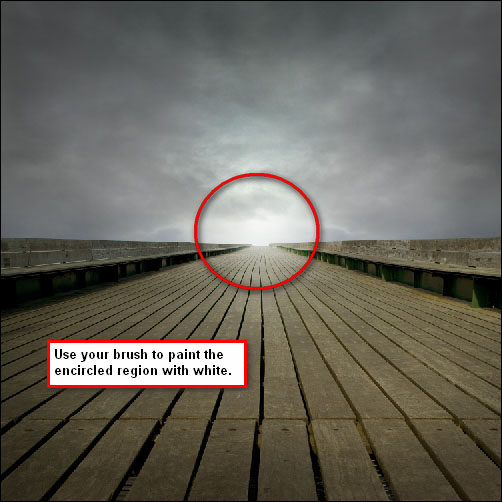
After the shadows have been applied, let’s add some dramatic light; create a new layer, name it “Light” and put it under the Clevedon Pier layer to make the light come from under the bridge. We will be treating the light on Clevedon Pier light in another layer.
Use your Brush Tool (B) and use these values to amplify the light in the center of the image:
- Master Diameter: 1000 px
- Opacity: 70%
- Flow: 30%
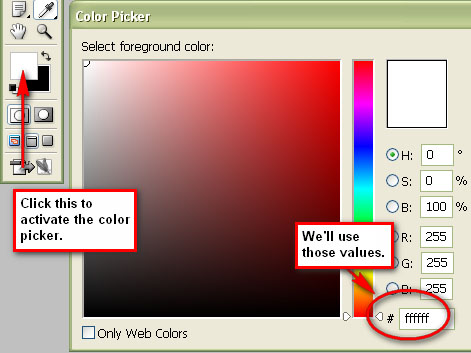
Make sure that you are using a white foreground color (#ffffff).
Now for the Clevedon Pier layer, let us create a new layer and name it “Light2“. Put it on top of the pier’s layer and set its values to:
- Master Diameter: 900 px
- Opacity: 30%
- Flow: 100%
Brush it on the same spot as we did in the “Light” layer.
To further enhance that light, we will be using the Dodge Tool (O) to brighten up parts of the pier that will be hit by the light.
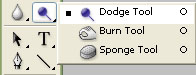
Set the Dodge Tool’s options to:
- Master Diameter: 400 px
- Range: Midtones
- Opacity: 18%
Use the Dodge Tool to paint light on the part of the bridge where our light is.
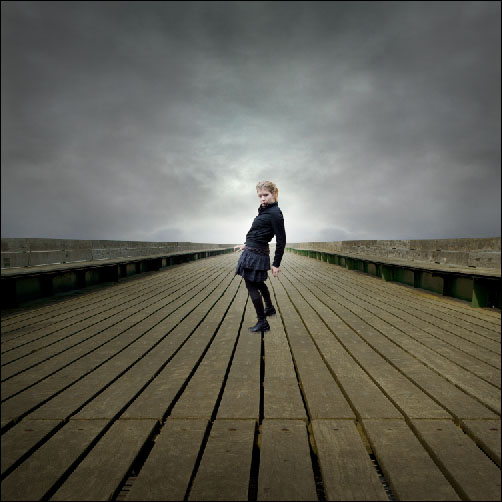
Step 6: Place the model
Now we will be incorporating our subject. Download and open the New Boots. Side pose stock photo in Photoshop.
(Update: This stock photo is no longer available. See explanation in the comments.)
Isolate the subject from its background using the Polygonal Lasso Tool.
After you’ve separated the subject from its background, use the Move Tool (V) to move the selected subject to our main canvas, just like with the other stock photos.
Use the Free Transform command (Ctrl/Cmd + T) to the size the subject as shown in the image below.
Step 7: Putting the TV on the subject’s head
Now that the model is all set in our scene, it’s time that we put the TV on her head. Download the Old Tv stock photo and drag it to our main canvas.
Position the TV on top of the subject’s head, making sure that the Old Tv layer is above our subject’s layer.
Notice that in the stock image, the background is a solid white.
You may use the Polygonal Lasso Tool, but I would recommend saving time and effort by using the Magic Wand Tool (W) to quickly select the white parts of the stock photo with a click of a button—you can activate the tool by pressing W.
With the Magic Wand Tool (W) chosen, left-click on the white area surrounding the TV. This will automatically select the white area. Just hit the Delete key to remove the white area around the TV.
Let us transform the TV to fit the girl’s head.
But before we do that, we need to erase the subject’s head using the Eraser Tool (E).
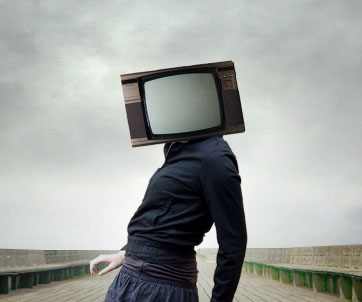
Step 8: Give the TV some white noise
A TV that is turned on is much better than a TV that is turned off. Therefore, we will put some white noise on it. Download and open the White Noise 2 stock image in Photoshop.
Move it to our main canvas, just like we’ve done with the other stock images. Scale and rotate the stock image using the Free Transform command (Ctrl/Cmd + T). The result should be similar to this:
To enhance the effect, you may want to brighten up the white noise by creating a new layer on top of it and use a white brush (#ffffff) on the center of the White Noise 2 image.
Step 9: Add shadows to the subject
Now it’s time to add shadows to our subject.
Note that the subject is positioned against the light, so we would have to darken the image a bit and create stronger shadows.
Let’s create a new layer and name it “Shadow“. Then let’s put that layer underneath the subject’s layer so the paint won’t smother the girl’s outfit.
Now, activate the Brush Tool (B). I used a variety of round brushes on this for two reasons.
The first reason is that a single brush throughout the whole process would make it more difficult because we’d have to erase the excess paint. The second is that it would be hard to spread paint accurately over a specific area with just one brush. So keep switching master diameters as you paint the shadows.
You can use any brush size as long as it makes a good shadow, although I would recommend using a brush size of 200 px, with the opacity around 18% and with the hardness set to 0%.
Paint the shadows as displayed below.
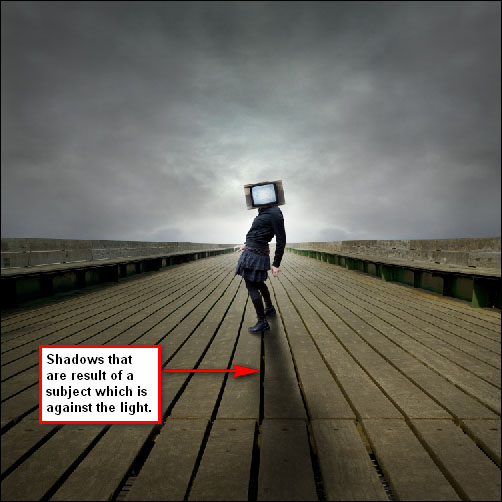
Note: we will not “burn” or darken the girl’s outfit yet because we will be using adjustment layers and filters to come up with that effect later down the process.
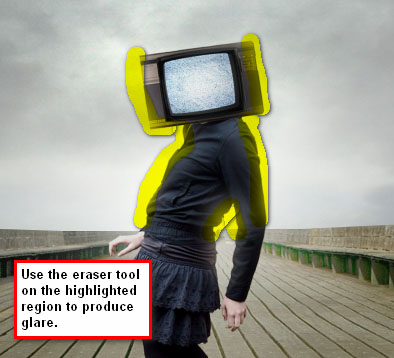
Step 10: Add a little glare
When a subject stands against the light, some details of that subject will be lost due to the intensity of that light—this is referred to as glare.
We will be adding a glare effect to our subject to make the lighting realistic in our photo manipulation.
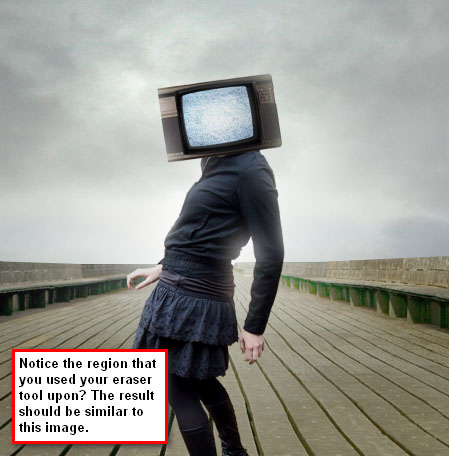
We’ll use the Eraser Tool (E) to add glare. Activate the Eraser Tool by pressing E, then erase the parts that are intensely hit by the light.
The result of using the Eraser Tool should be similar to this:
Step 11: Give the image a dark feel with fill layers
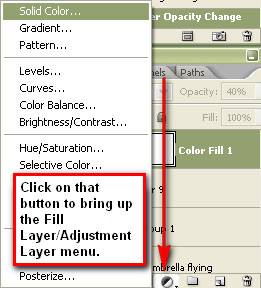
To give the image a dark and eerie tone, we’ll use fill layers to add some gloomy colors. Go to Layer > New Fill Layer> Solid Color or click on the Create new fill or layer adjustment button in the Layers Panel (as shown below) and choose Solid Color in the contextual menu that appears.
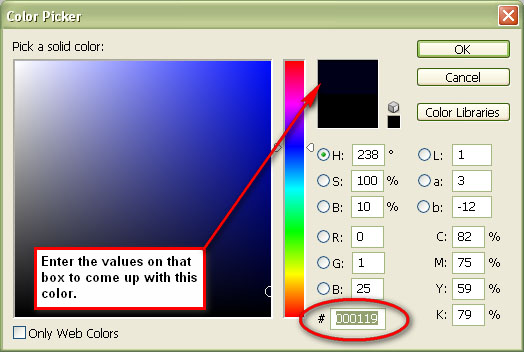
Use a very dark blue color (#000119) for the solid color fill.
The new fill layer will appear in our Layers Panel, showing the color of the fill layer that we’ve chosen.
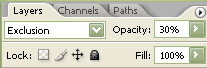
Notice that our scene has gotten a slightly yellow hue. We don’t want it that way, so let’s decrease the opacity of the fill layer to 30% and set its blending mode to Exclusion.
Create a new solid color fill layer again, but now use a brownish-orange color (#5c4011).
Set the blending mode of the new fill layer to Soft Light, and reduce the opacity to 70%.
Now we need to create a new adjustment layer to increase the image’s luminosity. Choose Layer > New Adjustment Layer > Gradient Map or click on the Create new fill or layer adjustment button in the Layers Panel (as shown below) and choose Gradient Map in the contextual menu.
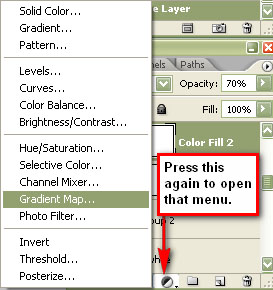
Use the Black, White gradient preset for the gradient map.
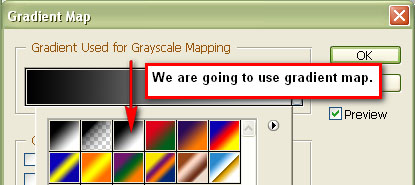
Then set the blending mode of the adjustment layer to Luminosity and bring the opacity down to 30%.
Step 12: Add a cool, atmospheric color using Curves
Now let’s give the image a cool atmospheric color using a Curves adjustment layer.
Choose Layer > New Adjustment Layer > Curves or click on the Create new fill or layer adjustment button in the Layers Panel (as shown below) and choose Curves.
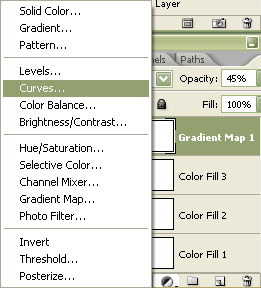
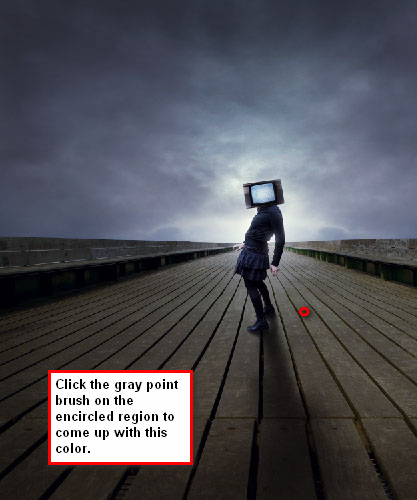
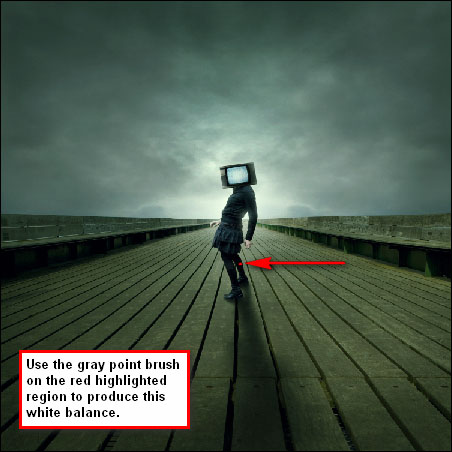
When the curves adjustment layer dialog window appears, click on the gray eyedropper, which will allow you to sample a part of the image to set the gray point of the curves. When you click on a specific part of the image using the gray point eyedropper, the image’s white balance will change. Take a sample somewhere on boardwalk right beside the subject.
Step 13: Give the composition a more somber feel
To give our scene a more somber feel, we need to use a cool color over the image.
Let’s create another adjustment layer: Photo Filter. Click on the Create new fill or layer adjustment button in the Layers Panel (as shown below) and choose Photo Filter.
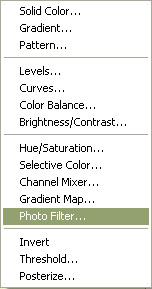
Once the Photo Filter dialog window opens, choose Deep Emerald in the pull-down menu for Filter.
Make sure that the filter’s density is set at 25% and that the Preserve Luminosity option is checked.
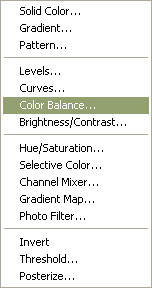
Now adjust the color balance of the photo to come up with our intended atmosphere. We’ll do this with yet another adjustment layer: Color Balance.
Like before, click on the Create new fill or layer adjustment button in the Layers Panel (as shown below) and choose Color Balance.
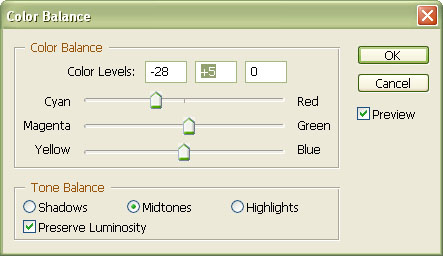
Use the settings shown below for the Color Balance adjustment layer:
Guess what? We’ll be adding another Curves adjustment layer to give the image a cooler white balance. Just like before, choose Layer > New Adjustment Layer > Curves or click on the Create new fill or layer adjustment button in the Layers Panel (as shown below) and choose Curves.
Use the gray point sampler and click on the leg of our subject to get a sample.
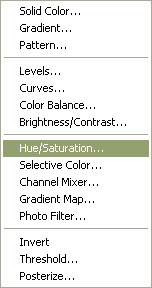
Step 14: Adjust the saturation
We will be adjusting the saturation to make the image look gray and less greenish. Create a new adjustment layer and pick the Hue/Saturation from the menu. Set the option values of the Hue/Saturation adjustment layer to:
- Edit: Master
- Hue: 0
- Saturation: -17
- Lightness: 0
Step 15: Adjust the contrast
We’re getting close to the finish line! Let’s increase the contrast of our scene. Choose Image > Adjustments > Brightness/Contrast or click on the Create new fill or layer adjustment button in the Layers Panel (as shown below) and choose Brightness/Contrast.
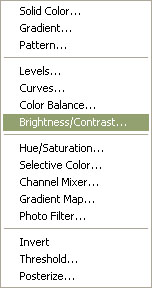
Once in the Brightness/Contrast dialog window, set Contrast to +10.
Step 16: Sharpen the composition
You can sharpen and bring out more details in your composition by going to Filter > Sharpen > Smart Sharpen.
Set the values of the Smart Sharpen filter to:
- Amount: 125%
- Radius: 1.0
- Remove: Gaussian Blur
And also, check the More Accurate box.
Tips for saving your work
I would recommend saving the file to a PSD first before you save it to another format so that you can make changes in the future.

After you’ve done that, flatten the image by right-clicking on any layer and choosing Flatten Image.
You may also consider saving it as a layered TIFF before flattening it, which allows for some quick changes like adjustment layers and fill layers without reducing the quality of the composition.
You can view cracks in the image through the Histogram.
Conclusion
In this tutorial, I walked you through how to create a mysterious and eerie-themed photocomposition using several stock images. We processed these images and blended them together using several techniques. We adjusted the mood of the scene using adjustment and fill layers, and used the Eraser Tool in several places to create a faux glare.
We also created a faux GND effect using Photoshop’s powerful tool. I also briefly touched upon some tips for saving your work in order to be able to edit and preserve its quality.
If you enjoyed the tutorial, followed along with it and/or were inspired by it, please let us see your awesome work in the Design Instruct Flickr group pool!
Download Source Files
- mysterious_tv_head (ZIP, 67.7 MB)
-
 Trevin serves as the VP of Marketing at WebFX. He has worked on over 450 marketing campaigns and has been building websites for over 25 years. His work has been featured by Search Engine Land, USA Today, Fast Company and Inc.
 -

WebFX is a full-service marketing agency with 1,100+ client reviews and a 4.9-star rating on Clutch! Find out how our expert team and revenue-accelerating tech can drive results for you! Learn more
Make estimating web design costs easy
Website design costs can be tricky to nail down. Get an instant estimate for a custom web design with our free website design cost calculator!
Try Our Free Web Design Cost Calculator
Table of Contents
- Preview
- Resources
- Step 1: Create a New File
- Step 2: Create the Sky
- Step 3: Retouch the Sky to Make It Look More Tempestuous
- Step 4: Create the Foreground
- Step 5: Fix the Viewer’s Focus
- Step 6: Place the Model
- Step 7: Putting the TV on the Subject’s Head
- Step 8: Give the TV Some White Noise
- Step 9: Add Shadows to the Subject
- Step 10: Add a Little Glare
- Step 11: Give the Image a Dark Feel with Fill Layers
- Step 12: Add a Cool, Atmospheric Color Using Curves
- Step 13: Give the Composition a More Somber Feel
- Step 14: Adjust the Saturation
- Step 15: Adjust the Contrast
- Step 16: Sharpen the Composition
- Tips for Saving Your Work
- Conclusion
- Download Source Files
Share this article


Web Design Calculator
Use our free tool to get a free, instant quote in under 60 seconds.
View Web Design CalculatorMake estimating web design costs easy
Website design costs can be tricky to nail down. Get an instant estimate for a custom web design with our free website design cost calculator!
Try Our Free Web Design Cost Calculator


