
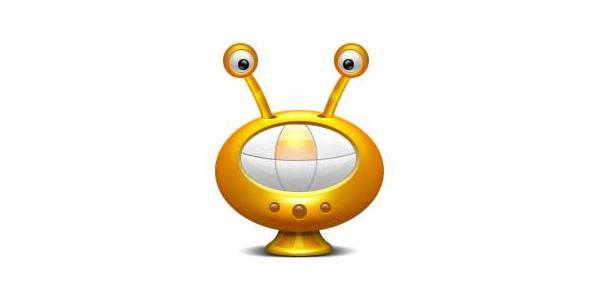
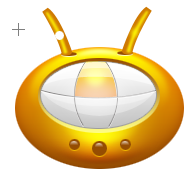
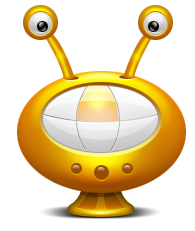
Preview
Step 1: Setting Up the Photoshop Document
Open up Photoshop. Create a new document (Ctrl/Cmd + N or File > New) with Width and Height of 400 px. Keep the Color Mode as RGB Color, 8 bit.

Step 2: Creating the Body
Create a new layer (Ctrl/Cmd + Shift + N or Layer > New Layer) – you may want to name this layer as “Body”.
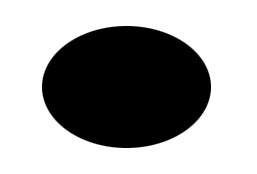
Create an ellipse shape using the Ellipse Tool (U).
You may also use the Elliptical Marquee Tool (M) or the Pen Tool (P) depending on what you are more comfortable with.
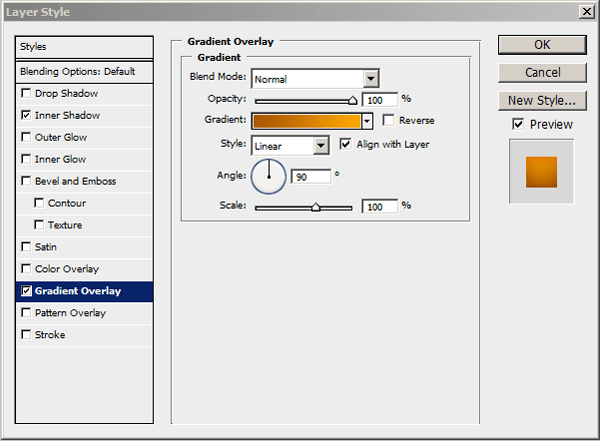
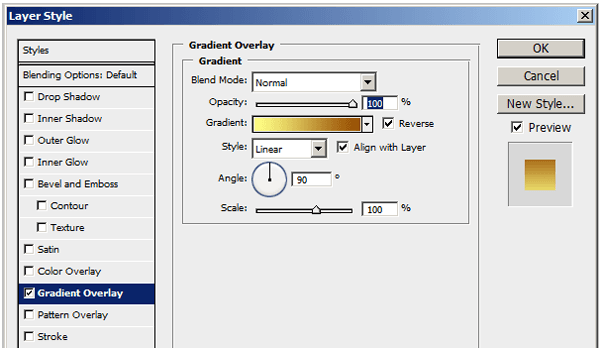
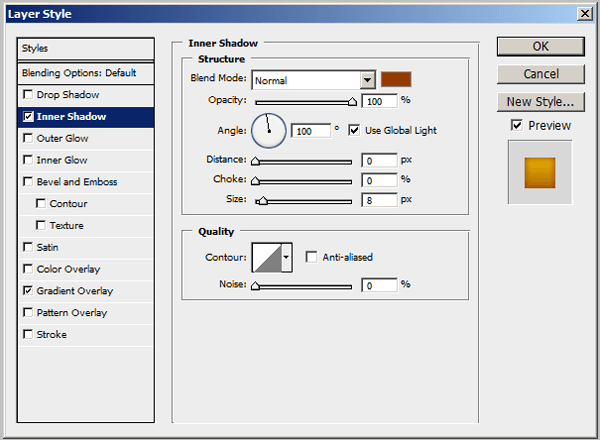
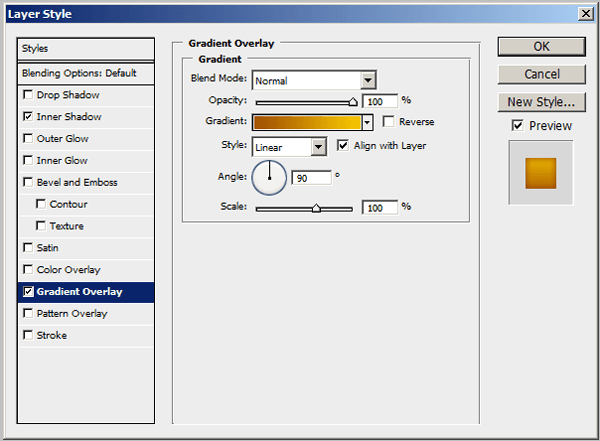
Next, double-click on this layer in the Layers Panel to bring up the Layer Style dialog window. We will apply a Gradient Overlay and an Inner Shadow layer style to give the body its color and beveled shape.
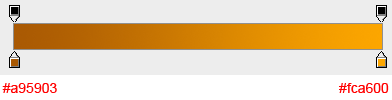
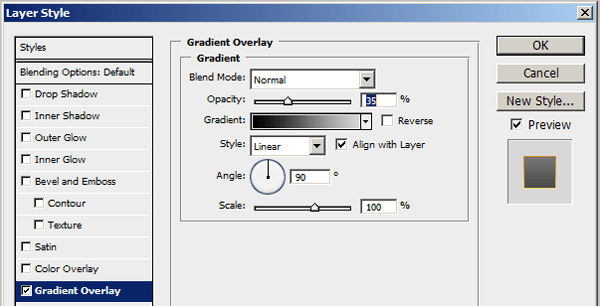
Gradient Overlay
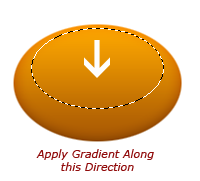
Set the left color stop to a brown color (#a95903) and the right color stop to a yellow color (#fca600).
Inner Shadow
The color of the inner shadow should be black (#000000).
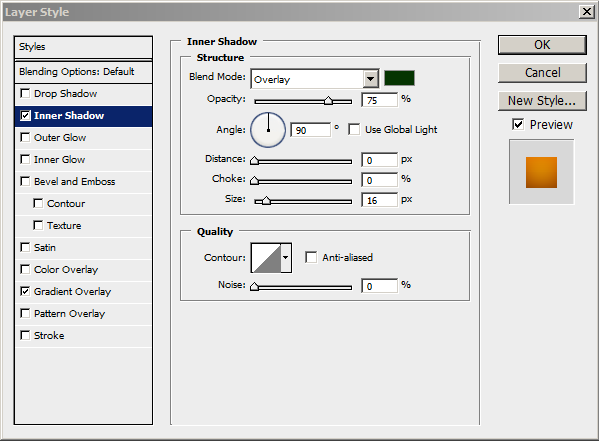
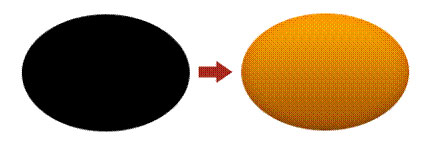
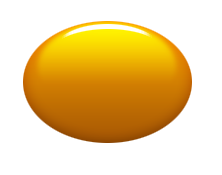
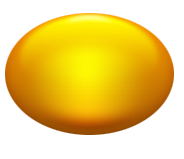
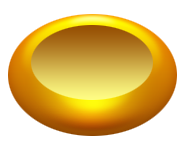
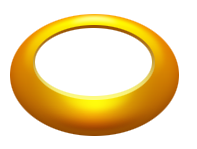
The above two layer styles add the desired effect to the flat shape.
Step 3: Shading the Body
Create a new layer (Ctrl/Cmd + Shift + N) – you may name this layer as “Body-shade.”
Create an elliptical selection using the Elliptical Marquee Tool (M).
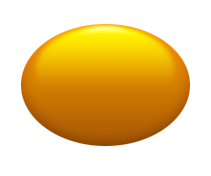
Set your Foreground color to white (#ffffff). Apply a white to transparent gradient to it using the Gradient Tool (G), starting from top to bottom of the elliptical marquee selection.

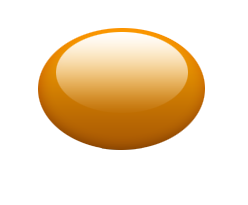
Now apply Filter > Blur > Gaussian Blur to the “Body-shade” layer with Radius set at around 3 px to 4 px.
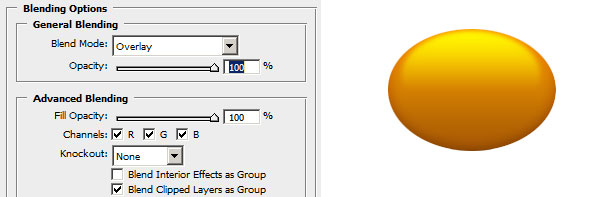
Double-click on the layer in the Layers Panel to open up the Layer Styles dialog window (right-clicking on it and choosing Blending Options from the menu that appears works too).
In the Blending Options section, under General Blending, set Blend Mode to Overlay.
Now apply a Gaussian Blur filter on the layer with Radius between 1.5 to 2 px.
Afterwards, duplicate the layer by pressing Ctrl/Cmd + J while it is the active layer in the Layers Panel — doing that will duplicate the layer on top of it.
Name the duplicated layer as “Shade-adv” and set the Blend Mode to Overlay.
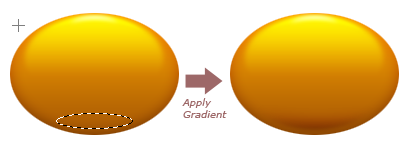
Make a smaller elliptical selection towards the bottom center of the body and then create a new layer (name it “bottom-shade”).
Set your Foreground color to black (#000000). On the newly created layer, use the Gradient Tool (G) with the Gradient set to the Foreground to Transparent gradient preset to apply a color gradient from the bottom to the top of the selection.
Create a new layer called “bulge.” Use the Elliptical Marquee Tool (M) to create an elliptical selection towards the center of the body.
Set your Foreground color to white (#ffffff). Then use the Gradient Tool (G) with the Gradient set to the Foreground to Transparent preset and with the Gradient Type option set to Reflected Gradient to apply a color gradient from the left to the right of your elliptical selection.

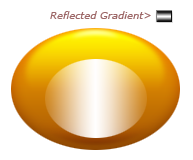
Next, apply a Gaussian Blur filter on this layer with Radius set at about 5 px and then switch the Blend Mode of the layer to Overlay.
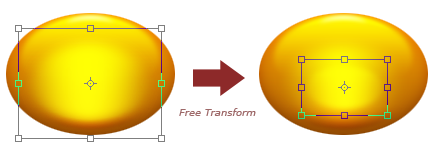
Duplicate the “bulge” layer and then use the Free Transform command Edit > Free Transform (Ctrl/Cmd + T) to reduce its size.
Step 4: Creating the Mouth
Create a new layer called “teeth-bevel” and make an elliptical selection that will represent the mouth of our yellow alien.
Fill (Shift + F5 or Edit > Fill) this elliptical selection with white (#ffffff).
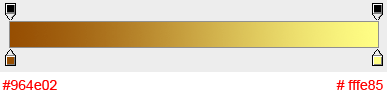
Apply a vertical Gradient Overlay layer style on the “teeth-bevel” layer with a brown color (#964e02) for the left color stop and a yellow color (#fffe85) for the right color stop.
Check the Reverse option to flip the color gradient as needed.
Now, use the Magic Wand Tool (W) in the Tools Panel to select the above ellipse automatically — just click inside the shape with the Magic Wand Tool.
With the Magic Wand Tool selection around the mouth of our alien still selected, go to Select > Modify > Contract and contact the selection by 2 px.
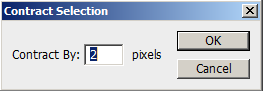
Keeping the selection active, create a new layer (name it “teeth”) and fill the contracted selection with white using Edit > Fill (Shift + F5).
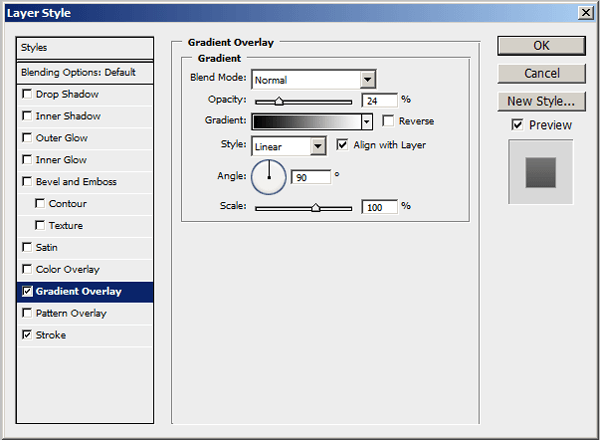
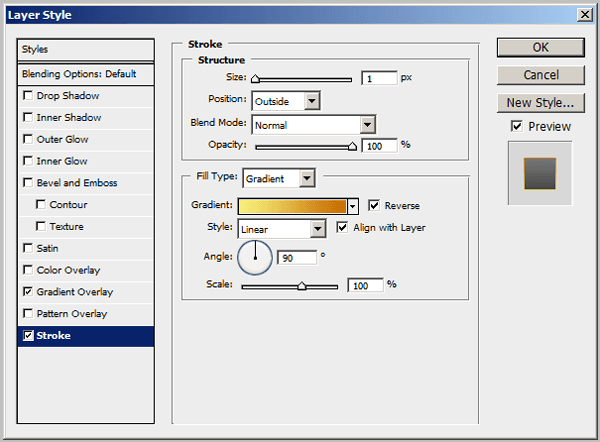
Next, apply a Gradient Overlay and a Stroke layer style.
Gradient Overlay
Use the default Black to White gradient.
Stroke
Set the color of the stroke to a gray color (#9c9c9c).
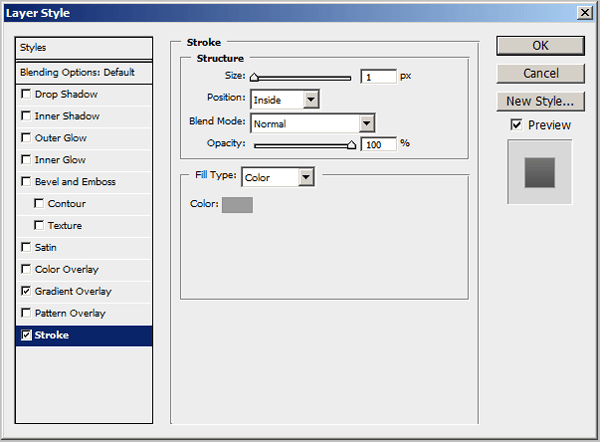
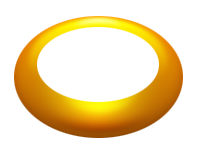
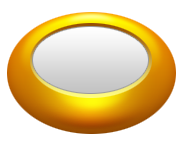
This should give our alien’s mouth a nice shape.
Step 5: Drawing the Teeth
Before proceeding to the next task, make sure you have set your Brush options for the Brush Tool (B) set as shown in the following images.
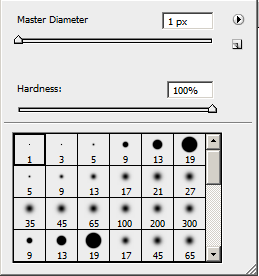
![]()
Once you are done setting the above settings, create a vertical, curved path on the left of the mouth using the Pen Tool.
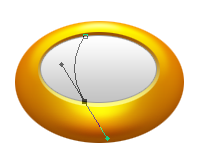
Create a new layer called “tooth-border,” right-click on the path in your canvas, and in the contextual menu that appears, pick Stroke Path to apply a stroke on your path. The stroke will embody the options you set up with the Brush Tool just previously.
Note: Unless you create a new layer after drawing a path, the Stroke Path option won’t appear.
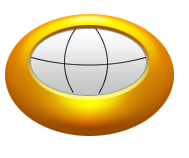
Create more stroked paths to shape the teeth of our yellow alien.
Tip: You can remove/hide a path you just made by pressing the Esc key with the Pen Tool still active.
You can merge these black strokes if you created them in separate layers by selecting the layers in the Layers Panel, right-clicking on them and thereafter merging the layers by selecting Merge Layers in the contextual menu that appears; Alternatively, you can also press Ctrl/Cmd + E with them selected to merge them into one layer. Name this layer as “tooth-separator.”
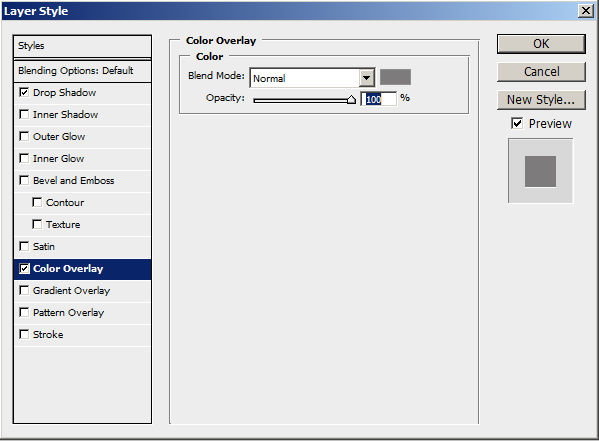
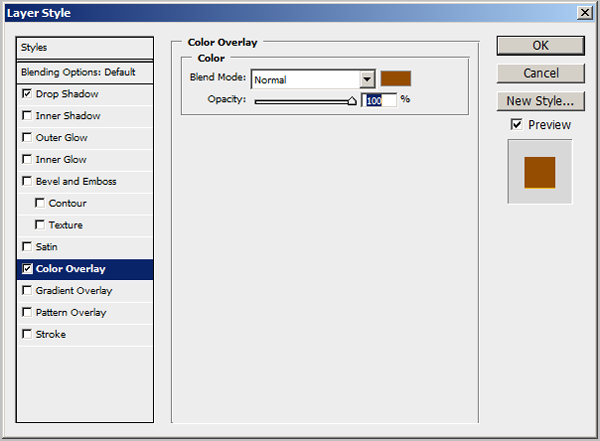
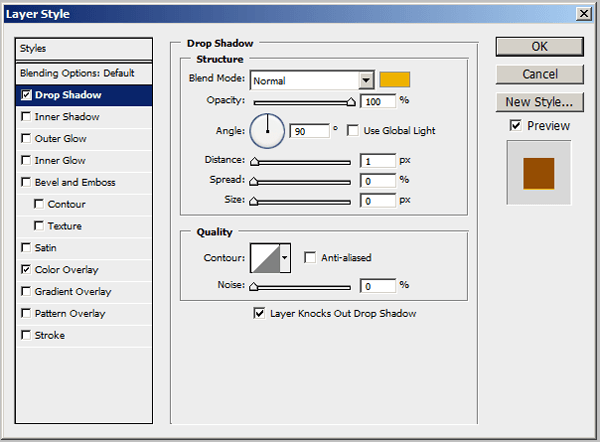
Next, we will apply a Color Overlay and Drop Shadow layer style on the “tooth-separator” layer.
Color Overlay
Use a gray color (#7d7b7b) for the color overlay.
Drop Shadow
Set the color for the drop shadow to white (#ffffff).
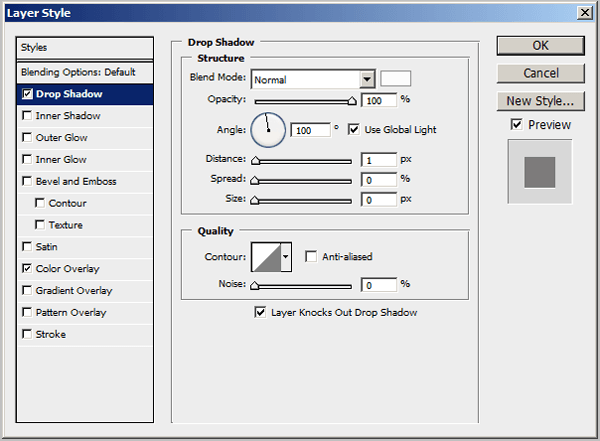
These layer styles give the separators a nice inset/depressed effect.
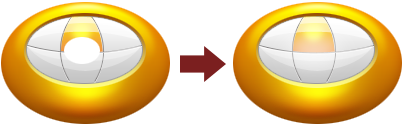
Now create a layer just below the “tooth-separator” layer and name it “yellow-tooth.”
On the “yellow-tooth” layer, create a shape using the Pen Tool (P) or Polygonal Lasso Tool (L) that covers the top middle tooth.
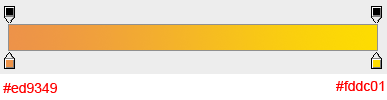
Fill the selection/shape with any color and apply a Gradient Overlay layer style to it.
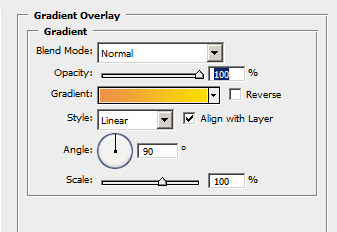
The gradient color is a peach color (#ed9349) for the left color stop and a bright yellow (#fddc01) for the right color stop.
Now create a new layer called “tooth-glow” and make a white circle on the center of the yellow tooth using the Elliptical Marquee Tool (M) and filling the selection with white (#ffffff).
Then apply a Gaussian Blur filter on it with Radius at about 5 px and also set the Blend Mode of the layer to Overlay.
Step 6: Give the Teeth Some Shiny Details
Create a new layer called “teeth-shine.” Make a white moon shape using the Pen Tool (P) or the appropriate lasso tool (L).
Fill this moon shape with white.
After filling the shape, set the Opacity of the layer to 33%.
Now create a new layer named “teeth-xtrashine.” Create an extra layer of shine using the same method as above, giving us an effect of depth.
Similar procedures can be applied to the upper teeth.
Create a new layer named “masterglow” and make a white ellipse on the center of the mouth of our alien.
Use a Gaussian Blur filter with Radius at 7.5 px on the white ellipse shape. Afterwards, set the Opacity of the layer to around 65%.
Step 7: Creating Switches
Since our yellow alien is sort of like a robot, we’ll create switches and controls on its body. Create a new layer named “switches” and make a set of round shapes towards the bottom of the body.
The colors of the round shapes don’t matter because we will set the color with layer styles.
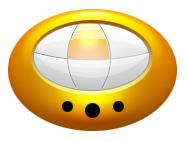
To color and style our switches, apply a Color Overlay and Drop Shadow layer style to their layer.
Color Overlay
Use a brown color for the color overlay (#954d02).
Drop Shadow
Use a yellow-colored (#eeb201) drop shadow.
Applying those two styles will result in switches that look like they are recessed.
On a new layer called “buttongloss,” create small, elliptical selections like we’ve done for the body at the top of each switch and then apply a white to transparent vertical gradient on each elliptical selection.

Step 8: Creating Antennas
First, create the sockets of the antennas by drawing an ellipse on the left and right top side of the body.
Apply the same Color Overlay and Drop Shadow layer styles to these sockets – the only difference is that the drop shadow’s color is white (#ffffff) and not yellow. Name this layer as “antenna-apertures.”
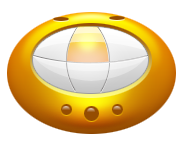
Create an antenna-like tube using the Pen Tool (P) on a new layer named “antenna.”
Give the antenna-like tube a Color Overlay layer style, with the Color set at a dark yellow/brownish color (#ce7902).
Create a new layer called “antenna-shade” and then make a white shape at the left of the antenna to represent a shading effect.
Apply a Gaussian Blur filter on the “antenna-shade” layer with a Radius of 1 px and then set the Blend Mode of this layer to Overlay.
Now select both the “antenna” and “antenna-shade” layers in the Layers Panel and duplicate them by right-clicking on them and choosing Duplicate Layers in the menu that appears.
With the duplicated layers still selected in the Layers Panel, apply Edit > Transform > Flip Horizontal.
Use the Move Tool (V) to move the duplicated antenna layers to the right socket.

Now, add a little glow to the antennae tubes to give them added detail. This can be achieved by making white circles in a new layer (name the layer “antenna-shine”), applying a Gaussian Blur filter with Radius of 1 px and setting the layer’s Blend Mode to Overlay.
Do this for both antennas.
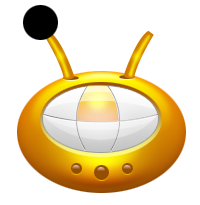
Create a new layer group in the Layers Panel by clicking on the Create a new group icon at the bottom of the Panel. Double-click this new group to rename it as “Body.” Drag all the layers created until now except the Background layer into this group. Then hide the contents of this group (for now).
![]()
Step 9: Creating Eyes
Create a new layer on top of the “Body” layer group by hitting Ctrl/Cmd + Shift + N or going to Layer > New Layer.
Name this new layer as “eye-base.”
Create a circle at the top of the left antenna to represent the alien’s eyes. The color doesn’t matter since we will use layer styles to change its look next.
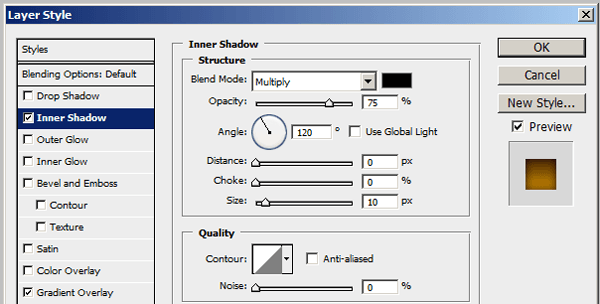
Apply an Inner Shadow and Gradient Overlay to the “eye-base” layer.
Inner Shadow
Use a brown color (#933d04) for the color of the inner shadow.
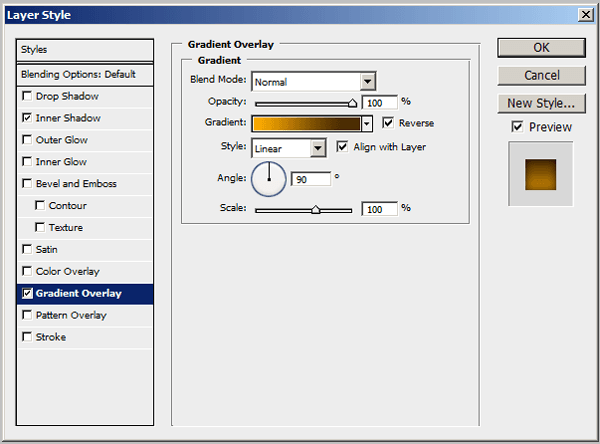
Gradient Overlay
Use a tan/brown color (#a35303) for the left color stop and a yellow color (#f6c601) for the right one.

These two styles give our “eye-base” layer a nice, rounded metallic effect.

Just like in previous procedures, apply a gloss to the top right of the “eye-base” layer by making a new layer named “eye-gloss,” creating an ellipse with a white to transparent gradient from top to bottom, applying a Gaussian Blur filter with Radius at 1 px, and setting the Blend Mode to Overlay.

Create a new layer for another gloss at the bottom of the eye-base and use the same process.

Step 10: Create the Eyeball
Create a new layer called “eyeball” and draw a white circle in the center of the eye-base.

Give the eyeball two layer styles: a Gradient Overlay and a Stroke.
Gradient Overlay
Give the “eyeball” layer a black (#000000)/gray (#d7d4d4) gradient overlay layer style.

Stroke
Give the eyeball a stroke that has a Gradient Fill Type. The gradient should be a dark yellow/brown color (#c86d01) on the left color stop and a yellow (#f7ef78) on the right color stop.

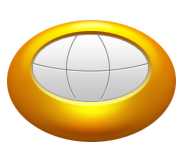
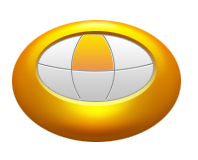
Our eyeball should now look styled as if it was on a lower plane than the “eye-base” layer.

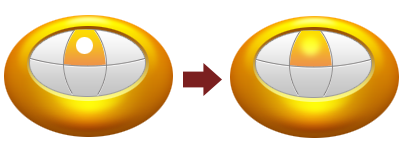
We’ll now apply a “gloss” on the eyeball.
Create a new layer called “gloss-top” and make an elliptical selection on it towards the top of the eyeball. Apply a white to transparent gradient on it from top to bottom.
![]()
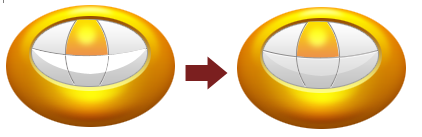
Create a new layer called “gloss-bot” for the bottom eyeball gloss. Make a tiny white moonlike shape at the bottom of the eyeball.
![]()
Set the layer’s Opacity to around 40-50%.

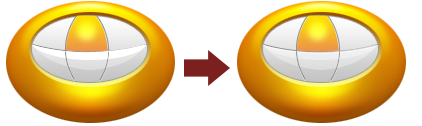
Step 11: Create the Pupil
Create a new layer called “black” and make a black circle inside the eyeball to represent the pupil of the eye.

Use a white to transparent gradient in a new layer called “black-gloss” in a similar fashion as with the gloss of the eyeball, as described before.

Step 12: Duplicate the Left Eye
Create a new group and drag all the eye-related layers into this group.
Name this group as “eyes.”
![]()
Duplicate this group by right-clicking on it in the Layers Panel and choosing Duplicate Group in the menu that appears.
Flip the duplicated eye group horizontally by going to Edit > Transform > Flip Horizontal.
Hit V on your keyboard or pick the Move Tool (V) from the Tools Panel to move the right eye on top of the right antenna.
Step 13: Creating the Base
Create a new layer on top of the Background layer.
![]()
Name the layer as “limb-base” and create a shape that serves as the base of the alien.

Give this shape two layer styles: a Gradient Overlay and an Inner Shadow.
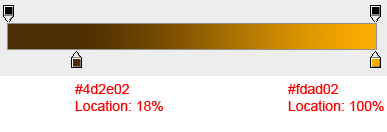
Gradient Overlay
Use a dark brown color (#4d2e02) for the left color stop and move the color stop to Location 18% and a yellow color (#fdad02) for the right one (keeping it at Location 100%).
Inner Shadow
Use black (#000000) as the color of the inner shadow.
Your base should now match the body of the yellow alien.

Step 14: Give the Base Some Details
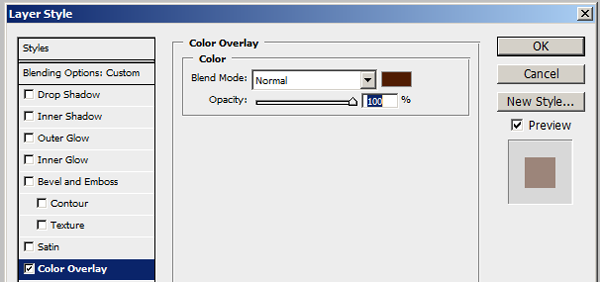
Create a new layer called “body-shadow” and make a black shape that represents the shadow that the body is casting onto the base.

Change the color by giving the layer a Color Overlay layer style of brown (#501c02).
The shadow should now look less harsh/prominent with the color change.
![]()
Next, we’ll give the base a gloss. Create a white shape on a new layer called “limb-glow,” apply a Gaussian Blur filter with Radius of 1 px, change the layer’s Blend Mode to Overlay, and duplicate the layer (Ctrl/Cmd + J).

To further add some details on the base, create a new layer called “nail” and make a black-colored strip on the left of the base.
![]()
Give the strip a drop shadow, with the color of the shadow as white (#ffffff).

The drop shadow layer style should look like a solid white border on its right.
![]()
Convert the strip into a smart object by first making sure that it is still the active layer in the Layers Panel and then choosing Layer > Convert to Smart Object.
Next, set the Blend Mode of the layer to Overlay and lower the Opacity to 29%.

To create the strip for the right side, duplicate this layer and flip it horizontally (Edit > Transform > Flip Horizontal), and then move it with the Move Tool (V) such that a symmetrical look is obtained.
![]()
Create a new white moonlike shape in a new layer called “limb-glow2” at the bottom of the two strips, give it a Gaussian Blur filter with Radius of 1.5 px, and set the “limb-glow2” layer’s Blend Mode to Overlay.
![]()
Create a new layer group named “limb” and drag every related layer into it.
Step 15: Give the Floor a Shadow
Above the Background layer and below the “limb” layer group, create a new layer named “supershadow” that will contain the shadow that the alien is casting on the floor.
On the “supershadow” layer, make a black ellipse shape at the bottom at of the alien’s base.
![]()
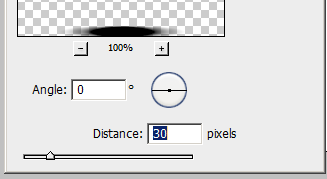
Now apply Filter > Blur > Motion Blur with Distance at 30 px and Angle at 0o.
Set the layer’s Opacity to around 50-65%.
Step 16: Final Details and Shading
Don’t you think our alien still lacks a punch? Yes, we need to add some more minor shadings to have it looking the way we want it.
Note: The preceding layers should be on top of the “eyes” layer group.
Create a new layer called “limb-ultrashine” and make a white ellipse on top of the base.
Apply the Gaussian Blur filter with Radius between 2 to 3 px on it and switch the Blend Mode to Overlay.
![]()
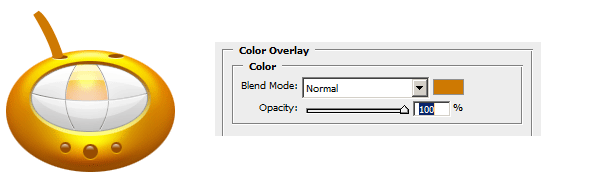
The teeth occupy a major part of its body. So they need it to be distinguished.
Duplicate the “tooth-separator” layer and remove the Drop Shadow layer style on the duplicated layer.

Create a new layer called “full-glow” and make a white ellipse at the bottom center of our alien’s teeth, overlapping onto the body. Apply a Gaussian Blur filter with 3 px Radius.
Afterwards, create an elliptical selection that excludes the bottom part of the “full-glow” shape and then hit Delete (or go to Edit > Clear) to remove the top part of the glow.

Create a new layer called “add-glow” and make a white circle at the bottom of the antenna, by the antenna socket.

Apply a Gaussian Blur filter with a Radius between 1 to 1.5 px.

Next, create a new layer called “teeth-shadow2”, make an elliptical marquee selection of the same size as the teeth and then apply a black to transparent color gradient from the bottom of the ellipse to its center using the Gradient Tool (G).
Finally, double-click this layer to bring about the Layer Style dialog window.
Give it a Color Overlay layer style using a brown color (#aaa9a9).

Tutorial Summary
In this Adobe Photoshop icon design tutorial, I walked you through the process of creating a highly detailed yellow alien icon that embodies metallic and robotic properties. We spent a lot of time with the details by adding glows, shading, and lighting effects on different components of the icon. I hope you learned a few tricks from this tutorial!
Download Tutorial Source Files
- yellow_alien_icon (ZIP, 0.01 MB)
-
 Trevin serves as the VP of Marketing at WebFX. He has worked on over 450 marketing campaigns and has been building websites for over 25 years. His work has been featured by Search Engine Land, USA Today, Fast Company and Inc.
 -

WebFX is a full-service marketing agency with 1,100+ client reviews and a 4.9-star rating on Clutch! Find out how our expert team and revenue-accelerating tech can drive results for you! Learn more
Make estimating web design costs easy
Website design costs can be tricky to nail down. Get an instant estimate for a custom web design with our free website design cost calculator!
Try Our Free Web Design Cost Calculator
Table of Contents
- Preview
- Step 1: Setting Up the Photoshop Document
- Step 2: Creating the Body
- Step 3: Shading the Body
- Step 4: Creating the Mouth
- Step 5: Drawing the Teeth
- Step 6: Give the Teeth Some Shiny Details
- Step 7: Creating Switches
- Step 8: Creating Antennas
- Step 9: Creating Eyes
- Step 10: Create the Eyeball
- Step 11: Create the Pupil
- Step 12: Duplicate the Left Eye
- Step 13: Creating the Base
- Step 14: Give the Base Some Details
- Step 15: Give the Floor a Shadow
- Step 16: Final Details and Shading
- Tutorial Summary
- Download Tutorial Source Files
Share this article


Web Design Calculator
Use our free tool to get a free, instant quote in under 60 seconds.
View Web Design CalculatorMake estimating web design costs easy
Website design costs can be tricky to nail down. Get an instant estimate for a custom web design with our free website design cost calculator!
Try Our Free Web Design Cost Calculator


