
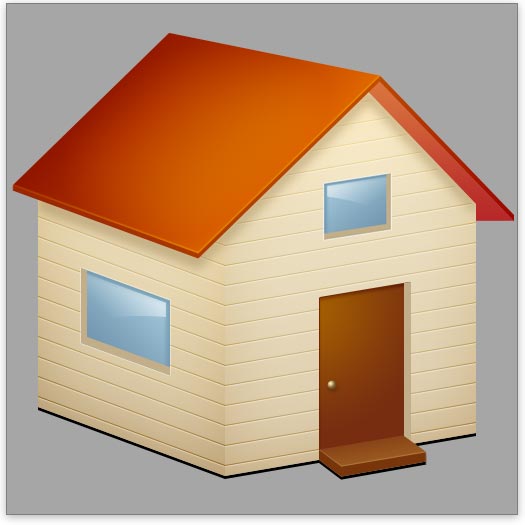
Preview
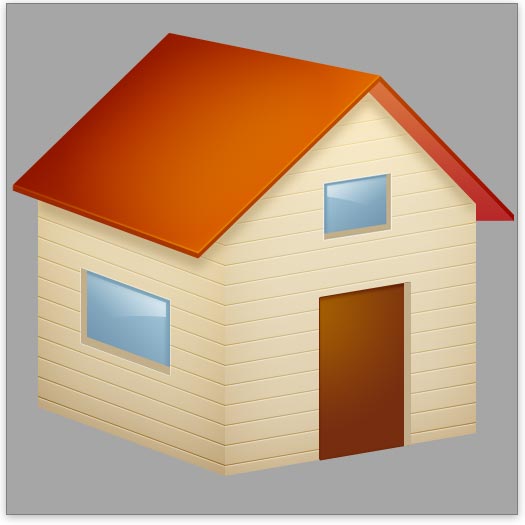
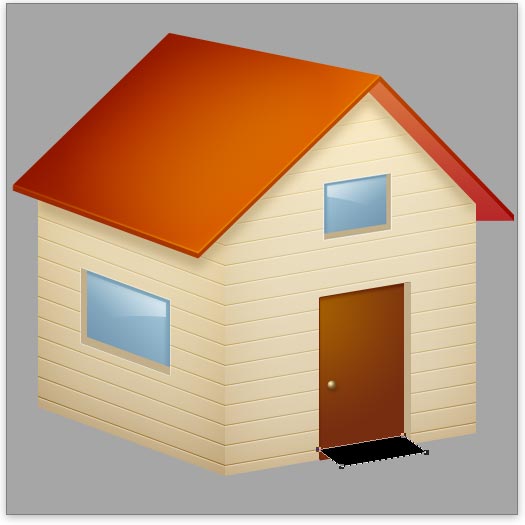
Here is a preview of what we will be making in this tutorial.

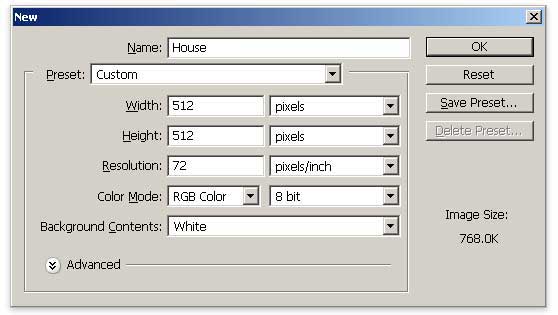
Step 1: Set up the Photoshop document
Create a new 512px by 512px canvas. Fill the Background layer with a shade of grey (#A6A6A6) or any color that will make it easier to see our work. The color you use is unimportant and can be changed later on (or removed).
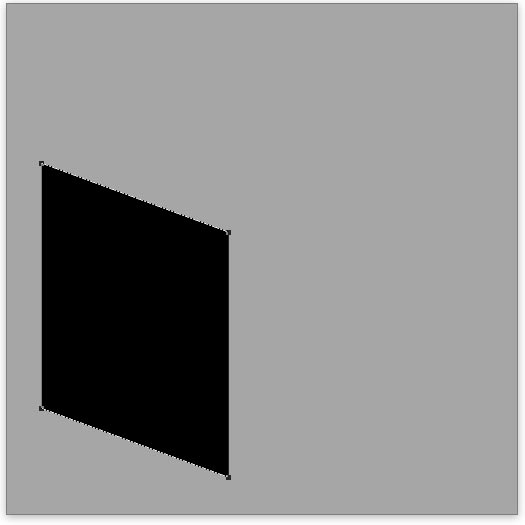
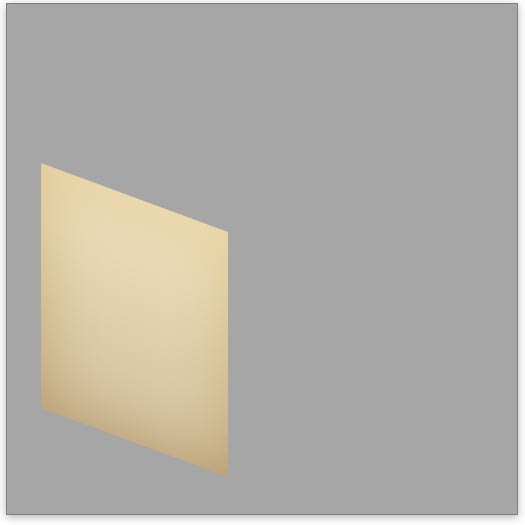
Step 2: Draw the left wall of the house
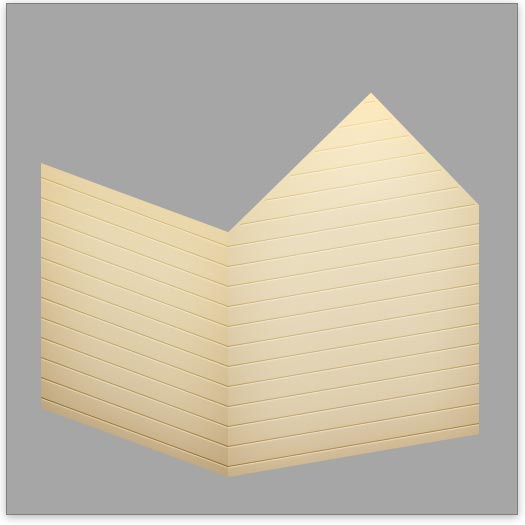
Select the Pen Tool (P) and draw a shape as shown below.
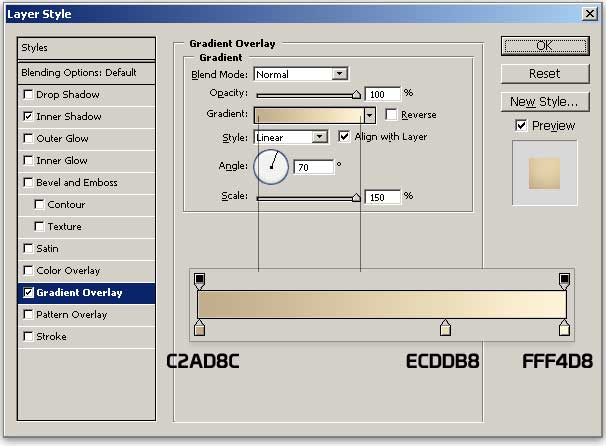
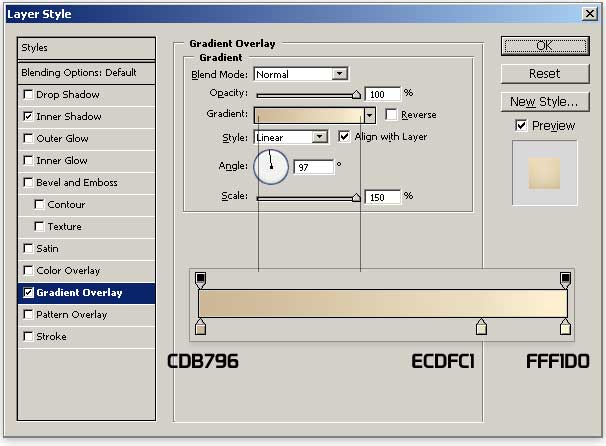
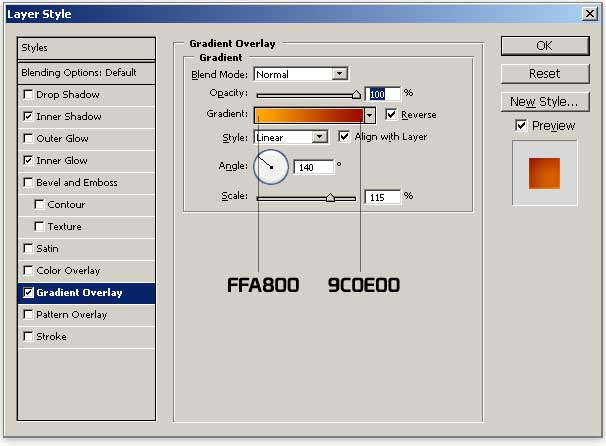
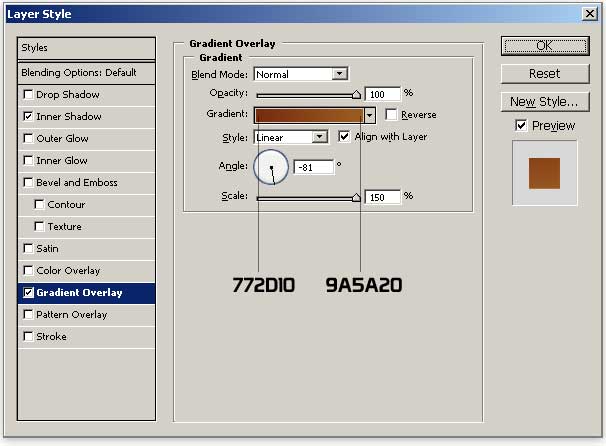
Apply a Gradient Overlay on the wall to give it color.
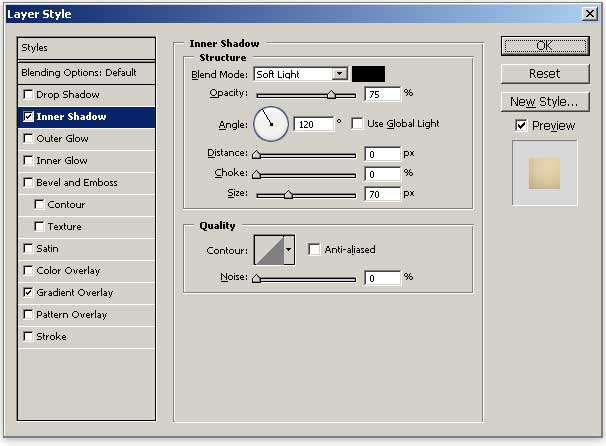
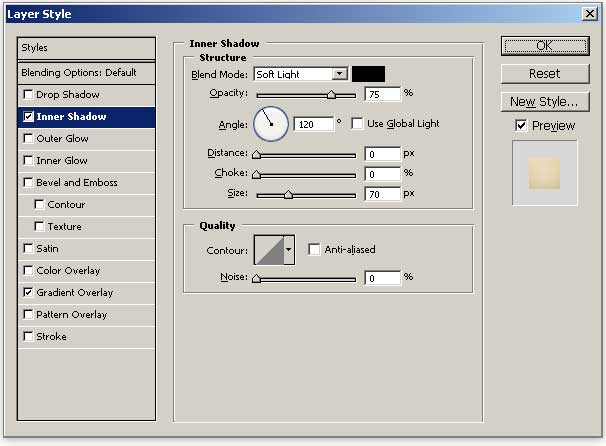
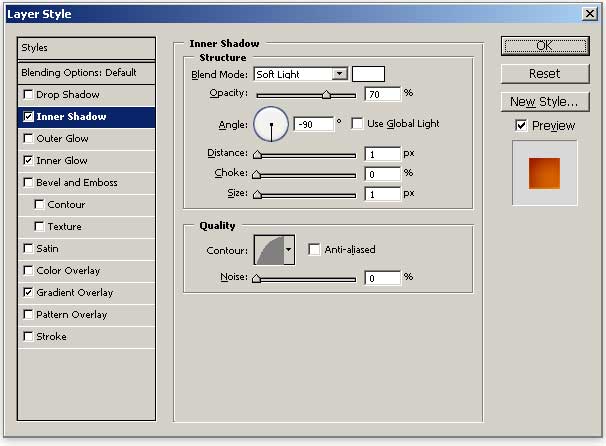
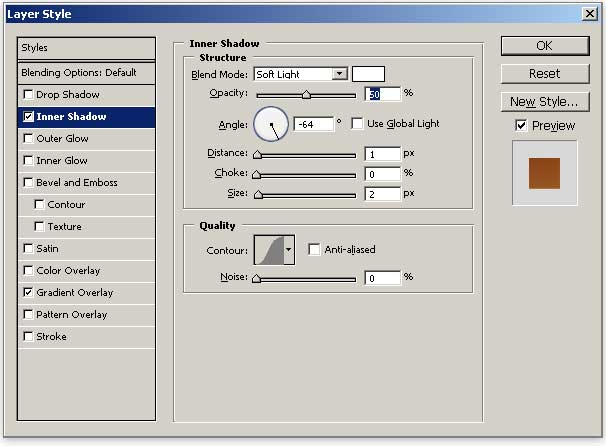
Give the shape layer an Inner Shadow layer style to give the wall some depth.
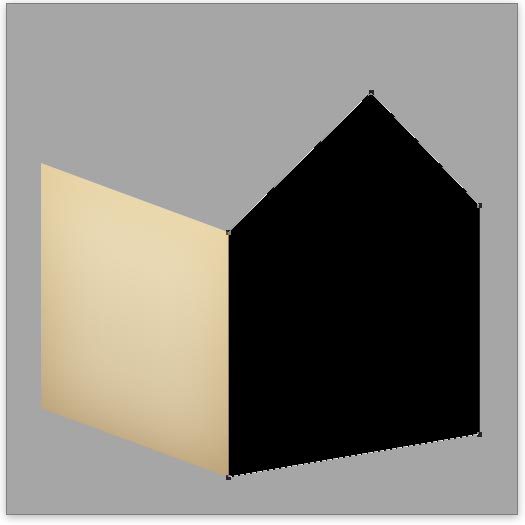
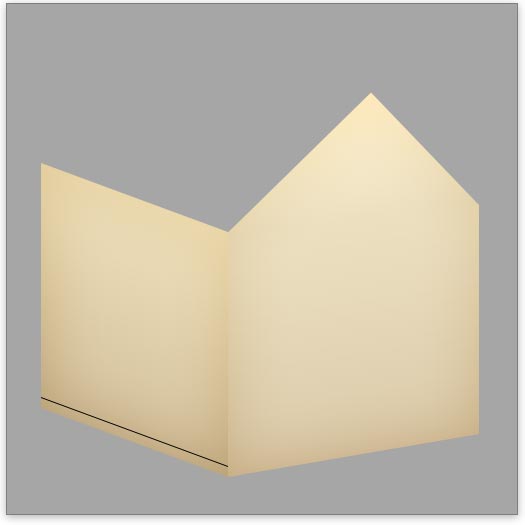
Step 3: Draw the front of the house
Using the Pen Tool (P), draw another shape that represents the front side of our house.
Similar to the preceding step, apply a Gradient Overlay onto the front on the shape layer to give it the color we need.
Also like the left wall, give this current shape an Inner Shadow.

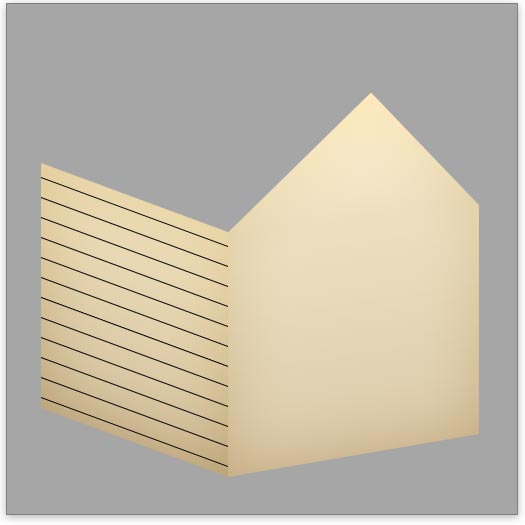
Step 4: Create the side panels
To give our icon design a nice detail, we will add side panels on the house.
To start, create a new layer and then Ctrl/Cmd + click on the left wall’s shape layer to load a selection around it.
Move the selection 10px up and fill it with black (#000000).
With the selection still loaded, press the Up arrow key once and hit Delete. This will leave us with a 1px line.
Make more strips on the same layer vertically upward and equally spaced from one another (about 20px apart).
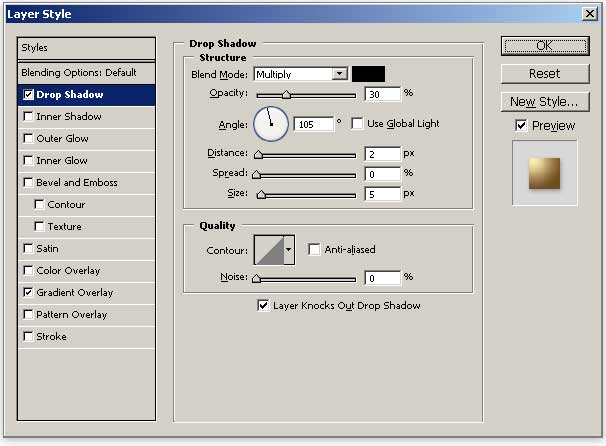
Next, give the layer a Drop Shadow layer style so that the lines have an inset/recessed effect that will complete the look of the side panels.
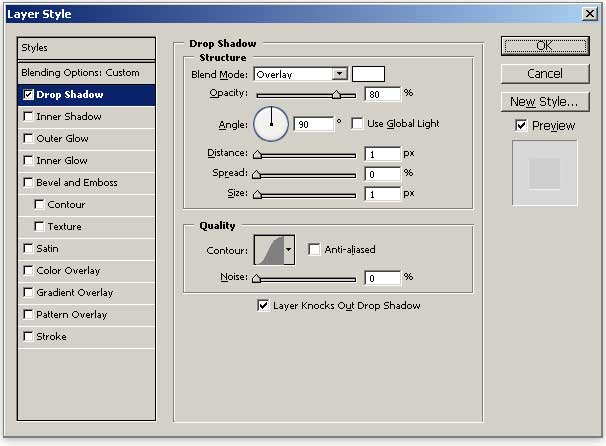
Change the blending mode of the layer to Overlay and reduce its opacity to 80%.
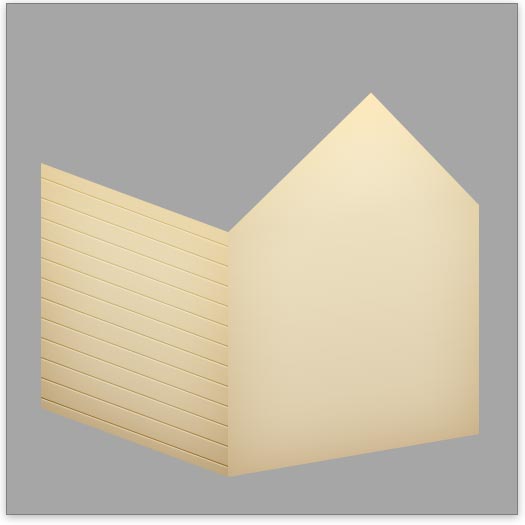
Use same steps to make ridges on the front of the house.
Make sure that the ridges on both walls meet and are correctly aligned.
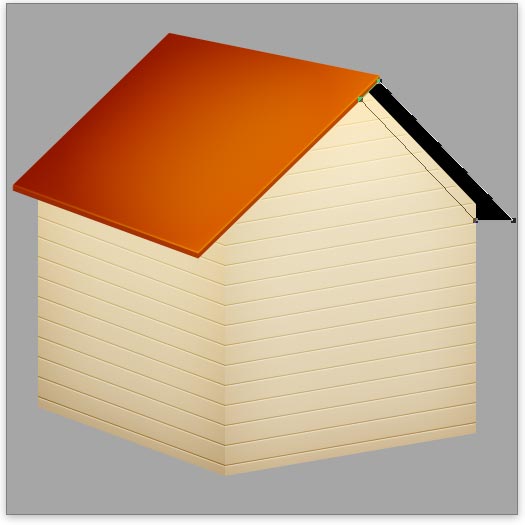
Step 5: Make the roof
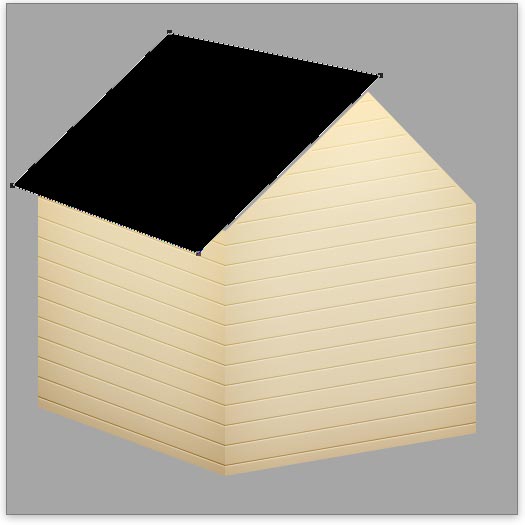
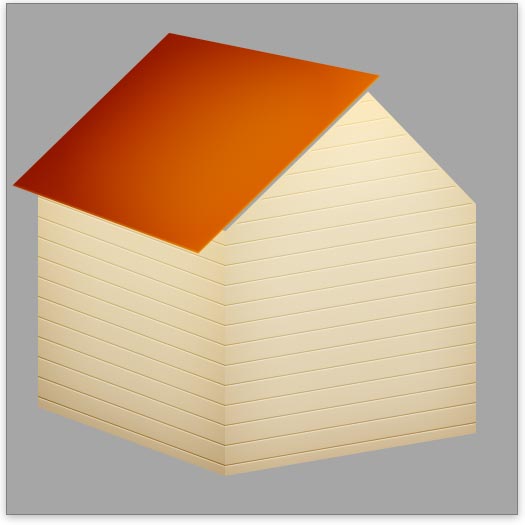
Time to move on to the roofing. The first thing to do is to draw a shape for the roof as shown, again, using the Pen Tool.
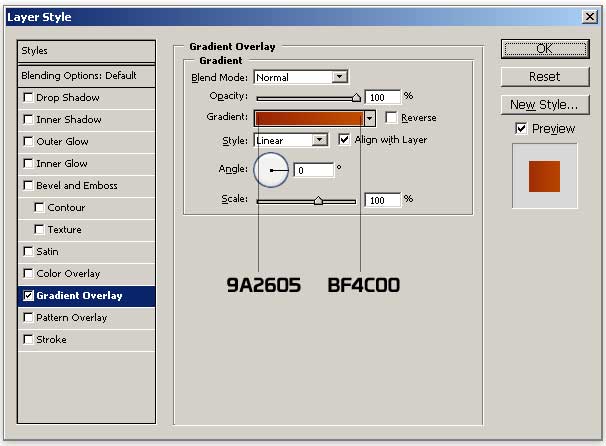
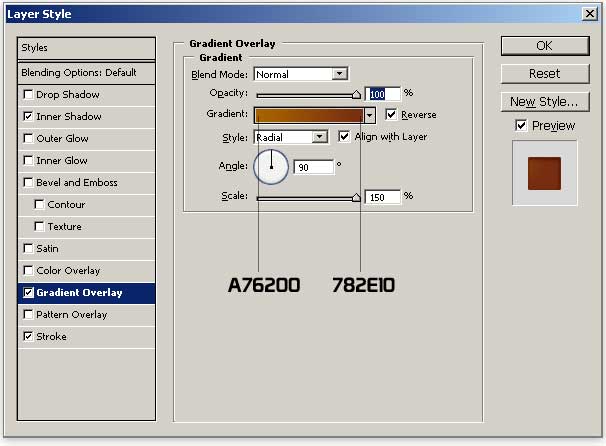
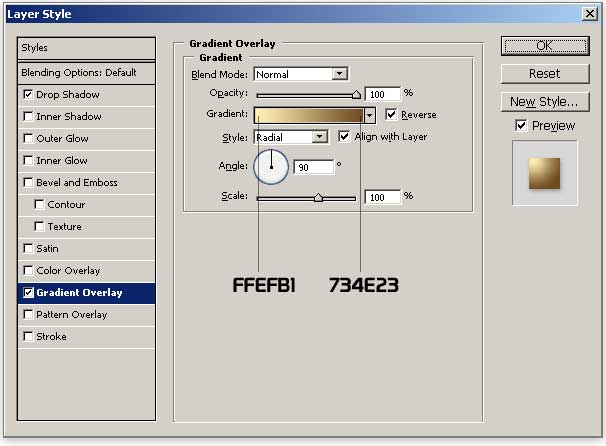
To give the roof its brown/reddish color, apply a Gradient Overlay layer style to the shape layer.
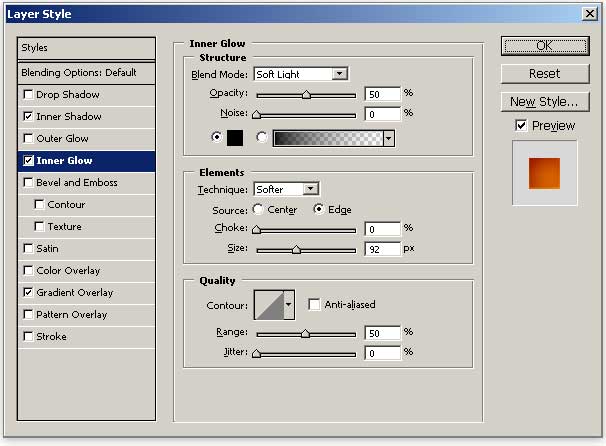
To give the roof some depth and to improve the three-dimensional look, also apply an Inner Shadow and Inner Glow layer style.
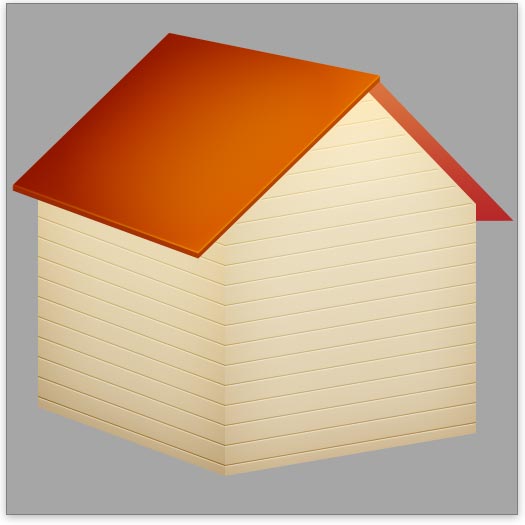
Next, we need to create the side/base of the roof. Create a new layer and place it below the roof layer.
Ctrl/Cmd + click on the roof shape layer then move the selection 1px down and fill it with black (#000000).
Without deselecting, move the selection 1px further down and fill it again with black (#000000).
Repeat this three more times until you get a 5px-thick roof side.
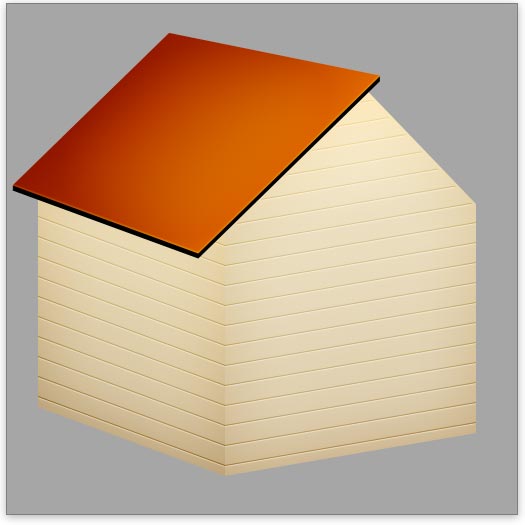
Finally, give it a Gradient Overlay of darker shades to give the side/base of the roof realistic lighting.

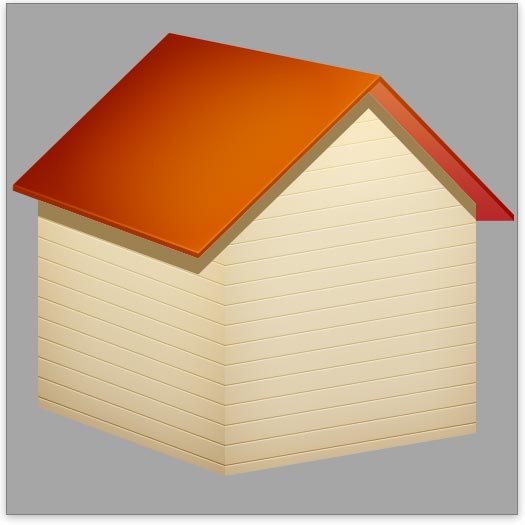
Complete the roof by drawing the other side and giving it layer styles consistent with the rest of the roofing.


Step 6: Give the roof a drop shadow
You can now add the roof’s shadow over the walls.
To do so, create a new layer and load a selection as shown using your preferred manual selection technique (I suggest using the Polygonal Lasso Tool).

Fill the selection (Ctrl/Cmd + F5) with a brown/tan color (#9C8151) on the new layer.
Without deselecting, move the selection 15px downward and press Delete.
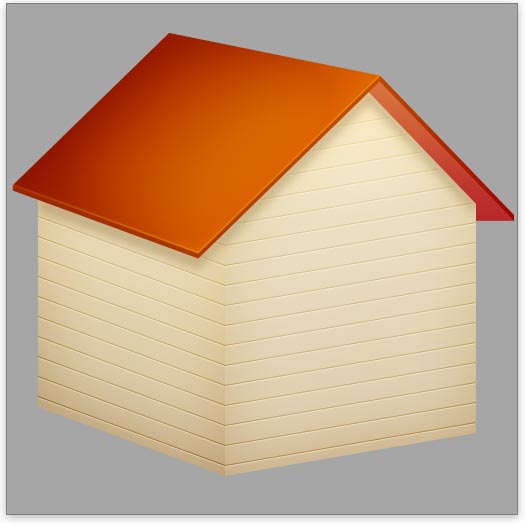
Deselect and apply Filter > Blur > Gaussian Blur with the Radius set at 5.0px.
Reduce opacity of the layer to 50%, move it upward and remove the parts of the drop shadow that spills outside that walls using your favorite manual selection tool (such as the Polygonal Lasso Tool) and the Delete key.
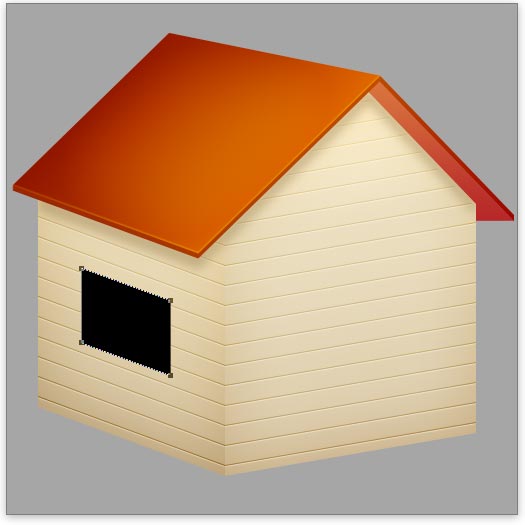
Step 7: Create the windows
Draw a window-like shape using the Pen Tool or the Rectangle Tool (U) on the left wall. If you use the Rectangle Tool, you can use the Free Transform command (Ctrl/Cmd + T) to adjust the shape so that it is consistent with the layout of the house.
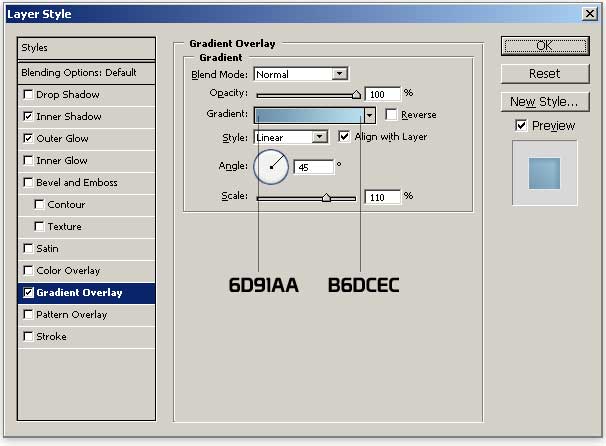
Afterwards, give it a Gradient Overlay to give the window its blue color.
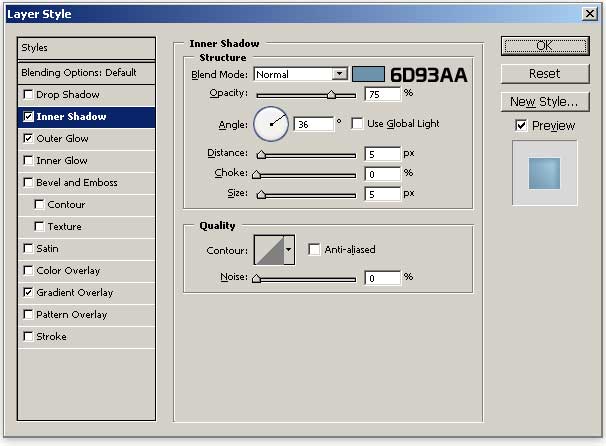
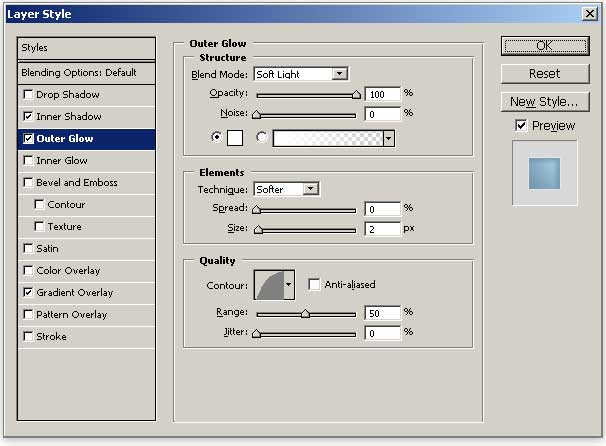
Also, give the window shape layer an Inner Shadow and Inner Glow to give it the depth that we need.
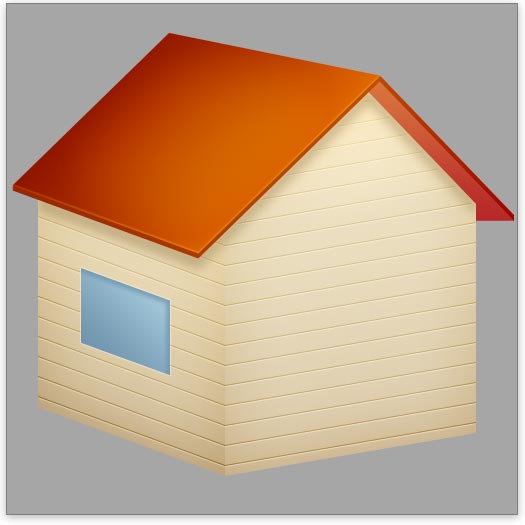
To make our windows more interesting, we will give it a glassy reflection. Add a reflection on the window like the one shown below.
To do this, draw the shape of the reflection and then use the Gradient Tool (G) with a white to transparent gradient on the shape.

Ctrl/Cmd + click on the window shape layer to load a selection and then create a new layer.
Fill the selection on the new layer with a brown color (#C2AE89).
Move the selection in the up and rightward direction and press Delete to get your desired depth for the window.

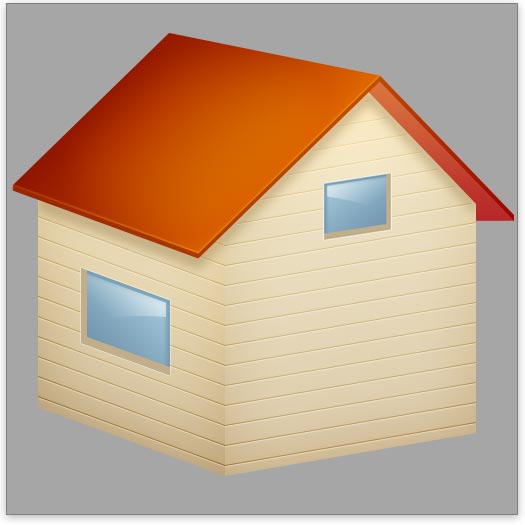
Make a copy of the window and flip it horizontally (Edit > Transform > Flip Horizontal).
Scale down the duplicated window using Free Transform, and then utilize your Move Tool (V) to position it over the front of our house (this window is for our attic).
Step 8: Create the door
We will now make the door on the front of our house. Use Pen Tool to draw a door-like shape.
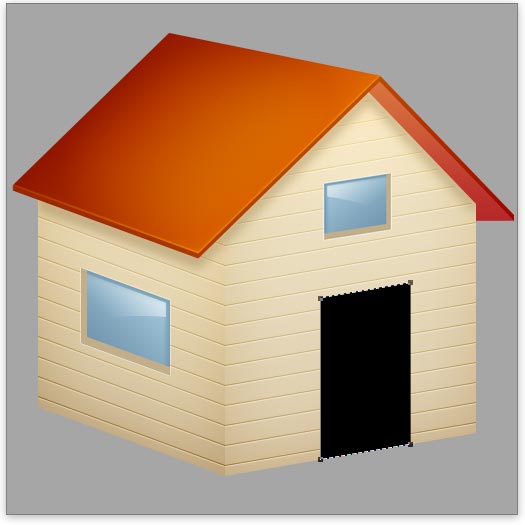
Use a Gradient Overlay to apply the dark brown/wooden color of our door.
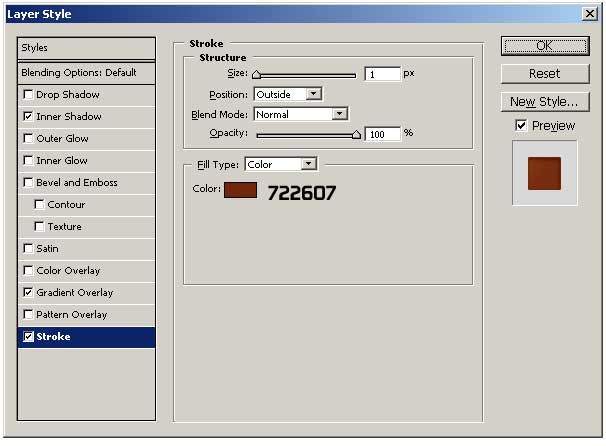
Give the door shape a Stroke layer style so that the edges have some depth.
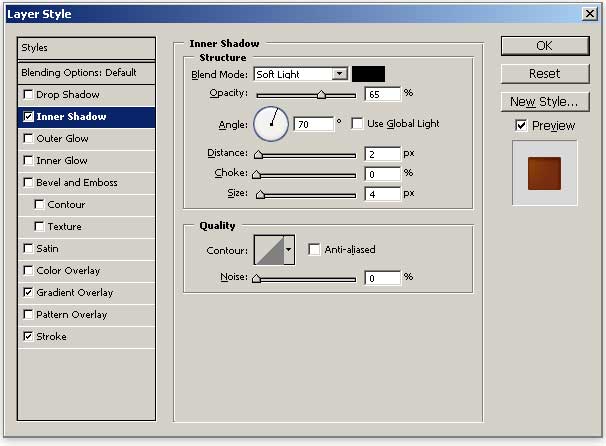
Also, apply an Inner Shadow to give the door its 3D look and feel.

Just like with our windows, we want to give the door a recessed look. To do so, make a 7px-thick strip for the door in the same way that you did for the window.
Step 9: Design the doorknob
We’re now going to make a common doorknob next so that the people living in our house can get in.
Select the Ellipse Tool (U) and create a circle as shown. Hold down the Shift key to make a perfect circle.

To give the doorknob its golden color, we will use a Gradient Overlay similar to how we have colored in the other sections of the house.
Use a Drop Shadow layer style to give the doorknob some depth.

Step 10: Make the door’s footstep
To finish the front of our house, we will create the steps that lead up to the door. Use the Pen Tool or the Rectangle Tool combined with the Free Transform command to make the top of the footstep.
Give it a Gradient Overlay and Inner Shadow as we have done in the previous steps to color the top of the footstep.

Draw the footstep’s base usinng a technique similar to that one used for drawing the side/base of the roof.
Make it about 10px-thick and fill it with a darker brown/wooden color (#78350B).

Step 11: Add a base shadow
To finalize the look of our icon, we will give the base of the house a shadow. Create a new layer and place it below all other layers (except the Background layer).
After creating a new layer, make a selection as shown.

Move the selection 3px down and fill it with black (#000000). With the selection still loaded, move it 4px up and hit Delete.
Now apply Filter > Blur > Gaussian Blur with Radius at 1.5px onto the layer.
Finally, reduce the opacity to 10% or to a value that pleases you.
Conclusion
In this tutorial, you found out about a method for drawing an icon using Photoshop.
We used the Pen Tool and shape tools to create different parts of the house. We used layer styles to color in these parts of our house. We also relied on some manual selection techniques to create various sections of our house.
I hope you learned a Photoshop trick or two in this tutorial.
Download Source Files
- 3d_house_icon (ZIP, 0.22 MB)
-
 Trevin serves as the VP of Marketing at WebFX. He has worked on over 450 marketing campaigns and has been building websites for over 25 years. His work has been featured by Search Engine Land, USA Today, Fast Company and Inc.
 -

WebFX is a full-service marketing agency with 1,100+ client reviews and a 4.9-star rating on Clutch! Find out how our expert team and revenue-accelerating tech can drive results for you! Learn more
Make estimating web design costs easy
Website design costs can be tricky to nail down. Get an instant estimate for a custom web design with our free website design cost calculator!
Try Our Free Web Design Cost Calculator
Table of Contents
- Preview
- Step 1: Set Up the Photoshop Document
- Step 2: Draw the Left Wall of the House
- Step 3: Draw the Front of the House
- Step 4: Create the Side Panels
- Step 5: Make the Roof
- Step 6: Give the Roof a Drop Shadow
- Step 7: Create the Windows
- Step 8: Create the Door
- Step 9: Design the Doorknob
- Step 10: Make the Door’s Footstep
- Step 11: Add a Base Shadow
- Conclusion
- Download Source Files
Share this article


Web Design Calculator
Use our free tool to get a free, instant quote in under 60 seconds.
View Web Design CalculatorMake estimating web design costs easy
Website design costs can be tricky to nail down. Get an instant estimate for a custom web design with our free website design cost calculator!
Try Our Free Web Design Cost Calculator


