
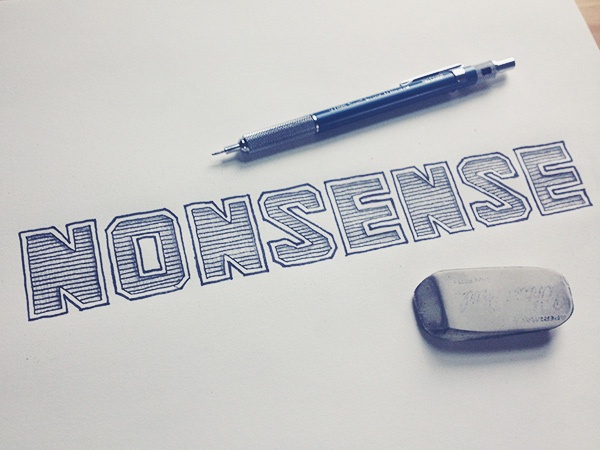
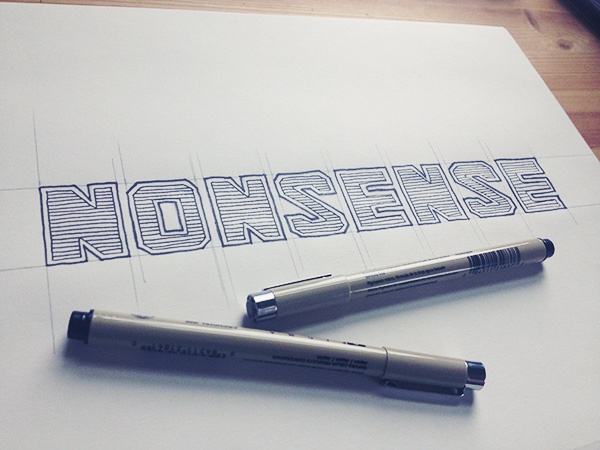
Tutorial Preview
Tutorial Resources
For this tutorial, you’ll need at least a pen, a pencil, and paper.
But it’s easiest if you have all of the following:
- Pencil
- Large eraser
- 0.35 mm tip ink pen or line marker — I suggest using Sakura Sigma Micron pens
- 0.2 mm tip ink pen or line marker
- Ruler or T-square
- Large piece of paper (I’m using 9″ x 12″)
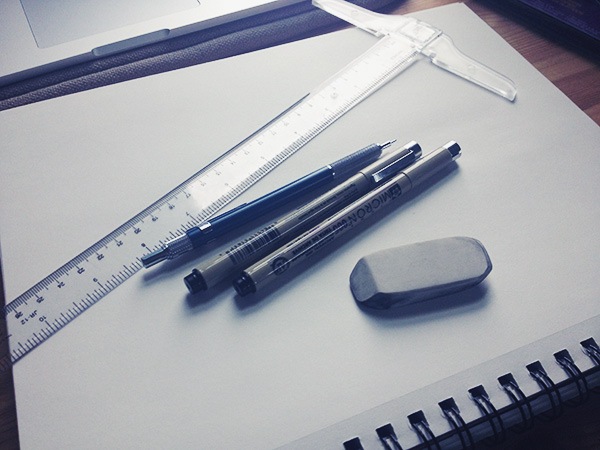
You’ll notice that I’m not picky about the brand of supplies you’ll be using (the ink pen is just a suggestion and you should feel free to use whatever you have at hand).
I want this tutorial to be approachable for you and allow for some creativity. Feel free to add your own style throughout this tutorial. Heck, if you’re a coffee shop owner, you might want to try this on your chalk board using chalk instead of ink.
Go ahead!
Like I said, at the very least, you can do what we’re about to do with just a pen, pencil, and paper.
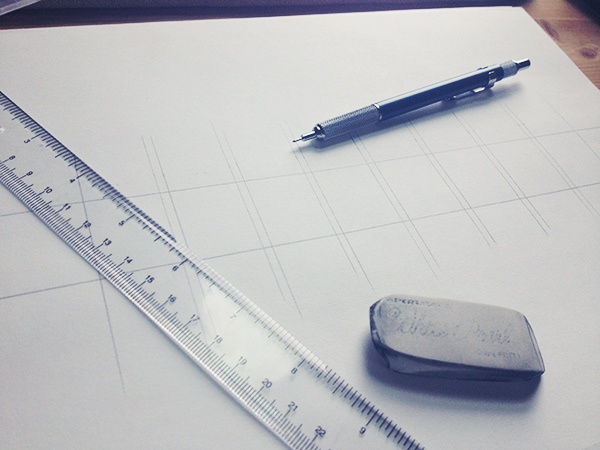
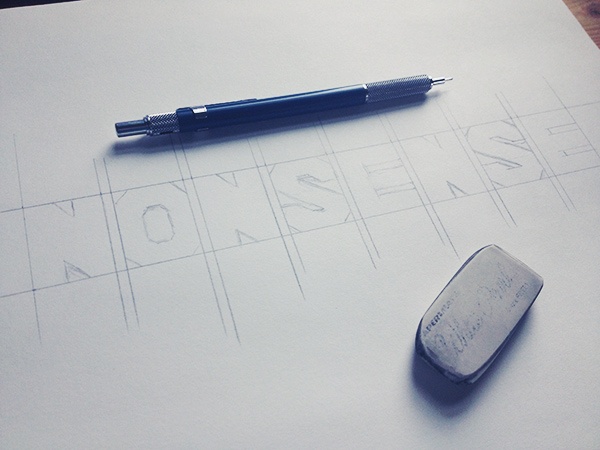
Step 1: Create Some Guiding Lines
Use your ruler to map out the size of each letter and the space between each letter. Draw very light guides using pencil.
I highly recommend having the space between each letter remain consistent — a ruler or T-square will help you to that. The width of each letter can vary, but you’ll notice that I’m keeping the same dimensions for every letter.
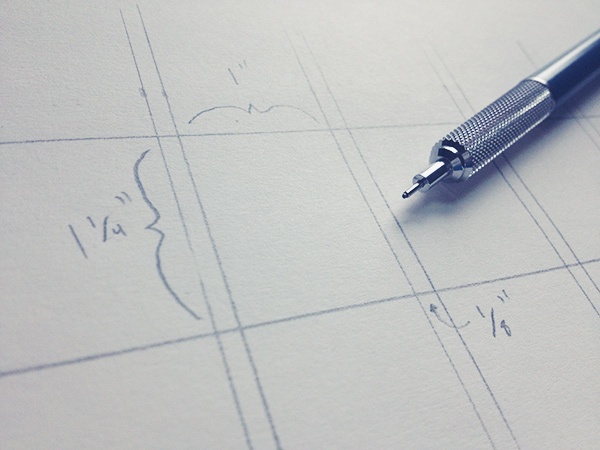
The dimensions I’m using are as follows:
- Letter height: 1 1/4 inches
- Letter width: 1 inch
- Space between letters: 1/8 inch
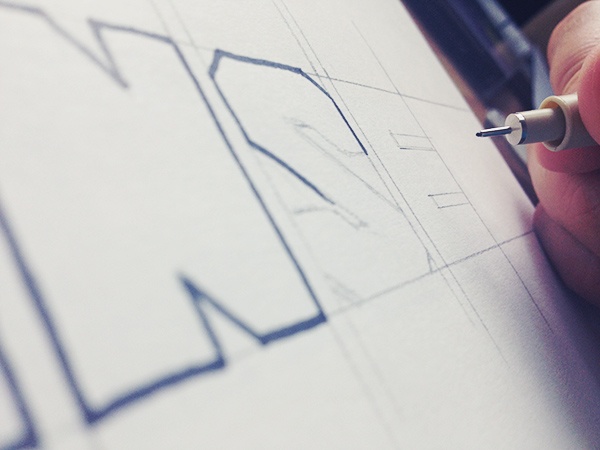
Step 2: Sketch Out the Letters
You can see here that I’m sketching out very geometric letters. Feel free to copy this style. However, I’d also love to see some of you try more rounded letters or even slab serif letters (and post a link to your results in the comments below).
Look at some typography on the Internet.
Make sure the letters fill your guides and be creative! This is your chance to make this yours if you want to.
Note: Fat letters work best for the text effect we’re going to be doing later below.
Step 3: Outline the Letters in Ink
This is pretty self explanatory.
Use a ruler if you’d like, but I usually do this free hand because I prefer a natural look-and-feel.
If you were good with your pencil guides, this should be an easy step! I use the larger tip pen for this.
Step 4: Create an Interesting Border for Each Letter
This is a technique I’ve seen in some of my favorite hand lettered artwork. To do this technique, simply draw a line with ink within the outline you just created to produce a nice border around your letters.
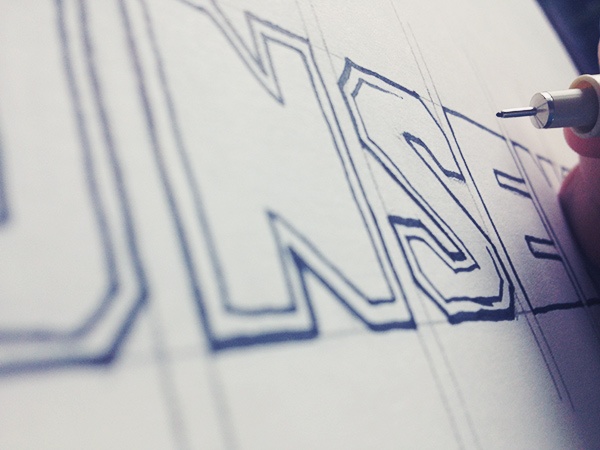
Try to keep the border width consistent throughout.
I use a smaller tip pen for this. I also do it by hand, but you can use your ruler or take measurements if that’s easier for you.
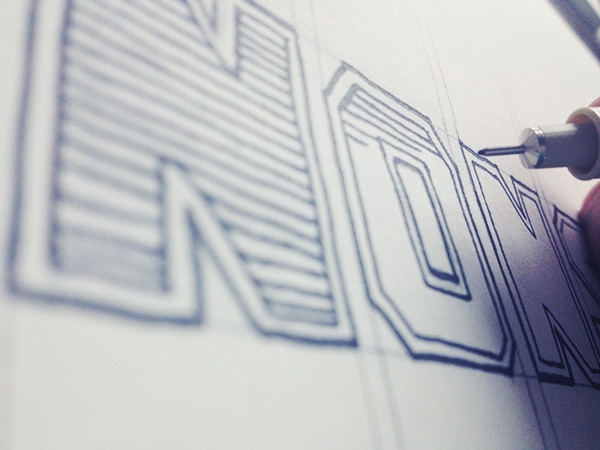
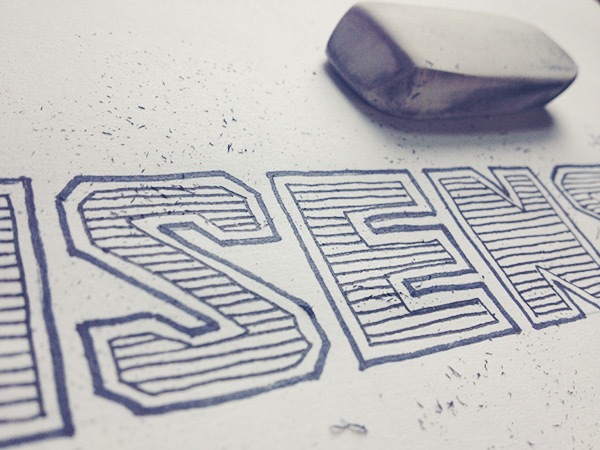
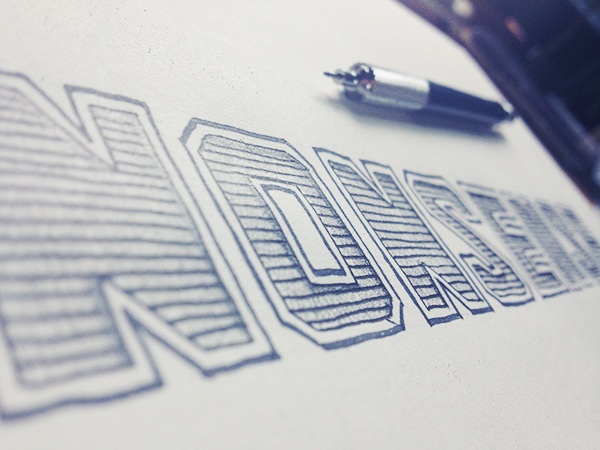
Step 5: Draw Horizontal Lines Inside Each Letter
This is when our hand-lettered artwork really starts to look interesting. Simply draw small horizontal lines (using a thin tip pen) within each letter.
Make sure the lines have consistent distance apart to keep things even. Also, don’t draw the lines into the borders you created.
If the lines aren’t perfectly straight or even, that’s okay! In my mind, the beauty of hand-lettered artwork is that it’s supposed to look natural and hand-made.
You may be tempted to stop now.
It’s looking pretty cool. Let’s keep going just a bit more. We’re almost done.
Step 6: Erase Your Guiding Lines
Make sure you give the ink at least several minutes to dry and then erase the pencil guides you made earlier.
If you erase too soon, the ink might smudge.
Step 7: Add Some Shading
Adding shading takes the whole design up a notch.
In this example, I lightly shaded the entire center of each letter (leaving the border section clean). I also added a bit of a inner shadow within each letter. If you’d like to add the inner shadow to your hand lettered artwork, lightly shade under the top and right edges of the border you created.
See what I mean below:
And you’re done!
Tutorial Summary
In this tutorial, I discussed my process for creating hand lettered artwork.
If you’re looking to get better at hand lettering, I would look up examples of typefaces and other hand lettering compositions. Try to replicate these even if you have to trace them at first. Practice until you can replicate your favorites without any rulers, tracing paper, or anything.
After that, create your hand-lettering style.
Make your own unique shapes, patterns, and more.
Here’s a short looping video that I created using Vine while I was writing this tutorial for you:
-
 Trevin serves as the VP of Marketing at WebFX. He has worked on over 450 marketing campaigns and has been building websites for over 25 years. His work has been featured by Search Engine Land, USA Today, Fast Company and Inc.
 -

WebFX is a full-service marketing agency with 1,100+ client reviews and a 4.9-star rating on Clutch! Find out how our expert team and revenue-accelerating tech can drive results for you! Learn more
Make estimating web design costs easy
Website design costs can be tricky to nail down. Get an instant estimate for a custom web design with our free website design cost calculator!
Try Our Free Web Design Cost Calculator
Table of Contents
- Tutorial Preview
- Tutorial Resources
- Step 1: Create Some Guiding Lines
- Step 2: Sketch out the Letters
- Step 3: Outline the Letters in Ink
- Step 4: Create an Interesting Border for Each Letter
- Step 5: Draw Horizontal Lines Inside Each Letter
- Step 6: Erase Your Guiding Lines
- Step 7: Add Some Shading
- Tutorial Summary
Share this article


Web Design Calculator
Use our free tool to get a free, instant quote in under 60 seconds.
View Web Design CalculatorMake estimating web design costs easy
Website design costs can be tricky to nail down. Get an instant estimate for a custom web design with our free website design cost calculator!
Try Our Free Web Design Cost Calculator


