
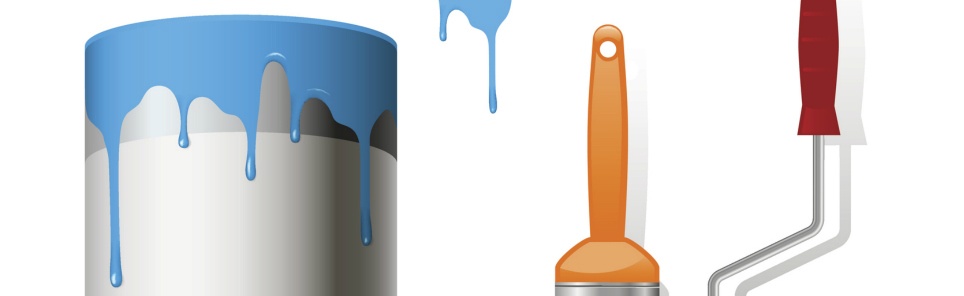
Preview
Step 1: Draw the Bucket’s Base Shape
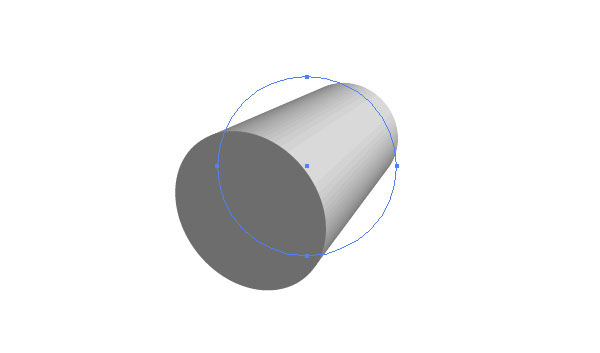
In Adobe Illustrator, create a new document (Cmd/Ctrl + N). Since we are in Illustrator and will be drawing vector objects, the size of the artboard doesn’t matter much and we can resize our illustration later when we are finished. Select the Ellipse Tool (L) from the Tools Panel and draw a circle; hold down Shift to create a perfect circle.
Set the Fill of your circle to white (#ffffff). 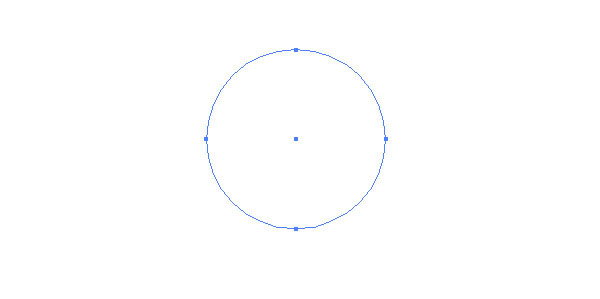 Select the shape with the Selection Tool (V) and then go to Effect > 3D Extrude & Bevel. Apply the settings outlined below to make a cylinder, which is the base shape for the paint bucket.
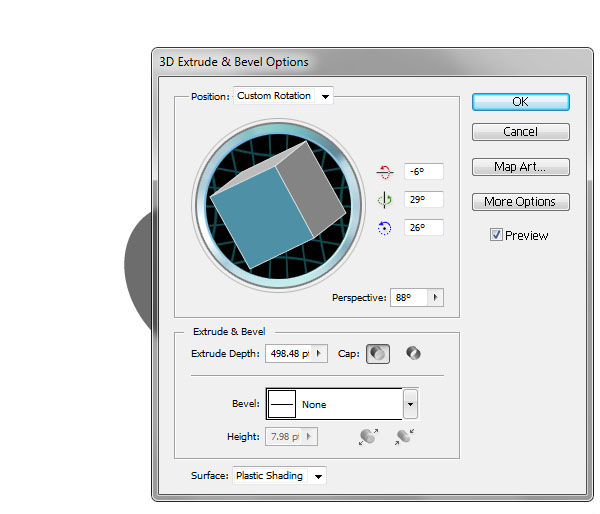
 If you’re not happy with the 3D look of your object, you can tweak it in the Appearance Panel (go to Window > Appearance or press Shift + F6 to reveal the Appearance Panel); locate the 3D Extrude & Bevel and click on it to edit the effect. Once you’re happy with the shape, expand the appearance by going to Object > Expand Appearance.
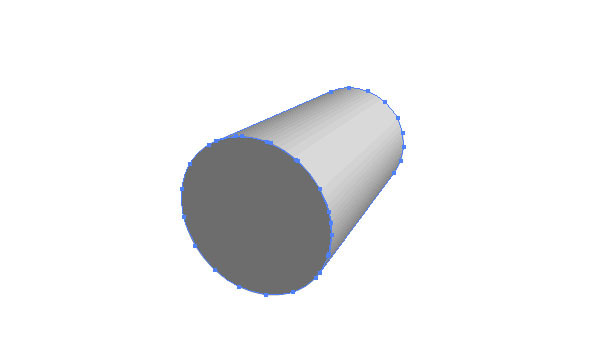
Step 2: Merging Paths and Applying Gradients
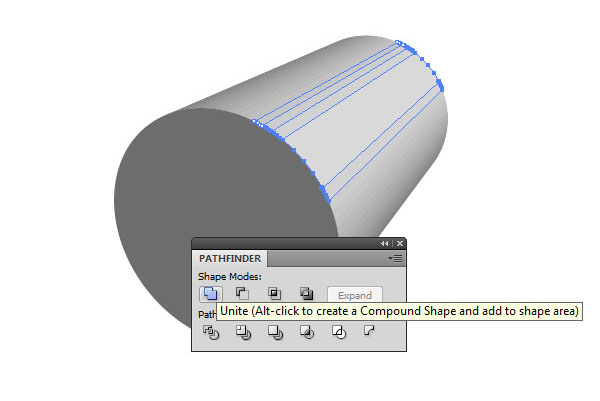
When you expand 3D elements in Illustrator, you might end up with more than one group of paths.
We need to unite some of these paths so that we can add some gradients to them continuously. First, make sure that you have the Pathfinder Panel open, and if you don’t, go to Window > Pathfinder or press Shift + Ctrl/Cmd + F9 to toggle the panel’s visibility. Select the shapes that should be combined — for example, a few shapes in the middle — and then press the Unite icon in the Pathfinder Panel.
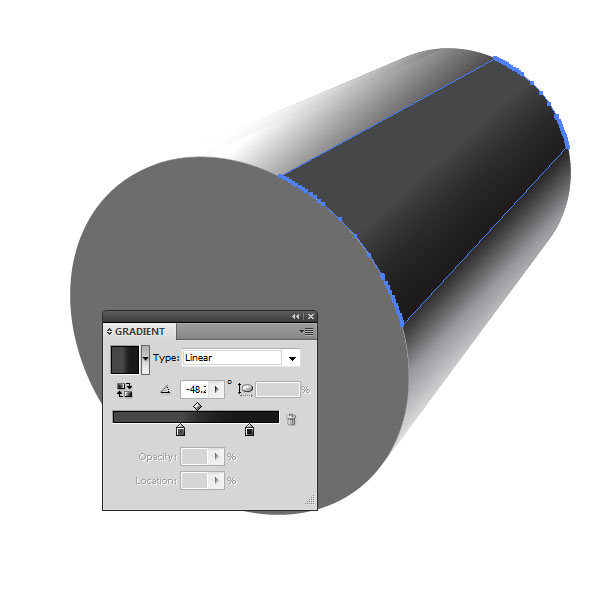
 Then in the Gradient Panel (Window > Gradient or press Ctrl/Cmd + F9) add a dark linear gradient on the united shape in the middle. Set the color gradient to be mostly black and transitioning to a dark gray color. Also, change the angle of the gradient so that it is consistent with the direction and orientation of the bucket.
 Unite more shapes and add linear gradients to them.
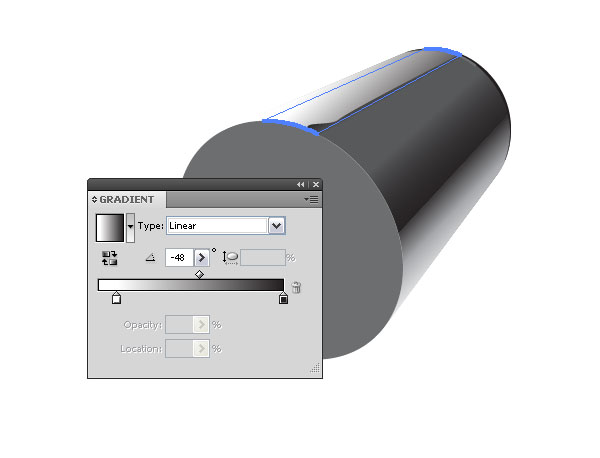
Step 3: Draw a Rectangular Path
Create a long rectangle along the side of the paint bucket using the Pen Tool (P). Tweak the rectangular path made by the Pen Tool so that there is a sort of hump at the top end that meets the paint bucket’s opening.
Give this path a dark gray to black linear gradient. 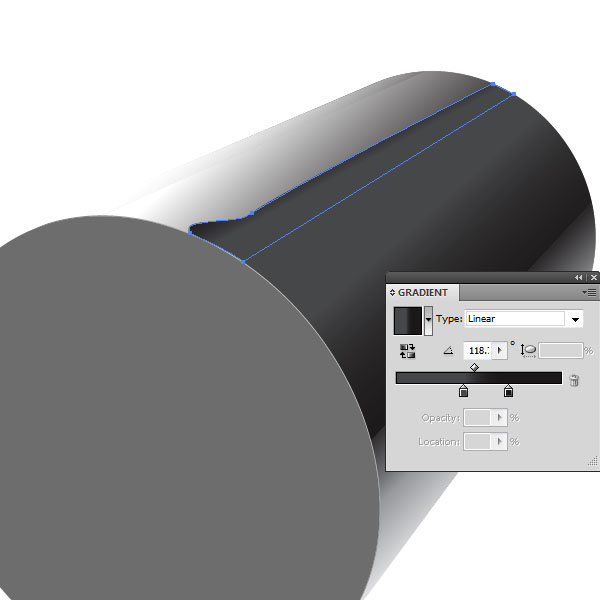
Step 4: Add Highlights and Shadows
Draw two curved paths as shown below; one long and one small. You could use the Ellipse Tool (L) to draw shapes on top of each other and then use the Minus Front Patherfinder command to achieve the desired shapes.
Fill the longer one with black or dark gray, and the other with a slightly lighter gray. Then place them on the back end of the paint bucket. 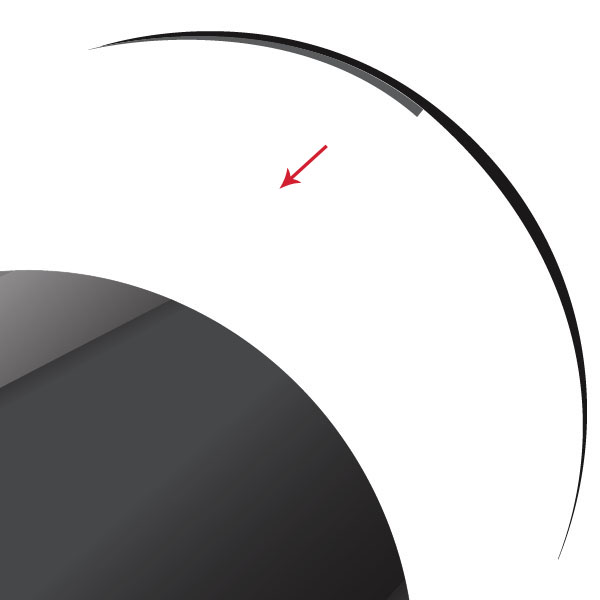
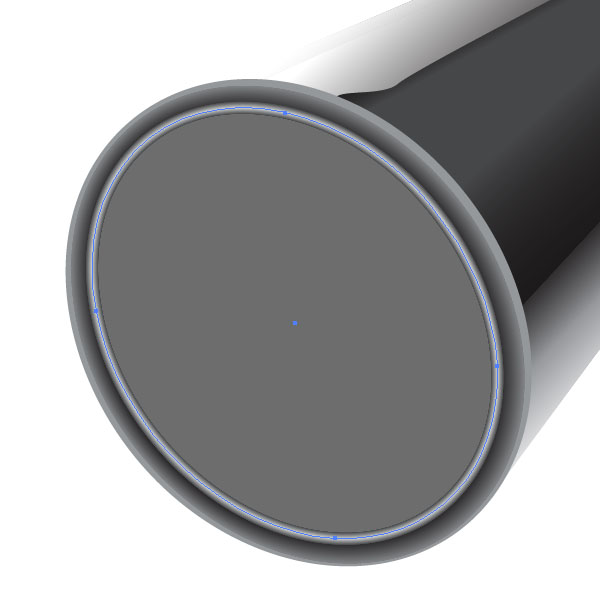
Step 5: Adding Details to the Paint Bucket’s Rim
Copy the front circle shape (Ctrl/Cmd + C), then paste it in front (Cmd/Ctrl + F).
Copy it again, and paste it in front again. Scale the topmost circle shape down with the Scale Tool (E); hold down Shift + Alt/Option so that its center stays in place. Then select both circles and click the Minus Front command in the Pathfinder Panel.
Fill the new shape with a gray color. 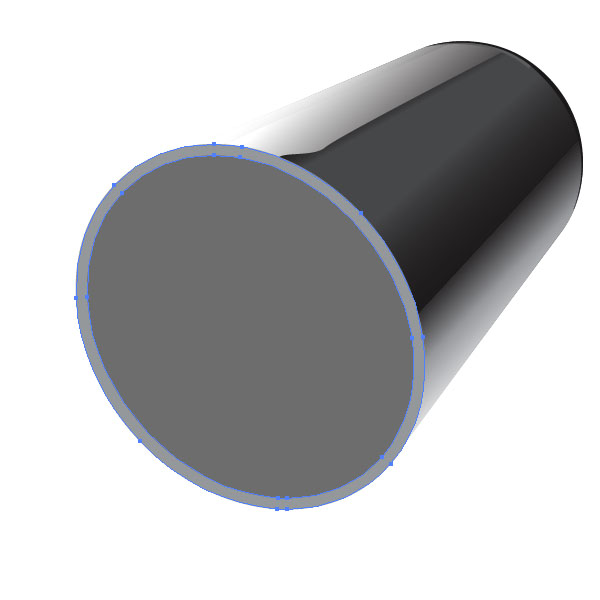
Step 6: Use Blend Modes for More Detail
Create two circles (based on the front of the paint bucket). One circle should be bigger than the other, and the bigger one should have a lighter color.
Remove the fill, but it should have a stroke. 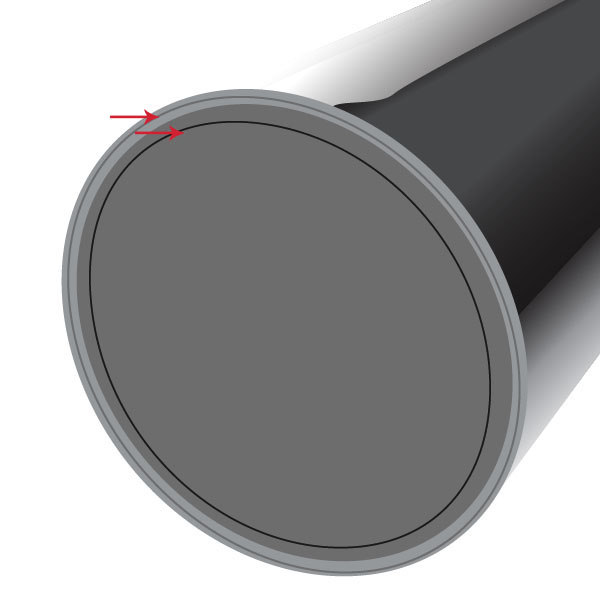 Select both circles and blend them by going to Object > Blend > Make (Cmd/Ctrl + Option/Alt + B). Then open up Blend Options (Object > Blend > Blend Options) and set Spacing to Smooth Color.
Since the outer circle stroke is lighter than the inner, the blended shape appears to get darker towards the middle. 
Step 7: Add More Blends
Add another blended shape. This time the circles are the same size, but the stroke weights should differ.
Make the bottom stroke 6pt dark gray and the top one 0.125pt and light gray.  Select both paths and make them blend (Cmd/Ctrl + Option/Alt + B). It is important that the thinner-stroked shape is on top for the blend to work properly.
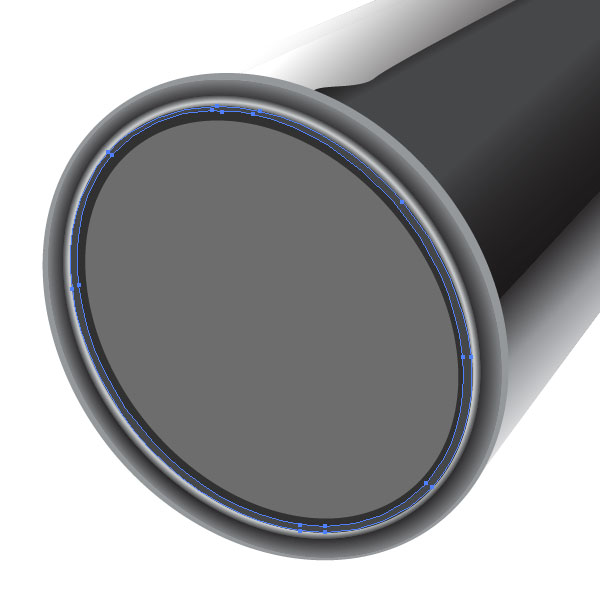
Step 8: Create More Rims
Create another rim using the same technique we performed in the previous step. 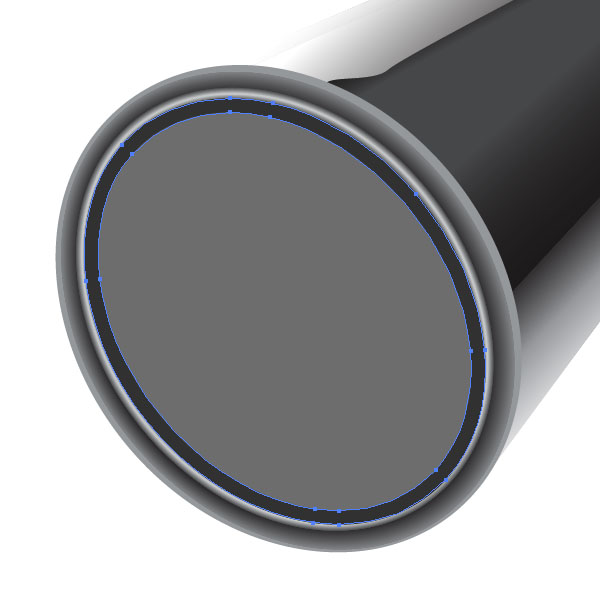 Just to add more detail to the piece, add another rim, but make it thinner and with a slightly ligher gray fill. You can create these shapes with two circles (one bigger than the other) and the Minus Front command in the Pathfinder Panel, or create a circle with a thick stroke.
Step 9: Add Some Highlights
Choose the Pen Tool (P) and draw some highlights and shadows by adding shapes filled with white, black, or dark gray. 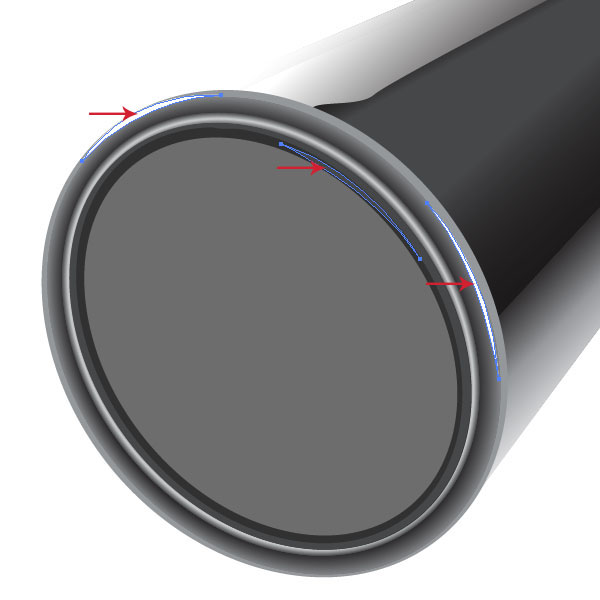
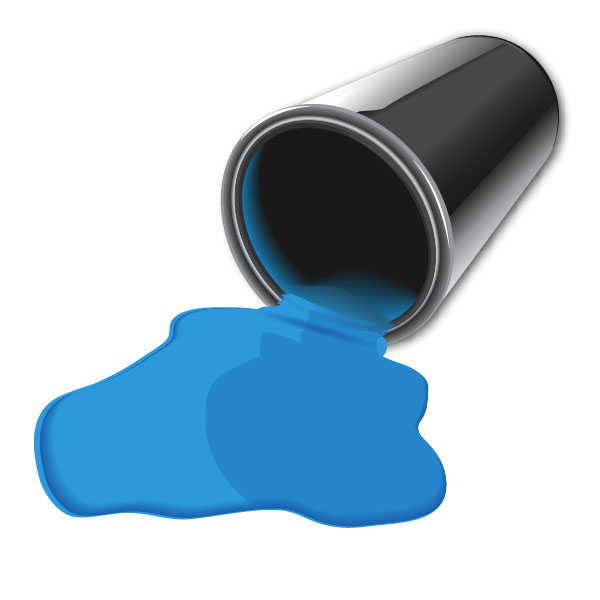
Step 10: Adding the Spilled Paint
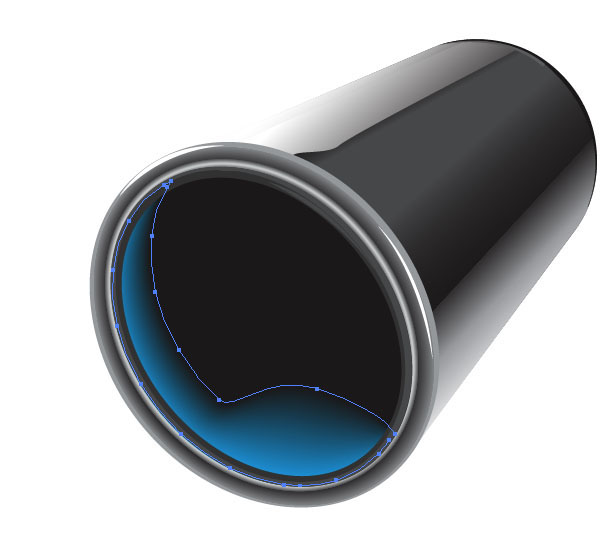
Create a path to represent the spilled paint. Set the stroke to 1pt and the color of the outer path to blue.
Set the inner path to black. Select both paths, make them blend (Cmd/Ctrl + Option/Alt + B), and then apply a Smooth Color blend. 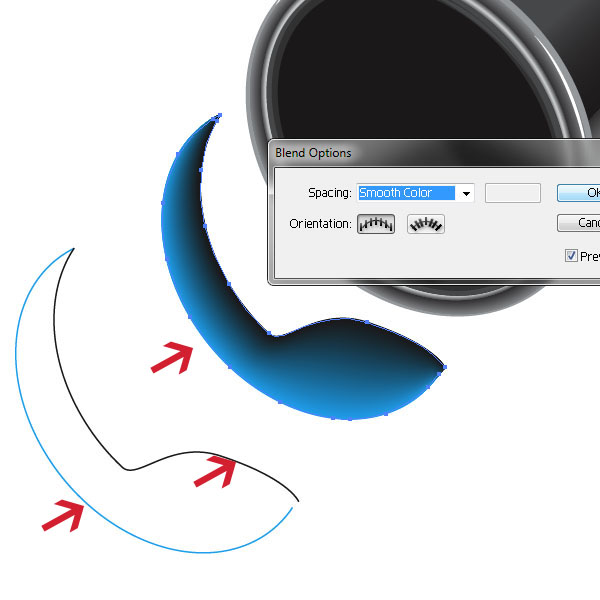 Position the shape inside the opening of the paint bucket.
 Let’s add the spilled paint that’s outside of the bucket. Create two shapes, with the edge shape a darker blue than the inner shape. You can use the Pencil Tool (N) to create organic shapes that mimic the uneven shape of liquid that has spilled out of its container.
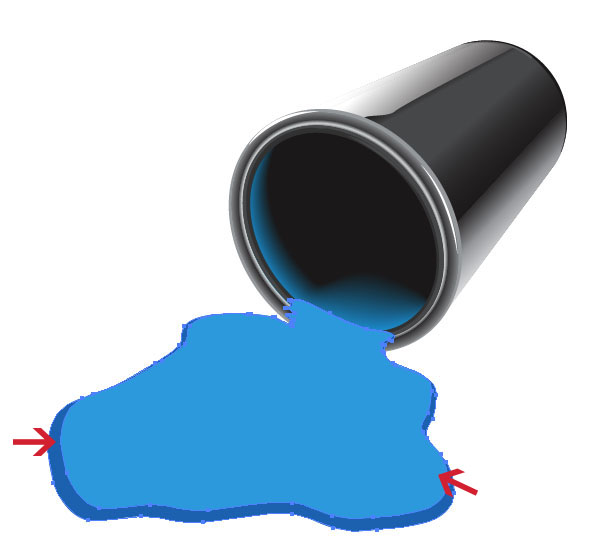 Select both shapes, go to Object > Blend > Make, go to Object > Blend > Blend Options, setting the Spacing to Specified Steps. Play around with the Specified Steps value to get the effect you desire — in this situation, 8 steps is enough to create a nice blend.
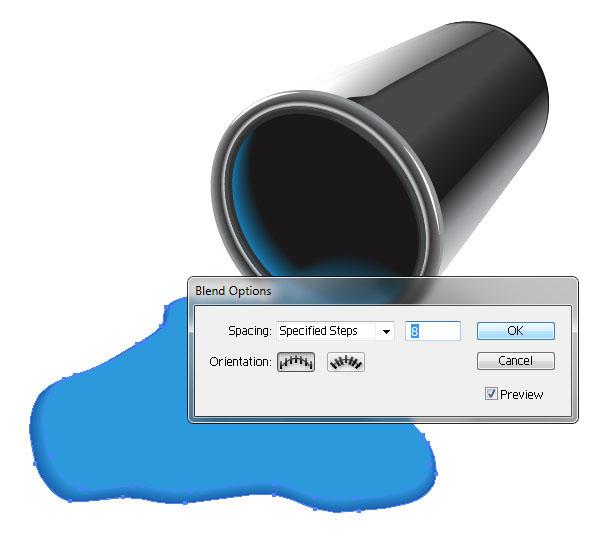
Step 11: Add a Highlight to the Spilled Paint
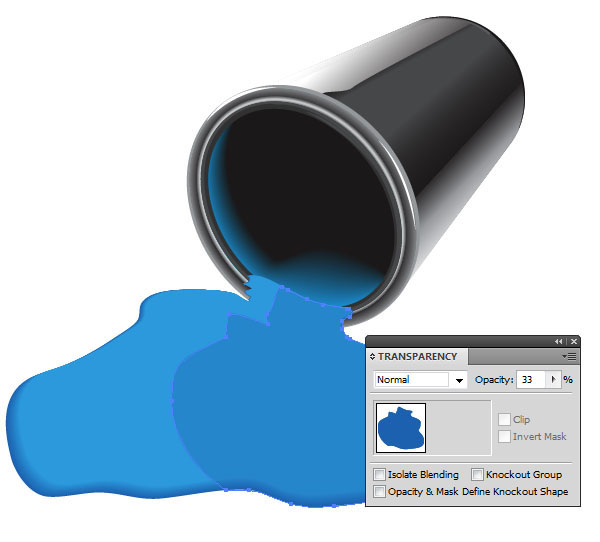
Since our light source comes from the top left, which makes objects along the left side of the canvas lighter in color, we will create a dark highlight on the right side of the spilled paint.
Create a shape that follows the spilled paint shape and set the fill to a darker blue. Then set the Opacity to 33%. This will add a sense of reflection to the shape.
Step 12: Paint Spill Details
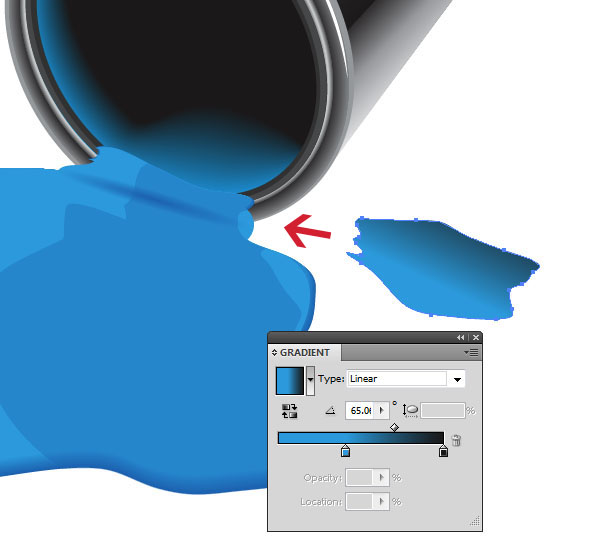
If you look at our piece now, the point where the spilled paint and the paint bucket opening meets looks awkward. We will correct that. First, create a shape similar to the one below, fill it with blue and add a radial gradient, setting the inner gradient color to dark blue.
Place it over the the bottom rim part of the paint bucket where the paint spills out. 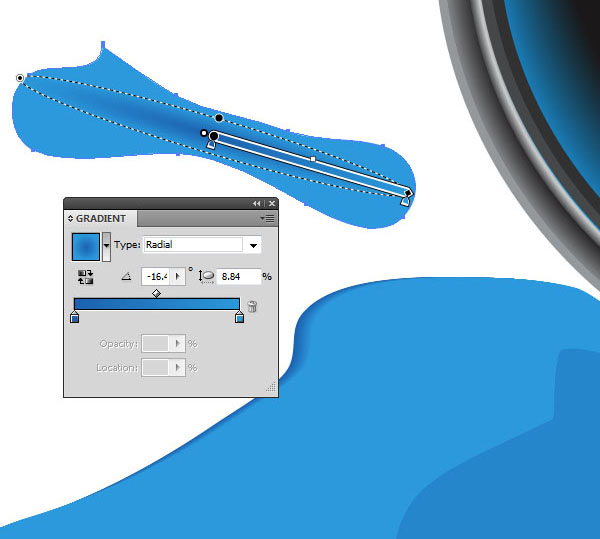 Draw another shape, filling it with a linear gradient. Place it over the rim.
Step 13: Use an Opacity Mask
Select the shape you created in the previous step and apply an Opacity Mask to it. Add two rectangles to hide certain parts of the shape. This way, the shape can blend in with the paint spilling out of the bucket.
Start with one rectangle and fill it with a white/black gradient — white color reveals, black color hides. Place more rectangles with gradients to hide/reveal parts of the shape. 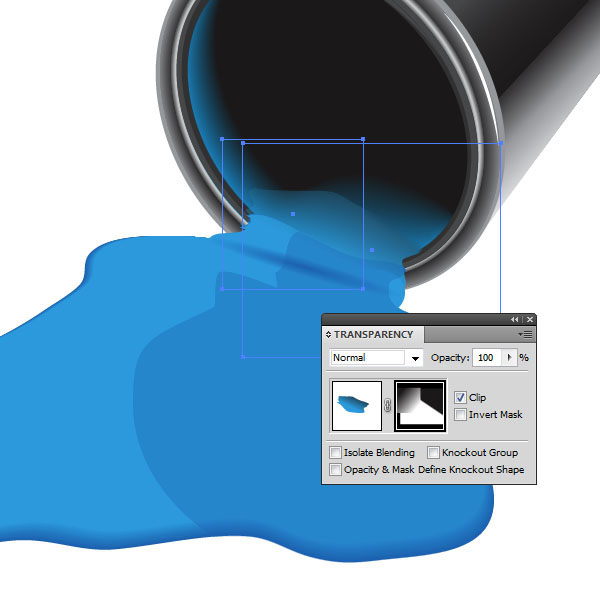
Step 14: Finishing Details
You can add a drop shadow (Effect > Stylize > Drop Shadow) to the bucket if you’d like.
I added a copy of the spilled paint shape underneath the paint and set the fill to a lighter blue. This way, the paint looks a little thinned out.
Tutorial Summary
We used some crafty methods for blending objects to produce nice shapes and color transitions.
For the bucket, we used the trusty 3D Extrude & Bevel to create a 3D cylinder that we later on styled. We also used Pathfinder commands to merge and create different shapes. That’s it folks.
I hope you had fun creating this little illustration.
Download Source Files
- spilledpaint_bucket_icon (ZIP, 1.33 MB)
-
 Trevin serves as the VP of Marketing at WebFX. He has worked on over 450 marketing campaigns and has been building websites for over 25 years. His work has been featured by Search Engine Land, USA Today, Fast Company and Inc.
 -

WebFX is a full-service marketing agency with 1,100+ client reviews and a 4.9-star rating on Clutch! Find out how our expert team and revenue-accelerating tech can drive results for you! Learn more
Make estimating web design costs easy
Website design costs can be tricky to nail down. Get an instant estimate for a custom web design with our free website design cost calculator!
Try Our Free Web Design Cost Calculator
Table of Contents
- Preview
- Step 1: Draw the Bucket’s Base Shape
- Step 2: Merging Paths and Applying Gradients
- Step 3: Draw a Rectangular Path
- Step 4: Add Highlights and Shadows
- Step 5: Adding Details to the Paint Bucket’s Rim
- Step 6: Use Blend Modes for More Detail
- Step 7: Add More Blends
- Step 8: Create More Rims
- Step 9: Add Some Highlights
- Step 10: Adding the Spilled Paint
- Step 11: Add a Highlight to the Spilled Paint
- Step 12: Paint Spill Details
- Step 13: Use an Opacity Mask
- Step 14: Finishing Details
- Tutorial Summary
- Download Source Files
Share this article


Web Design Calculator
Use our free tool to get a free, instant quote in under 60 seconds.
View Web Design CalculatorMake estimating web design costs easy
Website design costs can be tricky to nail down. Get an instant estimate for a custom web design with our free website design cost calculator!
Try Our Free Web Design Cost Calculator


