
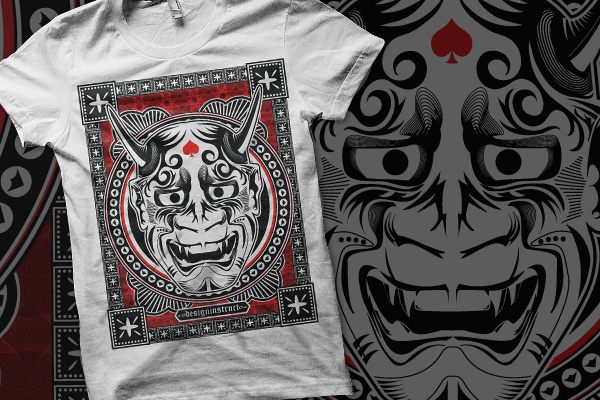
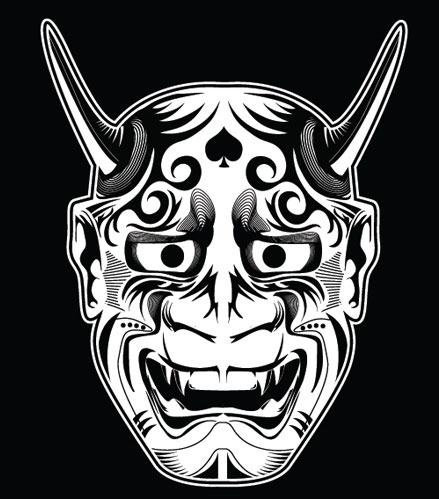
Preview
Tutorial Resources
- Stock Image: Pink oni Noh mask by Alex Muntean
- Font: Cloister Black by Dieter Steffmann (Optional)
- PSD: Mock Up Kit by Tom Neal (Optional)
Overview of the Layering
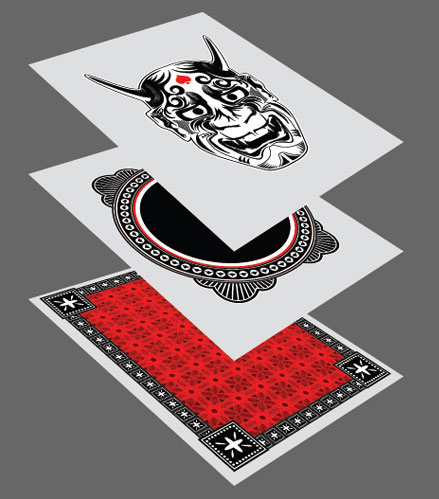
First, I want to show you the layer overview of the design so you have an idea of what we are trying to accomplish. In essence, we will start on the top layer, down to the bottommost layer.
Step 1: Setting Up and Preparing Your Work Area
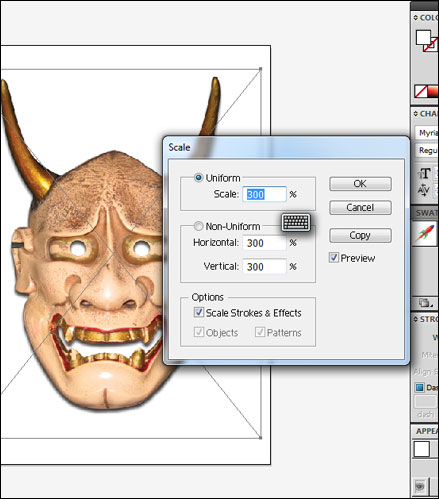
Open Adobe Illustrator and create a new document. Then Place (File > Place) the Pink oni Noh mask stock image into the artboard.
After you have placed the image, scale it to about 300% of its original size by right-clicking on it and choosing Transform > Scale from the menu.
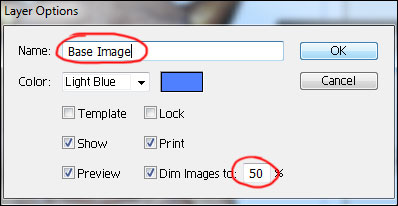
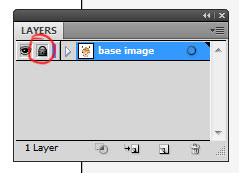
After that, double-click the layer in the Layers Panel and rename it to “Base Image” so that we are keeping our work organized.
In the same dialog window, set the opacity to 50%. This layer is going to be our tracing guide when we draw the illustration.
Lock the layer so you don’t accidentally move it while you’re working. We’re ready to go!
Step 2: Tracing the Image
First, add another layer on top of the “Base Image” layer and name it “Top” — this is where we will trace the image.
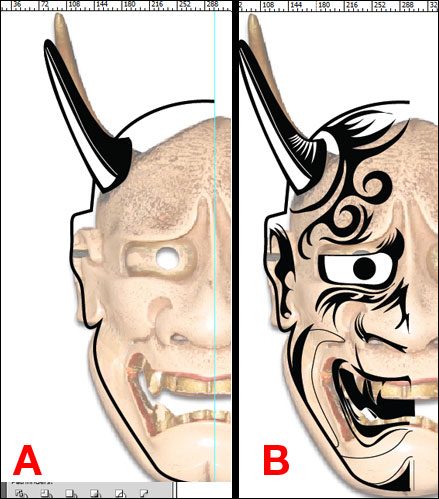
There is no shortcut here: The idea is to do just one side of the image (half of the face), and then copy and reflect it in the opposite direction to make it a whole; this allows us to save time, but more importantly, it will give us a symmetrical outcome.
It really isn’t necessary to trace the image exactly — it is there to serve only as a rough guide.
You should feel free to experiment and diverge from the base image.
Step 3: Adding Details to Eyes
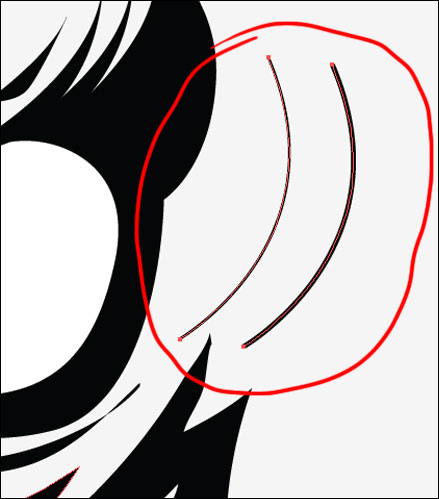
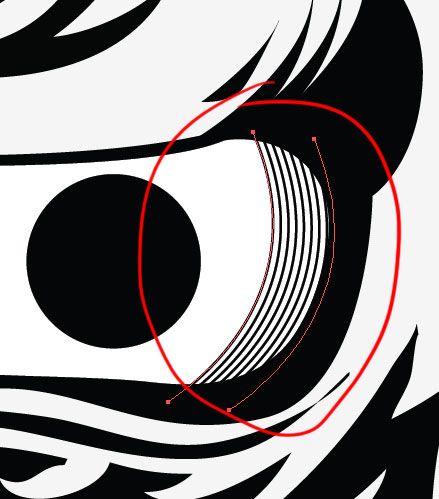
Now we will add some details on the eyes using the Blend Tool (W).
First, create two curved paths, with the right curve having a thicker stroke than the left (as shown below).
Select them both, then go to Object > Blend > Make, which will then produce another curved path in the middle. Go to Object > Blend > Blend Options and enter the settings below to create more curved paths.
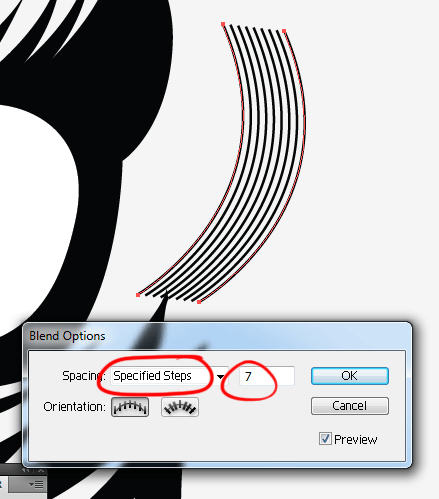
Now drag your finished curves and position them on the right side of the eyes.
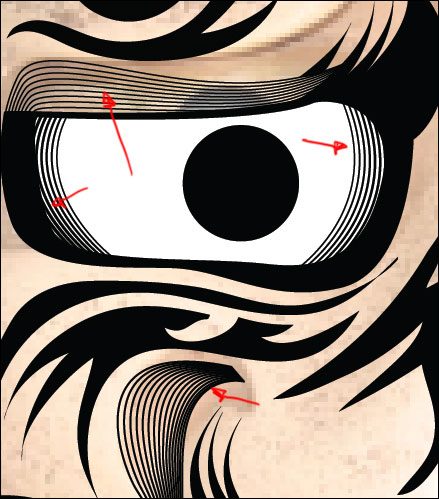
Do the same on the other parts of the eyes and in other parts of your illustration — feel free to experiment.
Step 4: Complete the Tracing
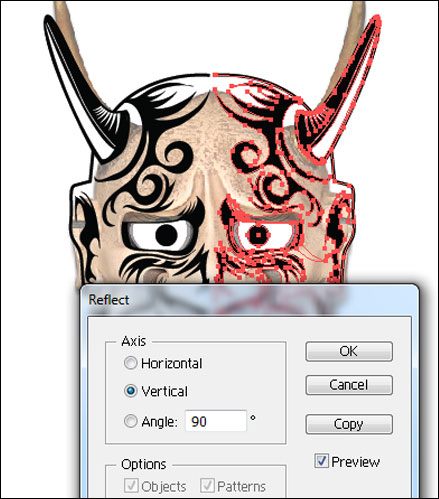
After finishing one side of the illustration, it’s time to duplicate it to complete the other half. First, select everything using Select > Select All (Ctrl/Cmd + A).
Hold down Shift + Alt and then click-and-drag all the selected objects using the Selection Tool (V); doing so should duplicate everything.
Next, while the duplicated paths are still selected, right-click on the selected area and then go to Transform > Reflect, which will open the Reflect dialog window. Choose the Vertical option and enter 90 degrees for the Angle.
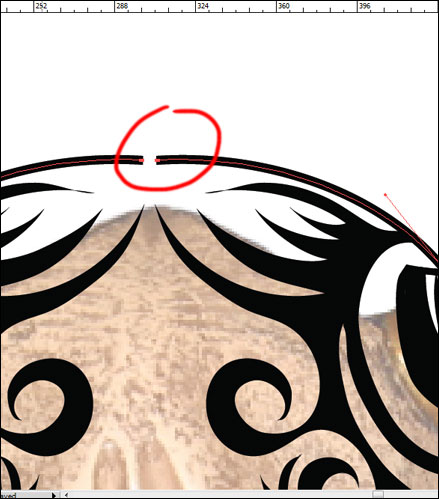
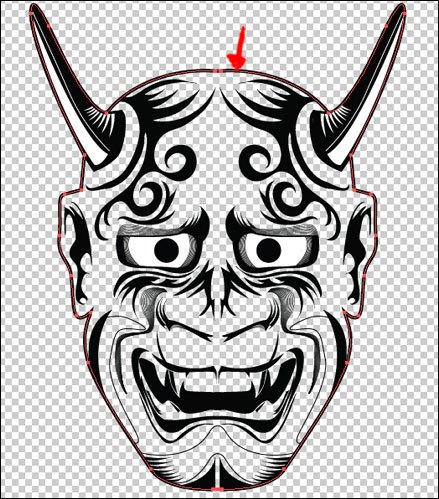
Step 5: Closing the Gaps
Close the gap in the middle of the head. Choose the Direct Selection Tool (A), select the two endpoints that you want to join, then go to Object > Path > Join, or alernatively, press the command’s shortcut, which is Ctrl/Cmd + J.
Repeat the process for the chin.
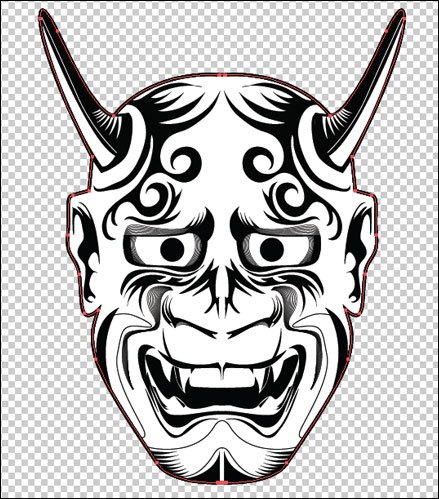
This is what we have so far without the background (View > Hide Transparency Grid).

Step 6: Fill the Illustration with White Color
We need to fill up the illustration with white.
Choose the Direct Selection Tool (A) and select the outline of the illustration. Copy it (Ctrl/Cmd + C), Paste it in front (Ctrl/Cmd + F), then go to Object > Arrange > Send to Back.
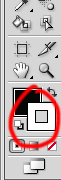
Swap the Fill and Stroke by pressing Shift + X, then change the Fill Color in the Tools Panel to white.
Step 7: Adding Additional Outlines
We are almost done with our “Top” layer. The last step is to have white outline strokes inside and outside of the illustration’s edge.
Start by deselecting the current selection, which you can do by pressing Shift + Ctrl/Cmd + D.
Select the outline of the illustration using the Selection Tool (V). Once selected, put it in front (Object > Arrange > Bring to Front). Then expand the outline (Object > Expand).
Give it a white stroke.
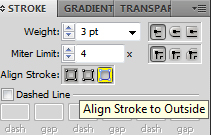
In the Stroke Panel, choose the Align Stroke to Outside option.
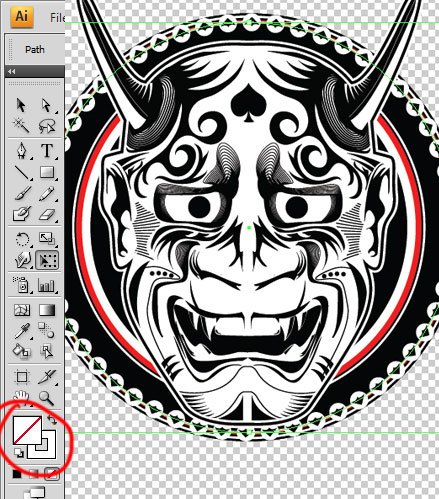
Now add a black-filled rectangular shape in the background of your illustration just to check your work and discover empty spaces that should be filled with white.
In this step, I also added additional details on illustration to refine it and finish it up.
Step 7: Starting the “Middle” Layer
We can now start the “Middle” layer. You can now delete the base image and also the black-filled rectangle (from the previous step). Add another layer below the “Top” layer and name it “Middle.”
This part is very straightforward and I know you guys can do this even with one hand tied behind your back.
It is just a stack of circles with variances in their stroke, stroke color and size. That’s it! You can use the Ellipse Tool (L) and create different sizes by duplicating your main circular object and scaling it (Transform > Scale).
While using the Ellipse Tool, hold down Shift to draw a perfect circle.
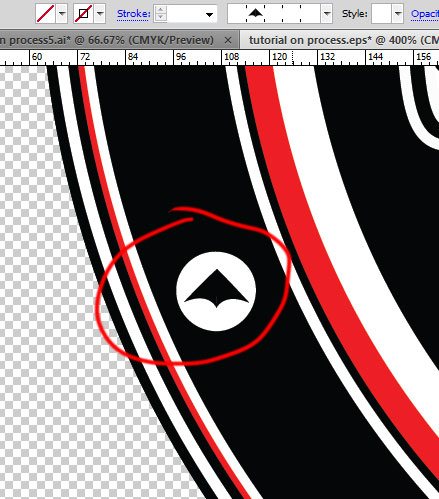
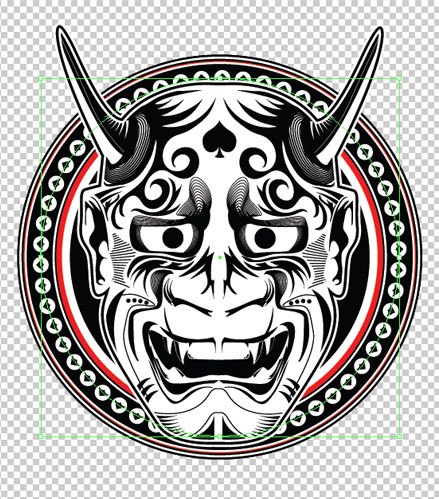
Step 8: Adding a Circular Pattern
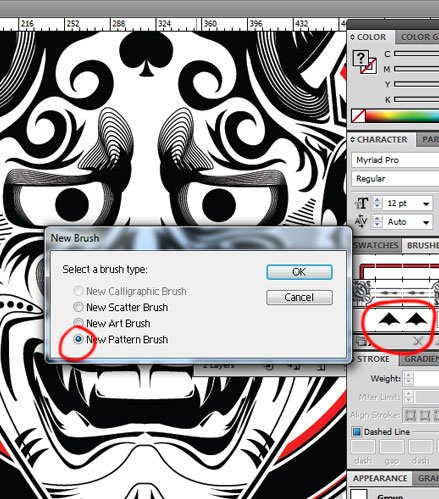
You can give the “Middle” layer circles some detail by using a repeating pattern. First make a circle which fits on the large black space in your circular illustration.
Now drag this to your Brushes Panel. When the New Brush dialog window opens, choose New Pattern Brush for the brush type.
Another dialog window will appear that will ask you what you want to name your brush; rename it if you want.
Now select any circles from your “Middle” layer, copy it (Ctrl/Cmd + C), and then go to Edit > Paste in Front — make sure your fill color is set to transparent. After that, go to your Brush Panel and click the pattern you have just made to apply it.
Tip: You can edit the spacing and size of your pattern if you double-click on your pattern from the Brushes Panel.
Resize the patterned object so that it fits within the thick black circle.
Remember this method of creating and applying patterns because we will do this again later.
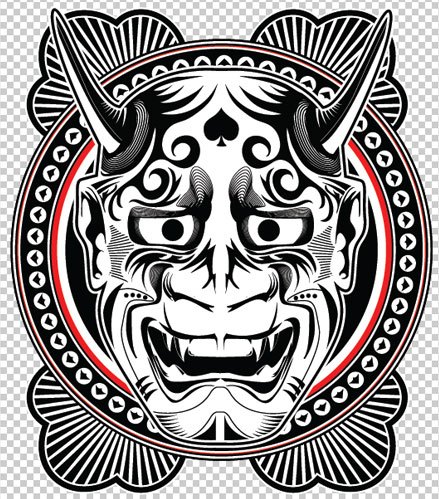
I just added additional details to the background to finish off our “Middle” layer.
Go and get yourself a drink because we’re now moving on into the last part!
Step 9: Starting the “Bottom” Layer
Now let’s begin the last part of the workflow. Create another layer below the “Middle” layer and name it “Bottom” layer.
It’s a good idea at this point to lock both the “Top” and “Middle” layer so that you don’t move or edit them by mistake.
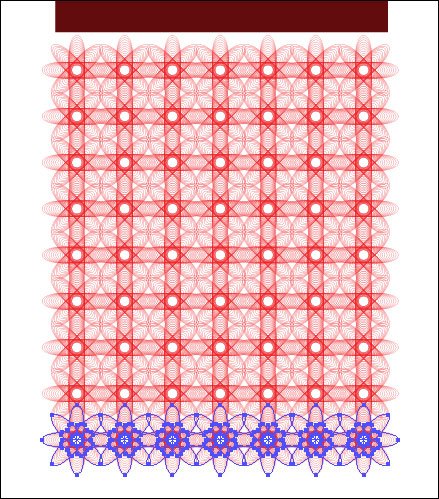
To start the “Bottom” layer, create a dark red-filled rectangle as illustrated below.
Step 10: Create the Background Pattern
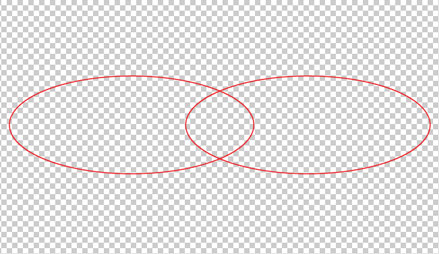
Now we will create the background pattern using the Blend Tool (W). First, create two overlapping ellipses with the Ellipse Tool (L), choosing a lighter red stroke than the dark red rectangle we created previously.
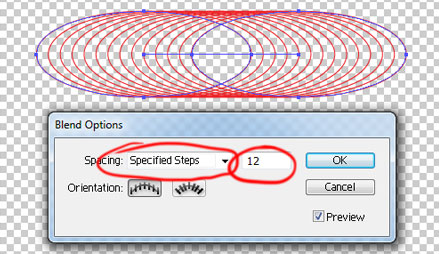
Select both ellipses, then go to Object > Blend > Make. Another ellipse in between your two ellipses will appear.
Now go to Object > Blend > Blend Options and use the suggested option values shown below.
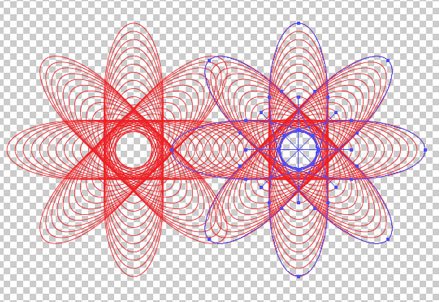
Now we will just copy it (Ctrl/Cmd + C), paste it in front (Ctrl/Cmd + F) and rotate the copied objects.

Step 11: Duplicate, Duplicate, Duplicate!
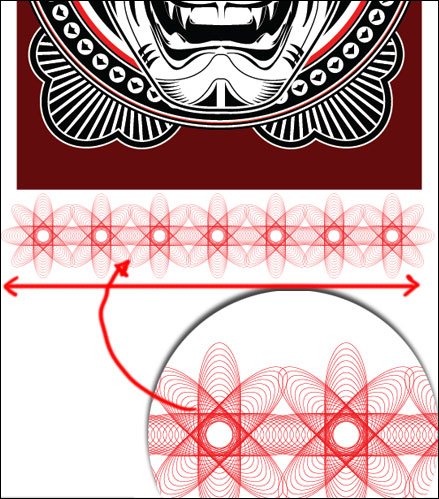
Select the object, then using the Selection Tool (V), click-and-drag it to the right while holding down Shift + Alt; this should duplicate the pattern object.
Now just press Ctrl/Cmd + D a couple of times to duplicate it repeatedly according to your first placement. By pressing Ctrl/Cmd + D (which is the shortcut for Object > Transform > Transform Again), the duplicates will be placed exactly with the same space as the first duplicate.
Stop duplicating when the pattern is approximately equal to the width of your dark red rectangular box (or you can just resize your pattern so that it’s the same width).
Now we will repeat the process, but vertically this time. Select the horizontal pattern, and again, just do what we did before, but this time, do it vertically, up to the point that it matches the height of our dark red rectangular background.
Now select all the patterns and then group them (Object > Group or press Ctrl/Cmd + G).
Position the pattern above your dark red rectangular background.
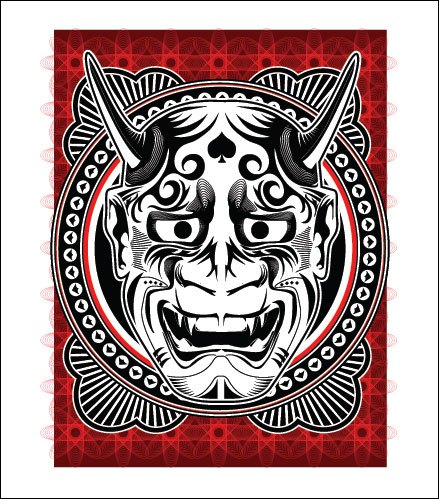
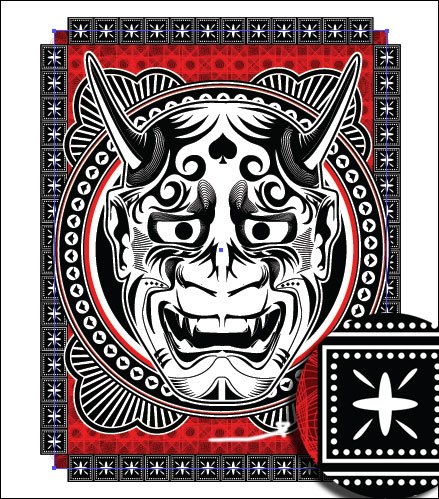
Step 12: Create the Border
Adding the border is similar in process to the circular pattern we created around the illustration. First, draw your rectangular pattern, and then add it to your Brushes Panel, setting it as a new pattern brush. Add a rectangular shape with no fill (the same size as your dark red rectangular box), and then click your rectangular pattern in the Brushes Panel to apply it.
You can tweak how the pattern is applied by editing the size and spacing when you double-click the pattern on the Brushes Panel.
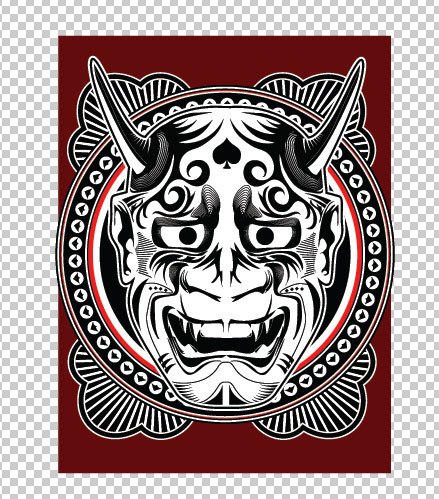
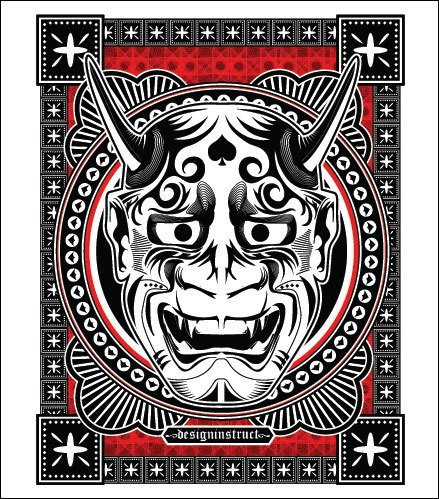
Step 13: The Finale
I added a larger pattern on each corner and created a shape to place the “Design Instruct” text on.
For the text, I used the Cloister Black font.
At this point, you could import the whole design into Photoshop, set the blending mode of its layer to Multiply and place it on top of the Mock Up Kit if you wanted to place it on top of a t-shirt.
Tutorial Summary
I showed you a workflow for creating a complex-looking illustration with the use of some basic techniques in Adobe Illustrator. Though it might look intimidating at first, the truth is it’s just a matter of composition and utilizing the tools available in Illustrator to do the heavy lifting.
If there’s a part in the tutorial you need help on, leave a note in the comments and I’ll try to answer all your questions. Also, for those that are experienced in Illustrator, please feel free to share your knowledge, tips and suggestions in the comments.
I hope you enjoyed this tutorial. Thanks!
Download Source Files
- complex_illustration_process (ZIP, 1.34 MB)
-
 Trevin serves as the VP of Marketing at WebFX. He has worked on over 450 marketing campaigns and has been building websites for over 25 years. His work has been featured by Search Engine Land, USA Today, Fast Company and Inc.
 -

WebFX is a full-service marketing agency with 1,100+ client reviews and a 4.9-star rating on Clutch! Find out how our expert team and revenue-accelerating tech can drive results for you! Learn more
Make estimating web design costs easy
Website design costs can be tricky to nail down. Get an instant estimate for a custom web design with our free website design cost calculator!
Try Our Free Web Design Cost Calculator
Table of Contents
- Preview
- Tutorial Resources
- Overview of the Layering
- Step 1: Setting Up and Preparing Your Work Area
- Step 2: Tracing the Image
- Step 3: Adding Details to Eyes
- Step 4: Complete the Tracing
- Step 5: Closing the Gaps
- Step 6: Fill the Illustration with White Color
- Step 7: Adding Additional Outlines
- Step 7: Starting the “Middle” Layer
- Step 8: Adding a Circular Pattern
- Step 9: Starting the “Bottom” Layer
- Step 10: Create the Background Pattern
- Step 11: Duplicate, Duplicate, Duplicate!
- Step 12: Create the Border
- Step 13: the Finale
- Tutorial Summary
- Download Source Files
Share this article


Web Design Calculator
Use our free tool to get a free, instant quote in under 60 seconds.
View Web Design CalculatorMake estimating web design costs easy
Website design costs can be tricky to nail down. Get an instant estimate for a custom web design with our free website design cost calculator!
Try Our Free Web Design Cost Calculator


