
Preview
You can click on the image below to see the web design in full scale. 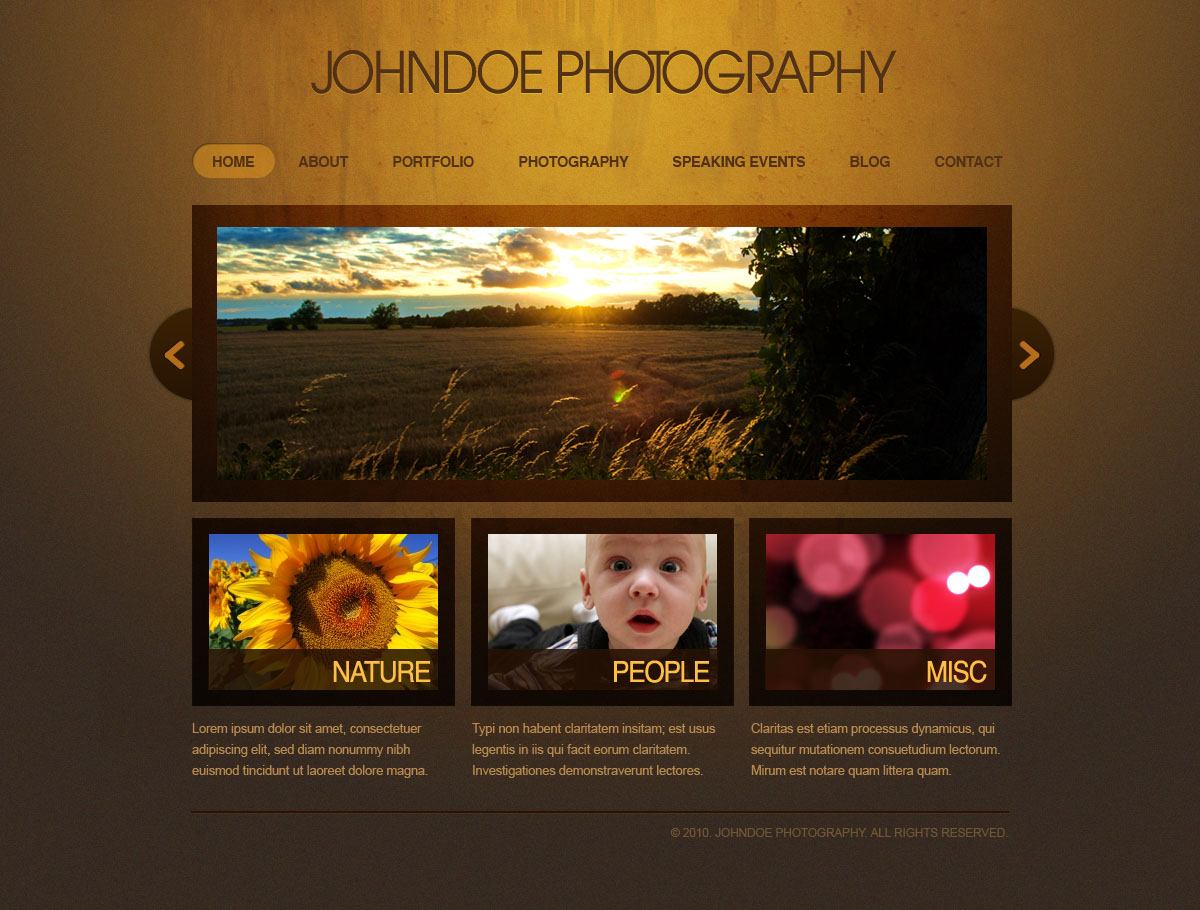
Tutorial Resources
- PSD Template: 960 Grid System
- Texture: Rust
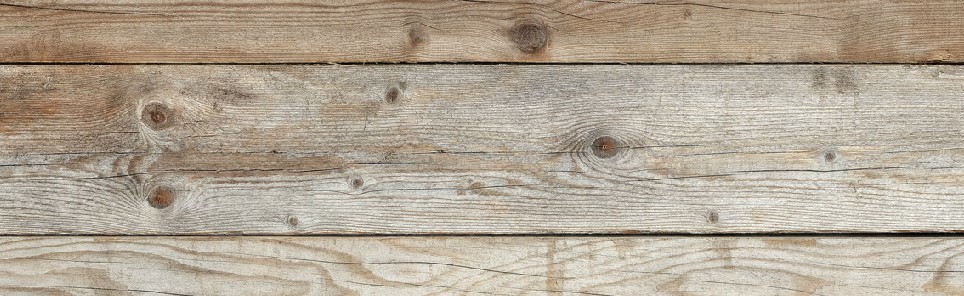
- Texture: Scratched Metal
- Stock Photo: Sunset
- Stock Photo: Sunflower
- Stock Photo: Baby boy
- Stock Photo: Bokeh
- Font: ITC AvantGarde
- Font: Helvetica
Step 1: Set Up the Photoshop Document
Create a new layer in Photoshop (Ctrl/Cmd + N) with dimensions of 1200x910px. 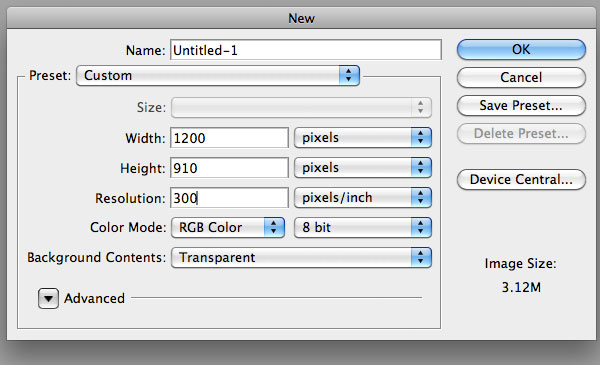
Step 2: Incorporate the 960 Grid System
We will be basing our layout on the 16-column 960 grid system. You can download the free PSD template from their website.
Once you have finished downloading the PSD template, open the PSD in Photoshop and drag it onto our canvas. Remember to keep this grid layer as the topmost layer in the Layers Panel, as this will serve as our guide for alignments. 
Step 3: Make the Layout’s Background
Temporarily hide our grid layer and create a new layer beneath it.
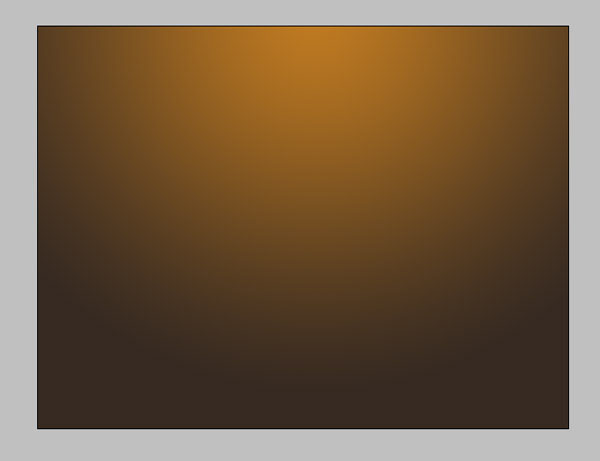
In the Tools Panel, set your Foreground color to a brown-orange color (#bc7821) and Background color to a dark brown (#362a21). Select the Gradient Tool (G) and set your option to Radial Gradient. Create a gradient at the center of the canvas.
 The gradient looks a bit plain, so let’s add some texture to it. Go to Filter > Convert for Smart Filter. By doing this, we are able to make changes to the filters applied to this layer later on.
Now let’s add some noise to this gradient by choosing Filter > Noise > Add Noise. 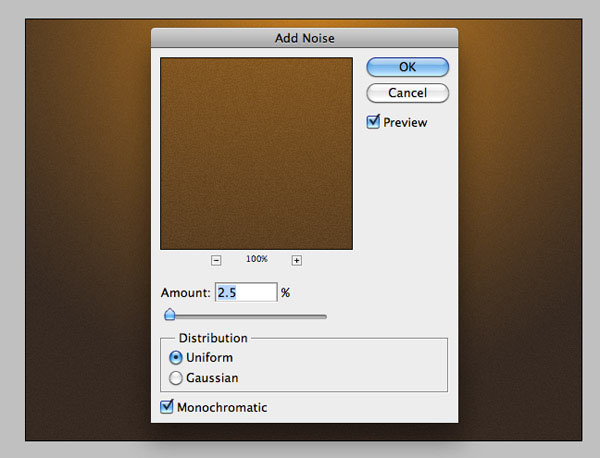 Let’s add more glow to the top area of our background. Take out your Brush Tool (B) and set the Master Diameter option to around 700px; also set your Foreground color to white.
Create a new layer on top of our gradient and click on the canvas once to apply the brush stroke. 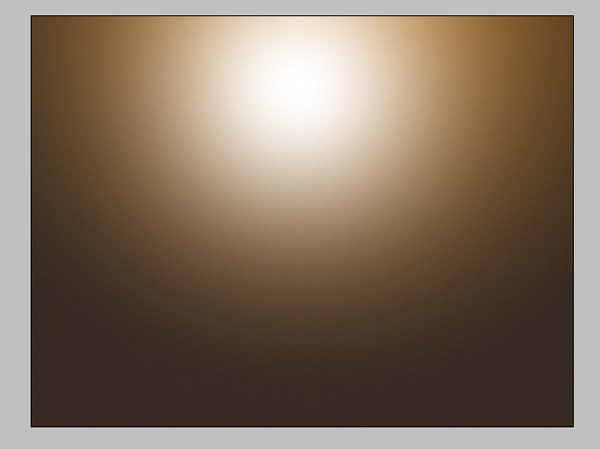 Change the Blend Mode of this layer to Overlay and adjust its Opacity to 34%.
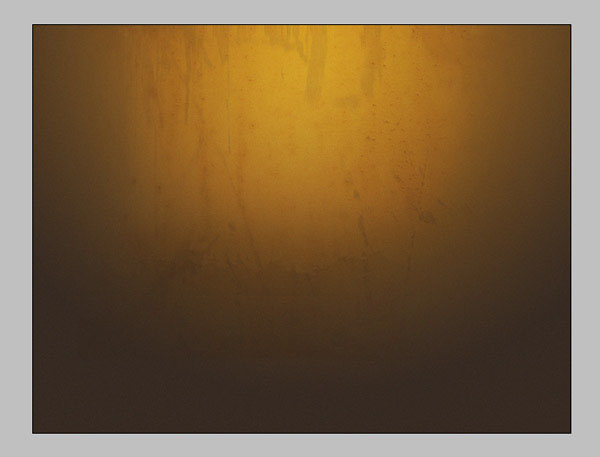
 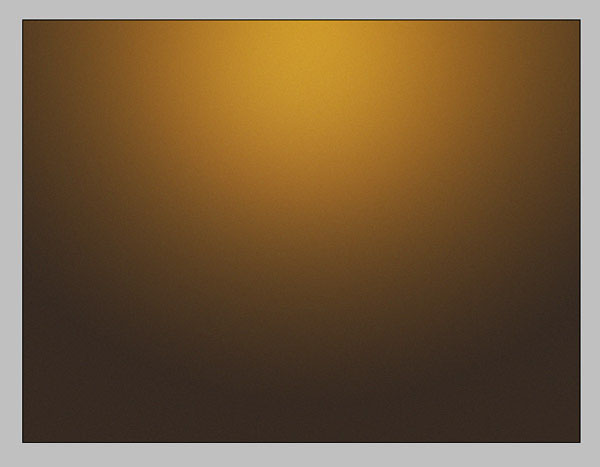 Open the Rust Texture suggested in the Tutorial Resources listing (or browse the Design Instruct Freebies section for something similar) in Photoshop.
Drag the image onto our canvas and resize it using the Free Transform command (Ctrl/Cmd + T) so that it is slightly smaller than the canvas. Using an ordinary rounded, feathered brush, slightly erase off the sides and the bottom area using the Eraser Tool (E). Alternatively, you can use a layer mask if you don’t want the changes to be permanent.
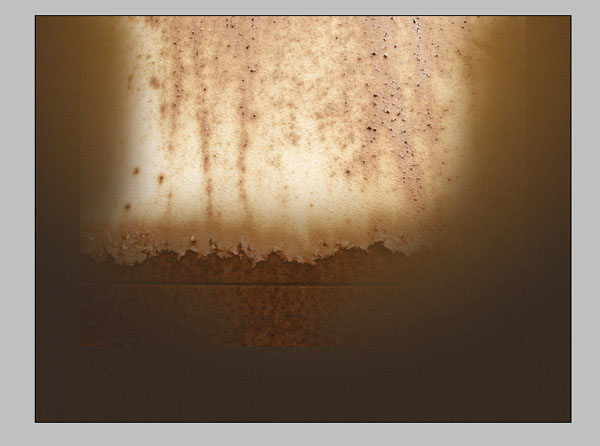 Change the rust texture’s Blend Mode to Overlay and its Opacity to 16%.
 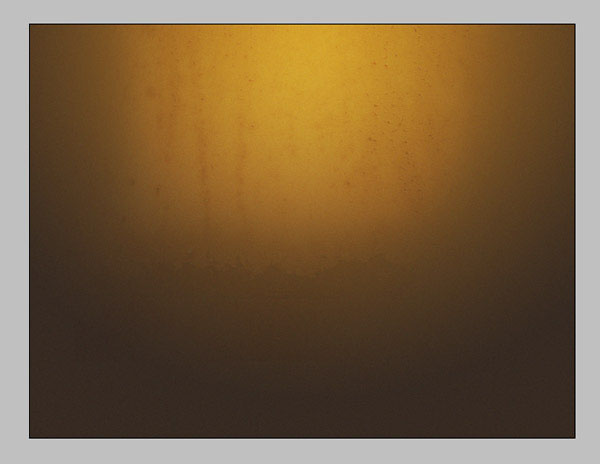 Next, open the Scratched Metal Texture in Photoshop, and also drag this texture onto our canvas and slightly erase off the sides and bottom. Set this layer’s Blending Mode to Multiply and adjust its Opacity to 15%.
Step 4: Add the Site Name
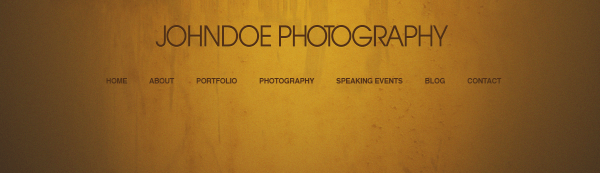
Unhide our grid layer. Select the Horizontal Type Tool (T) and set the Font option to ITC Avant Garde CE (or your preferred font). Also set the text color to a brown color (#523117).
Then type “JohnDoe Photography” (or any site name you would like) at the center of the layout. 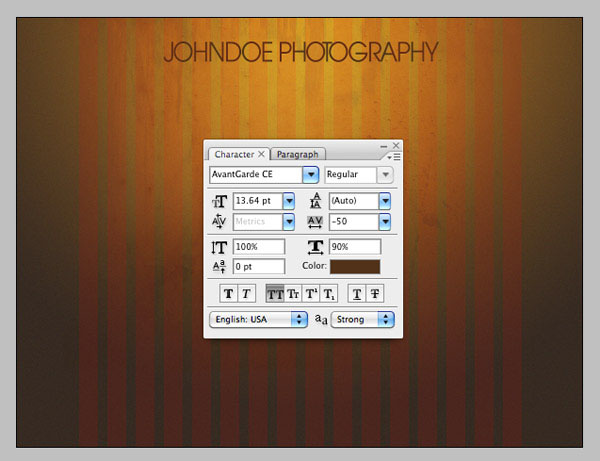 Duplicate the text layer and then set the duplicated text layer’s color to white (#ffffff), change its Blend Mode to Overlay and adjust its Opacity to 32%. Move it 1px down using the Move Tool (V) in combination with your Down Arrow key; this will create some sort of etched effect.

Step 5: Create the Navigation Menu
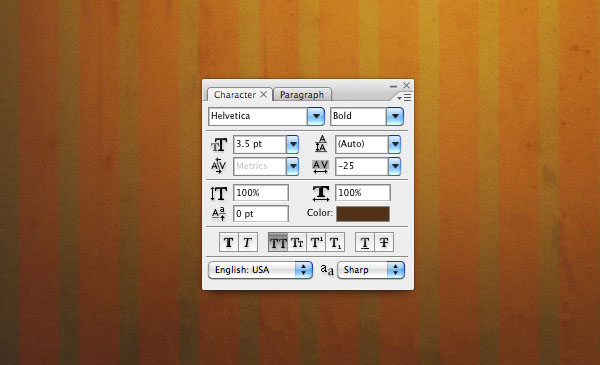
Create a new layer. Use the Horizontal Type Tool (T) (options settings shown below) to type out your navigation text underneath your site name. Make sure it’s centered on the canvas.
 Let us now design the hover state of each item on the navigation. Select the Rounded Rectangle Tool (U). Set the tool’s option to Shape Layers and Radius to 30px.
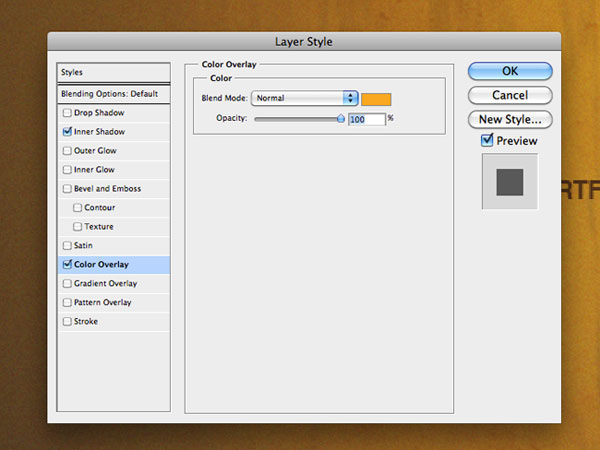
Draw a rounded rectangle on a new layer underneath the navigation link item (“Home”). 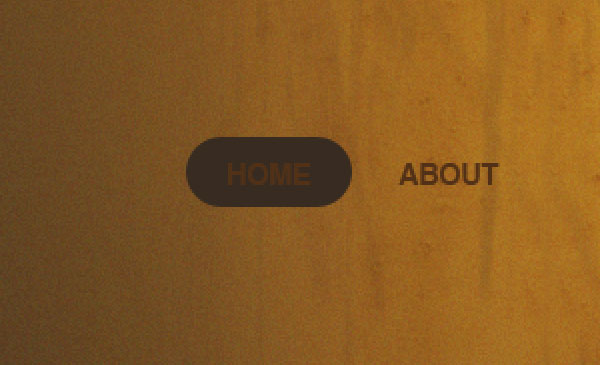 Next, apply a Color Overlay and Inner Shadow to the rounded rectangle’s layer (double-click on its thumbnail in the Layers Panel to access the Layer Style dialog window).
Color Overlay
Set the color to a yellow (#f9a81f).
Inner Shadow
Set the color of the inner shadow to black (#000000). 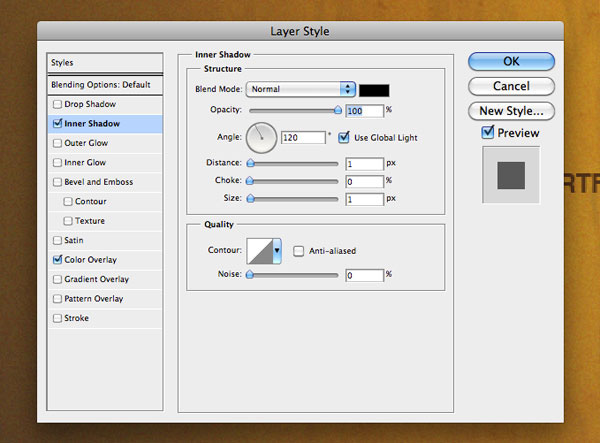 Also, set the rounded rectangle layer’s Opacity to about 30% to show our background through it slightly.
 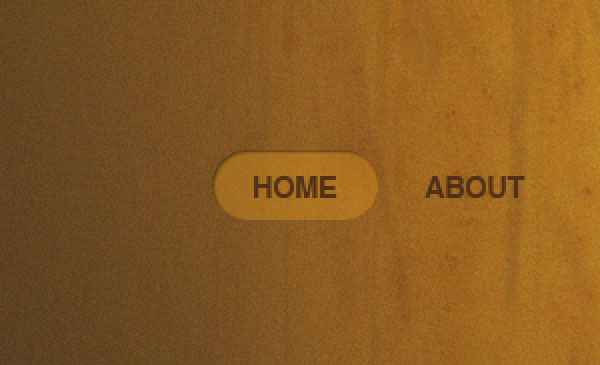 Let’s make the rounded rectangle look more etched.
Place a selection around the rounded rectangle by pressing Ctrl/Cmd and then clicking on the rounded rectangle from the Layers Panel. On a new layer, go to Edit > Stroke. 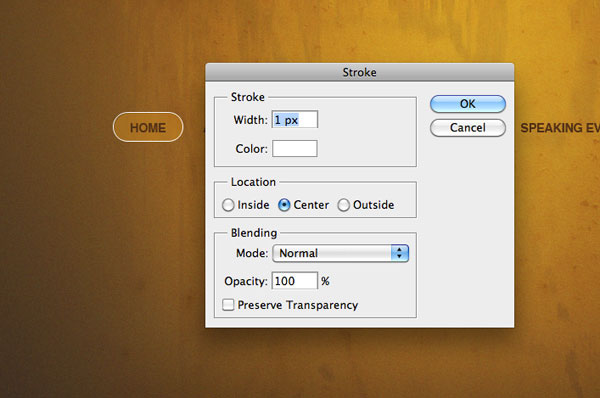 Change the layer’s Blend Mode to Overlay and adjust its Opacity to 18%.
Erase off the left and top stroke using the Eraser Tool (E) set with a small, feathered tip. 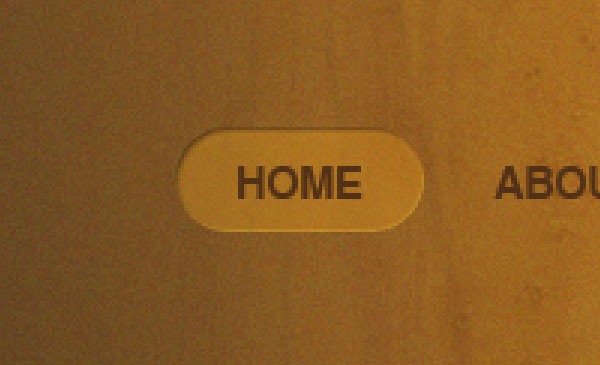
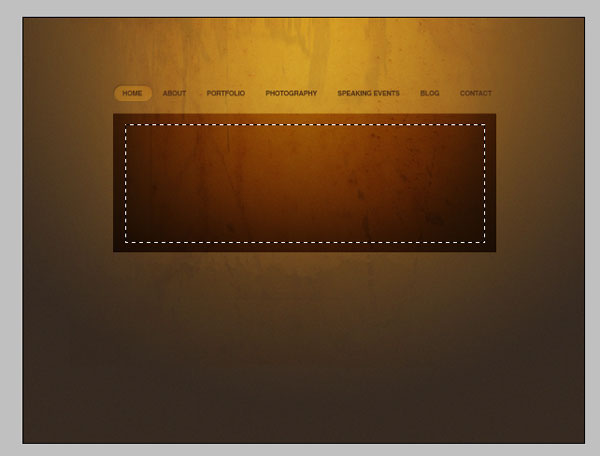
Step 6: Add the Slideshow Section
Turn our grid layer back on. Using the Rectangular Marquee Tool (M), draw a rectangular selection below our navigation and then fill (Shift + F5) the selection with black (#000000).
Make sure the rectangle is 14 grid columns wide and centered on our layout. 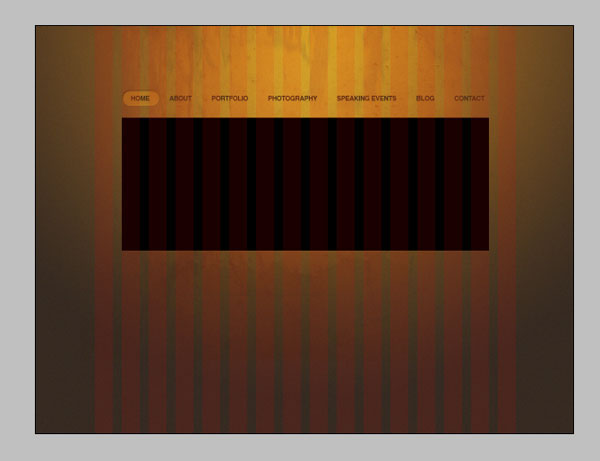 Change this rectangle layer’s Blend Mode to Soft Light to let some of the background show through it.
 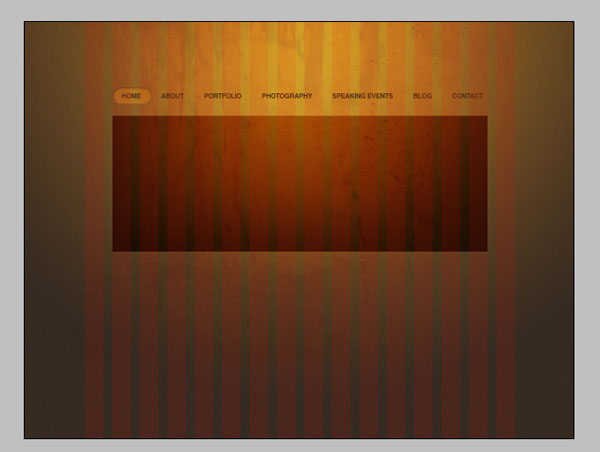 Time to place an image inside our slideshow.
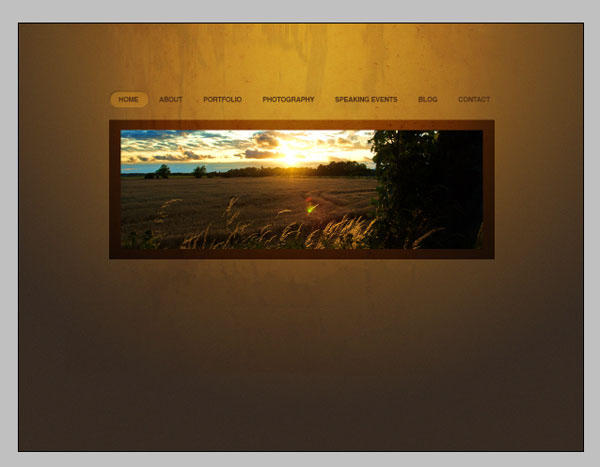
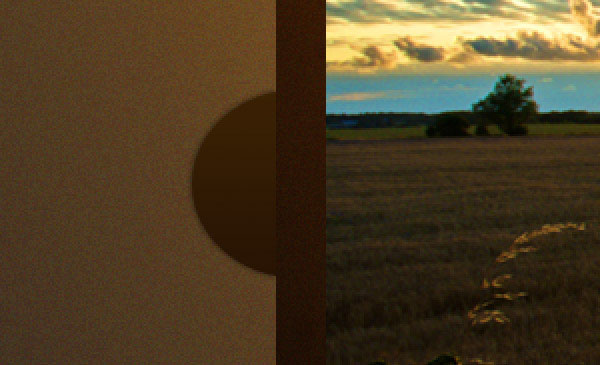
Open a photo (such as the Sunset stock photo mentioned in the Tutorial Resources listing) in Photoshop and drag it onto our layout. Scale it down appropriately with Free Transform. Hide the photo’s layer temporarily and then draw a rectangular selection inside the slideshow area with the Rectangular Marquee Tool (M).
 Let us mask the photo by hitting on Add vector mask button from the Layers Panel, which should create a mask with your selected area. You can now unhide the photo layer again. You should notice that, if done correctly, any parts of the image that lays outside of the masked area will be hidden.
Step 7: Make the Slideshow Controls
Create a new layer group underneath the slideshow layers and name it “arrow” (for organization). Create a new layer inside this newly-created layer group. Select the Ellipse Tool (U) and draw a circle on the left side of the slideshow.
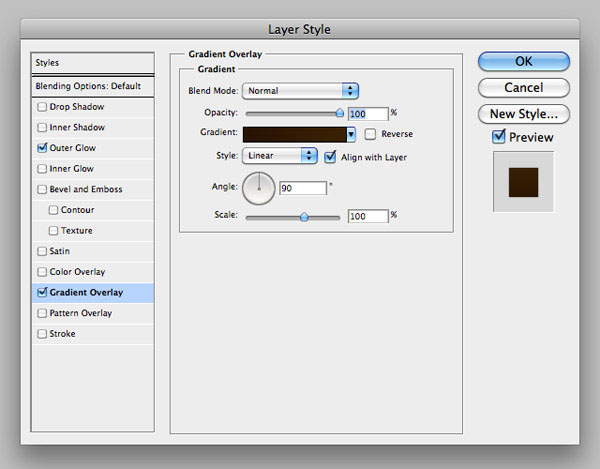
Next, add an Outer Glow and Gradient Overlay on the circle.
Outer Glow
Set the outer glow’s color to black (#000000). 
Gradient Overlay
Have the gradient go from a dark brown (#271303) to a slightly less dark brown (#3a2102).
 This is what our left slideshow control looks like now.
 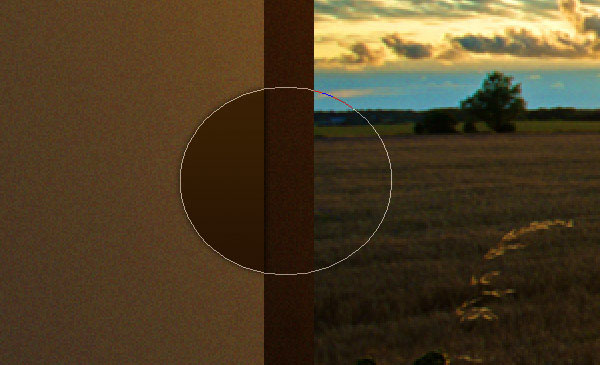 We will need to remove the unnecessary shadow of the circle. To do this, we need to flatten this shape by going to Layer > Rasterize > Shape.
After it’s flattened, select the area underneath the slideshow using a Rectangular Marquee Tool (M) and then hit Delete to remove the unwanted area below the rectangular selection. 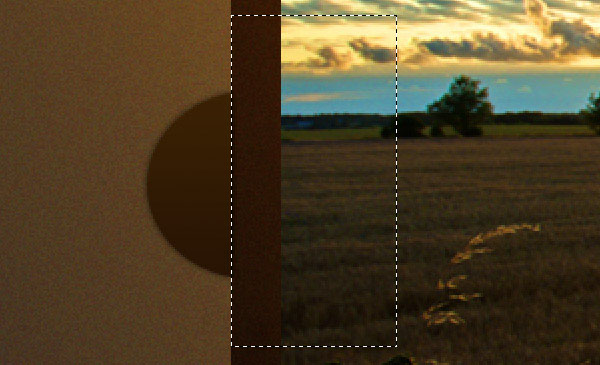
 Let us now create the arrows for our buttons. On a new layer, select the Rounded Rectangle Tool (U), and then set its options so that it’s set up for Shape Layers and Radius at 30px.
Having a high value for the Radius option makes each end look circular. Draw a diagonal shape that represents the left part of the arrow. Change this shape’s color to a dark muted orange (#b56d1b) by giving it a Color Overlay layer style.
![]() To create the bottom side of the arrow, duplicate this shape and go to on Edit > Transform Path > Flip Horizontal.
To create the bottom side of the arrow, duplicate this shape and go to on Edit > Transform Path > Flip Horizontal. ![]() Select the two layers that make up the arrow in the Layers Panel and then go to Edit > Transform > Rotate; rotate the arrow -90o so that it is pointing to the left.
Select the two layers that make up the arrow in the Layers Panel and then go to Edit > Transform > Rotate; rotate the arrow -90o so that it is pointing to the left. ![]() Merge these two layers by selecting them in the Layers Panel and then pressing Ctrl/Cmd + E.
Merge these two layers by selecting them in the Layers Panel and then pressing Ctrl/Cmd + E.
Duplicate the merged layer. ![]() Give the duplicated layer a black (#000000) Color Overlay layer style to change its color, and also move it 1px to the left using the Move Tool (V); this will create an etched look.
Give the duplicated layer a black (#000000) Color Overlay layer style to change its color, and also move it 1px to the left using the Move Tool (V); this will create an etched look. ![]() We will now be creating the right arrow.
We will now be creating the right arrow.
Select our “arrow” layer group in the Layers Panel, duplicate the group, and then flip its orientation by going to Edit > Transform > Flip Horizontal. Move the duplicated slideshow control to the right side. ![]() We should now have something like this:
We should now have something like this: ![]()
Step 8: Create the Small Photo Thumbnails
Turn the grid layer back on.
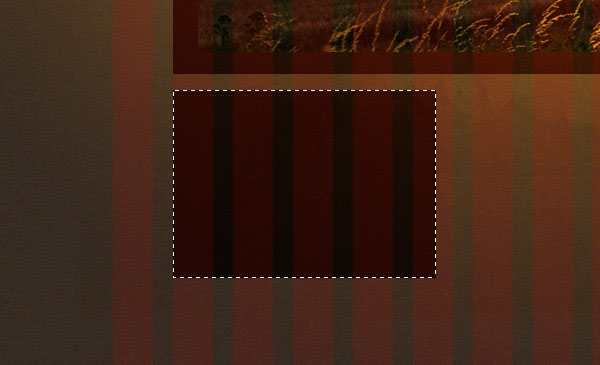
Using the Rectangular Marquee Tool (M), draw a selection about 4 and half columns wide below the slideshow. Fill it with the color black (#000000). Change the Blend Mode to Soft Light.
 Open a photo (such as the Sunflower stock photo), place it on our canvas, and then resize it to about 80% of its original size. Hide the sunflower’s layer temporarily and, using the Rectangular Marquee Tool (M), draw a smaller selection inside our first rectangle. Unhide the Sunflower photo and click the Add layer mask icon in the Layers Panel.
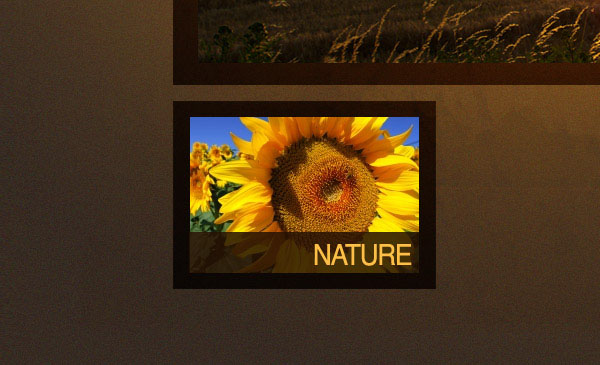
This will make it so that only the selected area of the sunflower shows. 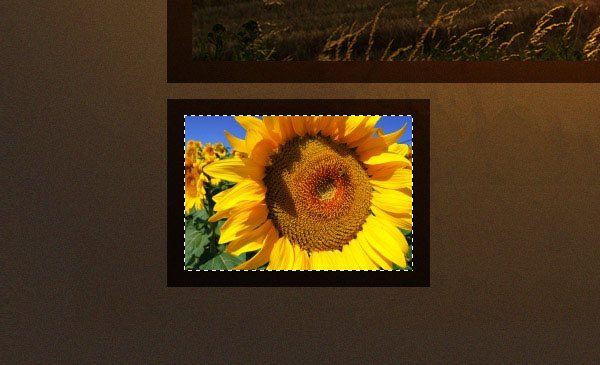 Let us now create the label for our thumbnail. Using the Rectangular Marquee Tool (M), create a selection at the bottom of the photo and fill it with our dark brown color (#261103).
Change this layer’s Opacity to 85% to let parts of the photo behind it show. Using the Horizontal Type Tool (T), add a label to it (such as “NATURE”). I used the Helvetica font with a yellow text color (#ffbf47).
 Add some text below our thumbnail; this will serve as some sort of description for this particular thumbnail.
 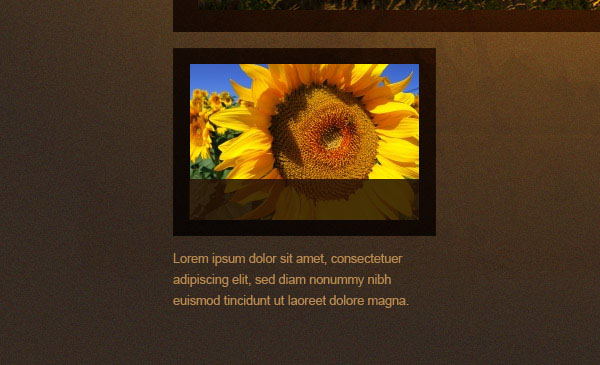 Repeat the same process to add 2 more thumbnail photos (you can use the Baby boy and Bokeh stock images suggested in the Tutorial Resources listing, or use some of your own photos).
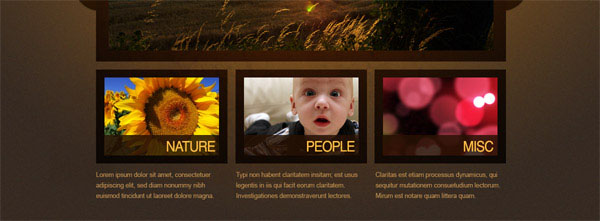
Step 9: Make the Footer
As the final step in the process, we will create the footer area.
Create a new layer. Select the Pencil Tool (B) and set its color to a dark brown color (#2c1303). Draw a 14-column wide division below the three thumbnails that will serve as our divider between the main content and the footer area.
Tip: Holding the Shift key ensures we create a straight line.  Duplicate the line layer you just created and change its color to white (#ffffff) using a Color Overlay layer style. Move the duplicate 1px down.
Change its Blend Mode to Overlay and reduce its Opacity to 18% to create some sort of etched effect.  Finally, use the Horizontal Type Tool (T) to add your footer text (you can include, for example, some copyright information).
Tutorial Summary
We have successfully created an elegant photography site design mockup!
We used various techniques and methods that are common in developing site layouts, including the use of selection tools, shape tools, applying grunge textures and filters, tweaking blending modes of layers, and so on. If you still aren’t comfortable building a site from scratch like this, I suggest checking out a web design company! If you aren’t sure how to find a good one, check out these tips!
Some companies can do designs for sites much more complex than this, like one with hundreds of pages for a college, so the options are out there. But if you are just looking for a simple design, I hope you found this tutorial useful and feel free to leave any questions in the comments.
Download Source Files
- elegant_photography_layout (ZIP, 9.31 MB)
-
 Trevin serves as the VP of Marketing at WebFX. He has worked on over 450 marketing campaigns and has been building websites for over 25 years. His work has been featured by Search Engine Land, USA Today, Fast Company and Inc.
 -

WebFX is a full-service marketing agency with 1,100+ client reviews and a 4.9-star rating on Clutch! Find out how our expert team and revenue-accelerating tech can drive results for you! Learn more
Make estimating web design costs easy
Website design costs can be tricky to nail down. Get an instant estimate for a custom web design with our free website design cost calculator!
Try Our Free Web Design Cost Calculator
Table of Contents
- Preview
- Tutorial Resources
- Step 1: Set Up the Photoshop Document
- Step 2: Incorporate the 960 Grid System
- Step 3: Make the Layout’s Background
- Step 4: Add the Site Name
- Step 5: Create the Navigation Menu
- Step 6: Add the Slideshow Section
- Step 7: Make the Slideshow Controls
- Step 8: Create the Small Photo Thumbnails
- Step 9: Make the Footer
- Tutorial Summary
- Download Source Files
Share this article


Web Design Calculator
Use our free tool to get a free, instant quote in under 60 seconds.
View Web Design CalculatorMake estimating web design costs easy
Website design costs can be tricky to nail down. Get an instant estimate for a custom web design with our free website design cost calculator!
Try Our Free Web Design Cost Calculator


