- Home
- Blog
- Web Design Create a Wild Western "Wanted" Poster in Photoshop
Create a Wild Western "Wanted" Poster in Photoshop
-
 19 min. read
-
 Trevin Shirey
 VP of Marketing
- Trevin serves as the VP of Marketing at WebFX. He has worked on over 450 marketing campaigns and has been building websites for over 25 years. His work has been featured by Search Engine Land, USA Today, Fast Company and Inc.
Preview
Click on the image to see the final result in full size. 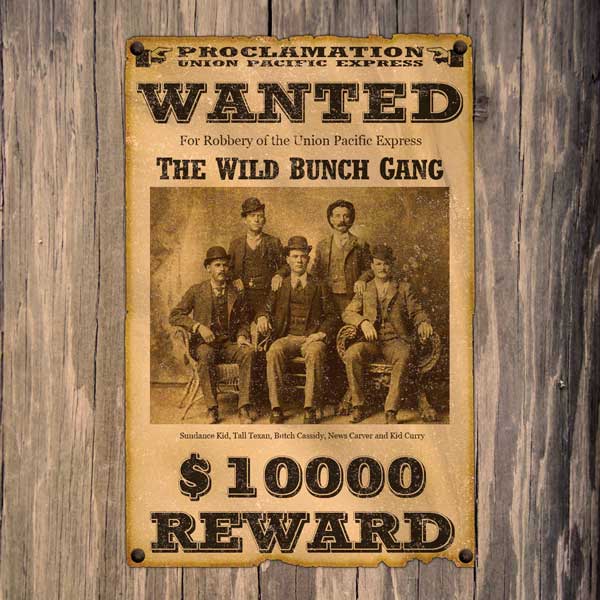
Tutorial Resources
- Texture: Wood Grain Texture 5 (Design Instruct)
- Image: Wild Bunch (Wikimedia Commons)
- Texture: Concrete Texture 02 (Design Instruct)
- Texture: Fold 01 (Design Instruct)
Step 1: Drop in the Wooden Background
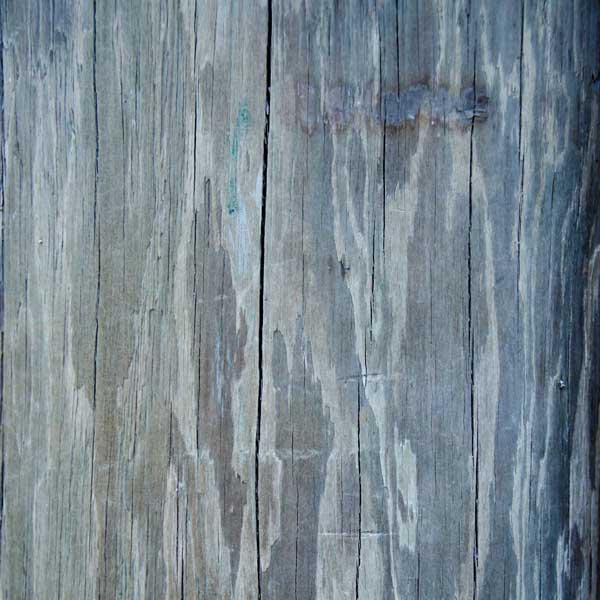
Create a new document in Photoshop by going to File > New (Ctrl/Cmd + N). Set the dimensions of the canvas to 1350x1350px. 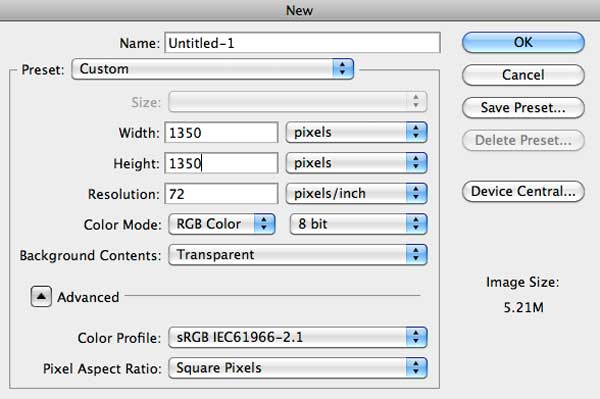 Download and open Wood Grain Texture 5 in Photoshop, place it into the new Photoshop document and then scale it down to fit the canvas.
Step 2: Create the “Wanted” Poster Background
With the Rectangular Marquee Tool (M), draw a selection sized at 800x1200px for the background of the “Wanted” poster. Go to Edit > Fill to fill the selection with a beige color (#f2e7cb). 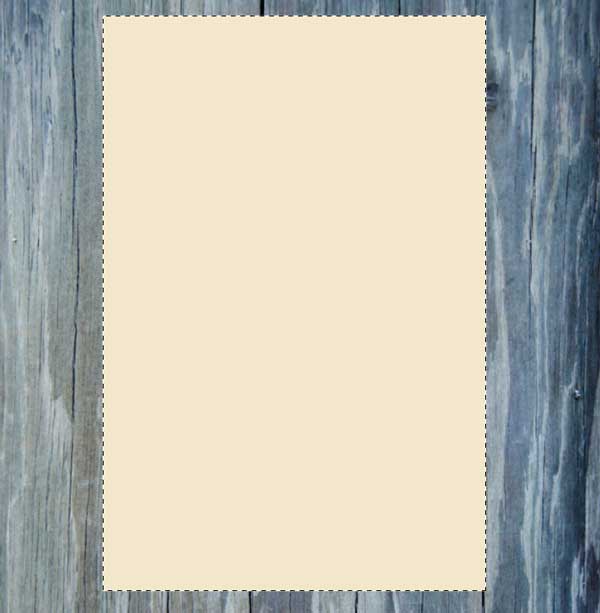 Zoom in using the Zoom Tool (Z) so that we can focus on the edges of the poster’s background.
Switch to the Lasso Tool (L) and then make an irregularly shaped selection at the top edge of the poster’s background. 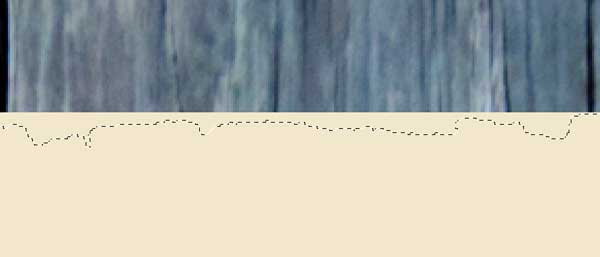 Once done, hit Delete to remove the selected parts of the poster’s background.
 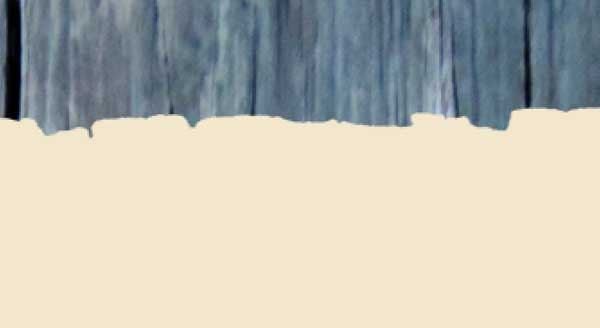 Go around the edges of the poster’s background to roughen up all the sides.
Patience and experimentation go a long way in this process. 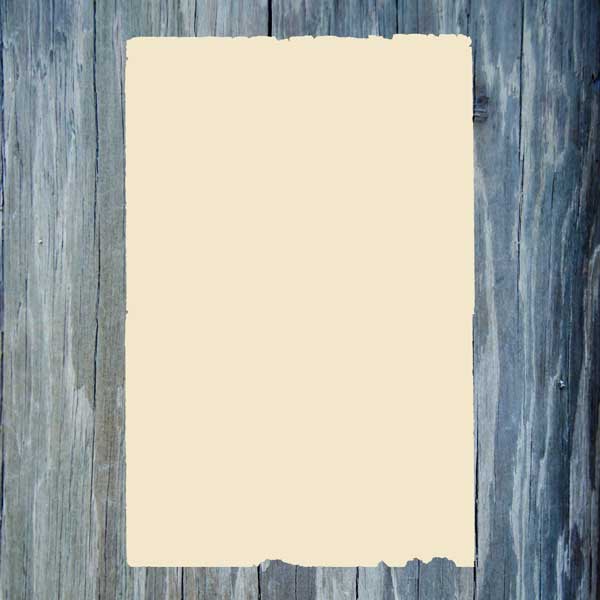 Create a selection around the poster’s background by Ctrl-clicking/Cmd-clicking on its layer’s thumbnail in the Layers Panel. Grab the Burn Tool (O) and, with a round, soft brush, brush over the poster background’s edges to give it a burnt look.
Note that we load a selection around the poster’s background so that we only burn within the selection. 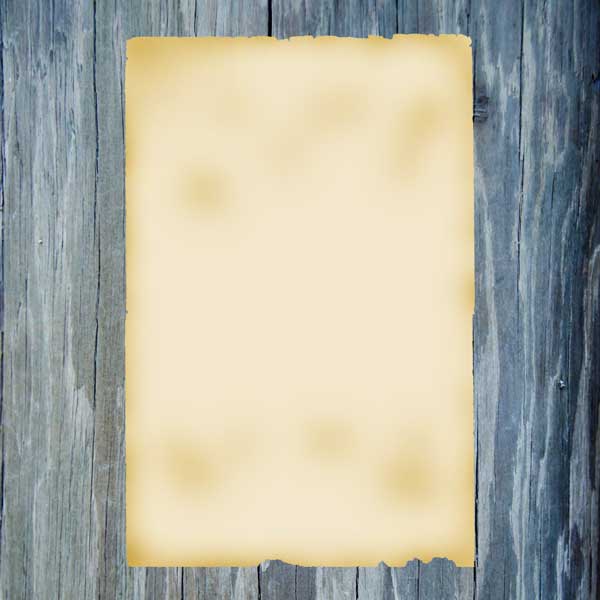
Step 3: Intensify the Burned Edges
Let’s intensify the burns around the edges. Create a new layer above the poster background layer (Ctrl/Cmd + Shift + N).
The previous selection should still be active, but if you accidentally deselected, just go to Select > Reselect (Shift + Ctrl/Cmd + D). Set the Foreground color to a dark brown (#211a0a) and, on the new layer, fill the selection with the Foreground color by pressing Alt/Option + Backspace. 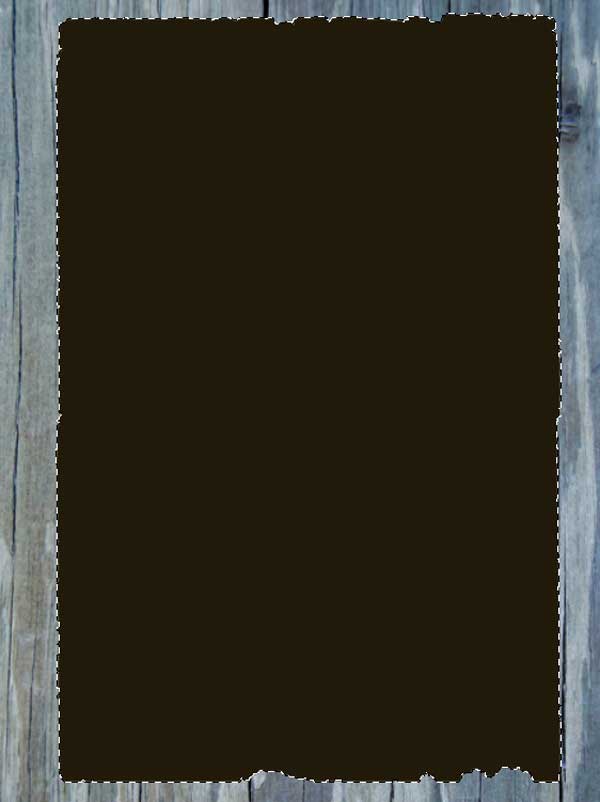 Go to Select > Modify > Contract and contract the selection by 10px.
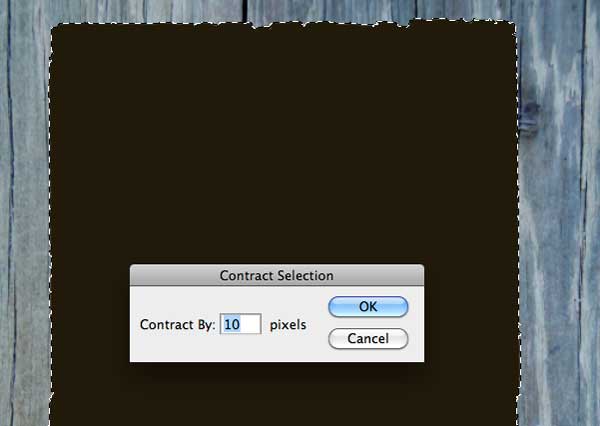 Remove the selected inner area by pressing Delete.
 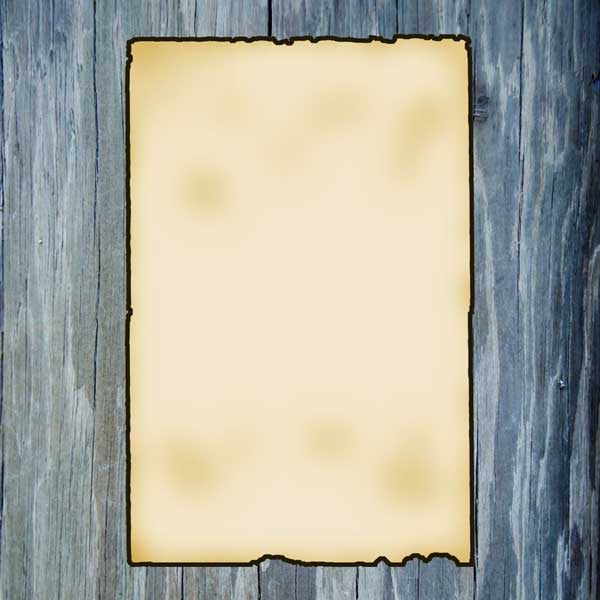 Load a selection around the poster’s background again. On the dark brown layer, apply the Gaussian Blur filter with Radius set at 3px.
Change the Blend Mode of the layer to Overlay and reduce its Opacity to 40%.  Deselect the selection (Ctrl/Cmd +D). Duplicate the dark brown layer (Ctrl/Cmd + J).
Load a selection around the poster’s background again. On the duplicate dark brown layer, reuse the Gaussian Blur filter by going to Filter > Last Filter (Ctrl/Cmd + F). Set the layer’s Opacity to 50% afterwards.
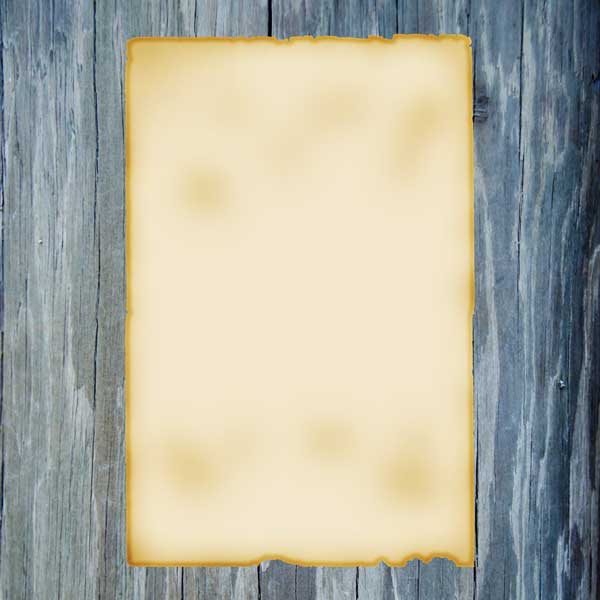 Repeat the above process one more time, but this time, use a Radius of 5px for the Gaussian Blur filter on the new layer and set the layer Opacity to 20%.
Step 4: Add the First Block of Text
Set the Foreground color to a dark brown (#231d14). Switch to the Custom Shape Tool (U).
Up in the Options Bar, under the Shape dropdown menu, choose the Point Right shape and then draw it on the upper left corner of the poster. 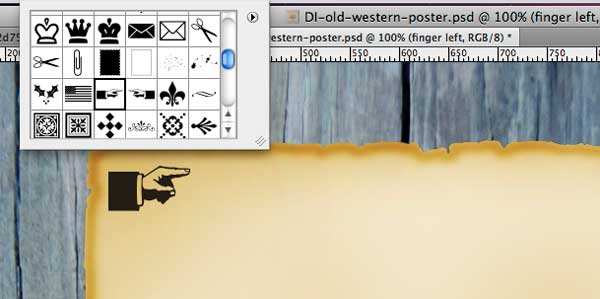 Duplicate this shape (Ctrl/Cmd + J). Go to Edit > Transform > Flip Horizontal and position the duplicate shape on the upper right corner.
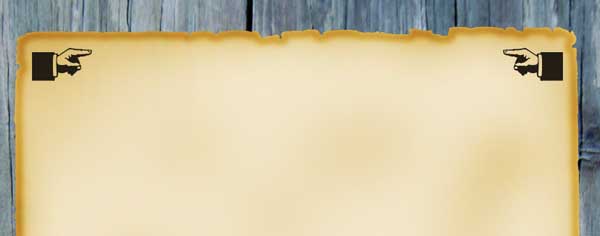 With the Horizontal Type Tool (T), type the word “PROCLAMATION” using the font Rockwell Std, Bold Condensed with the text color set to the dark brown we’ve been using (#231d14). Also, set the Vertically scale and Horizontally scale options to 70% and 180% respectively.
 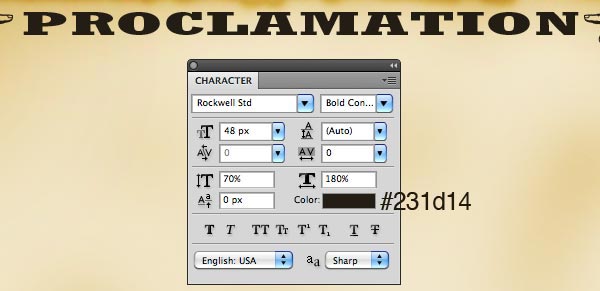 Add another text block below the first text block (settings of this new text block shown below).
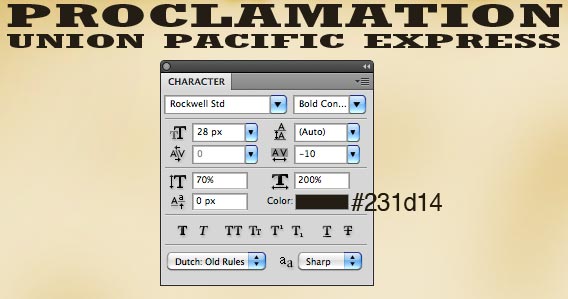
Step 5: Add the “Wanted” Text
We will now be adding the word “WANTED” on our poster. Choose the Horizontal Type Tool (T), set the tool up so that you’re using Rockwell Std, Bold as the font and the same dark brown text color (#231d14), and then type the word “WANTED” below the text we added earlier. In the Character Panel, set Tracking to 50 (to give the letters more space in between them), Vertically scale to 120% and Horizontally scale to 150%.
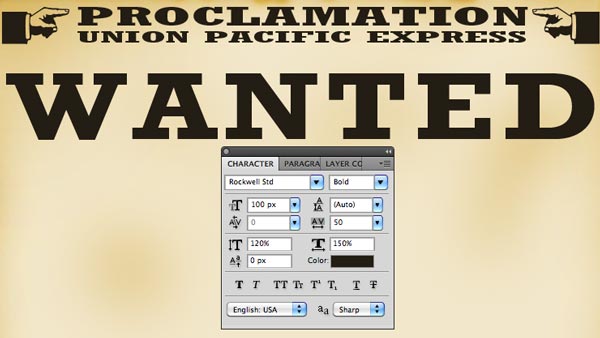 Ctrl-click/Cmd-click on the “WANTED” text layer’s thumbnail to load a selection around the letters. Go to Select > Modify > Expand to expand the selection by 3px. Create a new layer below the text layer and, on the new layer, fill the selection with a light beige color (#f2e7cb).
Double-click on the new layer to access the Layer Style dialog window, and then give the layer a 1px Stroke layer effect (color of the stroke shown below). 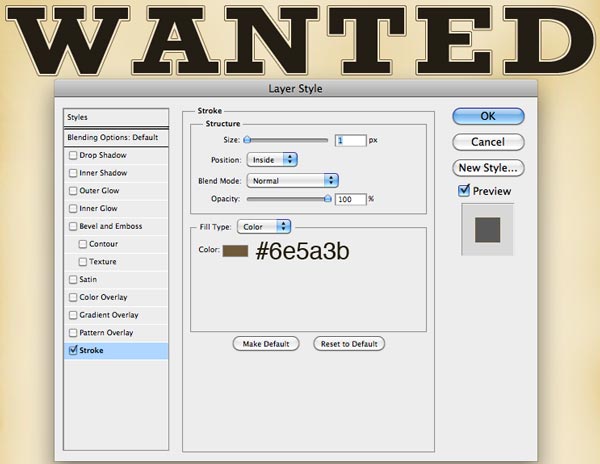 Ctrl-click/Cmd-click on the text layer’s thumbnail to load a selection around the letters. Expand the selection by 1px by going to Select > Modify > Expand.
Create a new layer below it and, on the newly created layer, fill the expanded selection with #231d14. Afterwards, switch to the Move Tool (V) and use your Arrow keys to move the layer 4px down and 2px to the right. 
Step 6: Adding More Text
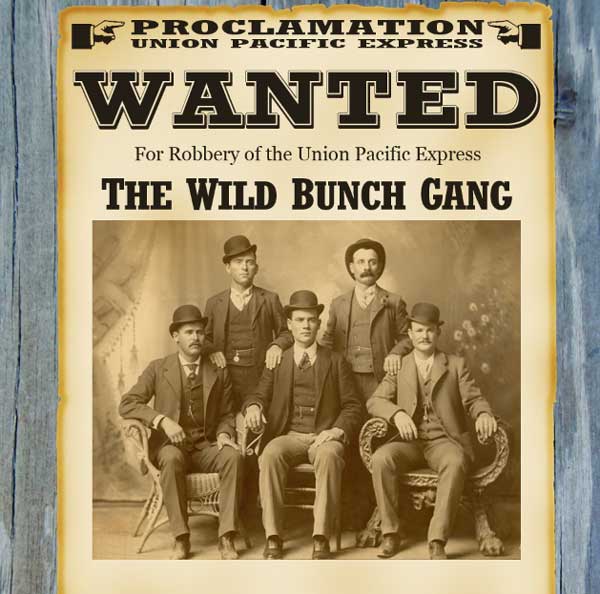
We need to add more text to our “Wanted” poster. Use the following images as a reference (the text color used is #231d14).
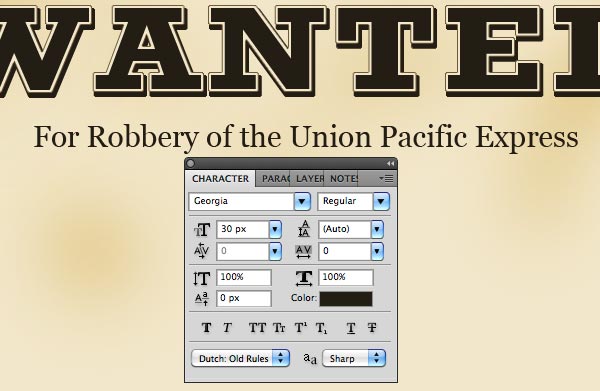
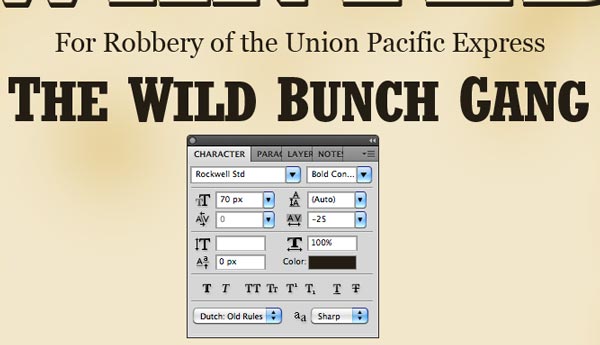 Note that for the “The Wild Bunch Gang” text, you have to set the Vertically scale option differently. First, set Vertically scale to 90% for the entire text layer. Afterwards, select the first letter of each word and then set the Vertically scale option to 100%.
Step 7: Add a Photo of the Wild Bunch Gang
I have used a Wild Bunch photo found on Wikimedia Commons, but feel free to use your preferred photo. Open the photo in Photoshop and then copy and paste it into our canvas. Use Free Transform (Ctrl/Cmd + T) to resize the photo a bit (make it smaller).
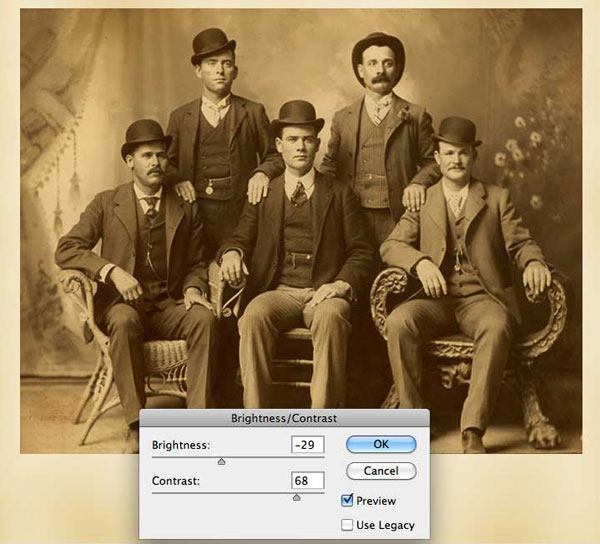
 Go to Image > Adjustments > Brightness/Contrast to make tonal changes to the photo (settings shown below). Afterwards, set the layer’s Blend Mode to Multiply.
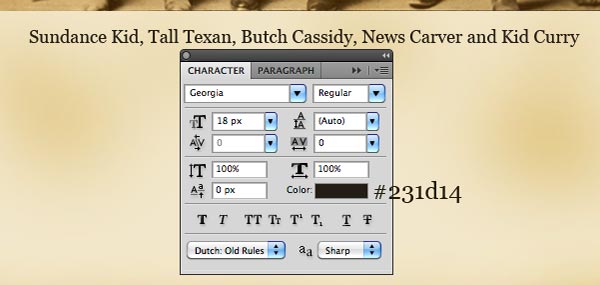
  With the Horizontal Type Tool (T), add names of the Wild Bunch members just below their photo.
Step 8: Add the Bounty
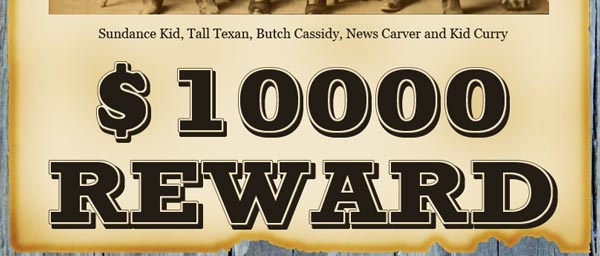
Many Old West “Wanted” posters had monetary rewards for the capture of the individuals featured in the poster. Let’s add a bounty to our poster. First, add a dollar sign using the Horizontal Type Tool (T) with the font Cooper Black sized at 120px.
In the Character Panel, set the Vertically scale option to 110% and the text color to the dark brown we have been using (#231d14). 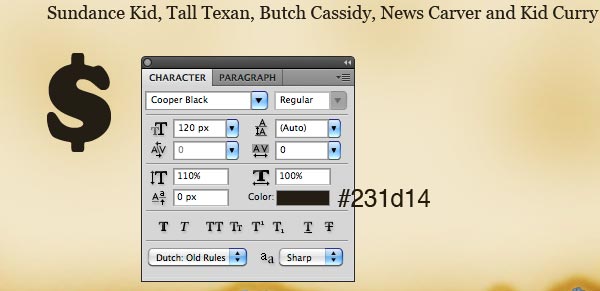 Use the text effect technique we used for the “WANTED” text (Step 5) on the dollar sign.
 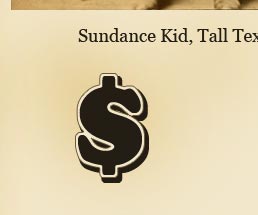 Beside the dollar sign, add the bounty’s value (I used “10000”).
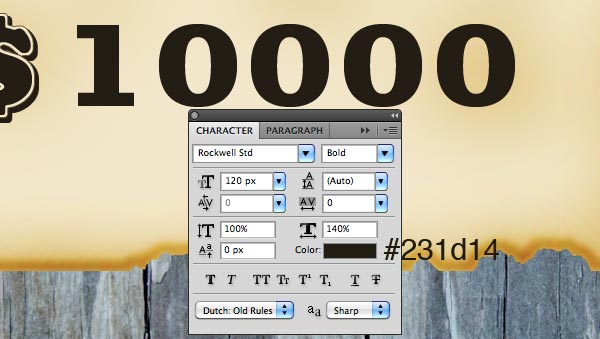 Below the bounty’s value, add the word “REWARD”.
 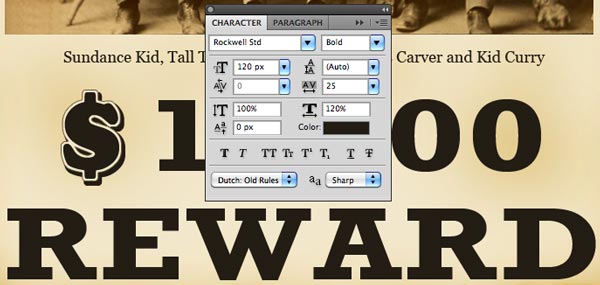 Use the same text effect technique in Step 5 to finish up the text.
Step 9: Add Some Textures
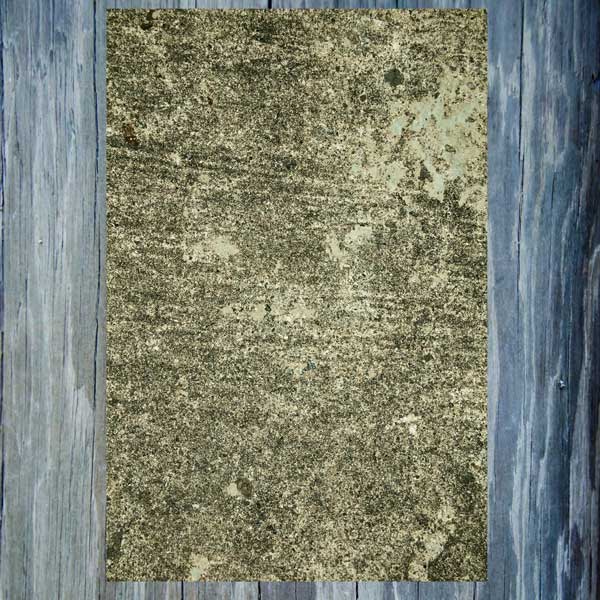
Download and open the Concrete Texture 02 texture (or your preferred texture from the Rough Concrete: Texture Pack freebie). Scale down the texture using Free Transform (Edit > Free Transform) so that it fits our poster’s dimensions.
 Load a selection around the poster’s background again by Ctrl-clicking/Cmd-clicking on the layer’s thumbnail.
 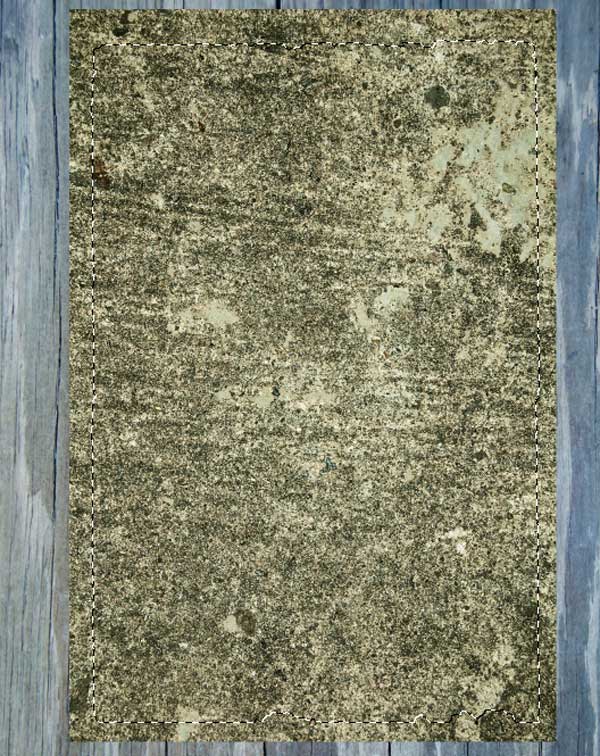 Make sure you are on the texture layer, then go to Layer > Layer Mask > Reveal Selection to apply a layer mask to the texture layer.
 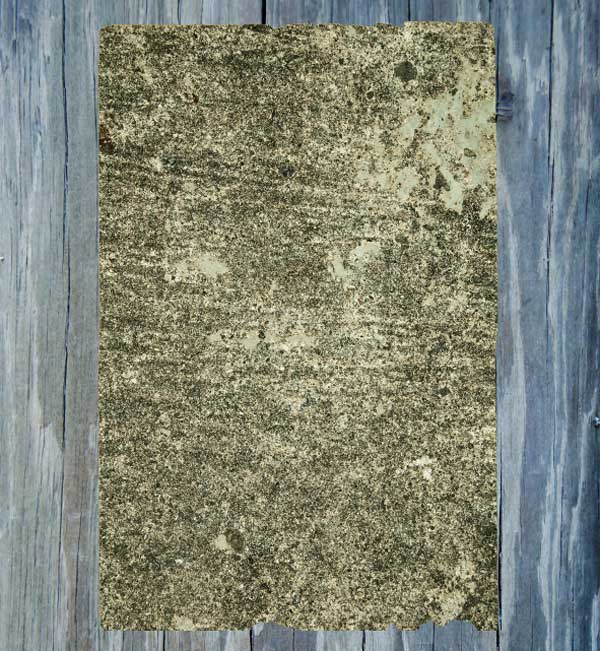 Change the Blend Mode of the layer to Overlay and Opacity to 60%.
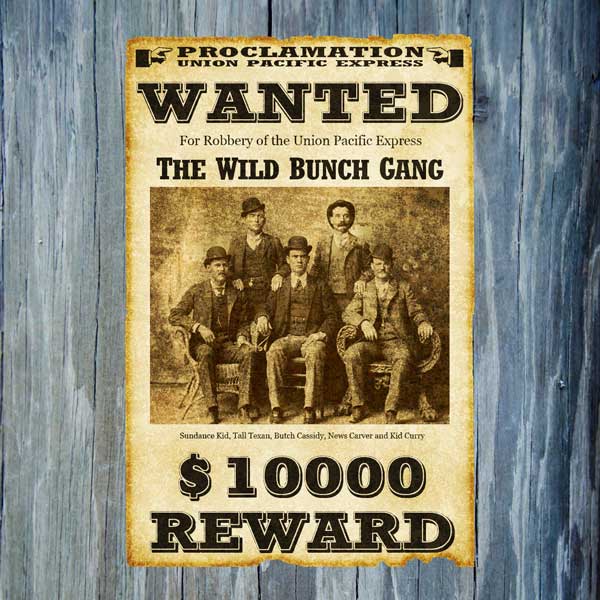 Open the Fold 01 texture from the Folds: Texture Pack in Photoshop. Desaturate the texture by going to Image > Adjustments > Desaturate (Ctrl/Cmd + Shift + U) to remove the colors in the texture. Afterwards, copy and paste the texture into our Photoshop document.
Using Free Transform (Ctrl/Cmd + T), scale down the Folds 01 texture to fit the poster’s background. 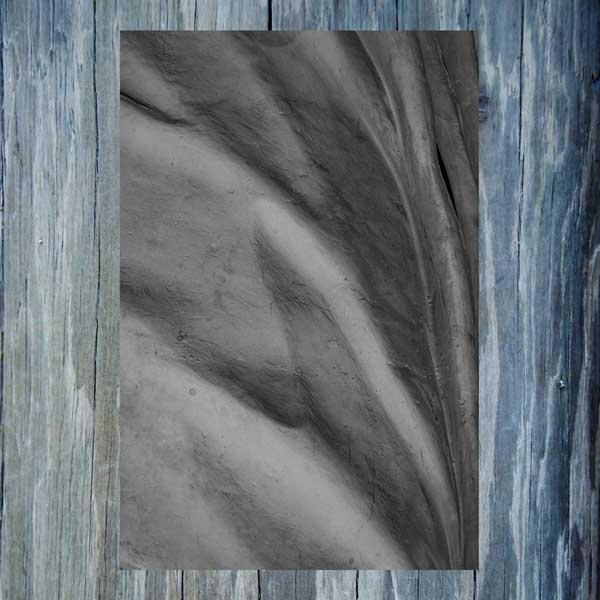 Set the Blend Mode of the layer to Multiply and lower the Opacity to 35%. Load a selection around the poster’s background then apply a layer mask to this layer by going to Layer > Layer Mask > Reveal Selection.
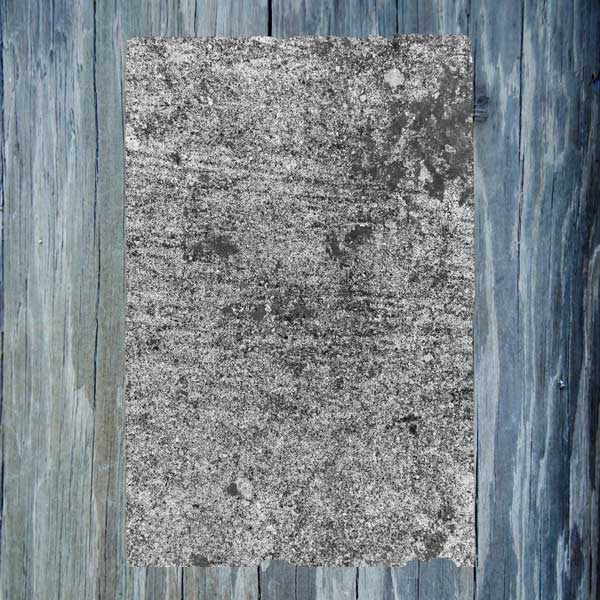
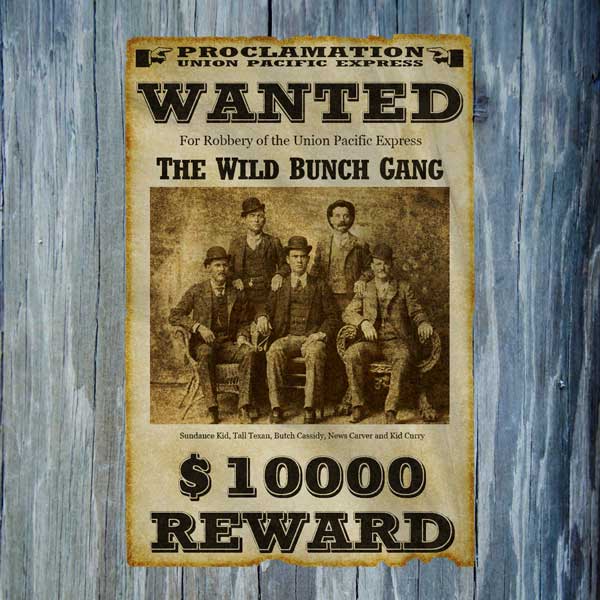 Let’s add more texturing effects: Some noise and scratches. Duplicate the Concrete Texture 02 layer and position it on top of all the layers. Desaturate the layer (Image > Adjustments > Desaturate) to remove its colors.
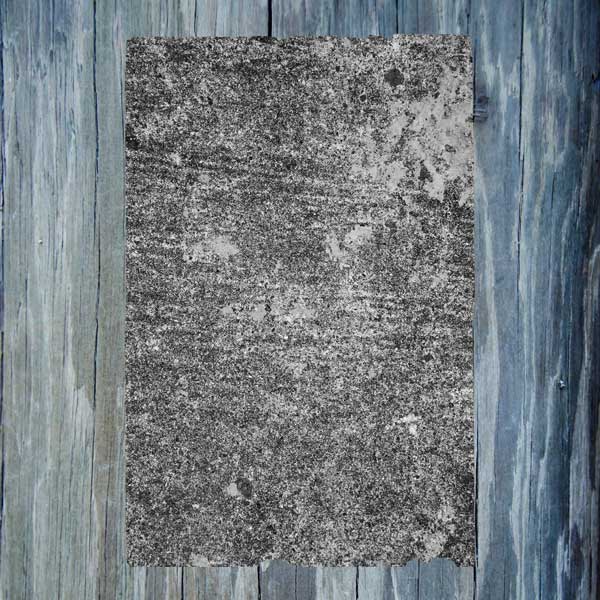 Go to Image > Adjustments > Invert (Ctrl/Cmd + I) to invert the colors of the concrete texture layer.
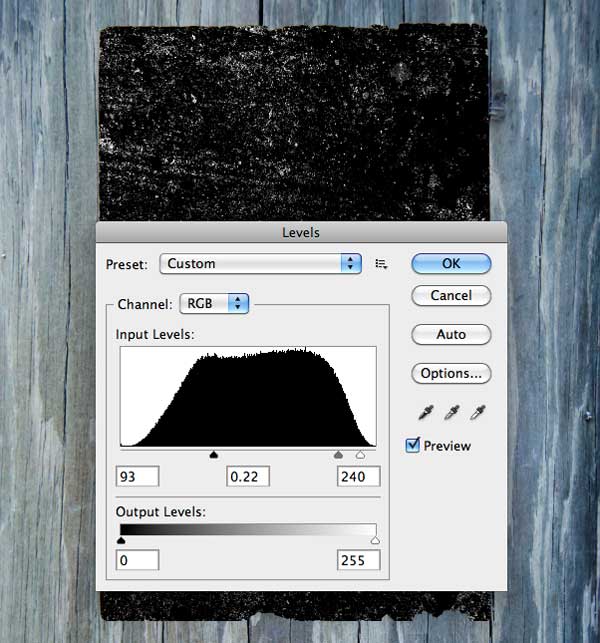
  Press Ctrl/Cmd + L to access the Levels image adjustment dialog window and then increase the color contrast by modifying the Levels settings (use the image below as a reference).
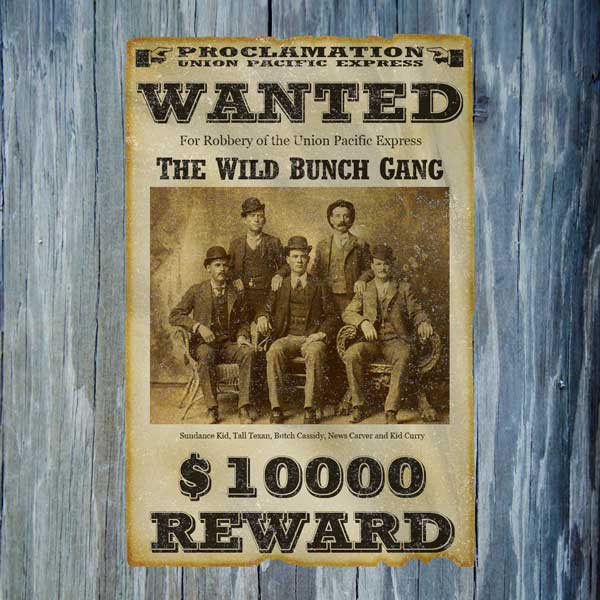
  Change the Blend Mode of the layer to Screen and then lower the Opacity to 70%.
Step 10: Nail Down the Poster
Let’s nail down the poster to the wood by creating the rusty nail heads. Create a new layer above all the layers. Zoom in to the upper right corner of the poster using the Zoom Tool (Z) so we can focus on the details of our nail head.
Select the Elliptical Marquee Tool (M) from the Tools Panel, hold Shift to create a perfect circle and then make the marquee selection. 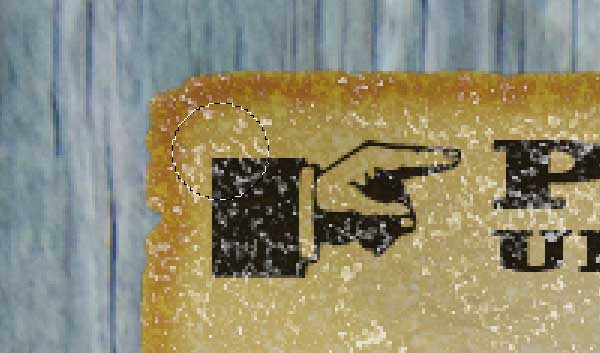 Set the Foreground color to gray (#434343) and the Background color to black (#000000). Switch to the Gradient Tool (G).
In the Options Bar, choose the Radial Gradient option and click on the Gradient Editor in order to be able to set the gradient to the Foreground to Background gradient preset. Click-and-drag over the selection to make the color gradient. 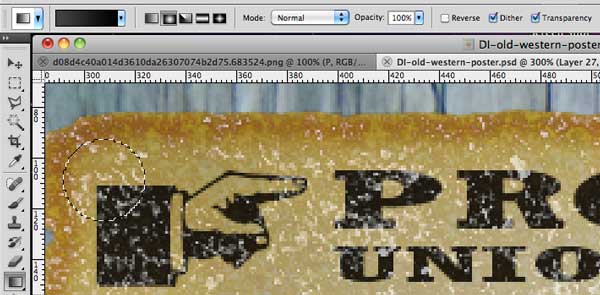
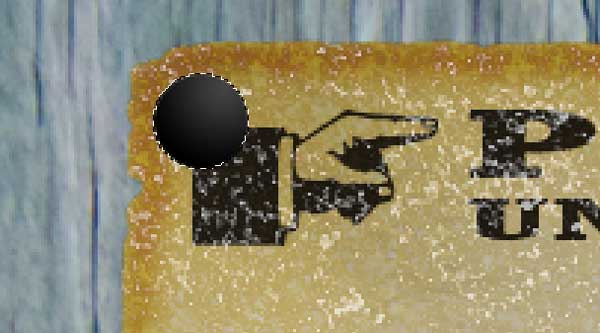 Double-click on the nail head’s layer to access the Layer Style dialog window.
Add the Bevel and Emboss layer effect using the settings shown below. 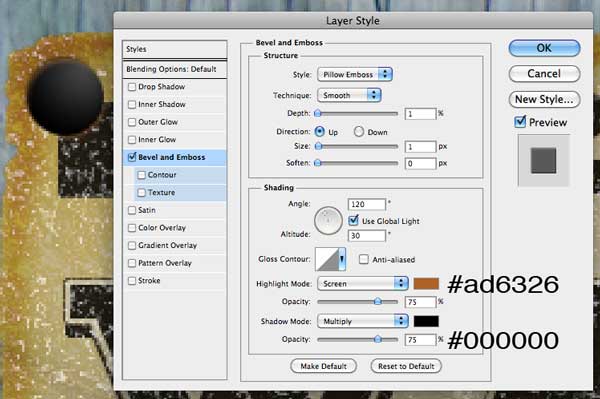 Grab the Custom Shape Tool (U) and, in the Shape dropdown menu up in the Options Bar, choose the 5 Point Star shape. Draw the star on top of the nail head.
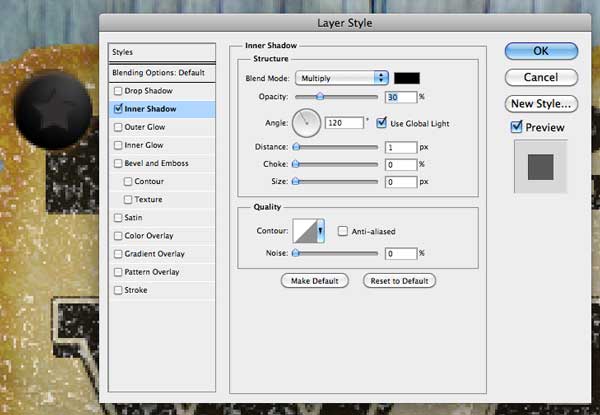
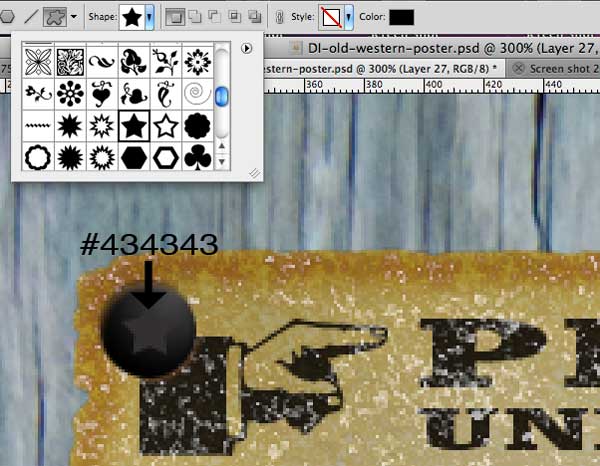 Add the Inner Shadow layer effect on the star.
  Create a new layer above the star layer. Switch to the Brush Tool (B), select the Chalk brush, set your Foreground color to white (#ffffff) and then click once over the nail head to apply your brush stroke.
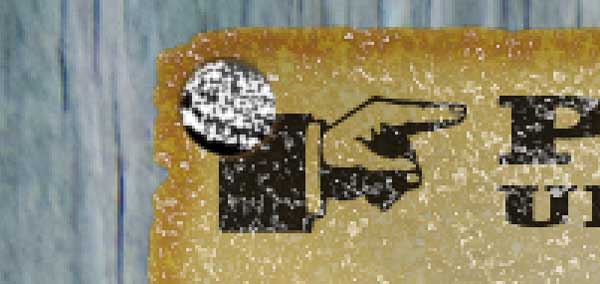 Change the Blend Mode of the layer to Overlay and set the Opacity to 50%.
 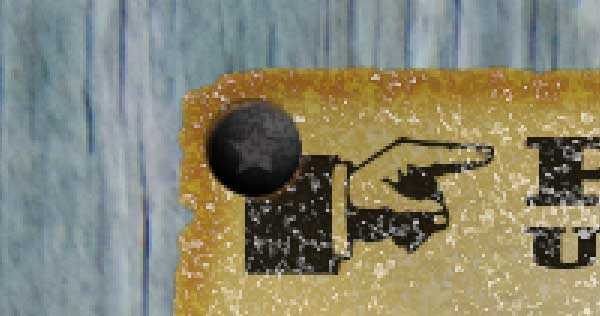 Group the three layers associated with the nail head in a layer group called “nails” by selecting the layers in the Layers Panel and then pressing Ctrl/Cmd + G. Duplicate the “nail” layer group three times by right-clicking/Control-clicking on the layer group and choosing Duplicate Group from the menu that appears.
Use the Move Tool (V) to relocate the duplicate nail heads to each corner of the poster. 
Step 11: Final Touches and Tweaks
Let us add some finishing touches to our Wild West “Wanted” poster design. First, we need to add a drop shadow below the poster, so create a new layer just below the poster background layer for the drop shadow.
Load a selection around the poster background. Fill the selection with black (#000000) on the new layer. Go to Filter > Blur > Gaussian Blur, use a 1.1px Radius and apply the filter on the drop shadow layer.
 Copy the drop shadow layer and then give the copy a Gaussian blur of 3px.
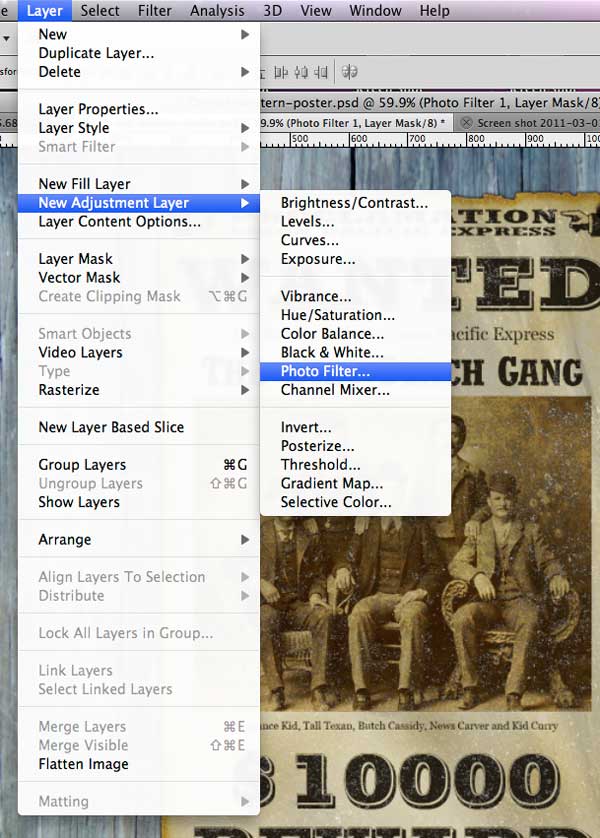
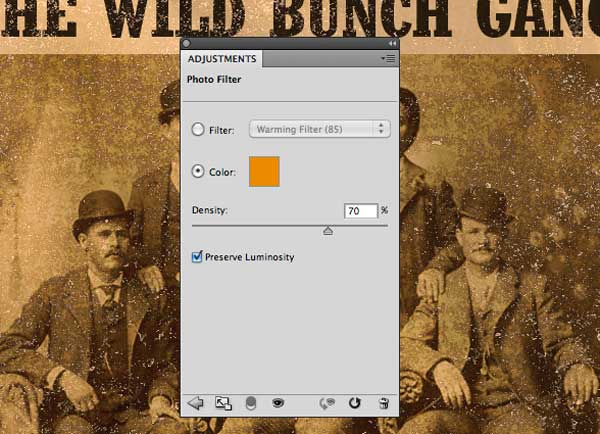
 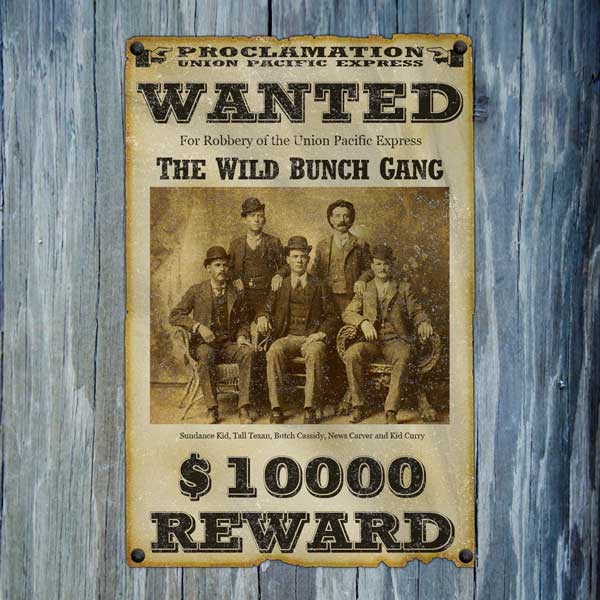 We are almost at the finish line! Go to Layer > New Adjustment Layer > Photo Filter to add an adjustment layer above all the other layers to harmonize the colors of our artwork.
 That’s it, we’re done!
Tutorial Summary
In this tutorial, we created a Wild West “Wanted” poster using Photoshop. We used the Lasso Tool to roughen/tear up the edges of the poster, the Burn Tool to age the surface, and plenty of textures to create folds and scratches.
I shared with you an awesome text effect technique that you can see on the “WANTED” text and the bounty text. To top it all off, we used a Photo Filter adjustment layer to adjust the overall color scheme of our piece. We did all that and more!
I hope you enjoyed this tutorial and I hope you have learned some useful techniques that you can use in your design work. I look forward to hearing your thoughts in the comments. Thanks for following along with me!
Stay tuned for more awesome tutorials! 
Download Source Files
- old_western_poster (ZIP, 20.1 MB)
-
 Trevin serves as the VP of Marketing at WebFX. He has worked on over 450 marketing campaigns and has been building websites for over 25 years. His work has been featured by Search Engine Land, USA Today, Fast Company and Inc.
 -

WebFX is a full-service marketing agency with 1,100+ client reviews and a 4.9-star rating on Clutch! Find out how our expert team and revenue-accelerating tech can drive results for you! Learn more
Make estimating web design costs easy
Website design costs can be tricky to nail down. Get an instant estimate for a custom web design with our free website design cost calculator!
Try Our Free Web Design Cost Calculator
Table of Contents
- Preview
- Tutorial Resources
- Step 1: Drop in the Wooden Background
- Step 2: Create the “Wanted” Poster Background
- Step 3: Intensify the Burned Edges
- Step 4: Add the First Block of Text
- Step 5: Add the “Wanted” Text
- Step 6: Adding More Text
- Step 7: Add a Photo of the Wild Bunch Gang
- Step 8: Add the Bounty
- Step 9: Add Some Textures
- Step 10: Nail Down the Poster
- Step 11: Final Touches and Tweaks
- Tutorial Summary
- Download Source Files


Web Design Calculator
Use our free tool to get a free, instant quote in under 60 seconds.
View Web Design CalculatorMake estimating web design costs easy
Website design costs can be tricky to nail down. Get an instant estimate for a custom web design with our free website design cost calculator!
Try Our Free Web Design Cost Calculator


