
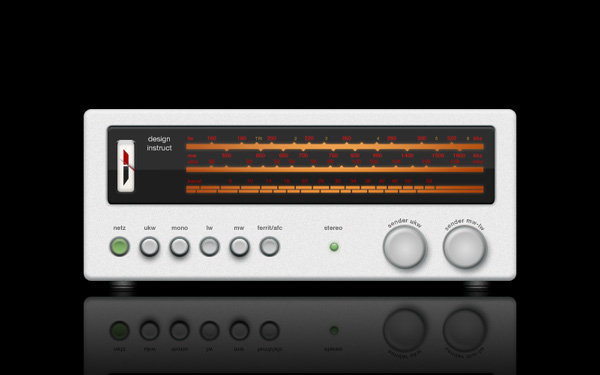
Preview
Step 1: Set Up the Document
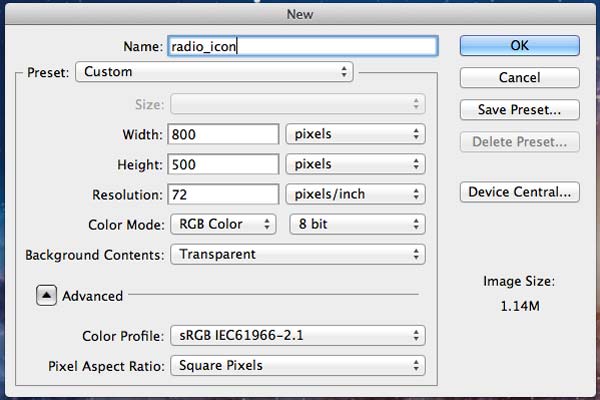
Create a new document that’s 800px wide and 500px high. Have the Resolution set at 72ppi. Set your background color to black.
Step 2: Create the Basic Shape
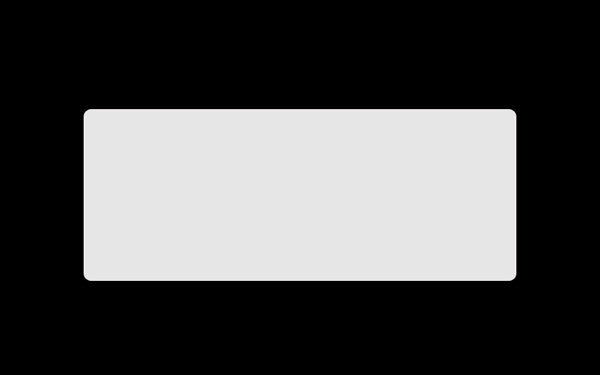
Create new layer. Inside the new layer, draw a light gray (#e7e6e6) rounded rectangle using the Rounded Rectangle Tool (U) with the Radius option at 10px. This rectangle will be the base shape of our stereo receiver.
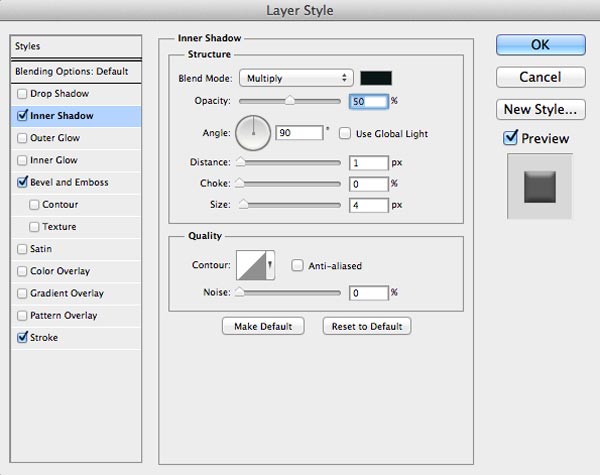
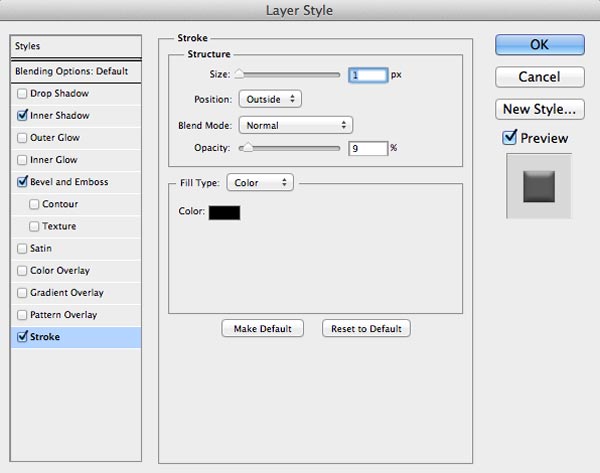
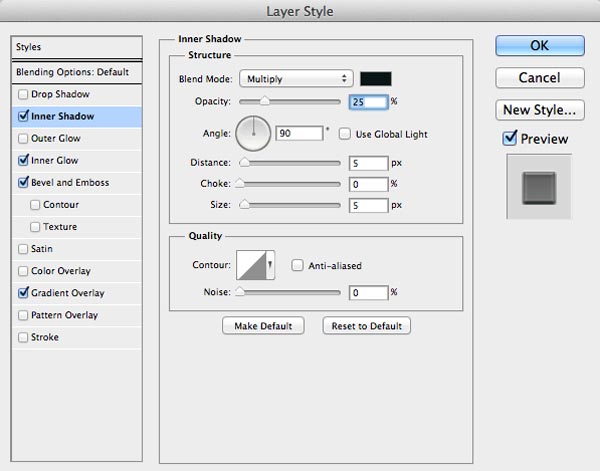
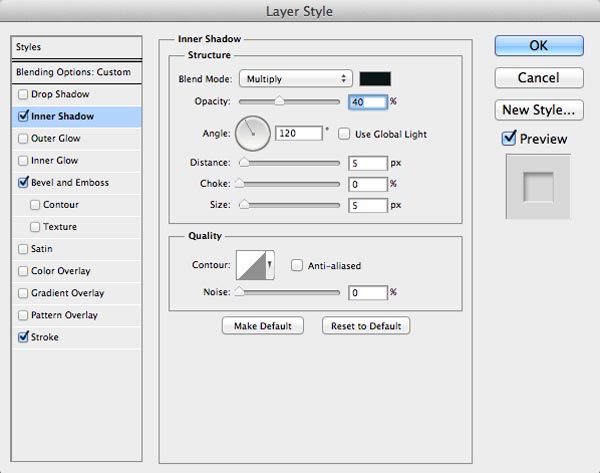
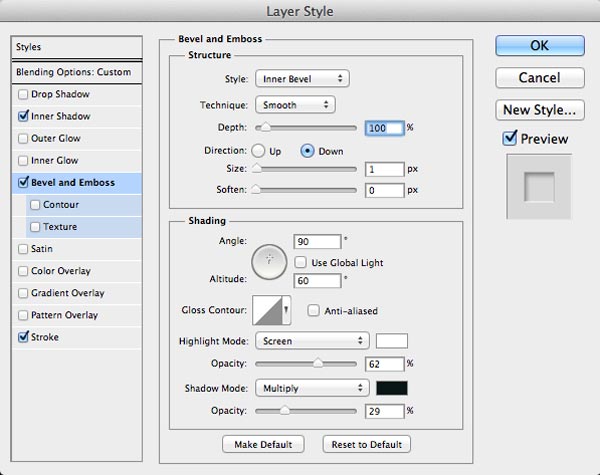
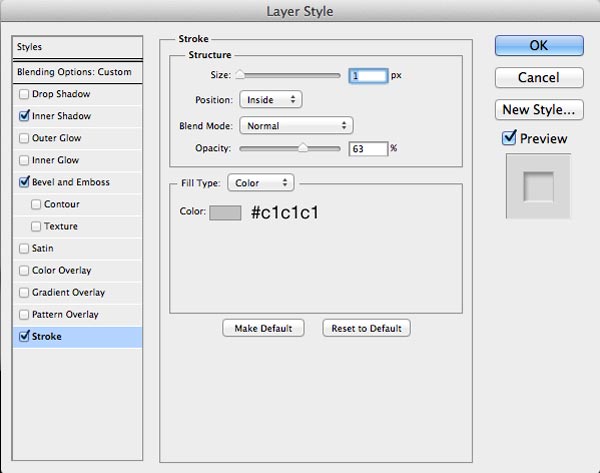
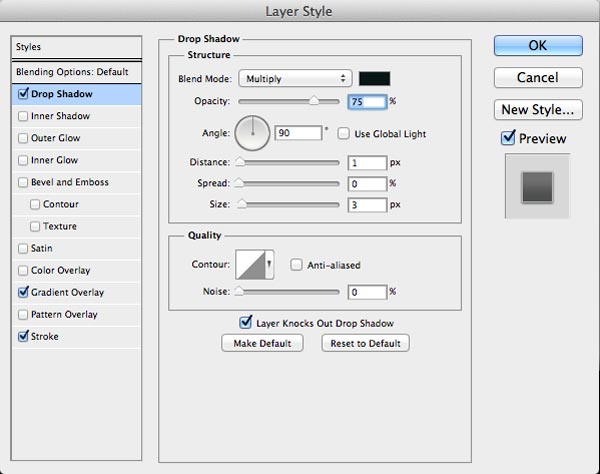
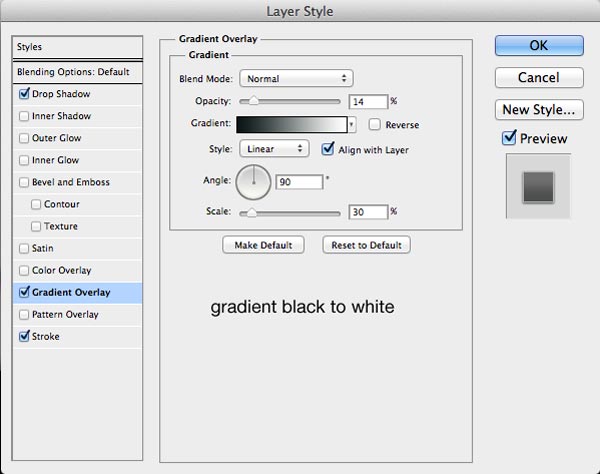
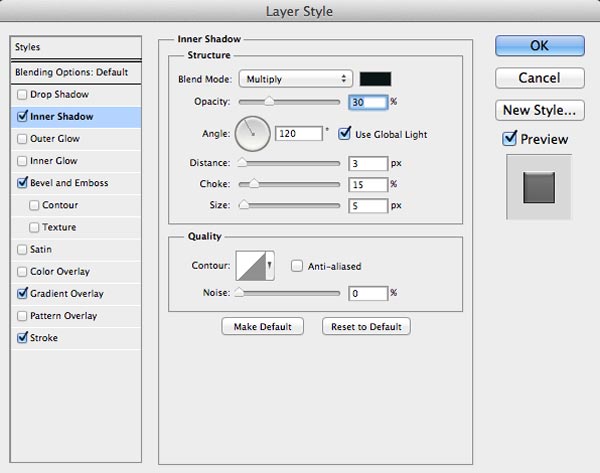
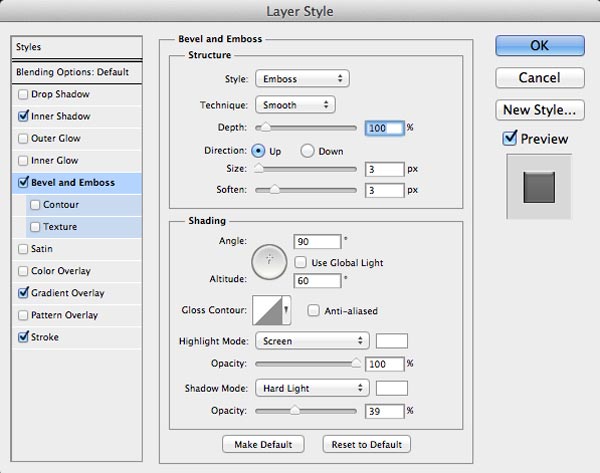
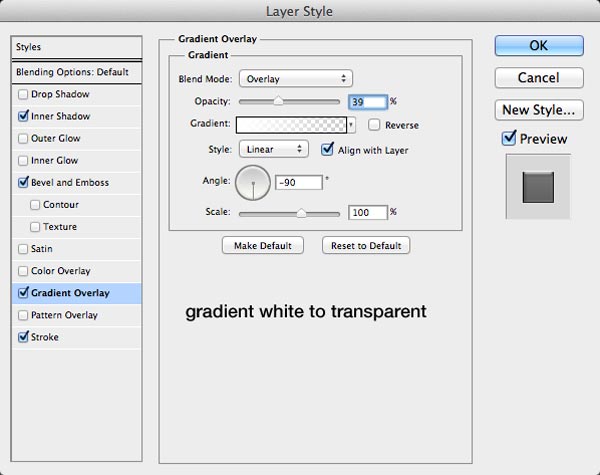
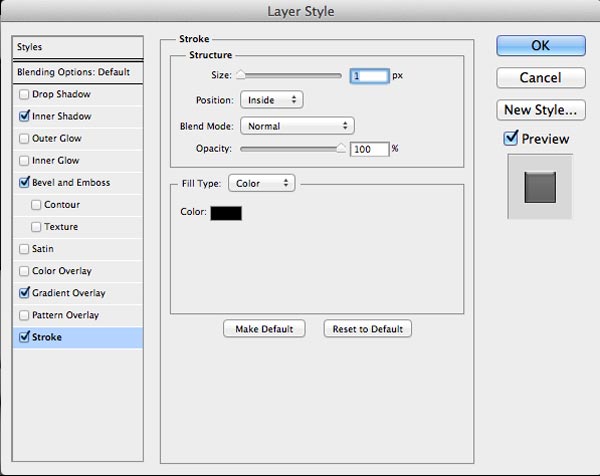
 Apply the following layer effects to the shape via the Layer Style dialog window: Inner Shadow, Bevel and Emboss and Stroke. Use the following images as a reference for the layer style settings.
Inner Shadow
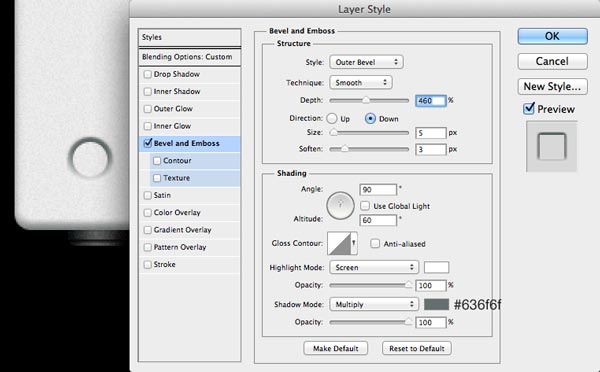
Bevel and Emboss
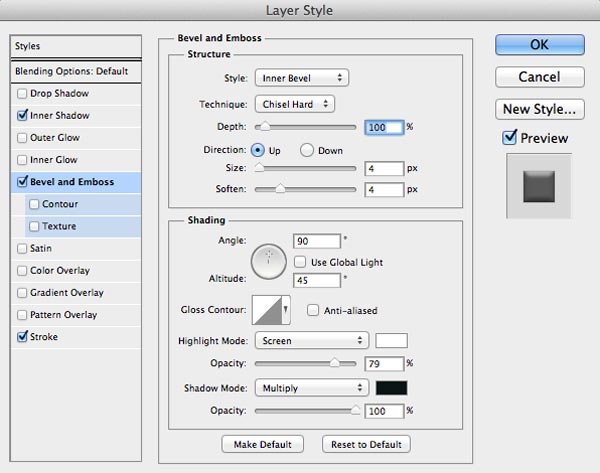
Stroke
 This is the result after the layer style has been applied:
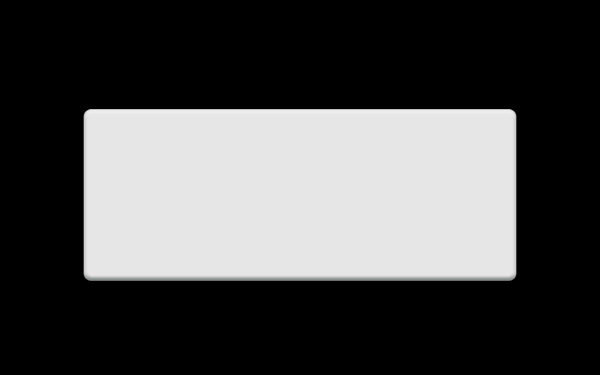
Tip: Read our Photoshop Layer Styles: Comprehensive Guide to learn more about Photoshop layer styles.
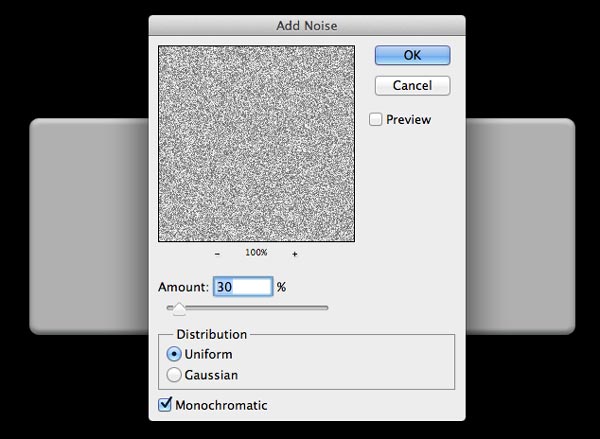
Create new layer.
Add a clipping mask by double-clicking on the new layer and choosing Create Clipping Mask from the menu that appears, or by pressing Cmd/Ctrl + Option/Alt + G. Fill the layer with a gray color (#b0b0b0). Next, we’ll add some noise to the layer.
Start by going to Filter > Noise > Add Noise. In the Add Noise window, use the following settings:
- Amount: 30%
- Distribution: Uniform
- Monochromatic: checked
 Set the Blend Mode of the layer to Soft Light and Opacity to 70%.
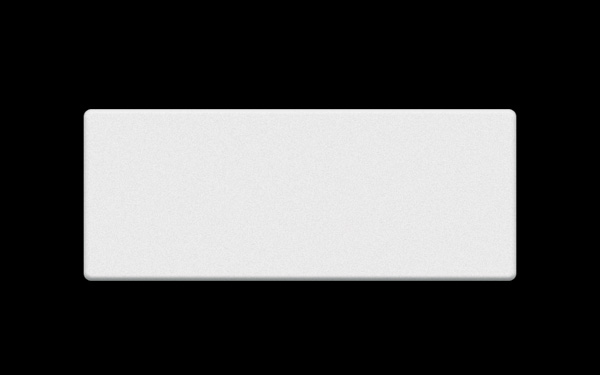
Step 3: Create the Stands
At the bottom of the stereo receiver’s body will be stands that hold it up, sort of like its feet. It has four of these, but since we’re only illustrating the front of the stereo receiver, we only need to draw two.
Let’s start by creating a new layer group (Layer > New > Group) for the stands. Position this layer group below the stereo receiver’s body shape layer. Click on the Rounded Rectangle Tool (U) in the Tools panel, set its Radius to 5px in the Options bar and then draw a small, black rectangle at the bottom of the stereo receiver’s body.
(Turn off the visibility of the Background layer so you can see what we’re doing, since the background is black.) 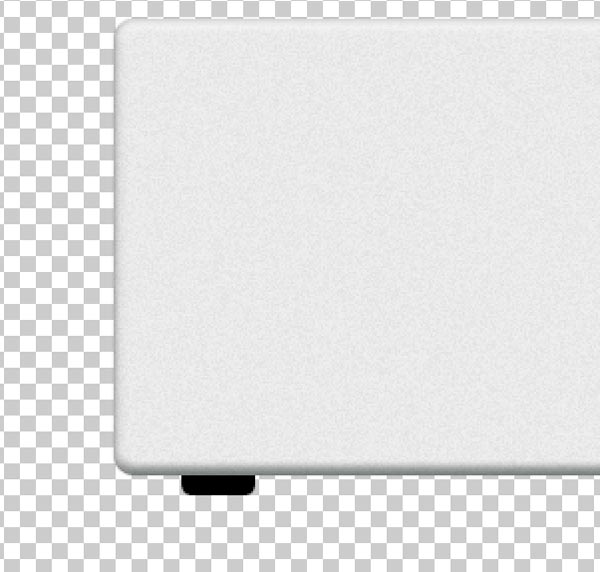 Next, give the stand a Gradient Overlay layer style.
 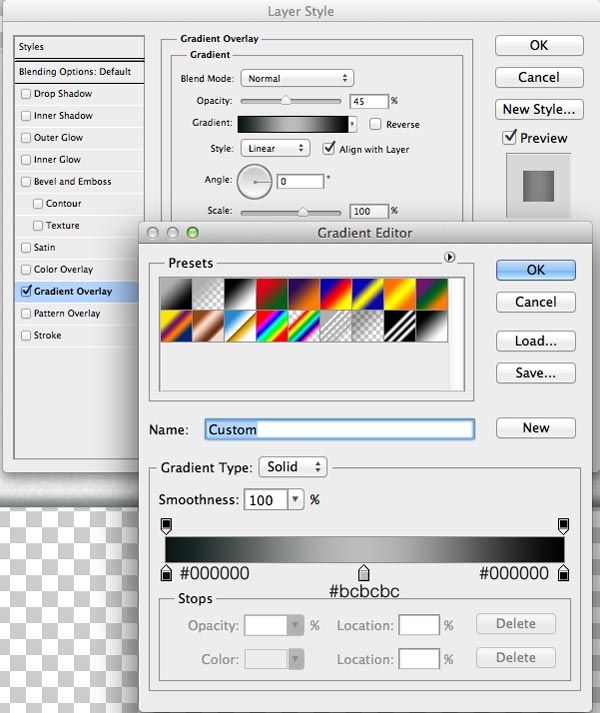 Here’s how our stand looks like now:
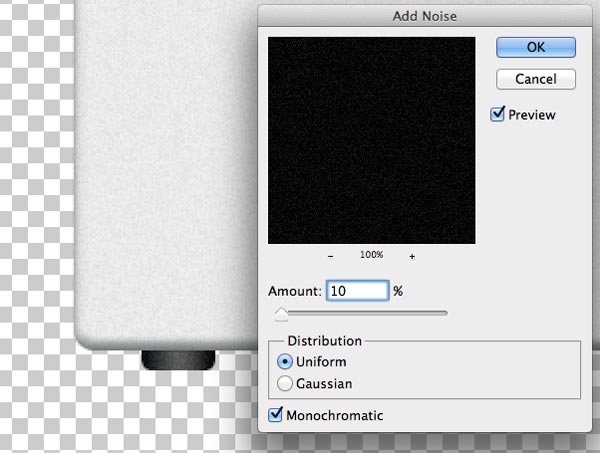
  Create a new layer just above the stand layer. On the new layer, create a clipping mask (Layer > Create Clipping Mask), fill it with black, and then apply the Add Noise filter to it.
 With the Rectangle Tool (U), draw a small rectangle towards the bottom of the stand (as shown below).
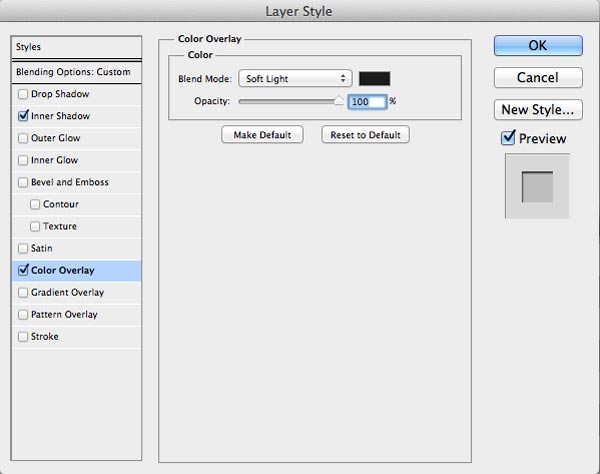
 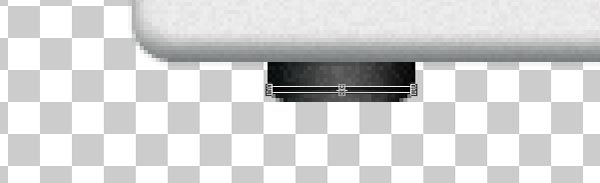 Afterwards, in the Layers panel, set the Fill of the layer to 0%. Next, give the layer an Inner Shadow and Color Overlay.
Inner Shadow

Color Overlay
 Duplicate the stand layer group and move it to the other side of the stereo receiver so that we now have two stands.
 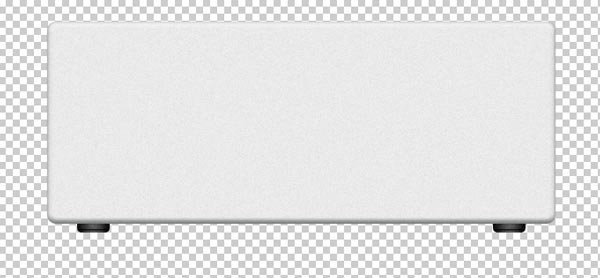 Turn on the visibility of the Background layer again. This is our work thus far:
Step 4: Create a Button
Now let’s create a button on the stereo receiver.
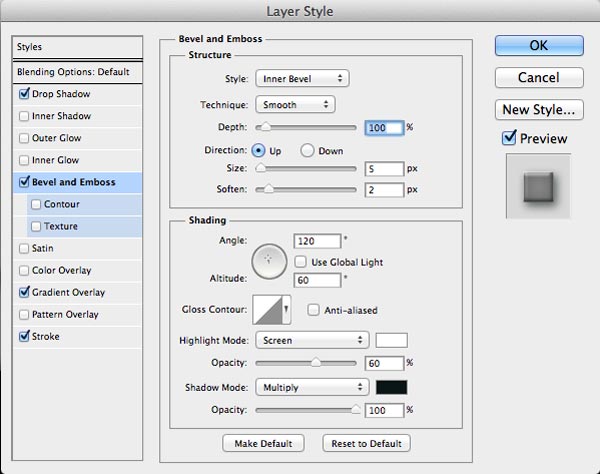
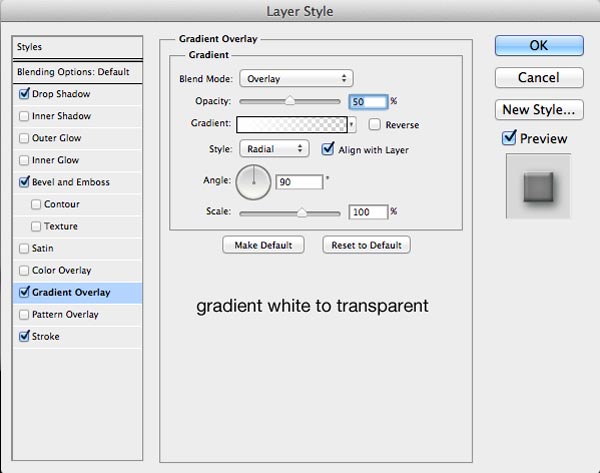
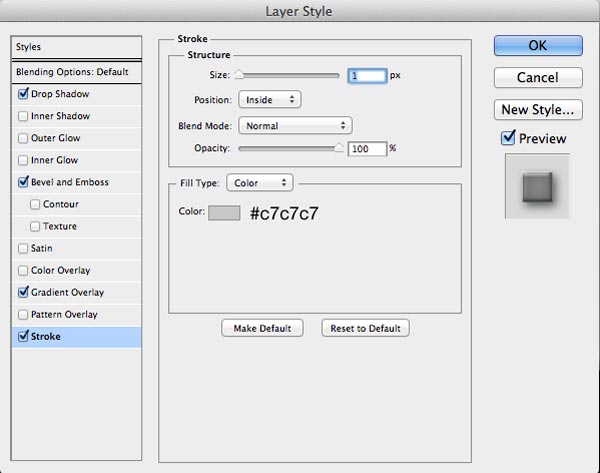
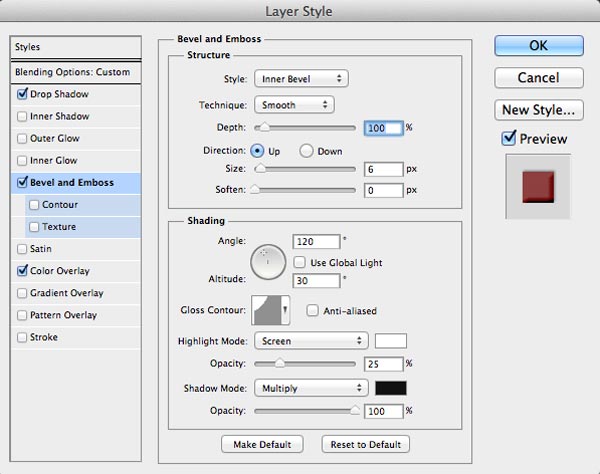
To start, create a new layer group at the very top of the layer stack. Name the new layer group “button”. Inside the “button” layer group, use the Ellipse Tool (U) to create a small circle. Set the layer’s Fill to 0% in the Layers panel. 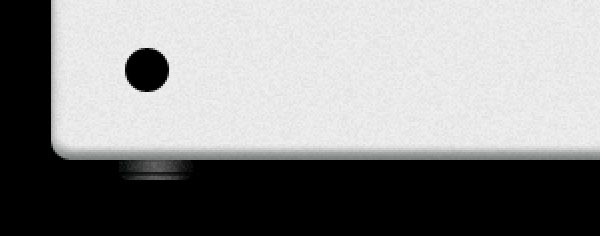 Apply a Bevel and Emboss layer style using the settings shown below.
 Duplicate the circle. Be sure you duplicate it so it appears in the exact same spot. You can do this by right-clicking on the layer in the Layers panel and then choosing Duplicate Layer in the contextual menu that appears, or by pressing Cmd/Ctrl + J.
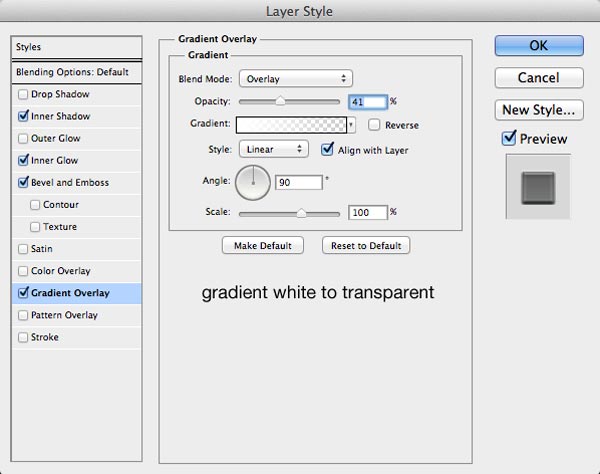
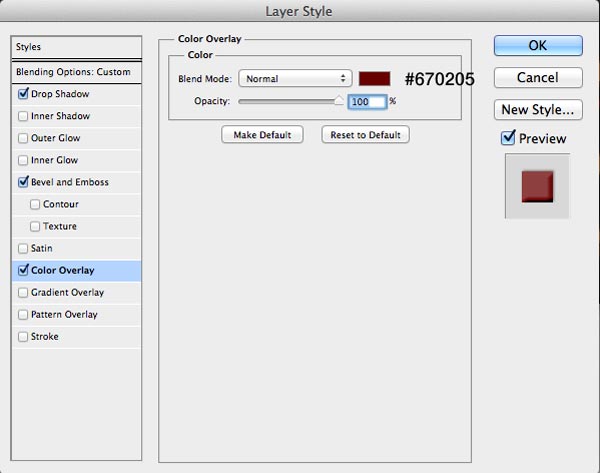
Set the duplicate layer’s color to a green color (#669552) in the Options bar and set its Fill in the Layers panel to 100%. 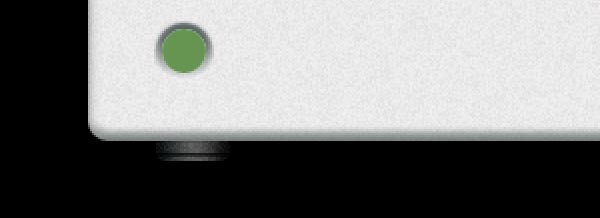 Double-click on the layer in the Layers panel to open the Layer Style dialog window. Give the layer an Inner Shadow, Inner Glow, Bevel and Emboss and Gradient Overlay.
Inner Shadow
Inner Glow

Bevel and Emboss
Gradient Overlay
 Here’s the result of applying the above layer effects:
 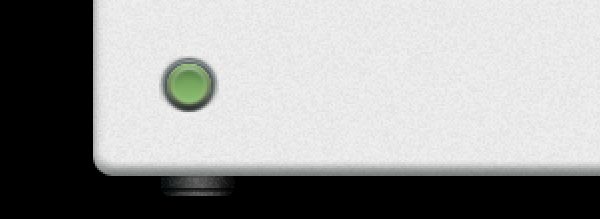 Use the Horizontal Type Tool (T) to add the label of the button (I just used “netz”, but you can type anything you want). Lower the Opacity of the text layer to 70%.
 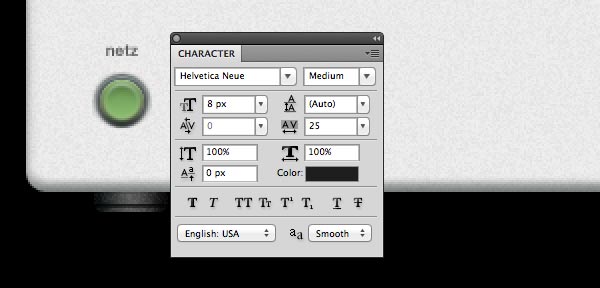 We should now have something like this:
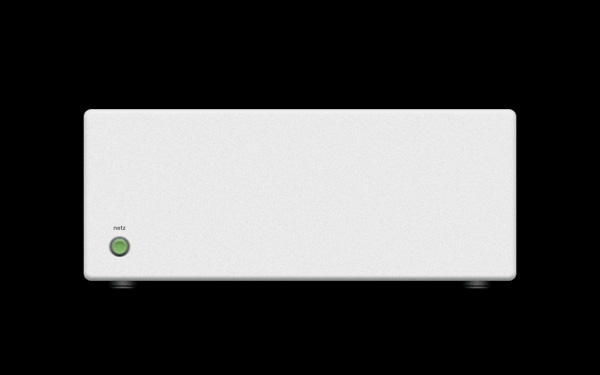
Step 5: Add More Buttons
Duplicate the “button” group and move it a bit to the right.
In the Layers panel, click on the top circle (the green one) to make it the active layer, and then change its color to a gray color (#b6b6b6) in the Options bar. Also, change the button’s label. 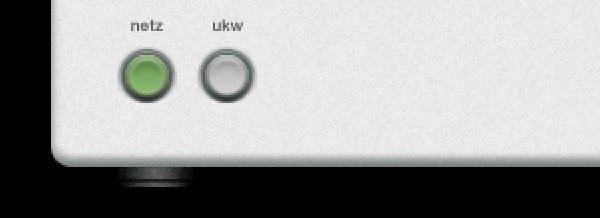 Double-click on the top circle layer to open the Layer Style dialog window so that we can edit the layer effects.
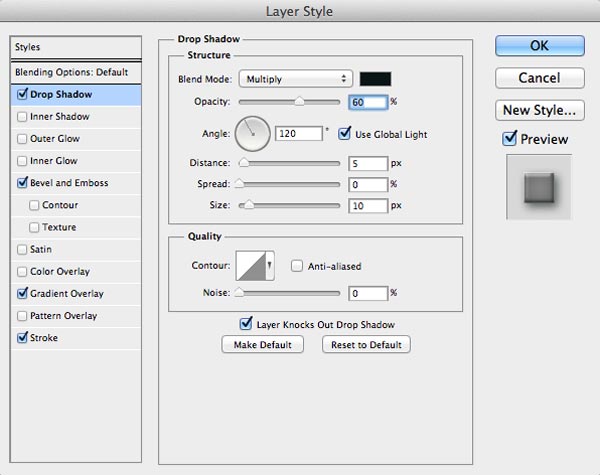
Turn off the Inner Shadow effect and add a Drop Shadow effect. This will make the button look like it’s not pressed down. 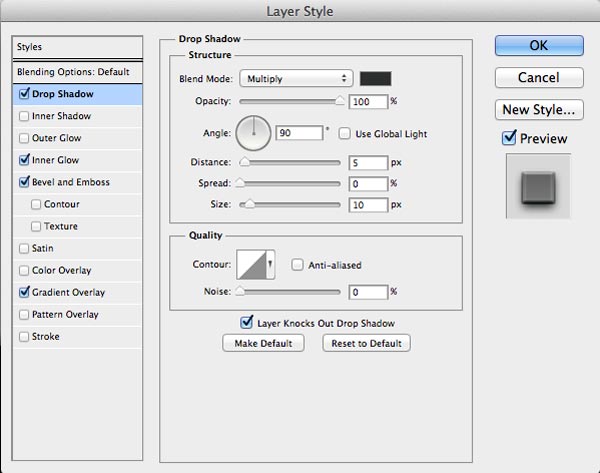
 Add more buttons by duplicating the “button” group.
Turn off Drop Shadow and turn on Inner Shadow to make the button look like it’s pressed, or turn on Drop Shadow and turn off Inner Shadow to make the button look like it’s not pressed. 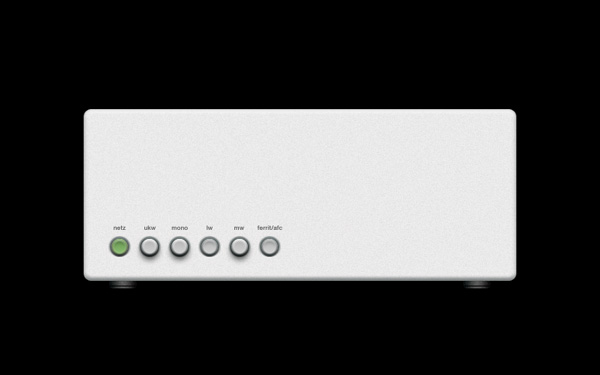
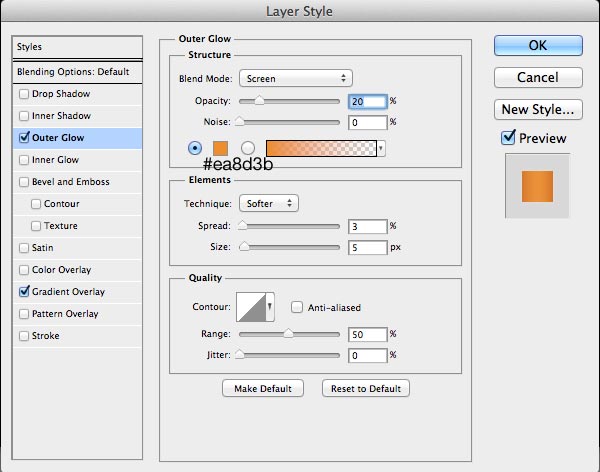
Step 6: Create a Green LED Indicator
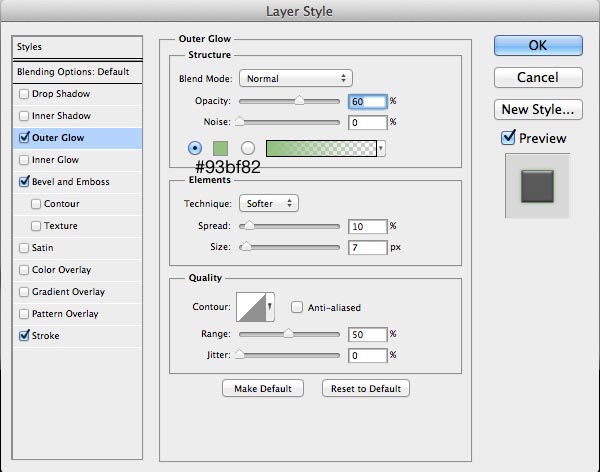
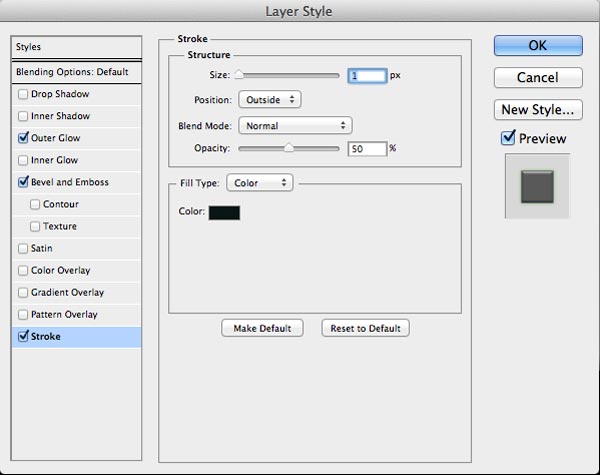
Draw a small green (#84b96e) circle on the right of the buttons. 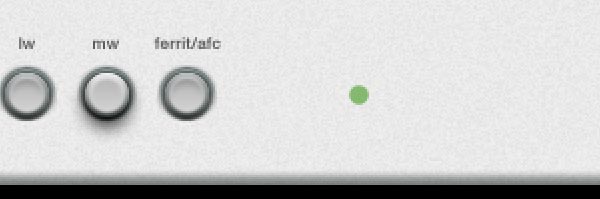 Give the green circle these layer effects: Outer Glow, Bevel and Emboss and Stroke, via the Layer Style dialog window.
Outer Glow
Bevel and Emboss

Stroke
 Here’s our green LED indicator with the above layer effects:
  Use the Horizontal Type Tool (T) to give the LED indicator a label.
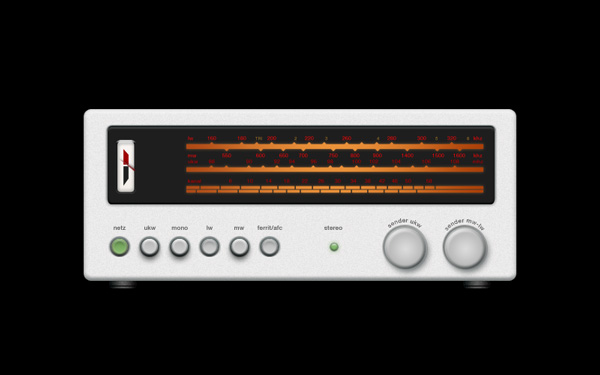
 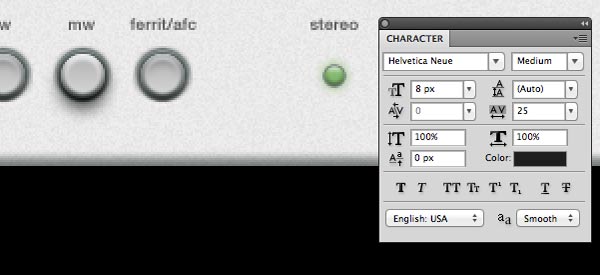 Let’s take a peek at what we have so far:
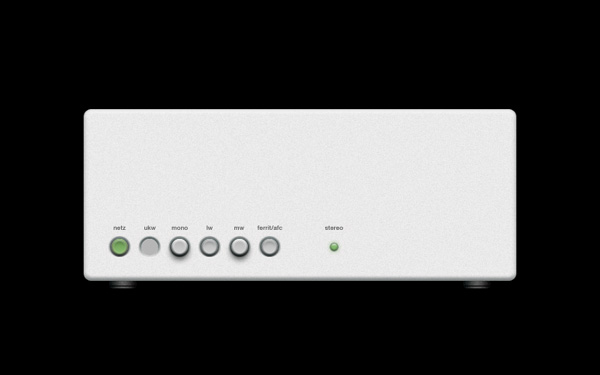
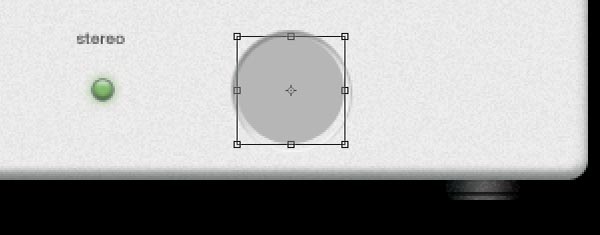
Step 7: Add a Tuning Dial
As we did before with the first button, create a new layer group on top of the Layers panel and name it “dial.” Inside that layer group, draw a circle with the Ellipse Tool (U). 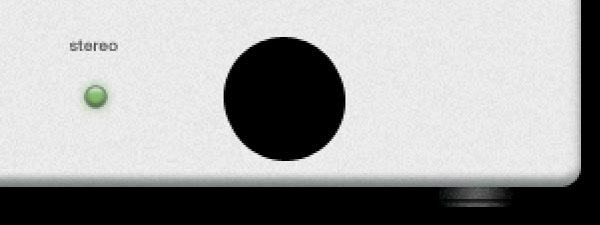 Set the layer’s Fill to 0%.
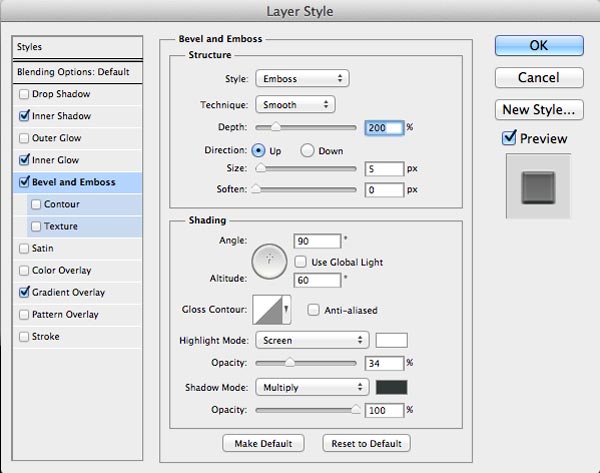
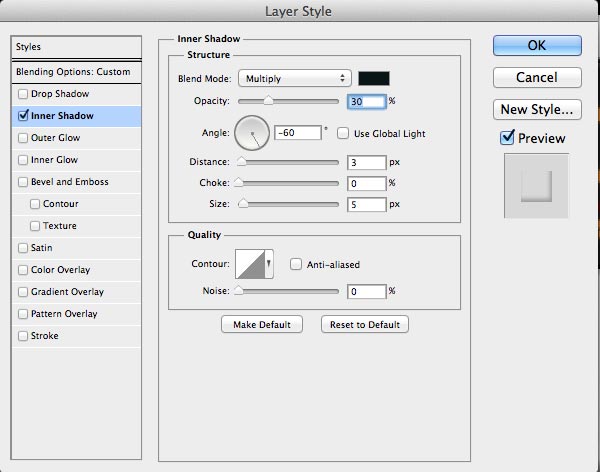
Open the Layer Style window by double-clicking on the layer, and then add these layer effects: Inner Shadow, Bevel and Emboss, and Stroke.
Inner Shadow
Bevel and Emboss
Stroke
 Here’s the result of the layer effects above:
 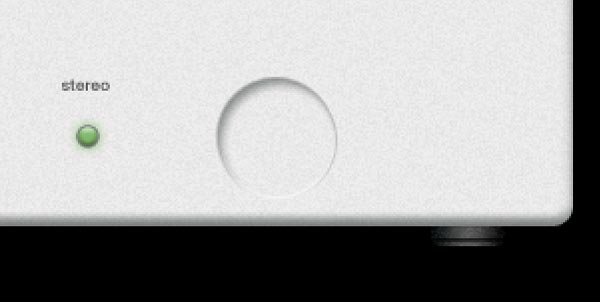 Use the Ellipse Tool to create a smaller circle on top of the first circle. For the color of the smaller circle, use a gray color (#b6b6b6).
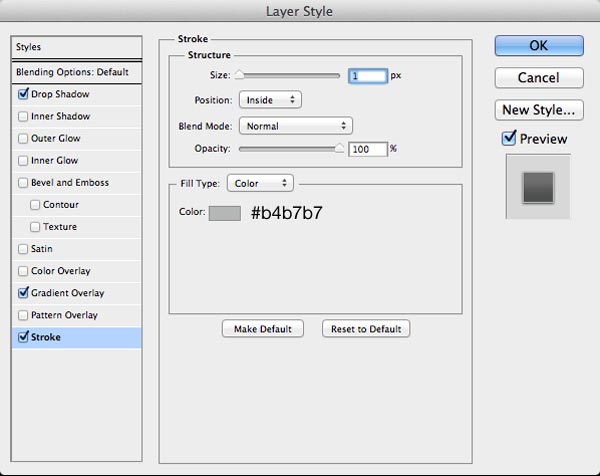
 Give the smaller circle the following layer effects: Drop Shadow, Gradient Overlay, and Stroke.
Drop Shadow
Gradient Overlay
Stroke
 Here’s the result of the layer effects above:
 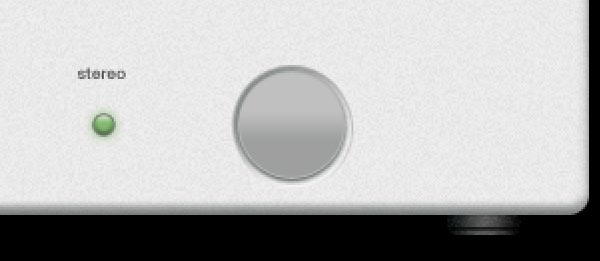 Duplicate the circle. Clear its layer style by right-clicking on the layer in the Layers panel and choosing Clear Layer Style in the contextual menu that appears.
Move the duplicated circle 1px down and right using your keyboard’s arrow keys. 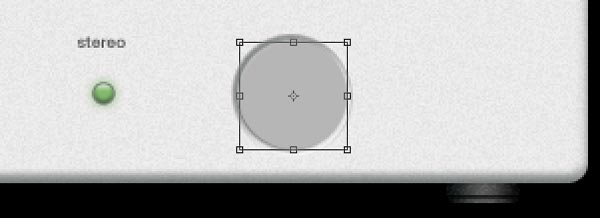 Give the layer these layer effects: Drop Shadow, Bevel and Emboss, and Stroke.
Drop Shadow
Bevel and Emboss
Gradient Overlay
Stroke
 Here’s what our dial looks like now after the above layer effects have been applied:
 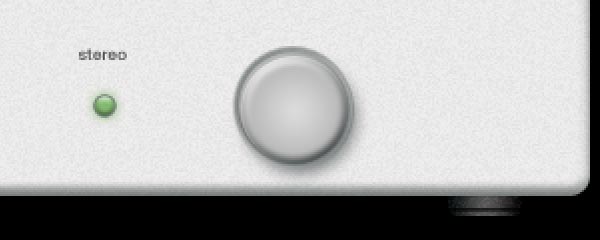 Let’s add a label that curves with the contour of the dial.
To do this, first select the bottom circle shape inside the “dial” layer group in the Layers panel. In the Paths panel (if you can’t see the Paths panel, turn it on by going to Window > Paths), click on the path’s layer to make it the active path. 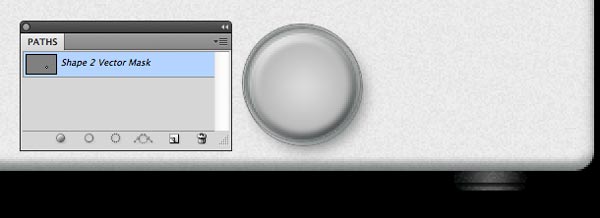 Click on the Horizontal Type Tool (T) in the Tools panel and make sure you have it set to the Center text option.

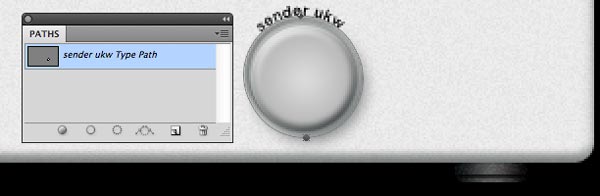 Move the text layer at the top of the “dial” layer group. Then use your keyboard’s arrow keys to move the text up a bit. Also, set the Opacity of the text layer to 70%.
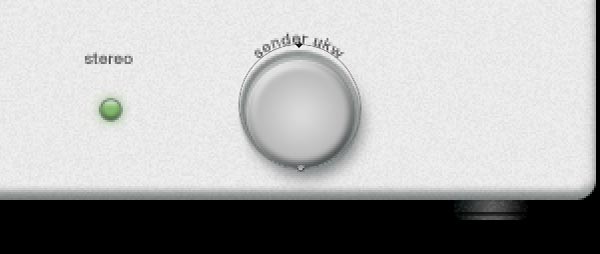 Create another dial by duplicating the “dial” group and moving it to the right. Change the text of the dial’s label as well.
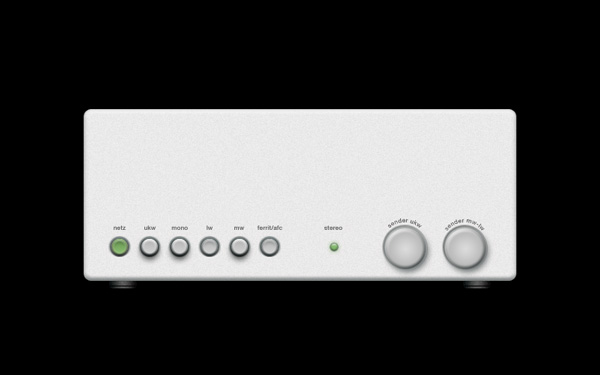
Step 8: Creating the Display Screen
Create a new layer group on top of the Layers panel, and name the group as “Display.” Inside the “Display” layer group, draw the shape of the display as shown below using the Rounded Rectangle Tool (U) with Radius set to 5px and dark gray (#1e1e1e) as the color.
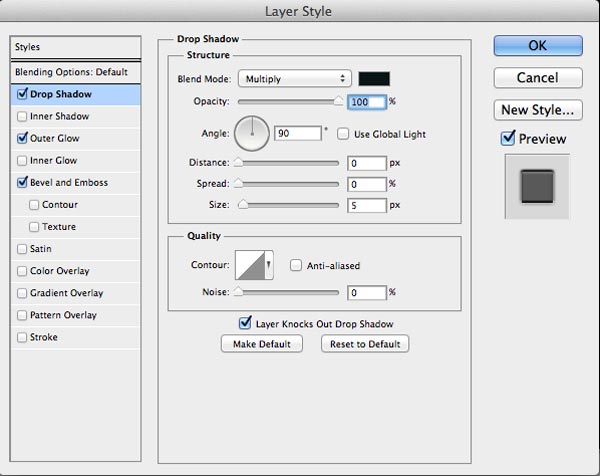
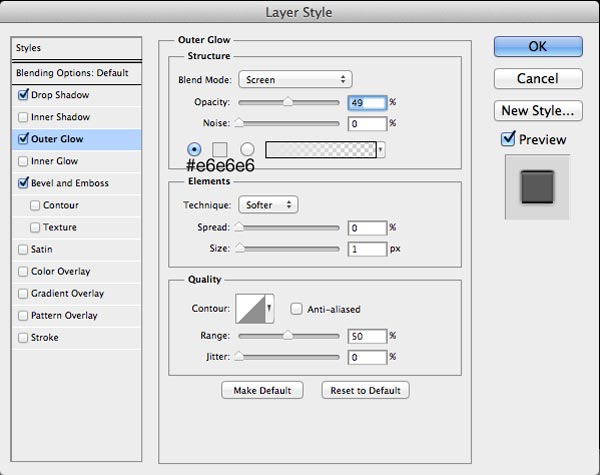
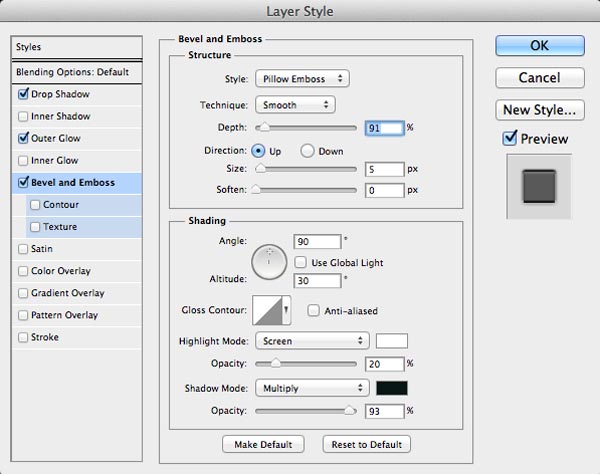
 Give the display screen shape layer these layer effects: Drop Shadow, Outer Glow, and Bevel and Emboss.
Drop Shadow
Outer Glow
Bevel and Emboss
 Here’s our display screen now:
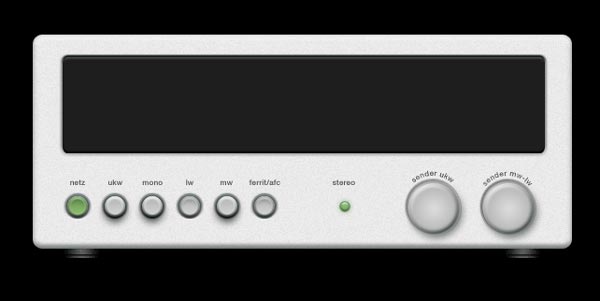
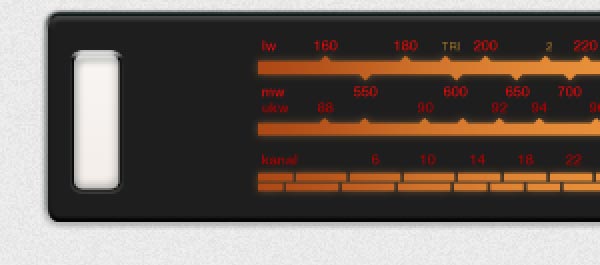
Step 9: Create a Channel Scale
Draw a small white rectangle using the Rectangle Tool (U). 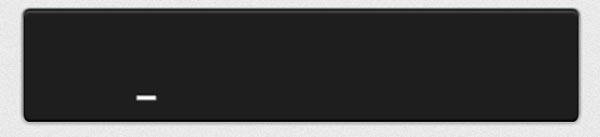 Select its path, hit Cmd/Ctrl + Alt/Option + T, move it to the right and scale it up or down horizontally (it’s all up to you).
 Repeat this until you have a row that looks like the one displayed below:
 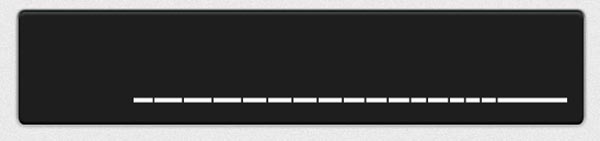 Continue adding rectangles to create a second row.
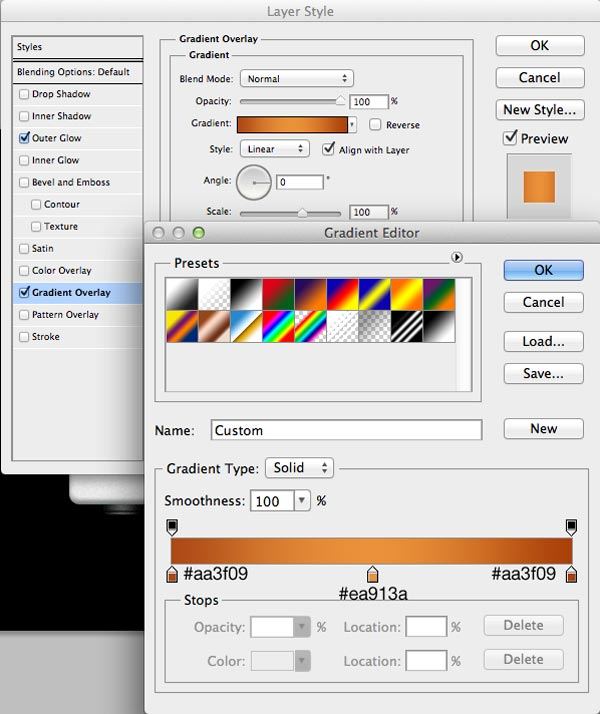
 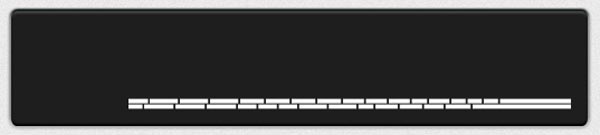 Give the scales an Outer Glow and Gradient Overlay.
Outer Glow
Gradient Overlay
 Here’s what they look like now:
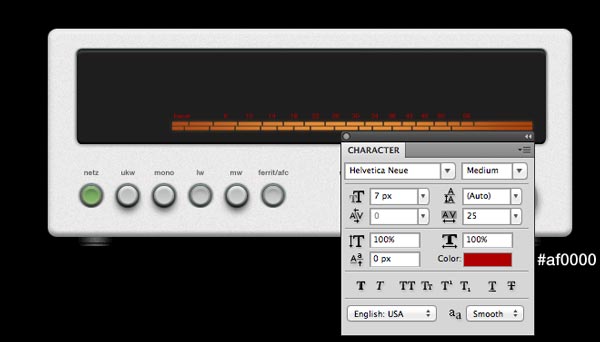
 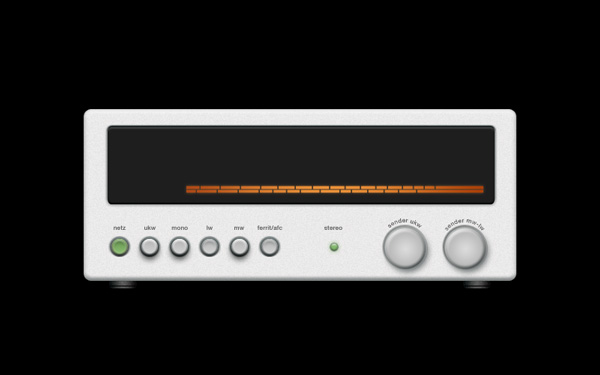 Add channel numbers using the Horizontal Type Tool (T).
Step 10: Add More Display Elements
Next, we’ll add another channel scale. Draw a white rectangle like on the image below. 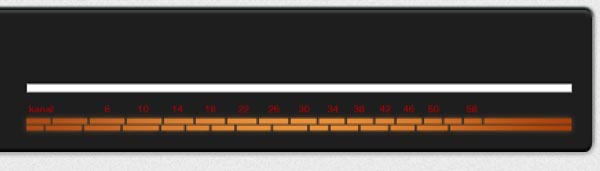 Select the path, hit Cmd/Ctrl + Alt/Option + T to duplicate it and scale it down horizontally.
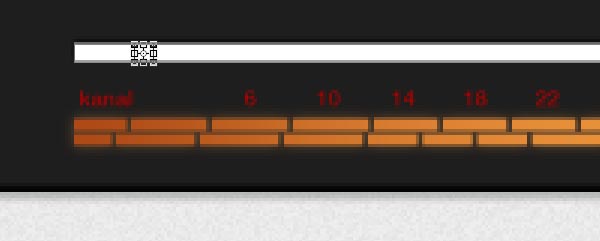 Rotate it 45o and move it up a bit to create a sort of peak.
 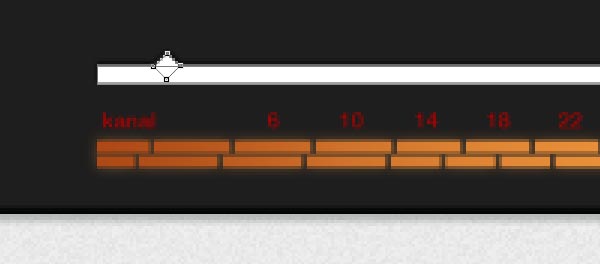 Add more peaks until you have something like this:
 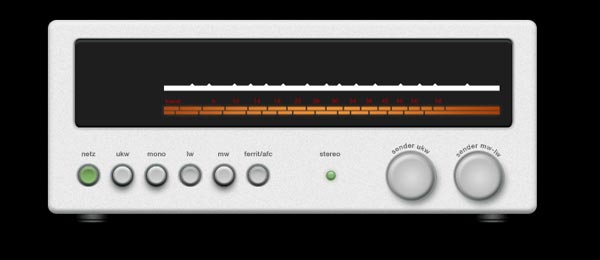 Apply the same layer effects (Outer Glow, Gradient Overlay) and channel numbers like in Step 9.
 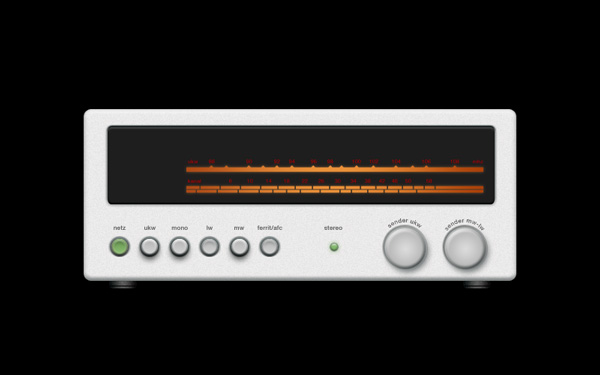 Create another channel scale using the same process described above. Here’s what we should have right now:
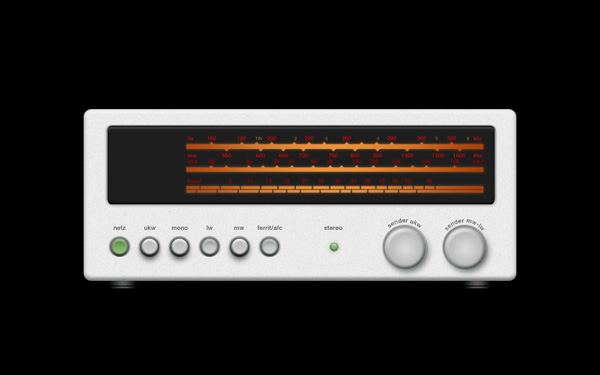
Step 11: Add a Volume Meter
In this step, we’ll add a volume meter to our stereo receiver. Create a new layer group and name it “volume meter”. Start by drawing a rounded rectangle with the Radius set to 5px inside the “volume meter” layer group. For the color, use light gray (#f4eee9). 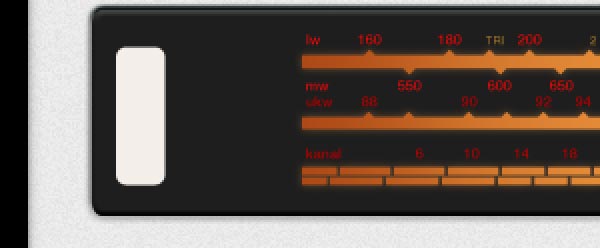 Give the layer these layer effects: Inner Shadow, Bevel and Emboss, Gradient Overlay, and Stroke.
Inner Shadow
Bevel and Emboss
Gradient Overlay
Stroke
 Here’s the result of the layer effects we applied above:
 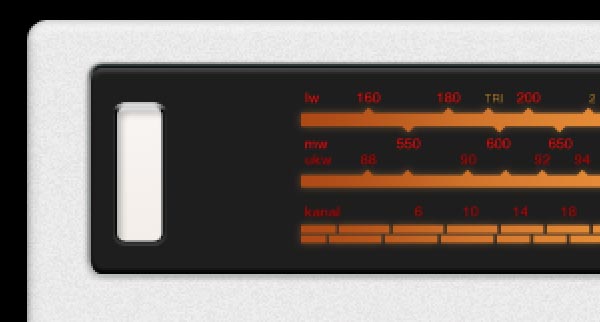 Duplicate the shape above. Clear the layer style and set the Fill to 0% of the duplicate shape. Then give the duplicate an Inner Shadow layer effect.
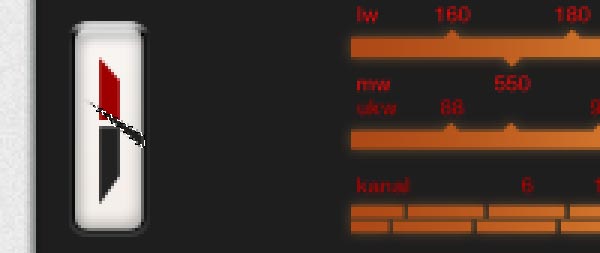
 Use the Pen Tool (P) to create the two shapes shown below.
 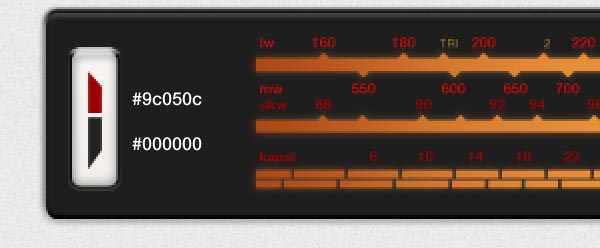 Use the Polygonal Lasso Tool (L) to create a lasso selection shown below. Then, create a new layer and fill the selection with any color.
 Set the Fill of the new layer to 0%, then give it these layer effects: Drop Shadow, Bevel and Emboss, and Color Overlay.
Drop Shadow
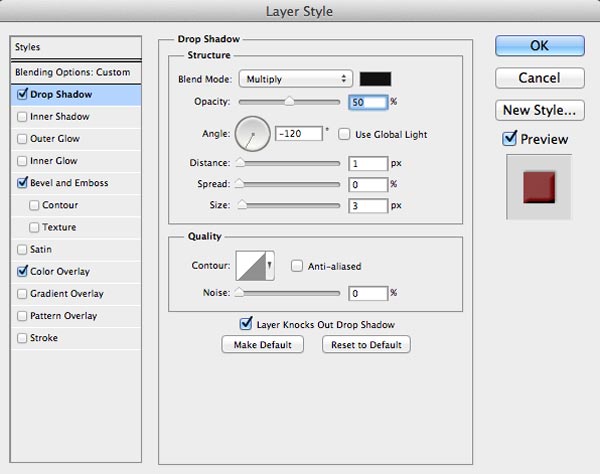
Bevel and Emboss
Color Overlay
Step 12: Final Touches and Details
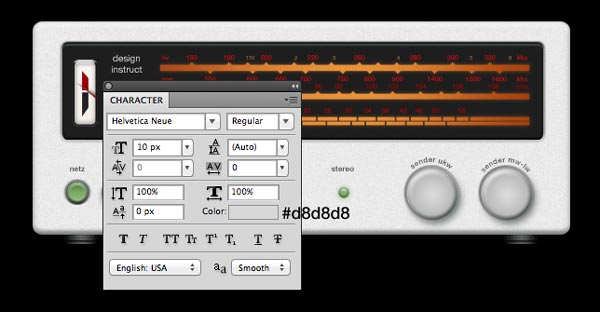
In this last step, we’ll give our stereo receiver some finishing details. Let’s type out the stereo receiver’s manufacturer name (we’ll just say it was created by “design instruct”) using the Horizontal Type Tool (T).
 Let’s add a glare effect to the display screen to make it shinier. To do that, first, create a new layer on top of the Layers panel and then make a selection around the display screen (shown below).
 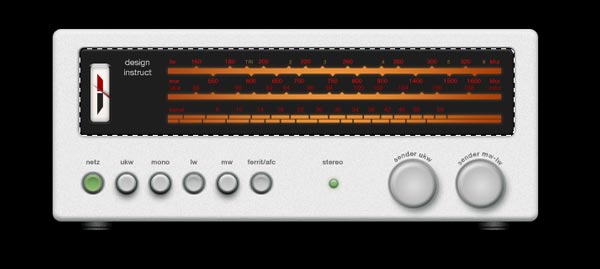 Click on the Rectangular Marquee Tool (M) in the Tools panel, and then in the Options bar, choose the Intersect with selection option.
Draw a marquee selection around the top half of the display screen, which will reduce the first selection to what’s shown below.  Fill the selection with white in the new layer that we just created. Set the Blend Mode of the layer to Soft Light and lower the Opacity to 30%.
 Let’s add a reflection on the floor of our composition. Select all layer groups and layers in the Layers panel, duplicate all them, and then merge the duplicates into one layer by going to Layer > Merge Layers (Cmd/Ctrl + E). In the Layers panel, name the merged layer “reflection”, then position it just above the Background layer.
Flip the layer vertically by choosing Edit > Transform > Flip Vertical and then lower the layer’s Opacity to 50%. 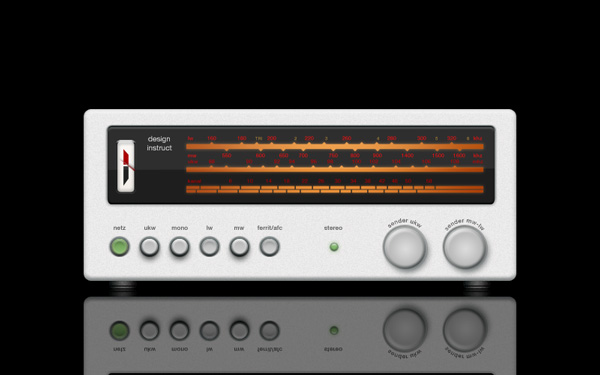 Add a layer mask to the “reflection” layer, set your Foreground color to black. With the Gradient Tool (G) set to the Foreground to Transparent gradient preset (which you can do in the Options bar by clicking on the Gradient Editor), draw a few gradients to mask out the bottom part of reflection.
You can add a tagline text at the top of the composition, but this is optional. 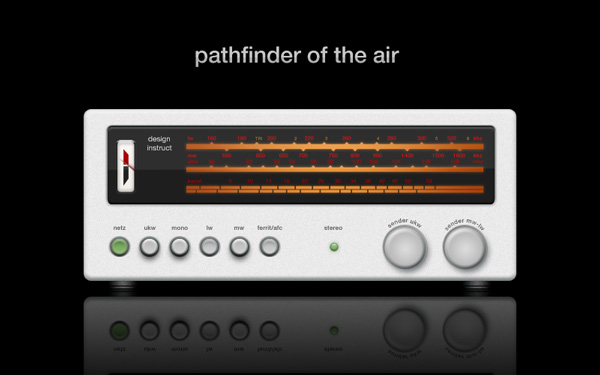 That’s it, we’re done!
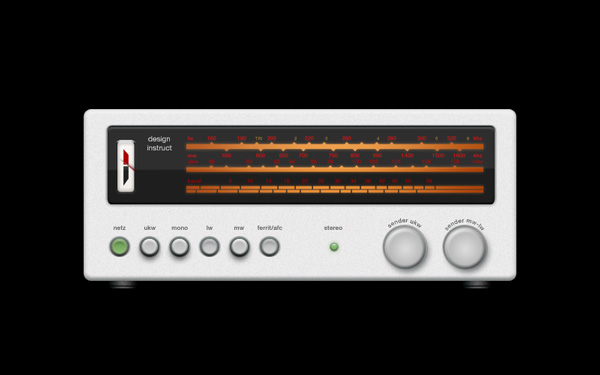
Tutorial Summary
Using fundamental Photoshop tools (layer styles, vector-drawing tools, etc.) and techniques, we were able to create a beautiful stereo receiver from scratch.
Here is the final result:
Download Source Files
- stereo_receiver (ZIP, 0.56 MB)
-
 Trevin serves as the VP of Marketing at WebFX. He has worked on over 450 marketing campaigns and has been building websites for over 25 years. His work has been featured by Search Engine Land, USA Today, Fast Company and Inc.
 -

WebFX is a full-service marketing agency with 1,100+ client reviews and a 4.9-star rating on Clutch! Find out how our expert team and revenue-accelerating tech can drive results for you! Learn more
Make estimating web design costs easy
Website design costs can be tricky to nail down. Get an instant estimate for a custom web design with our free website design cost calculator!
Try Our Free Web Design Cost Calculator
Table of Contents
- Preview
- Step 1: Set Up the Document
- Step 2: Create the Basic Shape
- Step 3: Create the Stands
- Step 4: Create a Button
- Step 5: Add More Buttons
- Step 6: Create a Green LED Indicator
- Step 7: Add a Tuning Dial
- Step 8: Creating the Display Screen
- Step 9: Create a Channel Scale
- Step 10: Add More Display Elements
- Step 11: Add a Volume Meter
- Step 12: Final Touches and Details
- Tutorial Summary
- Download Source Files
Share this article


Web Design Calculator
Use our free tool to get a free, instant quote in under 60 seconds.
View Web Design CalculatorMake estimating web design costs easy
Website design costs can be tricky to nail down. Get an instant estimate for a custom web design with our free website design cost calculator!
Try Our Free Web Design Cost Calculator


