
Preview
You can click the image below to see the finished work in full scale. 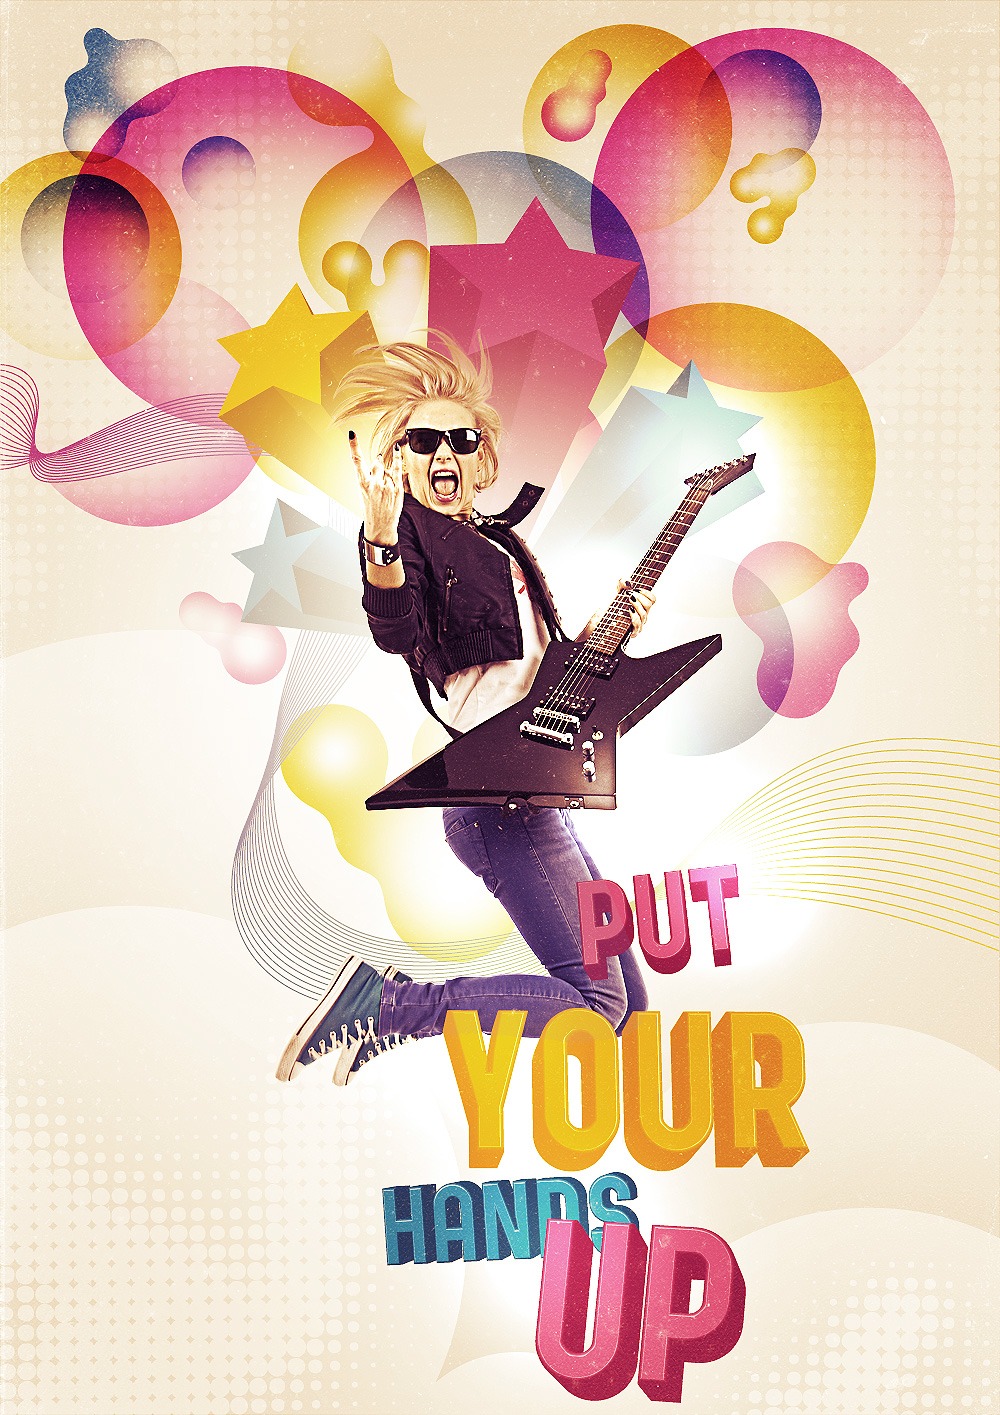
Tutorial Resources
- Free stock image: headbanging woman guitarist by Viorel Sima
- Free font: Public Gothic by ANTREPO
- Free texture: Black and White Grunge by Bittbox or Grunge Grab Bag: Texture Pack by Design Instruct
Using Photoshop and Illustrator Together
Illustrator or Photoshop? That is the question! There are designers who create their illustrations — from initial sketch to final digital artwork — entirely in Illustrator.
On the other hand are designers who don’t need anything else but Photoshop to create their work. While these two Adobe products can work separately and give great results, they can also collaborate and combine their strengths.
My Story
When I started learning graphic design basics, the first tool I worked with was Photoshop (CS version). I was in love with its simplicity and its power at the same time.
After I learned the Photoshop fundamentals from tutorials, I was able to create nice compositions by myself. At the same time, I was spending my time studying other important matters like color theory and typography. Like all others young designers, I loved — and still love — searching for inspirational pieces from other designers.
At a certain point, I realized that not everything can be created in Photoshop. There were other powerful tools to discover. Illustrator was one of these other tools.
Great Artists That Use Photoshop and Illustrator Together
Take a look at the works of:
- Adhemas Batista
- Radim Malinic
- Von. R. Glitschka
Their wonderful design decorations are created using Illustrator. I wanted to create something similar by myself, so Illustrator was a tool to be learned.
The Difference Between Photoshop and Illustrator
As a guideline, we must acknowledge that there are fundamental differences between these two applications. Photoshop works best as a raster image manipulation tool, whereas Illustrator’s main purpose is to create vector-based objects.
And while the two applications may share many features between them, it is ultimately up to the designer to choose which tool will best suit the needs of the project. My only a suggestion to young designers: Explore both tools and don’t limit yourself to just one tool. Even though creativity is the starting point to becoming a good graphic designer, the ability to combine different tools for different purposes can only broaden your creative horizons. Exploration between styles and the study of different tools is the key to growing as a graphic designer.
Inspiration
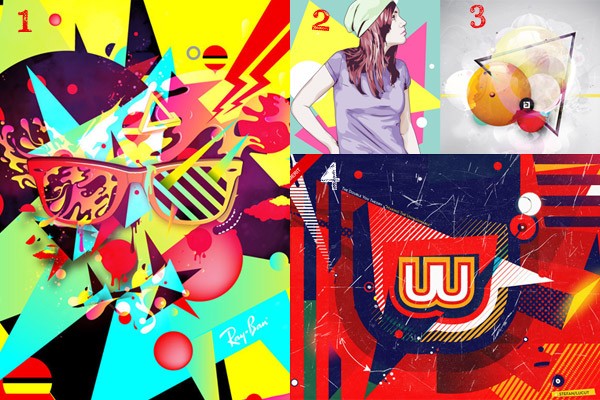
Here are some works that have inspired my tutorial.
You will notice that all these wonderful images are characterized by the use of abstract vector elements. While it is simple to create abstract shapes in Illustrator, it’s more difficult to merge them into a well-matched composition. In the tutorial, I’ll also explain how to create other decorations like halftones, 3D stars, bubbles and ribbons.
Here are the links to the original works featured in the screenshot below:
- Ray Bans by I Love Dust
- It makes me wonder by DeftBeat
- Simple Philosophy by Jeroen van Eerden
- Power without control by Stefan Lucut
 Let’s get started, shall we?
Step 1: Create the Photoshop Document and Make the Background
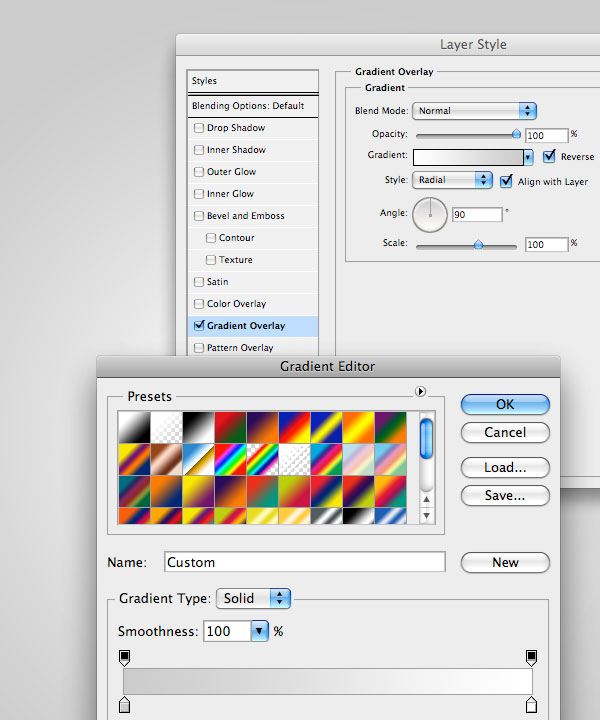
First, create a new A4 document in Photoshop. 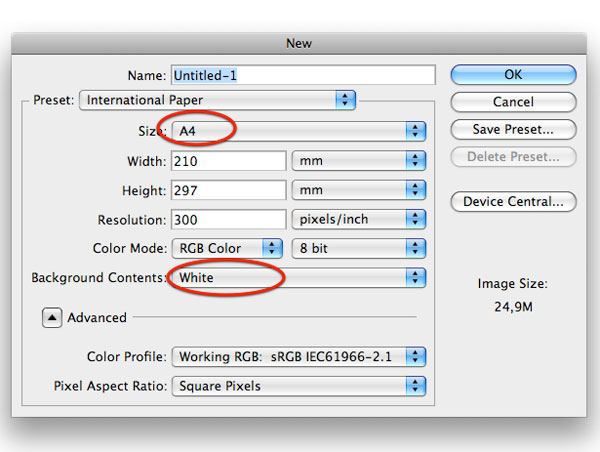 Right-click on the Background layer and select Blending Options from the contextual menu that appears. Add a radial gradient overlay going from white (#ffffff) to gray (#cccccc).
Step 2: Create Clouds from Illustrator and Import to Photoshop
Create a new A4-sized document in Illustrator. Here, we will create the main decorative elements of our composition.  Grab the Ellipse Tool (L) and create a couple of circles.
The fill color is not important, but the Stroke must be set to None. Place the circles close to each other. 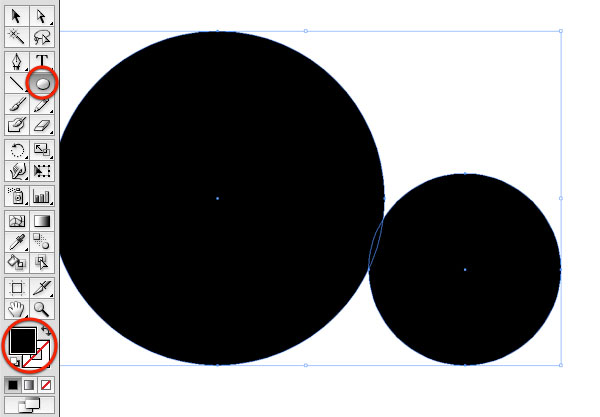 Copy (Ctrl/Cmd + C) and paste (Ctrl/Cmd + V) the circles in Photoshop.
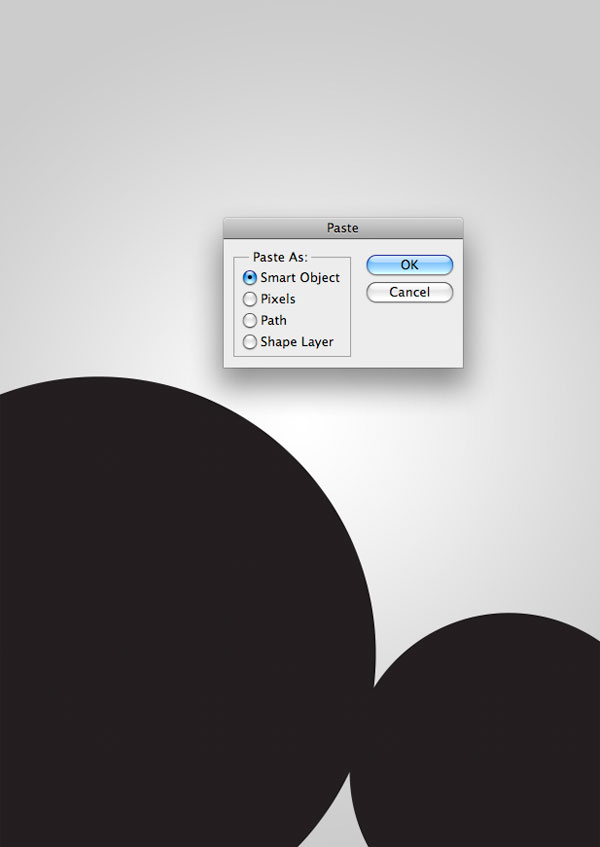
In the dialog window that appears, select Smart Objects. Using smart objects as the pasting option allows all the elements that we will import in Photoshop from Illustrator to be scalable without loss of image quality. Place the circles at the bottom of the canvas.
 Right-click on the circles’ layers in the Layers Panel and reduce Fill Opacity to 0%. Next, add a white Color Overlay.
 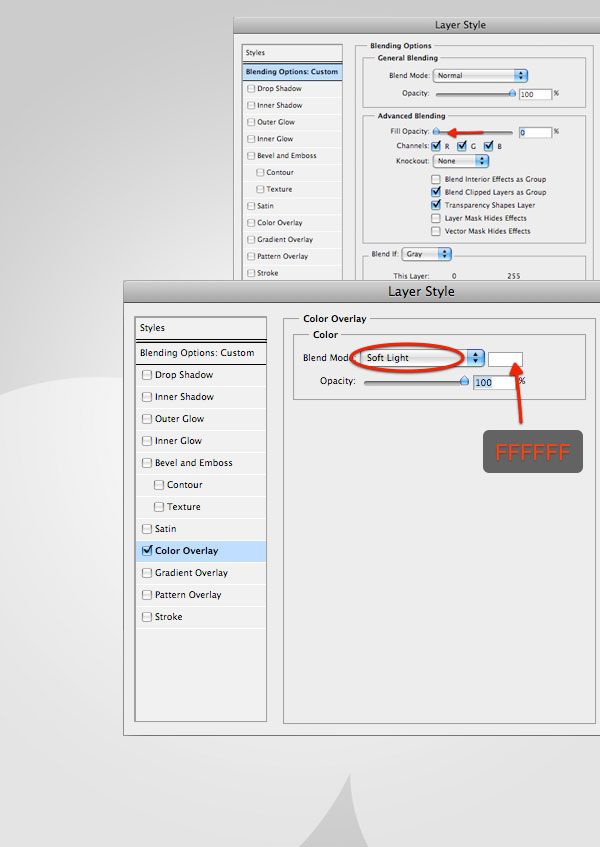 At this point, we want to merge the circles with the background to make them look like large, funky-looking clouds.
Add a layer mask by pressing the Add layer mask icon at the bottom of the Layers Panel and then paint the bottom of the circles shape. For this purpose, set your Foreground color to black (#000000) and use the Brush Tool (B) with a large, soft brush with Hardness at 0%. 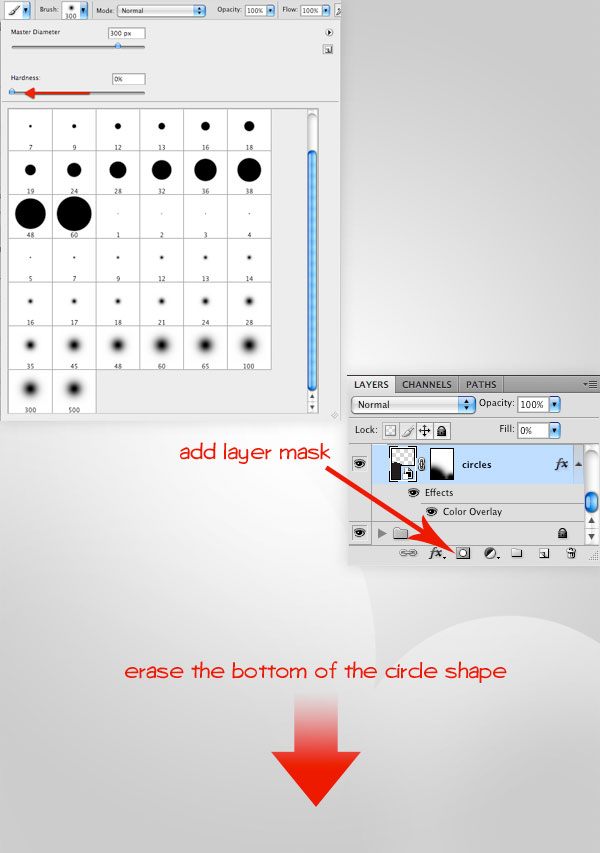 Using the same method, you can add other cloud shapes to the bottom of the composition.

Step 3: Create Quick and Easy Halftone Effects Elements
Have you ever wanted to create your own set of halftone effects? Good news: We’ll cover it in this tutorial. Halftones can easily be created in Illustrator.
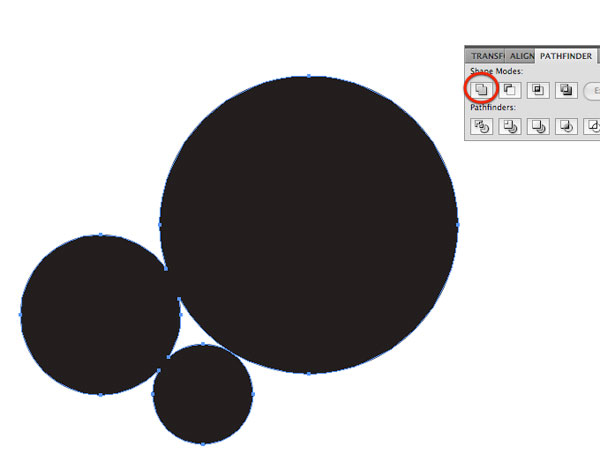
Start by drawing three or more tangent circles. 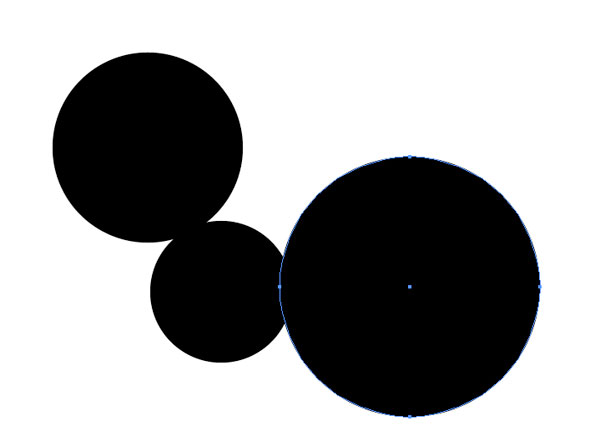 Select the three circles with the Selection Tool (V) and merge them by pressing the Unite button in the Pathfinder Panel (Windows > Pathfinder).
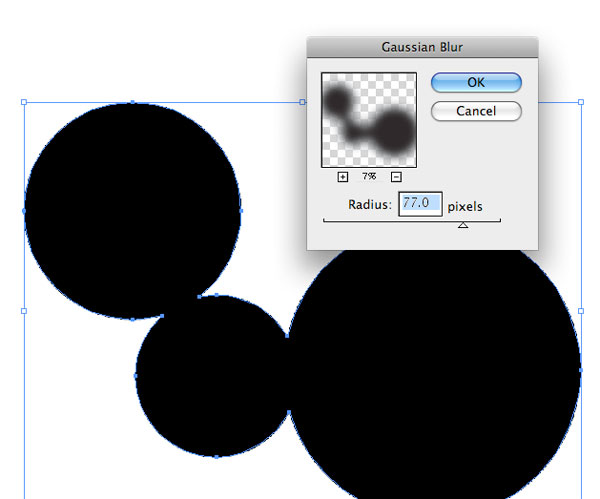
 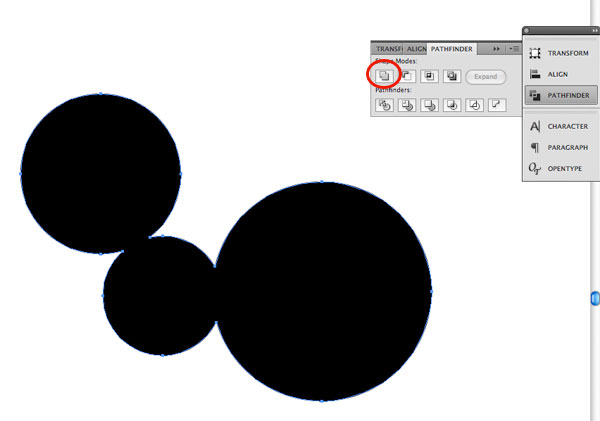 Apply the Gaussian blur effect (Effect > Blur > Gaussian blur) with a Radius of around 70 to 77 pixels.
 Once the Gaussian blur has been applied, rasterize the circles by going to Object > Rasterize.
 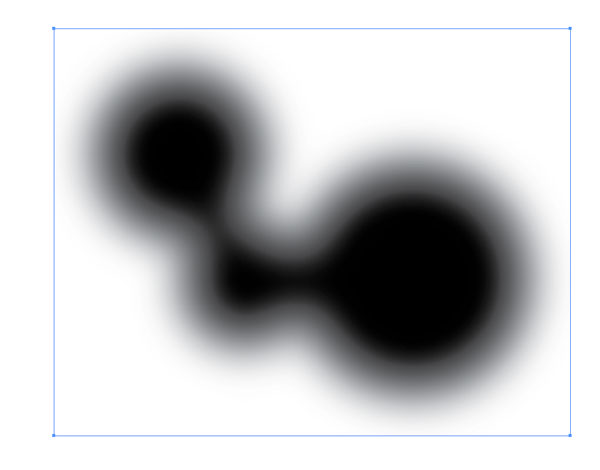 At this point, create the halftone effect by going to Effect > Pixelate > Color Halftone. Enter a value for the Max.
Radius in accordance with how big you want the halftone circles to be. Play around with this option until you get an effect that you like. 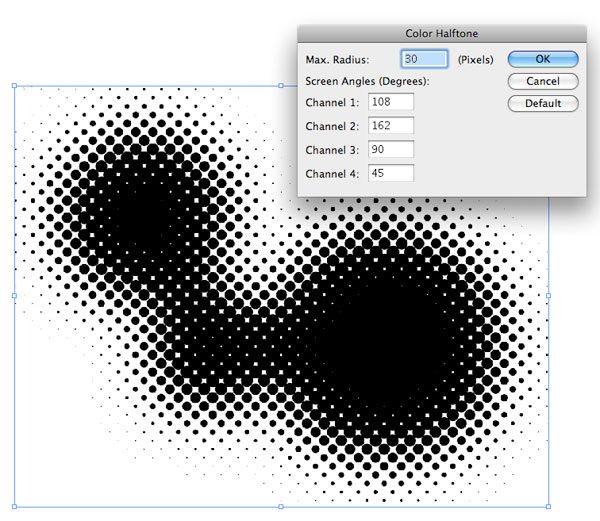 The halftone object we just created now needs to be converted into a vector, so go to Object > Live Trace > Tracing Options and enter the following values: 2 px for Path Fitting, 5 px for Minimum Area and 5 px for Corner Angle.
Then, when you have the option values in place, click on the Trace button to automatically convert the object into a vector.  Since we want to select only the halftone effects part of the vector, we have to expand the result of the Live Trace. Go to Object > Expand Appearance and then go to Object > Expand; check the Object and Fill options in the dialog window that appears.
Next, grab the Magic Wand Tool (Y) and automatically select the white area. Once the white areas are selected, hit Delete to remove them. 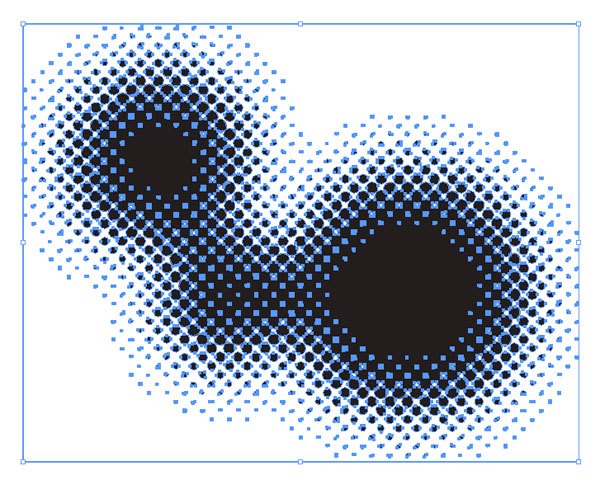 Copy (Ctrl/Cmd + C) and paste (Ctrl/Cmd + P) the halftone effects object as a Smart Object in Photoshop.
Right-click on the smart object and choose Blending Options in the contextual menu that appears. Give it a Color Overlay of white (#ffffff). Afterwards, reduce the layer’s Opacity to around 40%.
Rotate the halftone effect smart object using Free Transform (Ctrl/Cmd + T) and place it at edge of the canvas (or wherever you want it in your composition) using the Move Tool (V). Create more halftone effect elements by duplicating the layer (Ctrl/Cmd + J) and moving them around in various places of your composition. 
Step 4: Add the Subject of the Composition
We need a subject for our composition.
I downloaded this nice stock image of a guitarist from Shutterstock. You can choose any image you prefer. Tip: Try taking a photo of a friend jumping or running to give our composition some life with human movement.
It could be fun and fulfilling to use your own subject/photo for this tutorial! Start this step by extracting the person using your favorite method of isolating a subject from its background. Place the subject in the center of the canvas.
In case you want to increase color contrast of the subject, duplicate its layer (Ctrl/Cmd + J) right on top of it and set the duplicated layer’s blend mode to Overlay with the Opacity at around 70%. 
Step 5: Choosing the Color Palette
We are going to place a series of colored decorative elements into the scene. Before creating these elements, it’s a good habit to choose a color palette.
For this image, I chose 3 colors:
- Cyan: #51bbe1
- Magenta: #ec6ccc
- Yellow: #f3cf40
Tip: You can use the subject of your photos for inspiration. Use the Eyedropper Tool (I) to get color values from interesting parts of your subject. The colors I chose were inspired by the subject.
This can make your color palette harmonious in your composition. 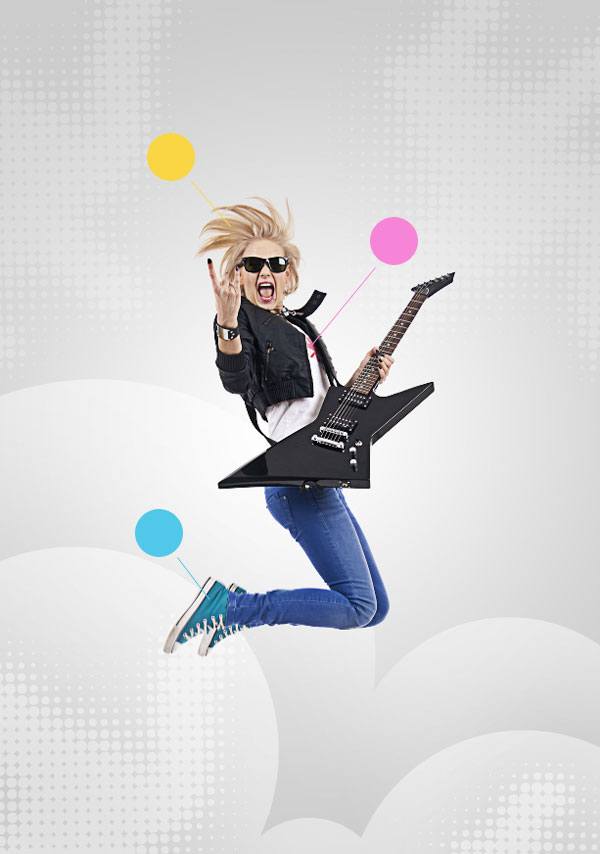
Step 6: Creating Geometric Decorations
We can start adding some geometric decorations to the composition. For this step, we don’t need Illustrator.
Create a new layer group, name it “colored circles”, and place it below the guitarist layer. Set the Foreground color using one of the palette colors you’ve chosen. Grab the Ellipse Tool (U) and create a circle; hold down Shift while making the ellipse if you want a perfect circle.
 Flat colors are so boring! There is a trick to better integrate these circles into the composition. As we did with the clouds in Step 2, add a layer mask and then mask out a part of the circle using a soft brush.
After masking, switch the blending mode of the circle layer to Linear Burn. You will notice the importance of this process later when we layer the circles. 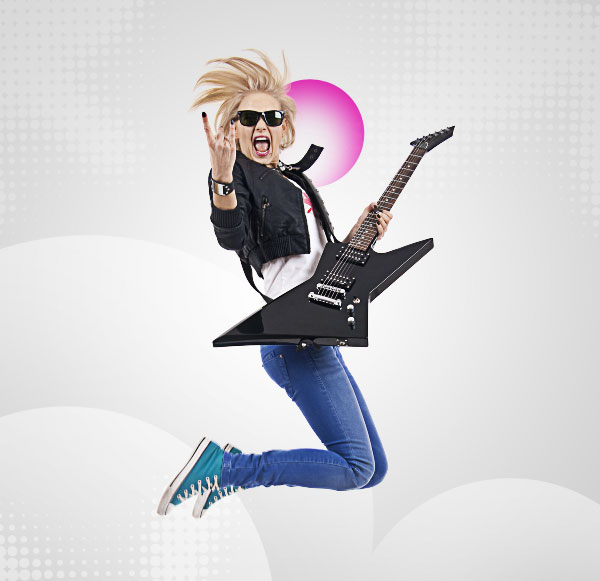 Create other circles using the same technique we just discussed or duplicate the first circle and then resize and rotate the duplicates with Free Transform (Ctrl/Cmd + T).
Tip: In Illustrator and Photoshop, you can duplicate an object by pressing Alt/Option + left-clicking on it in the canvas/artboard and then dragging your mouse to make a copy.  You can now add other circles using the remaining colors of the palette. In my case, I used cyan (#51bbe1) and yellow (#f3cf40).
Try to create good intersections between the circular elements and remember to set the blending mode of each layer to Linear Burn to get the effect we need. 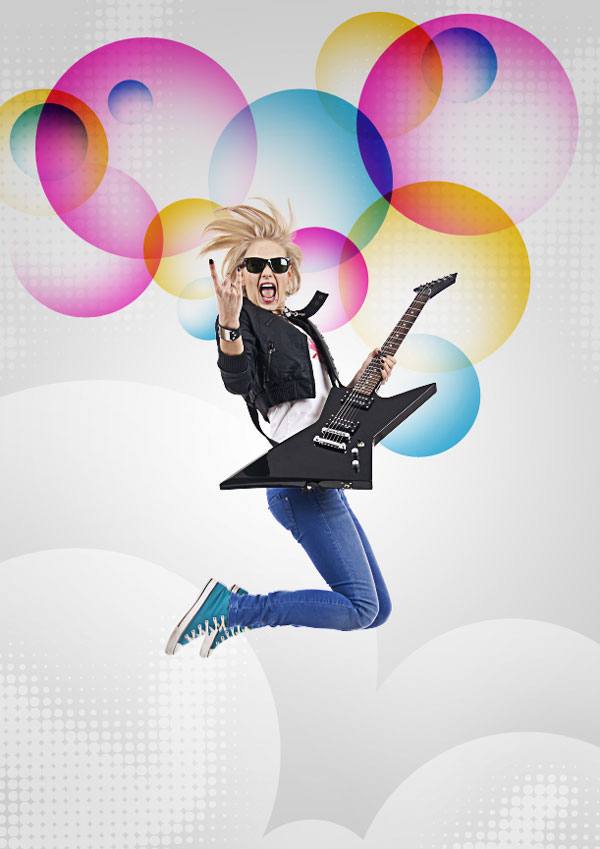
Step 7: Create “Bubbly” Decorative Elements
Let’s return to Illustrator for creating the following “bubbly” decorative elements. Start by creating some tangent circles and merging them using the Unite button in the Pathfinder Panel.
 Apply a gaussian blur effect (Effect > Blur > Gaussian Blur) to the united shape with a Radius of 60 pixels.
 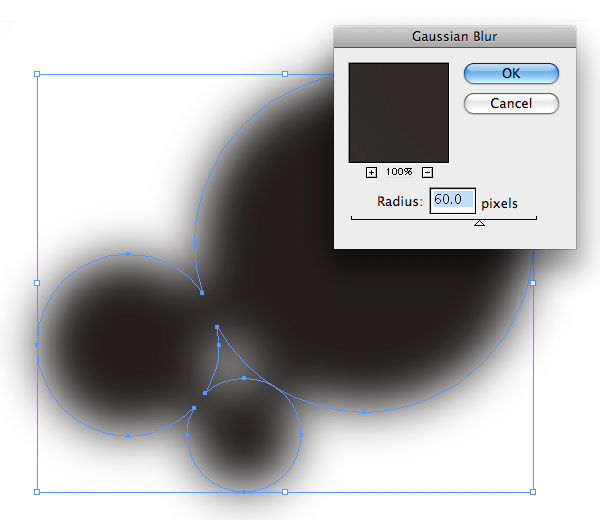 Expand the object by going to Object > Expand Appearance. Now go to Object > Live Trace > Make and Expand.
Remember to take out the white areas by selecting them with the Magic Wand Tool (Y) and hitting Delete. 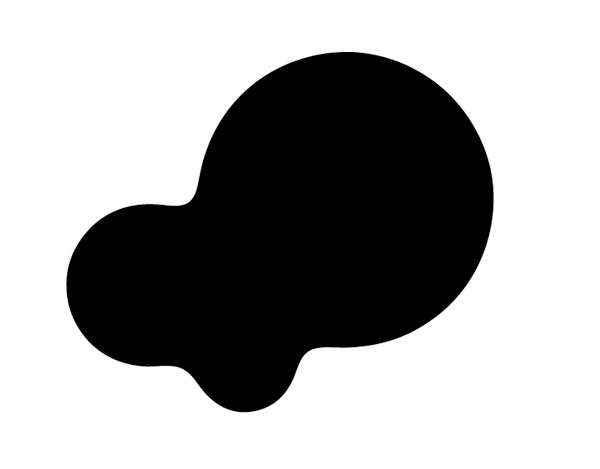 Copy (Ctrl/Cmd + C) and paste (Ctrl/Cmd + V) the bubble in Photoshop. Right-click on the “bubbly” element layer in the Layers Panel and then select Blending Options from the contextual menu that appears.
In the Blending Options dialog window, set Fill Opacity under the Advanced Blending section to 0% and also add a Color Overlay layer style using one of your palette colors as the color overlay. 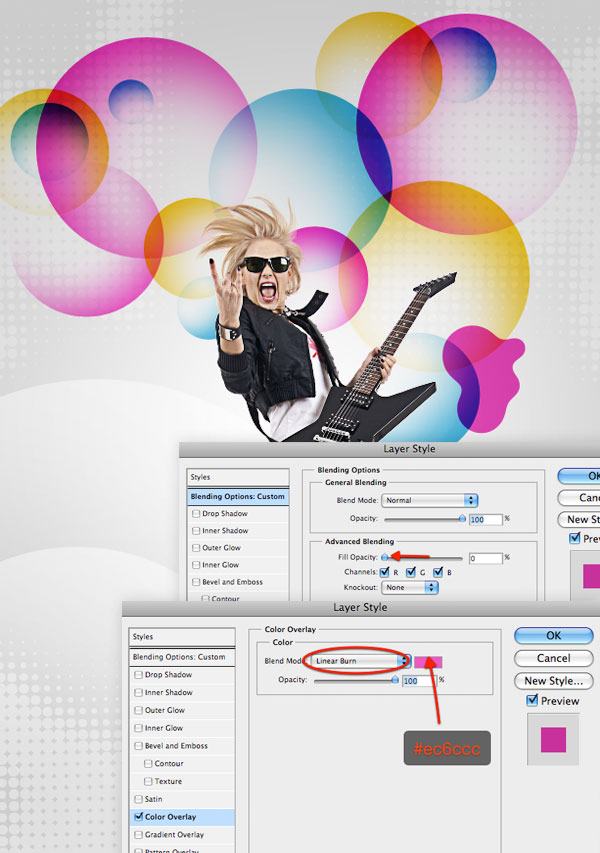 As we did with the circles, add a layer mask and use a soft brush to mask out a part of the bubble.
  Add more bubbles.
Create different shapes and forms in Illustrator then import them into Photoshop. Just use the same technique for every bubble: Change the color accordingly with your color palette and use layer masks to mask out some parts. Finally, keep your work tidy by grouping all bubbles in a layer group.
Do this by selecting them in the Layers Panel and pressing Ctrl/Cmd + G. 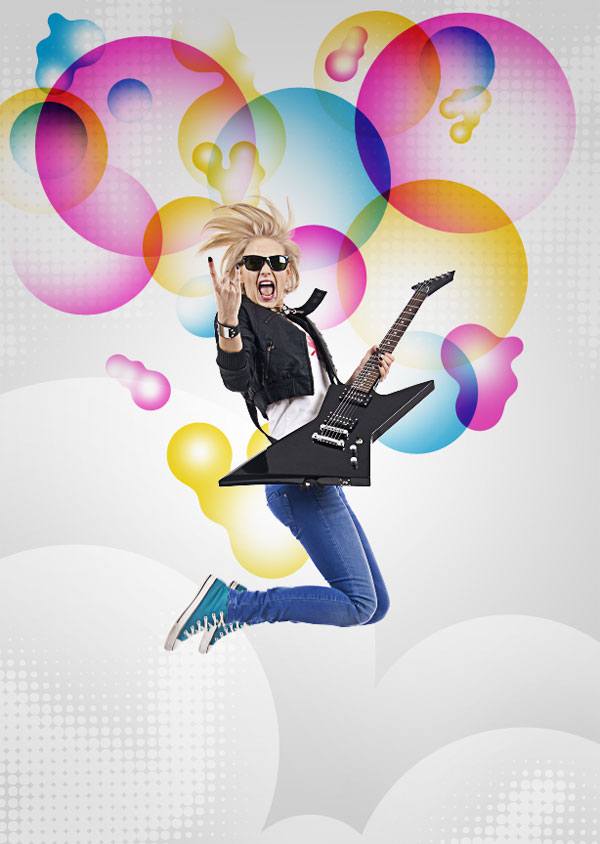
Step 8: Create Ribbon Elements
Let’s switch to Illustrator again to create vector ribbons. For this step, we will use a powerful Illustrator tool: the Blend command (Alt/Option + Ctrl/Cmd + B).
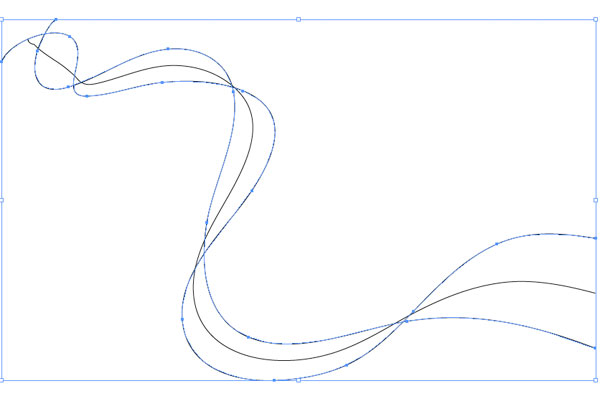
Start by creating two curves in Illustrator: You can use the Pen Tool (P) or the Pencil Tool (N) for this purpose. Make sure to intersect the curves on two or more points because this will allow you to give more complexity to your ribbons. 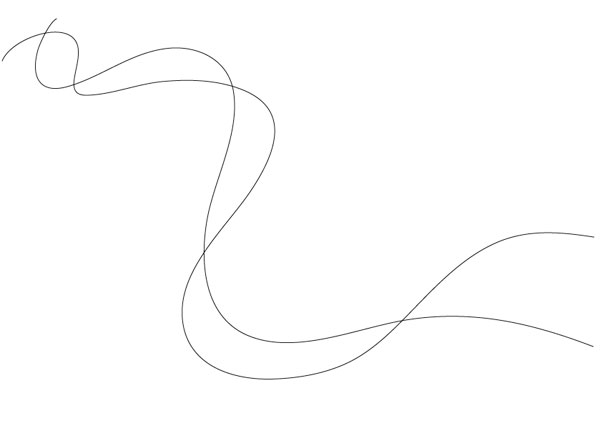 Select both curves and go to Object > Blend > Make (Alt/Option + Ctrl/Cmd + B).
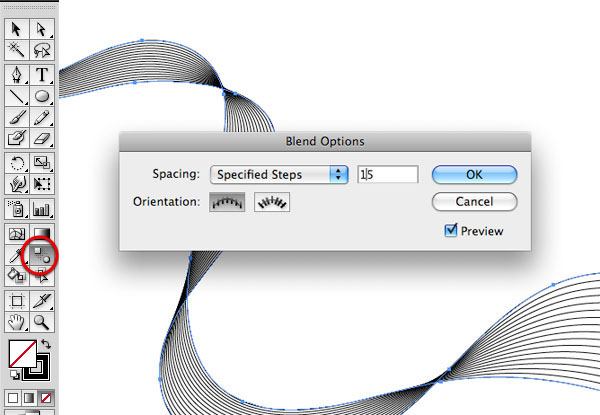
 Double-click on the Blend Tool in the Tools Panel to change blend options. For Spacing, switch from Smooth Color to Specified Steps and enter 15 as number of steps. Press OK.
 Select the ribbon, copy it, and then paste it in Photoshop as a smart object. Place the ribbon above the group containing the “bubbly” elements. The only thing to modify with your ribbon is the color: Apply a Gradient Overlay using blending options.
Use the three colors of the palette for your gradient overlay. 
Step 9: Make 3D Star Decorative Elements
Let’s create some retro-looking 3D stars. Switch to your Illustrator artboard and use the Star Tool to create a star.
The color is the same magenta from our color palette (#ec6ccc). 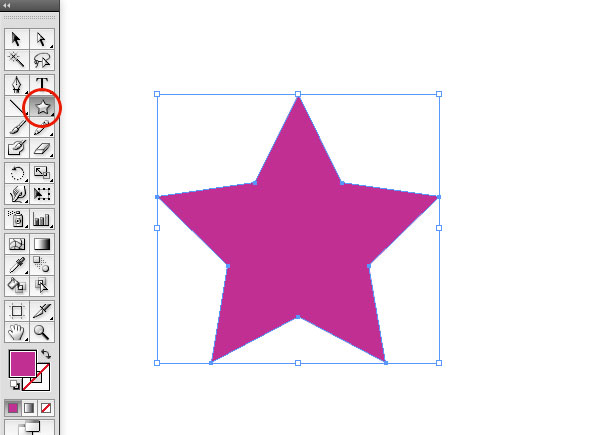 In Illustrator, there is a 3D Tool for creating simple three-dimensional effects. Select the star object on the artboard and go to Effect > 3D>Extrude and Bevel.
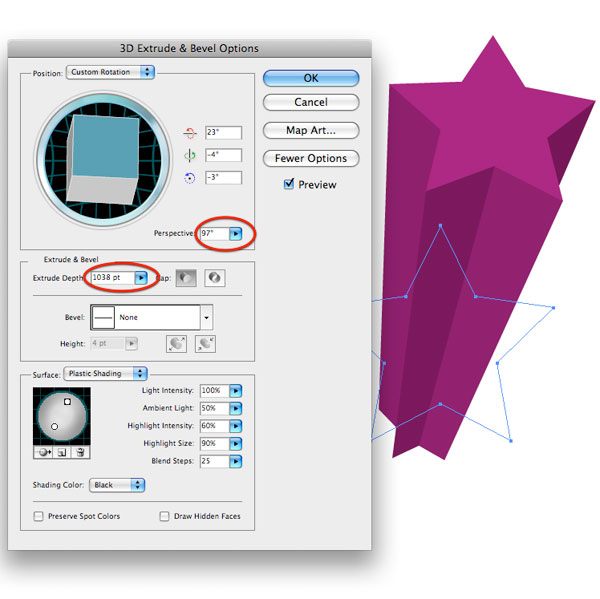
Rotate the cube to change the orientation of the star. Increase the Extrude Depth and Perspective to create the star’s tail. In the Surface section, move the light spot in front of the star face.
Tip: You can create new light spots by pressing the New Light icon. The Extrude & Bevel Effect is really intuitive to use. Play around with other options to come up with other 3D stars on your own.
 Copy and paste the star in Photoshop, just like with our other decorative elements. Position it behind the guitarist.
 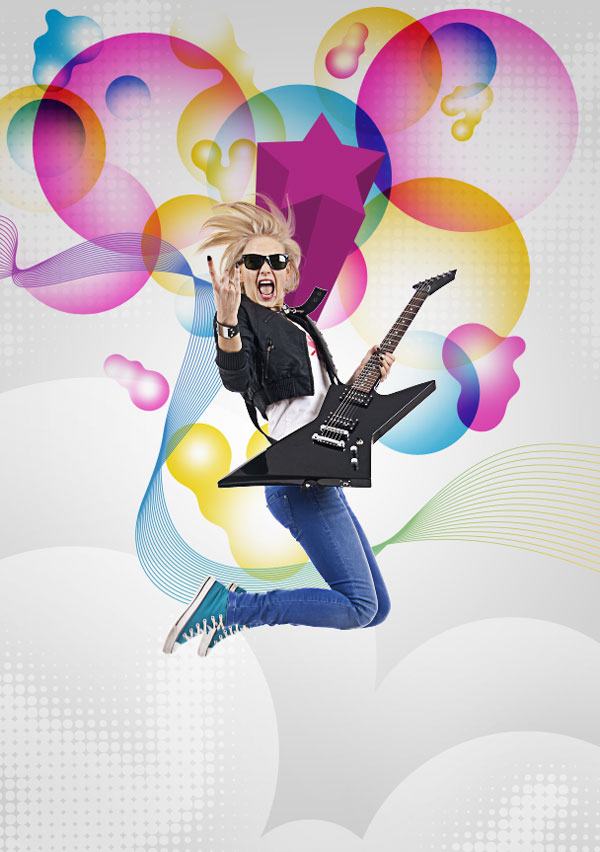 Create more 3D stars in Illustrator and put them behind the guitarist in Photoshop.
Then select all the Star layers and group them (Ctrl/Cmd + G). 
Step 10: Add a Light Effect Behind the Subject
Create a layer between the guitarist layer and the stars group. Select a large, soft, white brush with Hardness at 0% and click in the center of the composition behind the guitarist.
Reduce the opacity of this layer as necessary. This light effect will enhance the focus of the composition towards the subject. 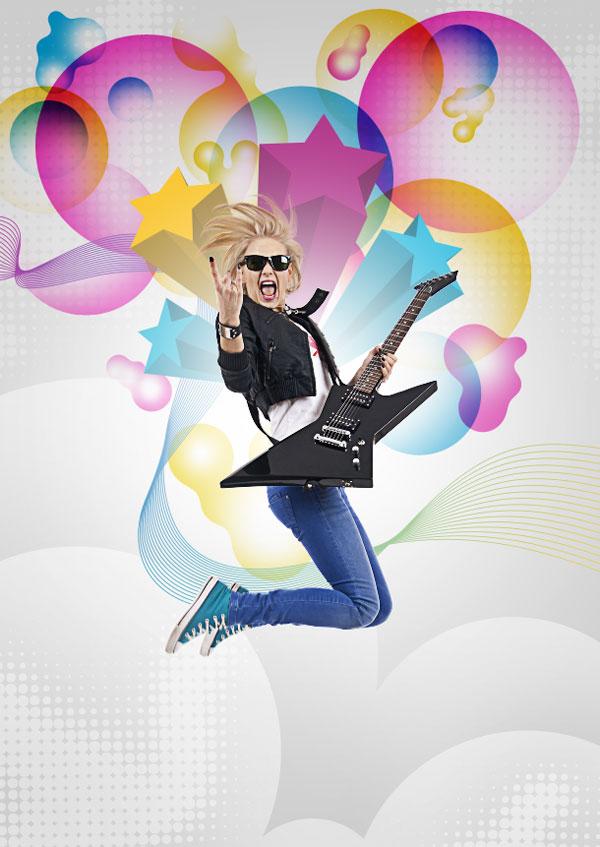
Step 11: Make 3D Text in Illustrator
3D text can be created using Illustrator’s Bevel & Emboss Effect.
To start, write a word in Illustrator using the Type Tool (T). The font used in this tutorial is Public Gothic circular (listed in the Tutorial Resources section above) and the font size is 100 pt. Of course, feel free to use your own font, but try to pick a bold sans serif type face if you can so that you may follow along (for example, Impact, Arial, or Helvetica Bold are widely available fonts you can use).
 Select your text in the artboard, and then go to Type > Create Outlines (Shift + Ctrl/Cmd + O) to turn the text into compound paths.
 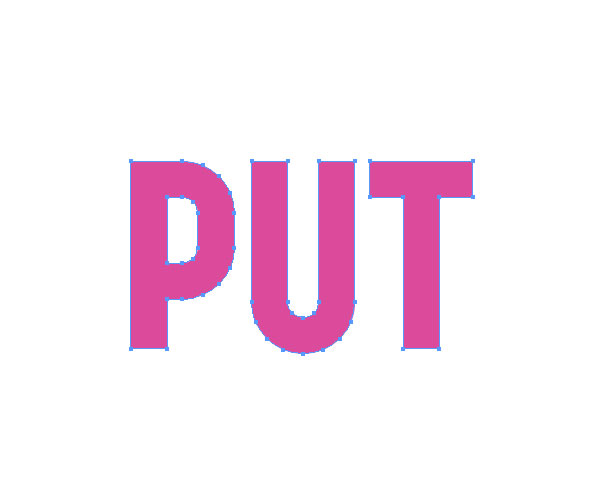 To make the text three-dimensional, go to Effect > 3D > Extrude & Bevel. In the Extrude & Bevel Options dialog window, make sure to switch the Bevel option to Tall-Round with Height at 2 pt.
This way, you will see a tiny inner glow effect. 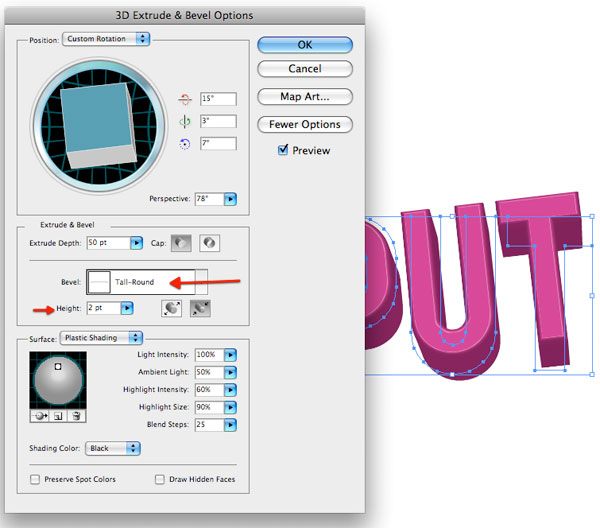 After you’re happy with your 3D text, copy it and paste it into Photoshop as a smart object. Using the same method, you can create other words using the other colors of the color palette we chose earlier and import them in Photoshop as smart objects.
You can experiment with size, angle, and style of your 3D texts in Illustrator’s Extrude & Bevel Options window. In Photoshop, you can experiment with their layer order to compose your text block. 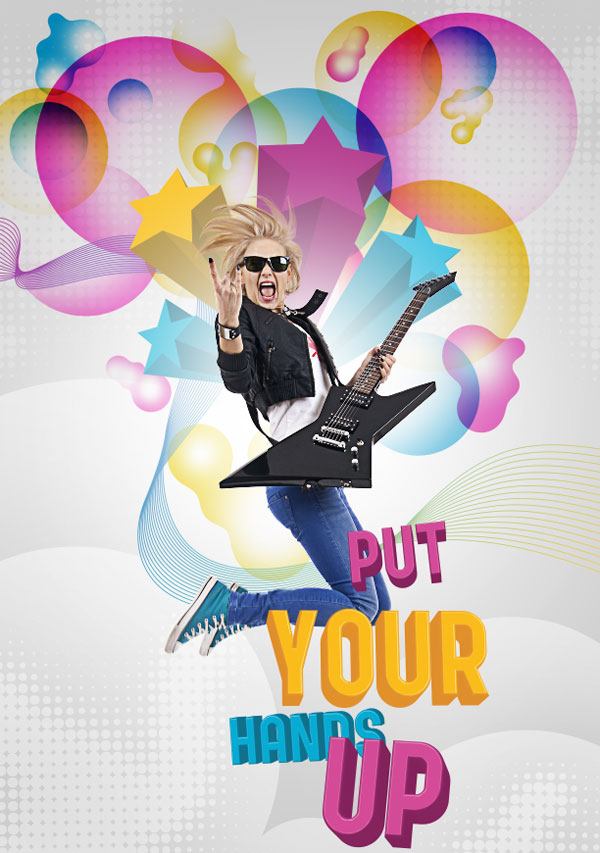
Step 12: Add a Noise Effect
We now have all the elements of our poster in place, so now we’re going to fine-tune our composition in Photoshop.
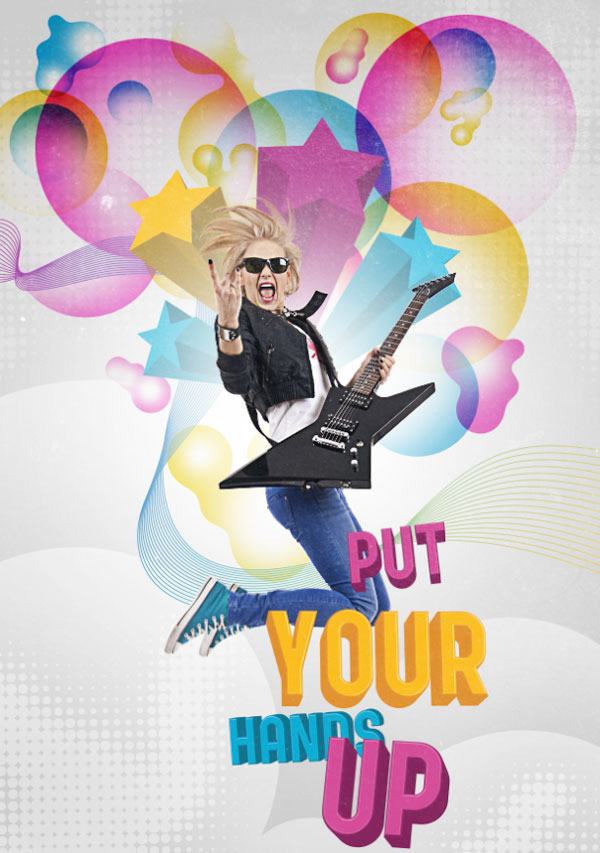
First, it’s time to texturize the image. A soft and subtle noise effect will work well. Download the third texture from this grunge set created by Bittbox and open it in Photoshop.
Alternatively, there are many textures you can use and download free of charge in Design Instruct’s Freebie section (check it out). Place the texture on top of all other layers and set its blending mode to Screen. This way, black areas will disappear, while white ones will be retained.
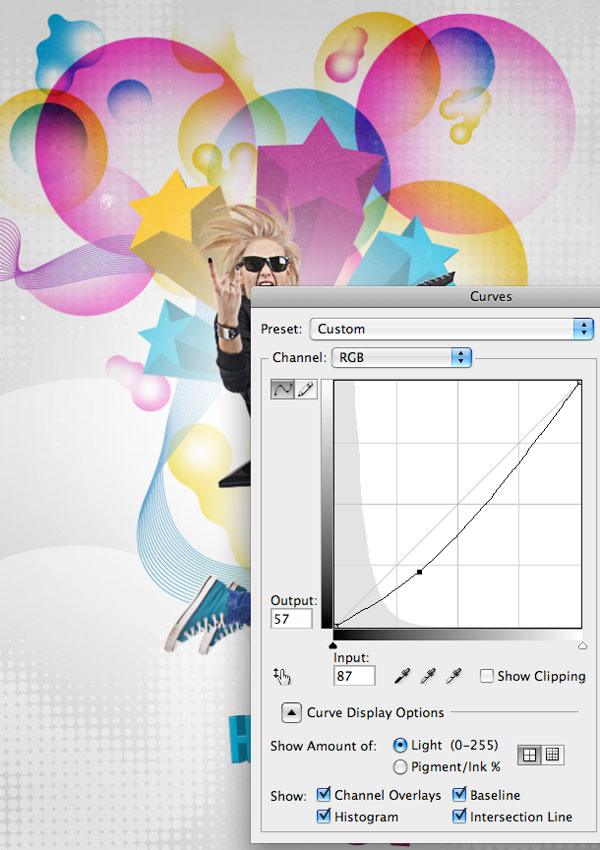
 Press Ctrl/Cmd + M to open the Curves image adjustment dialog window. Create an anchor point by clicking once on the curve and then drag this point towards the bottom-right area. You will notice that the more you move the anchor point to the bottom-right, the softer the white noise becomes.
 The final touch to the texture is the Sharpen filter. This filter enhances image details. Go to Filter > Sharpen > Sharpen to apply the filter.
Then press Ctrl/Cmd + F to reapply the same filter. 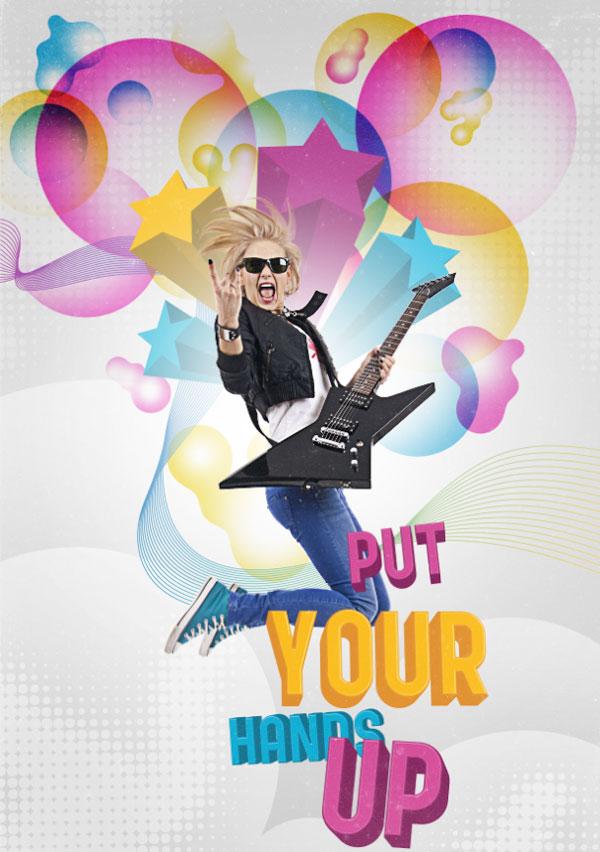
Step 13: Add Adjustment Layers
Let us enhance our composition for vividness and color. As I often do at the end of my work, I’ll apply some adjustment layers.
The first one will desaturate the image. The second one will increase color contrast and will give the piece a new look. Start by going to Layer > New Adjustment Layer > Hue/Saturation.
Set Saturation to -40. 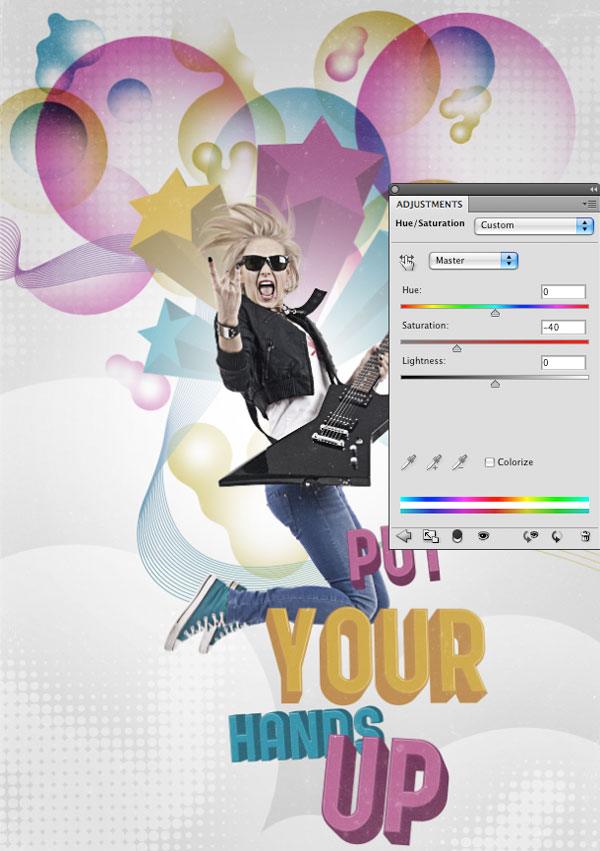 Add a new adjustment layer, but this time add a Gradient Map (Layer > New Adjustment Layer > Gradient Map). Set a gradient going from purple (#9e0c92) to orange (#ffae00).
 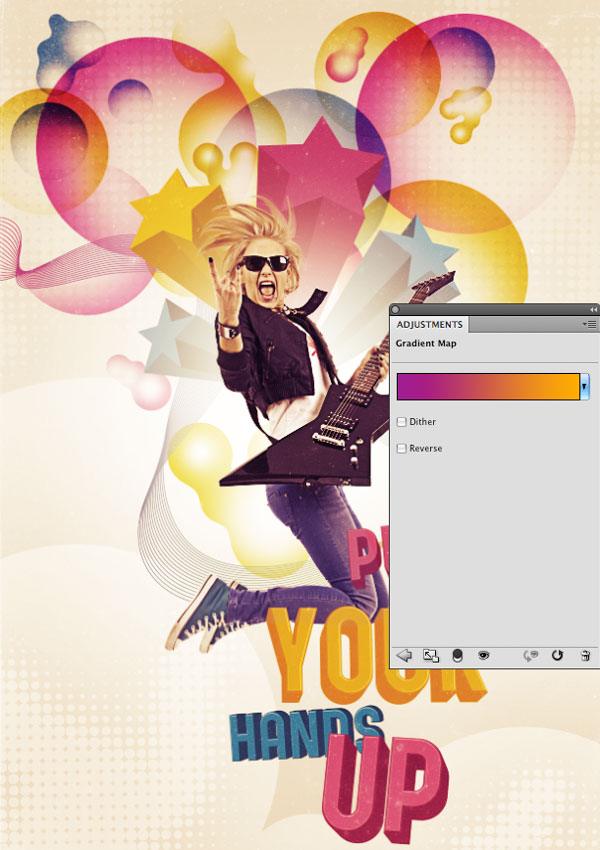 Optional: If you want to increase the poster’s color contrast, you can apply a third adjustment layer: Brightness/Contrast (Layer New Adjustment Layer > Brightness/Contrast).
Increase the Contrast value by moving the slider to the right.
Step 14: Apply Some Final Touches
We can enhance specific details of the composition with some lighting spots. Create a new layer group immediately below the grunge texture and set the group’s blending mode to Color Dodge. Create a new layer inside the group, grab a soft white (#ffffff) brush and click over the details you want to emphasize.
For example, I created lighting spots over the text and the subject’s hands. 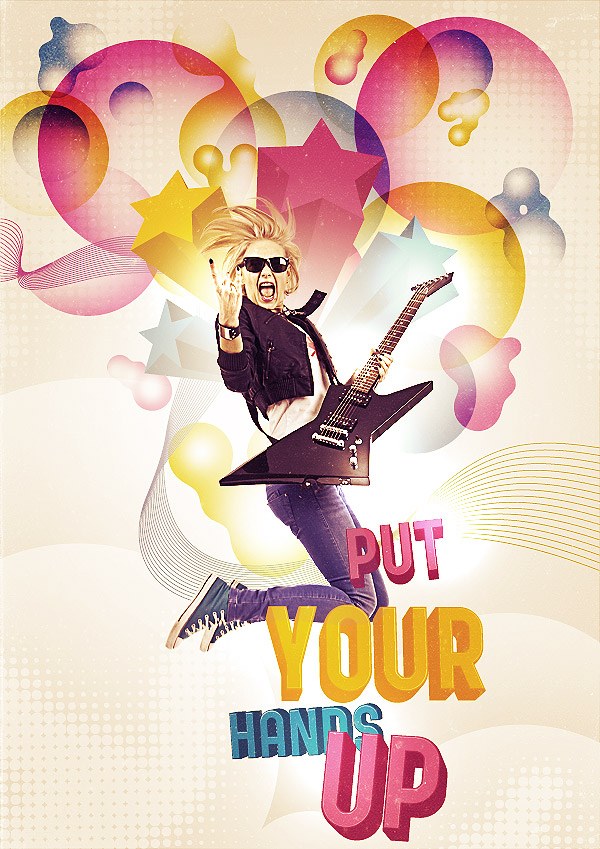
Tutorial Summary
Here is the end. We have covered a lot in this tutorial.
We made various decorative design elements in Illustrator, such as geometric shapes, ribbons, 3D stars, and 3D text. We used Photoshop to compose our poster as well as to apply textures and adjustment layers to improve the vibrancy and colors of our poster. I hope this tutorial showed you some new and interesting tips.
Also, I hope you’ve learned that the combination of two or more tools — like Adobe Photoshop and Adobe Illustrator — can speed up your workflow and open new design horizons. Never stop experimenting with new styles and tools.
Download Source Files
- decorative_elements_poster (ZIP, 25.5 MB)
-
 Trevin serves as the VP of Marketing at WebFX. He has worked on over 450 marketing campaigns and has been building websites for over 25 years. His work has been featured by Search Engine Land, USA Today, Fast Company and Inc.
 -

WebFX is a full-service marketing agency with 1,100+ client reviews and a 4.9-star rating on Clutch! Find out how our expert team and revenue-accelerating tech can drive results for you! Learn more
Make estimating web design costs easy
Website design costs can be tricky to nail down. Get an instant estimate for a custom web design with our free website design cost calculator!
Try Our Free Web Design Cost Calculator
Table of Contents
- Preview
- Tutorial Resources
- Using Photoshop and Illustrator Together
- Step 1: Create the Photoshop Document and Make the Background
- Step 2: Create Clouds from Illustrator and Import to Photoshop
- Step 3: Create Quick and Easy Halftone Effects Elements
- Step 4: Add the Subject of the Composition
- Step 5: Choosing the Color Palette
- Step 6: Creating Geometric Decorations
- Step 7: Create “Bubbly” Decorative Elements
- Step 8: Create Ribbon Elements
- Step 9: Make 3D Star Decorative Elements
- Step 10: Add a Light Effect Behind the Subject
- Step 11: Make 3D Text in Illustrator
- Step 12: Add a Noise Effect
- Step 13: Add Adjustment Layers
- Step 14: Apply Some Final Touches
- Tutorial Summary
- Download Source Files
Share this article


Web Design Calculator
Use our free tool to get a free, instant quote in under 60 seconds.
View Web Design CalculatorMake estimating web design costs easy
Website design costs can be tricky to nail down. Get an instant estimate for a custom web design with our free website design cost calculator!
Try Our Free Web Design Cost Calculator


