- Home
- Blog
- Web Design Create a Realistic MacBook Air in Photoshop
Create a Realistic MacBook Air in Photoshop
-
 25 min. read
-
 Trevin Shirey
 VP of Marketing
- Trevin serves as the VP of Marketing at WebFX. He has worked on over 450 marketing campaigns and has been building websites for over 25 years. His work has been featured by Search Engine Land, USA Today, Fast Company and Inc.
Preview
Click the image to see it in full scale. 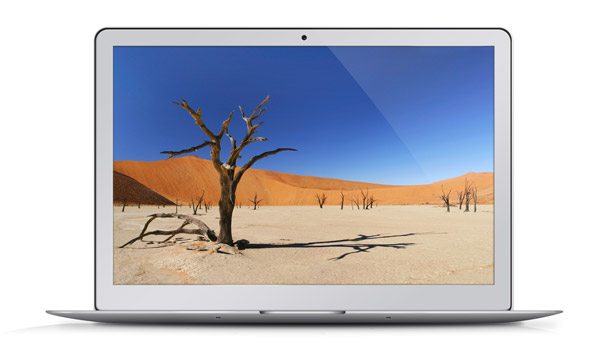
Step 1: Create the Top Part of the MacBook Air
Create a new Photoshop file with size of 1500x900px. Start by creating a rounded rectangle using the Rounded Rectangle Tool with Radius of 35px and a light gray color (#e0e1e3).
This will be the top part of the laptop that will hold the computer screen. 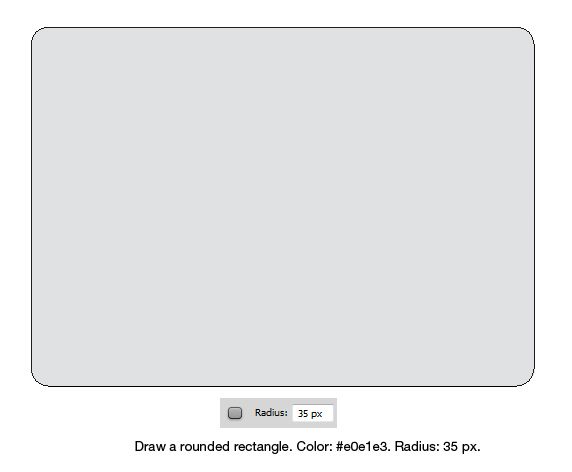 We need to modify this shape. Switch to the Direct Selection Tool (A), select the two bottom anchor points and move them up.
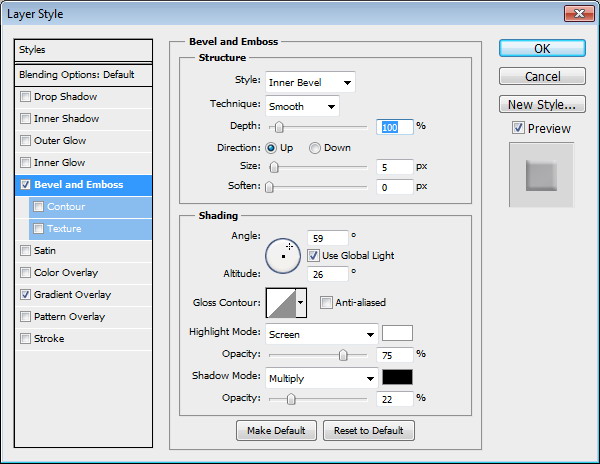
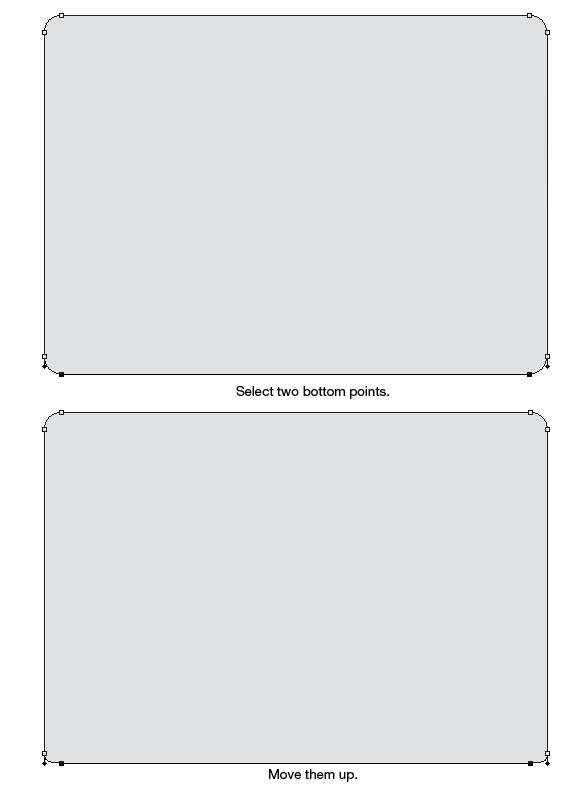 Double-click/Control-click on the layer to open up the Layer Style dialog window. (Learn more about layer styles). Add a Bevel and Emboss and a Gradient Overlay layer effect to the shape.
Bevel and Emboss
Gradient Overlay
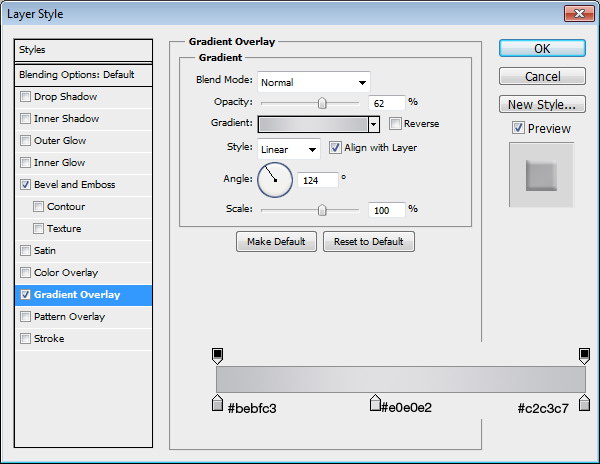 The Bevel and Emboss layer effect gives the screen area a 3D appearance and the Gradient Overlay gives it the metallic surface. This is the result of the layer style:
  Draw another rounded rectangle that should be slightly smaller than the first rounded rectangle above.
 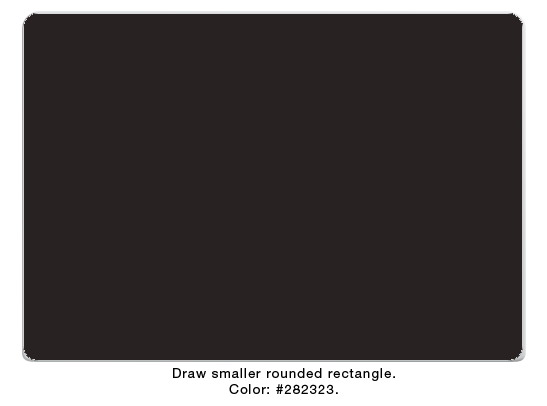 Draw another rounded rectangle that’s even smaller than the one we just created.
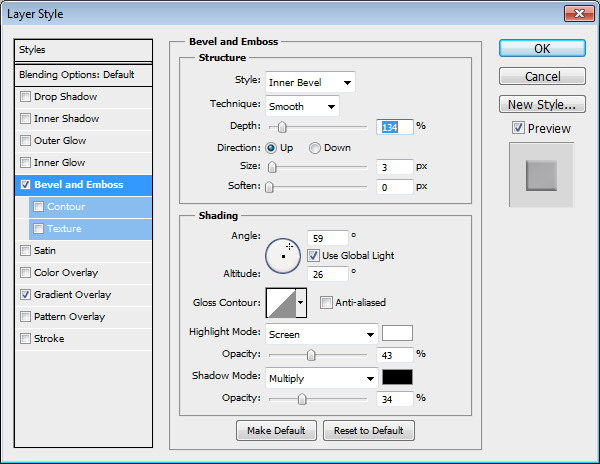
Select the two bottom anchor points and move them up. 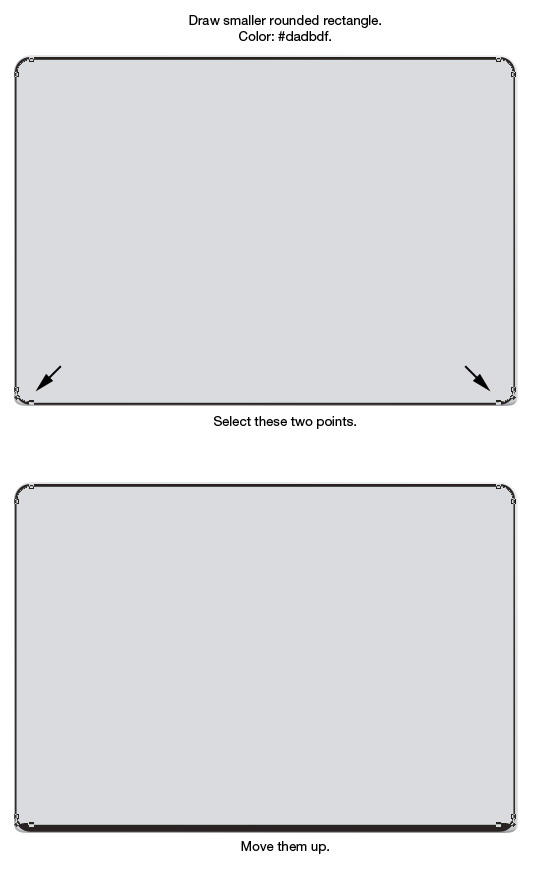 Give the rounded rectangle a Bevel and Emboss and a Gradient Overlay layer style.
Bevel and Emboss
Gradient Overlay
 This is what you should have now:
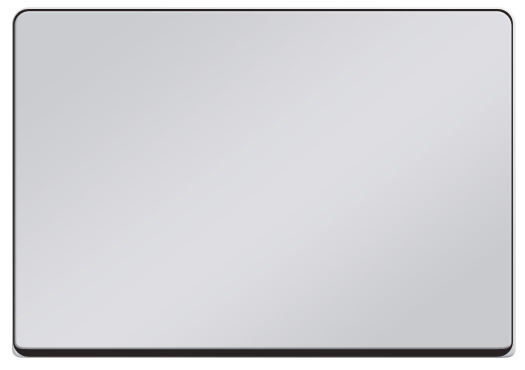
Step 2: Create the Screen
Draw a black rectangle inside the grey rounded rectangle.
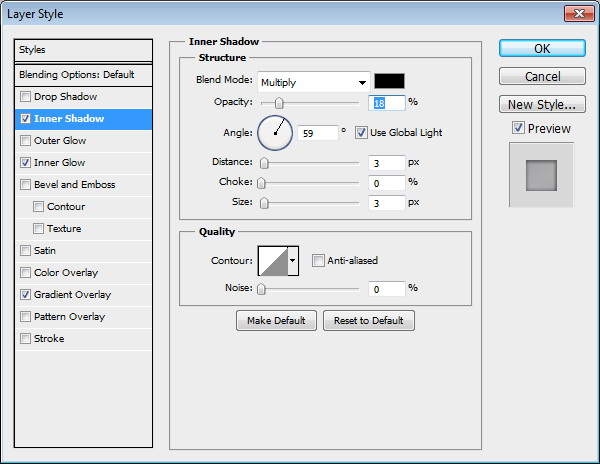
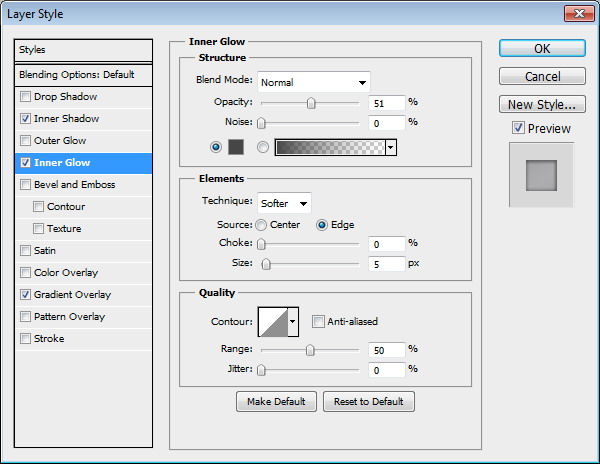
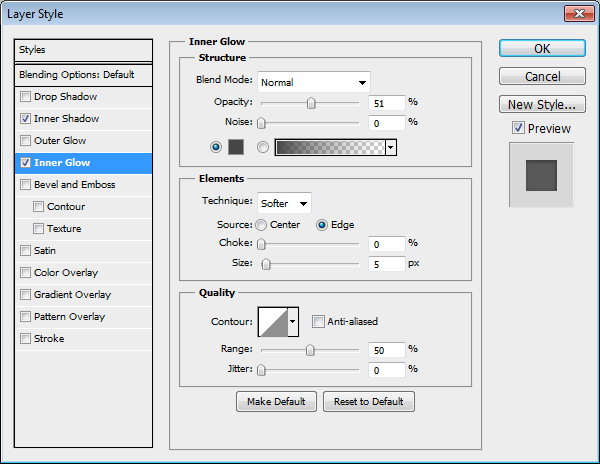
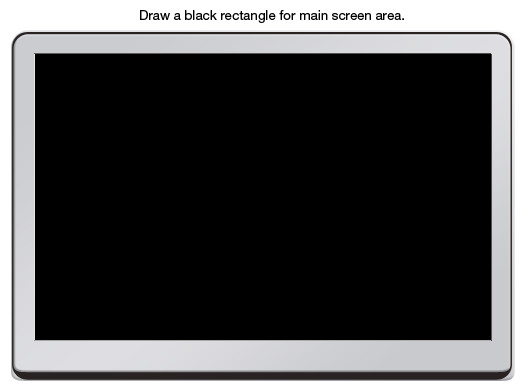 Add an Inner Shadow, Inner Glow, and Gradient Overlay to make the screen look realistic.
Inner Shadow
Inner Glow
Gradient Overlay
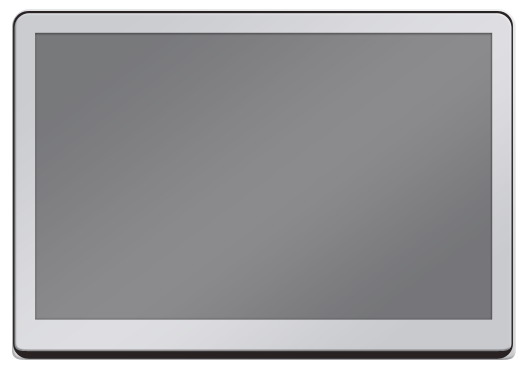
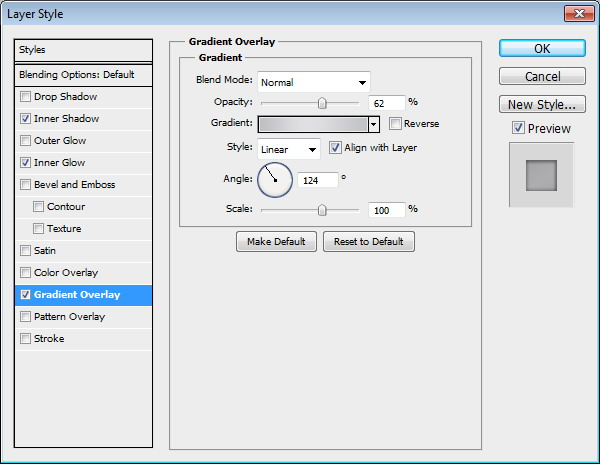 As you can see below, the inner shadow inside the screen adds depth and avoids a flat appearance.
Step 3: Add a Desktop Wallpaper
If you want a blank screen (i.e., the MacBook Air is turned off), you can skip this step.
But it would be nice to have something on the screen to make it look like the computer is powered on and to make our work look more interesting. Paste in your desired image on top of the laptop’s screen. For this tutorial, I’m using a nice landscape picture by Italian photographer, Enrico Nunziati.
Ctrl-click/Cmd-click on the screen layer to load a selection based on its shape. 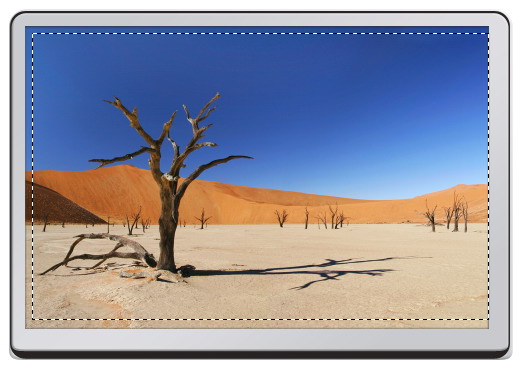 Click the Add layer mask button at the bottom of the Layers Panel. The wallpaper should now just be inside the screen; the parts of the photo outside of it has been masked away.
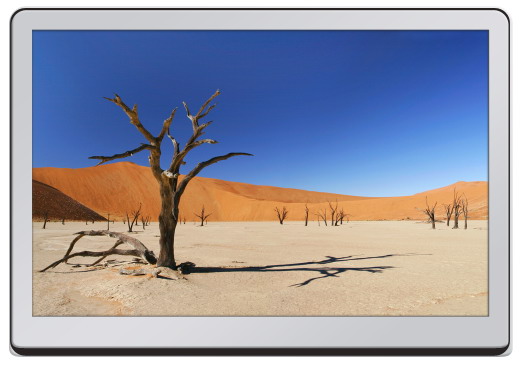
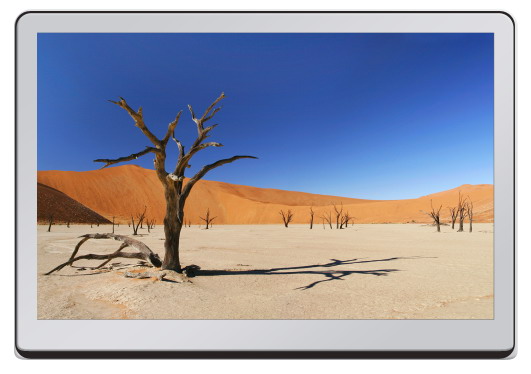 To make the desktop wallpaper look more realistic (and not so flat), add an Inner Shadow and an Inner Glow.
Inner Shadow

Inner Glow
 The layer style gives us some nice depth:
Step 4: Add the FaceTime Camera
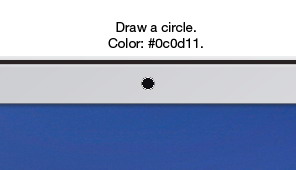
The MacBook Air has a web cam at the top that’s called FaceTime. To create this detail in our work, draw a small circle above the screen.
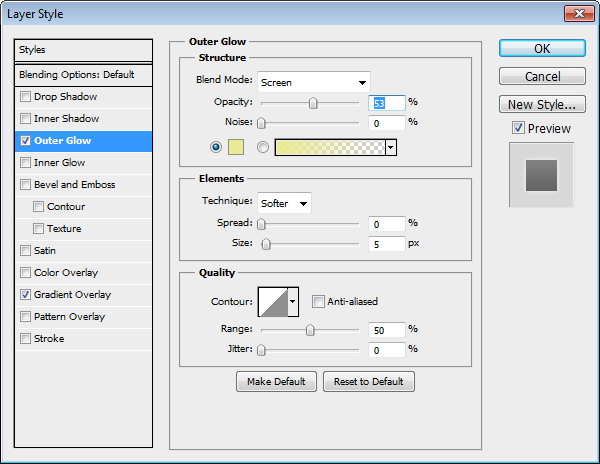
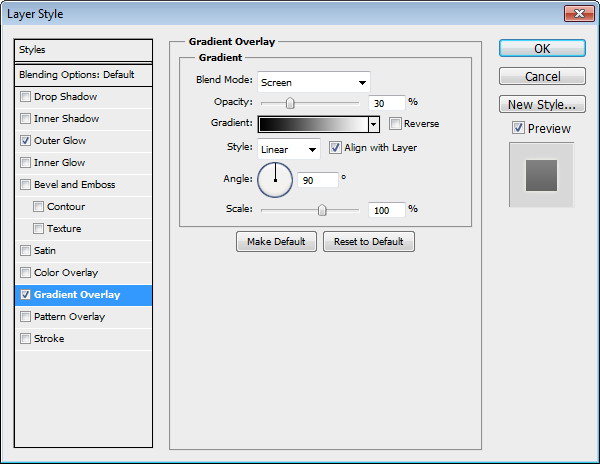
 Give the FaceTime camera an Outer Glow and Gradient Overlay.
Outer Glow
Gradient Overlay
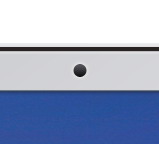 Next, draw a smaller circle inside the previous circle shape.
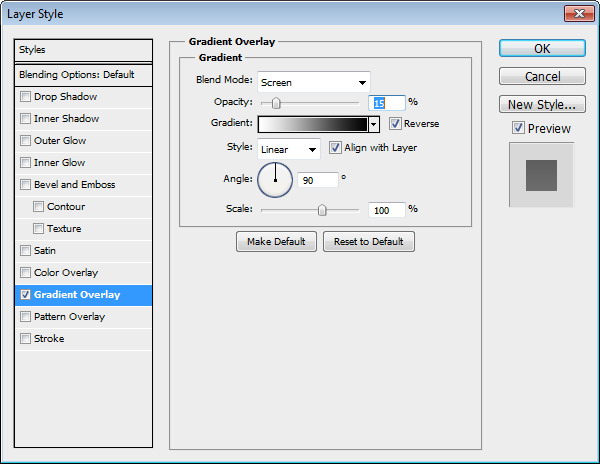
 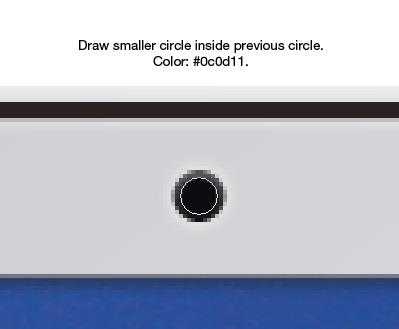 Give this new shape a Gradient Overlay.
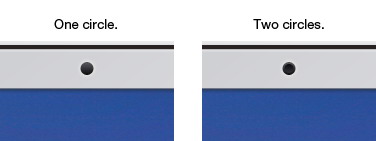
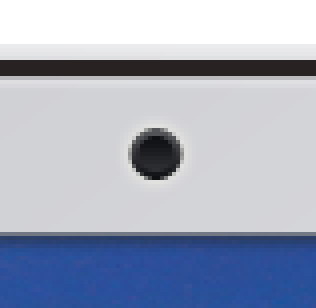 Below, you can see the subtle difference between a camera made from one circle versus two circles. If we only used one circle, the FaceTime camera would appear to be flat and would look empty. In the second camera, we can feel that there is something inside it.
Step 5: Adding Details to the FaceTime Camera
Let’s keep on working on the camera. Zoom in very closely with the Zoom Tool (Z). Create a new layer above the camera.
Use a 1px brush to draw a very small highlight and shadow on the camera lens. 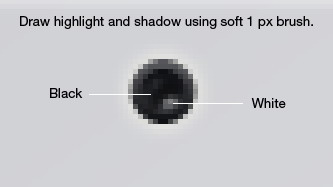 Here’s the highlight and shadow on a plain grey background.
 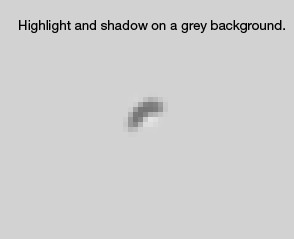 Here’s what our camera should look like at this point:
  Here, you can see the subtle difference before and after adding the highlight and shadow.

Step 6: Draw the Base of the MacBook Air
Create a rounded rectangle with Radius of 5px located under the top part of the laptop. 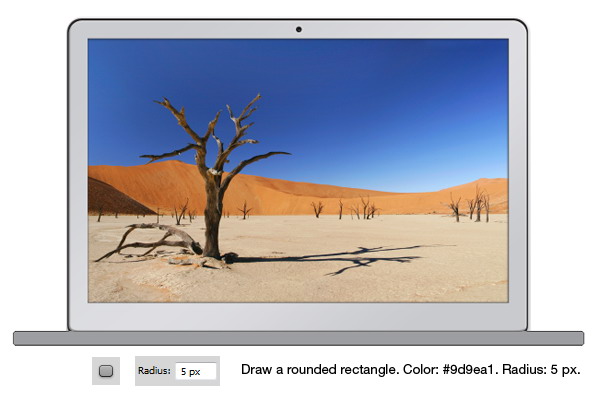 Zoom in to the left side of the rounded rectangle. Choose the Pen Tool (P) and then click the anchor point shown below to delete it.
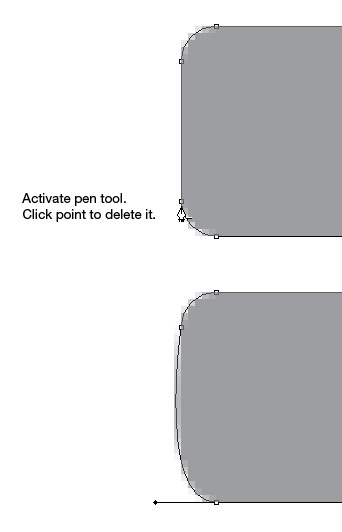 Repeat the same process on the other side.
 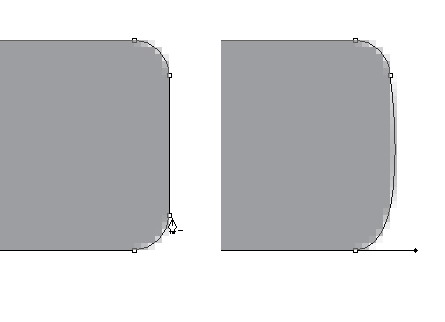 Switch to the Direct Selection Tool (A) and then select the two lowest anchor points. Hit Ctrl/Cmd + T to activate Free Transform.
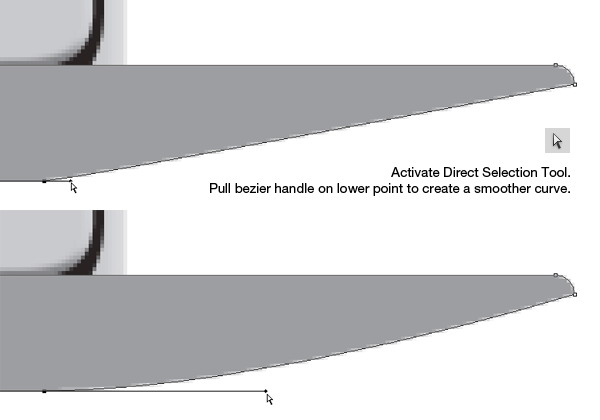
Hold down Alt/Option and then drag the side handle inwards to skew the rectangle. 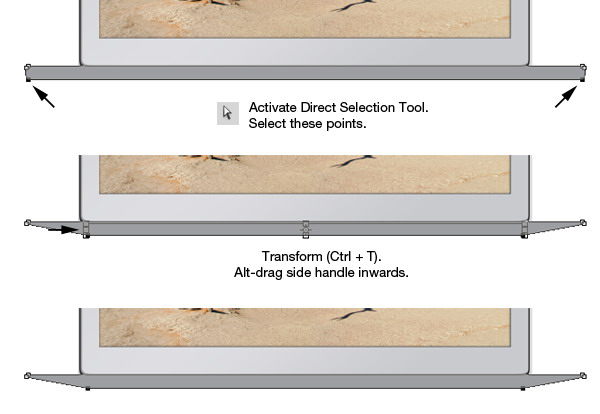 Zoom in to the right side of the shape. Select the Bezier handle at the bottom anchor point and pull it to create a smoother curve.
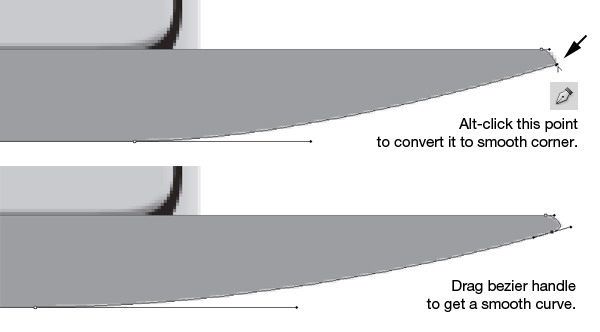
 Switch back to the Pen Tool. Hold Alt/Option to activate the Convert Point Tool (the mouse cursor should change appearance to indicate that you are using the Convert Point Tool). Click on the indicated anchor point below to convert it to a smooth corner.
 Repeat the same process on the other side.
 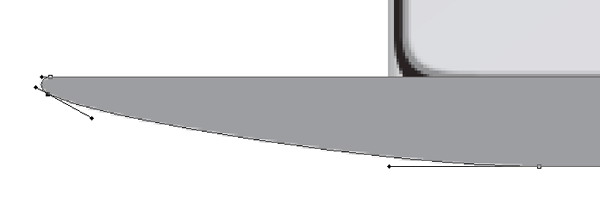 As you can see, we have modified the base shape to mimic the elegant curves that the MacBook Air is known for.
Step 7: Give the Base a Layer Style
Add the following layer style to the shape.
Inner Shadow
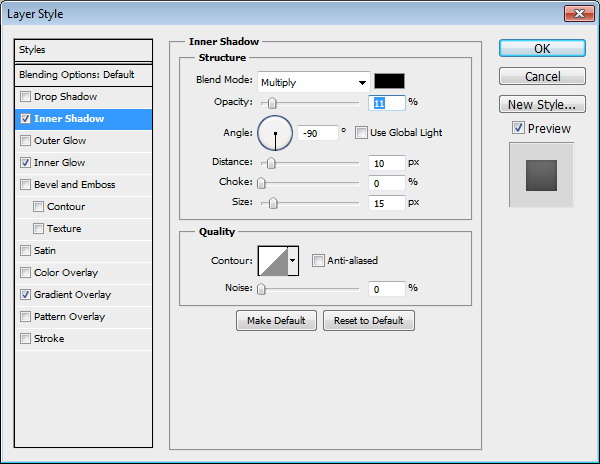
Inner Glow
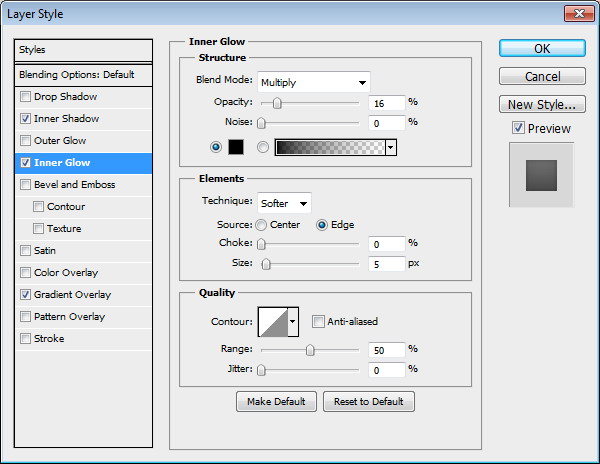
Gradient Overlay
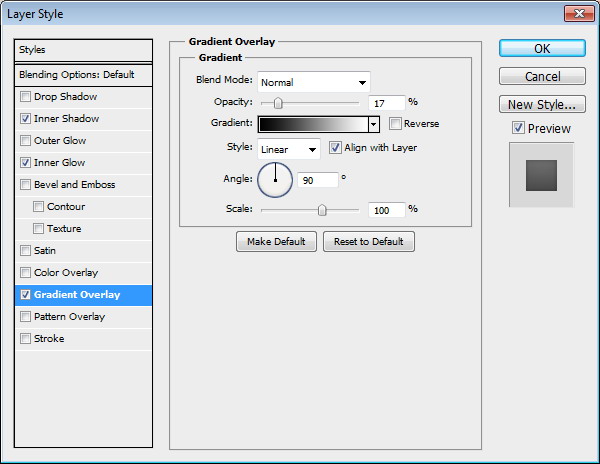
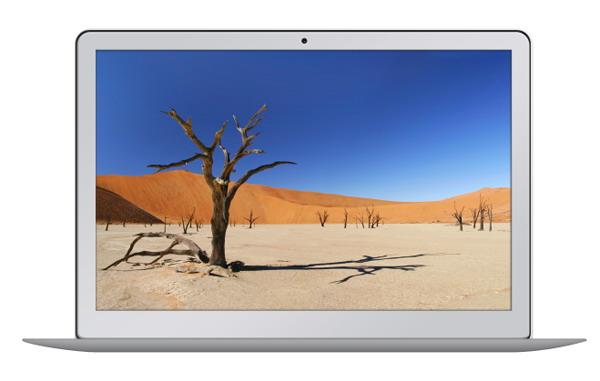
Step 8: Add Shadows at the Bottom of the Base
The layer style in the previous step has given the base of the computer greater depth, but I feel it’s still not enough. We need to add more shadows. Ctrl-click/Cmd-click the base shape layer in the Layers Panel to load a selection around it.
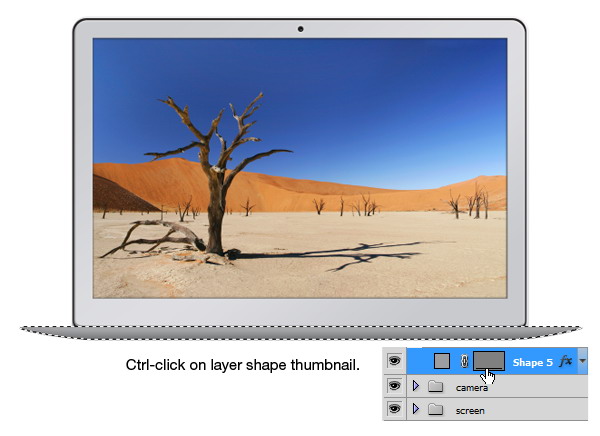 Create a new layer. Use the Brush Tool (B) with a soft brush to paint the lower part of the selection with black.
Step 9: Create a Realistic Highlight on the Base
Now let’s create a highlight.
On a new layer, use the Rectangular Marquee Tool (M) to make a thin, horizontal selection and then fill it with white. 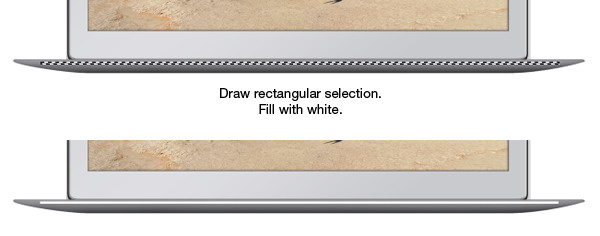 Soften it by using the Gaussian blur filter (Filter > Blur > Gaussian Blur).
 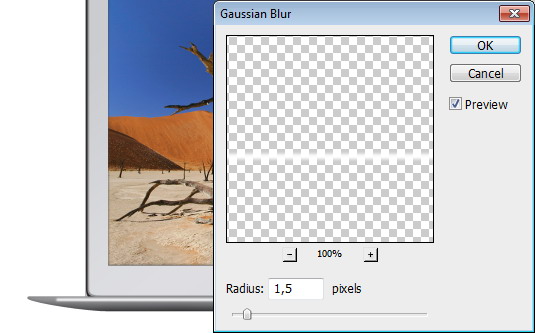 Zoom in to the left side of the rectangle.
Use the Rectangular Marquee Tool to create a selection around the end of the rectangle, hit Ctrl/Cmd + T for Free Transform, right-click inside the selection box and then choose Warp from the contextual menu. 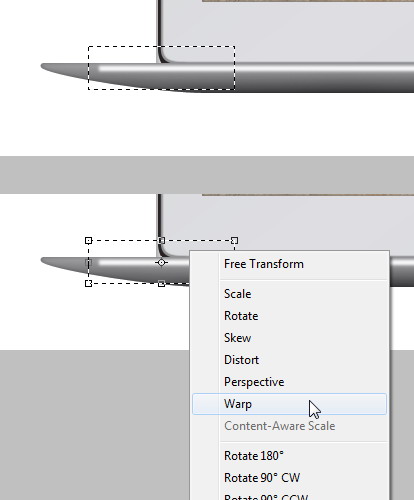 Modify the box to convert the end into a curve.
 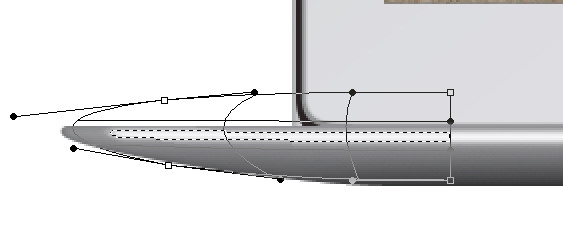 Here’s the result of the transformation.
We did this so that the highlight conforms with the curve on the base, making our work as realistic as possible. 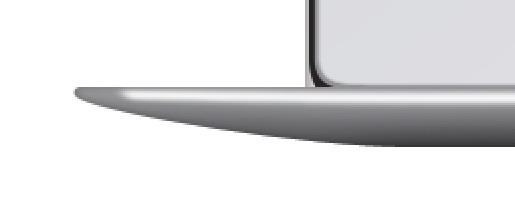 Switch over to the Eraser Tool (E) and, in the Options Bar, set the tool’s Opacity option to 30%. Paint on the edges and some parts of the highlight shape to soften it up.
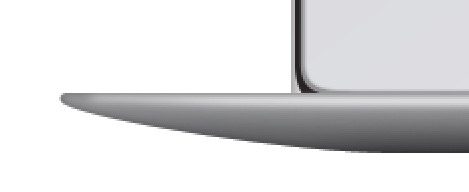 Repeat this process on the other side of the highlight shape.
 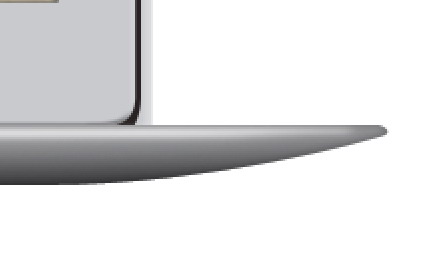 Let’s create a stronger, more prominent highlight. Draw another rectangular selection.
 Create a new layer, and on it, fill the selection with white.
  Remove parts of the shape using the Eraser Tool until we have a stronger highlight.
 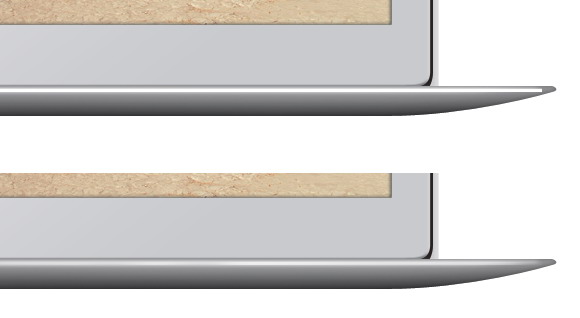 Here’s the difference before and after the stronger highlight is added.

Step 10: Draw a Groove in the Middle of the Base
If you look at a real MacBook Air in this angle, you’ll see that there’s a groove in the middle so that you can easily open up the laptop. We should create this detail. To start, draw a white rounded rectangle.
Place it at the middle of the MacBook Air. 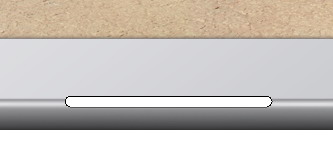 Use the Convert Point Tool to convert the points shown below.
  Use the Delete Anchor Point Tool to remove the anchor points shown below.
 The result should be half of a rounded rectangle.
  Give the layer an Outer Glow, Inner Glow, and Gradient Overlay.
Outer Glow
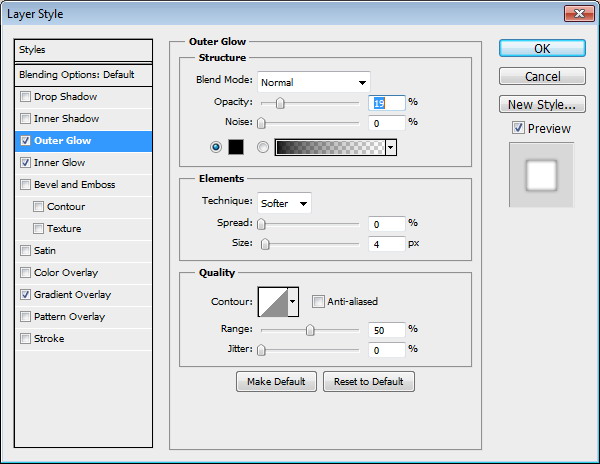
Inner Glow
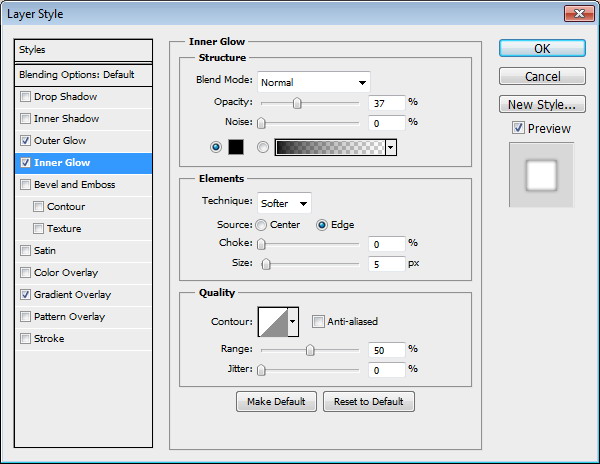
Gradient Overlay
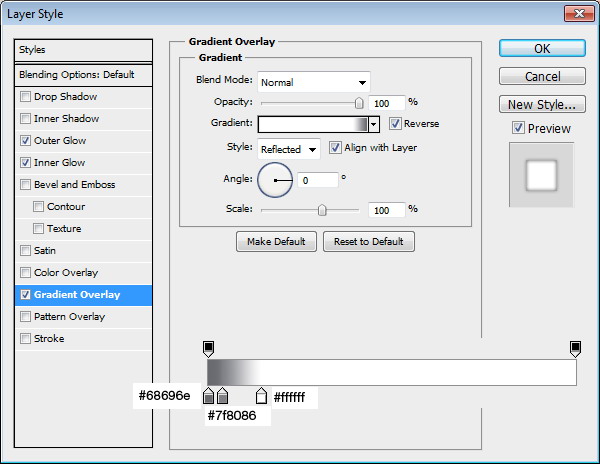 Here’s the result of our layer style:
 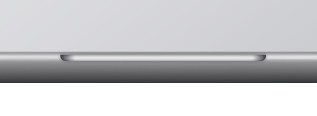 Now, we will draw a subtle highlight under the shape.
Ctrl-click/Cmd-click on its layer’s thumbnail in the Layers Panel to create a selection around the shape. Hit the Down Arrow key three times to move the selection 3px down. Create a new layer and place it under the shape.
Look over to the Tools Panel to make sure that the Rectangular Marquee Tool is the active tool, then, on the canvas, right-click inside the selection and then choose Stroke from the menu that appears. Use the Stroke settings shown below. 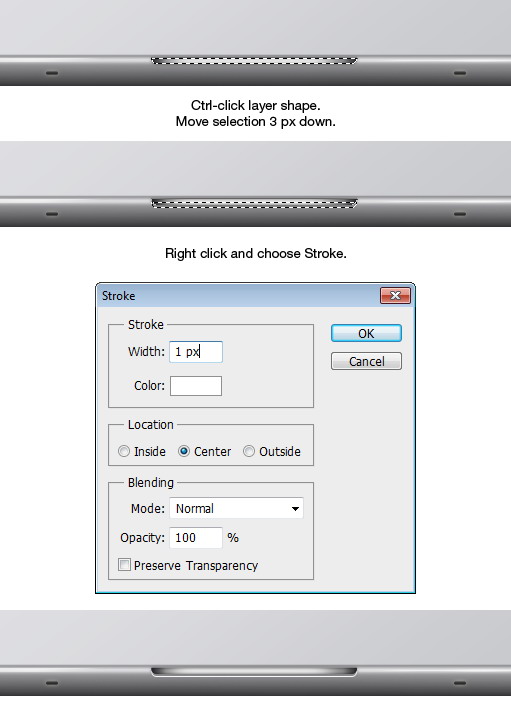 Activate the Eraser Tool (E).
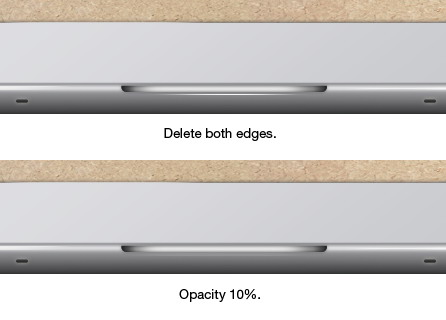
Set the brush Hardness to 0%. Remove both edges of the stroke line. Reduce the layer’s Opacity to 10%.
Step 11: Create Ventilation Holes
Draw a very small rounded rectangle on the right of the groove that we drew in the previous step. 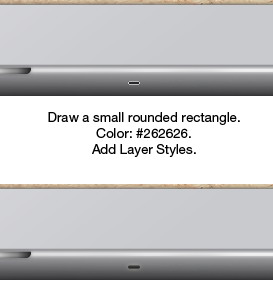 Give the ventilation hole an Outer Glow and Gradient Overlay.
Outer Glow
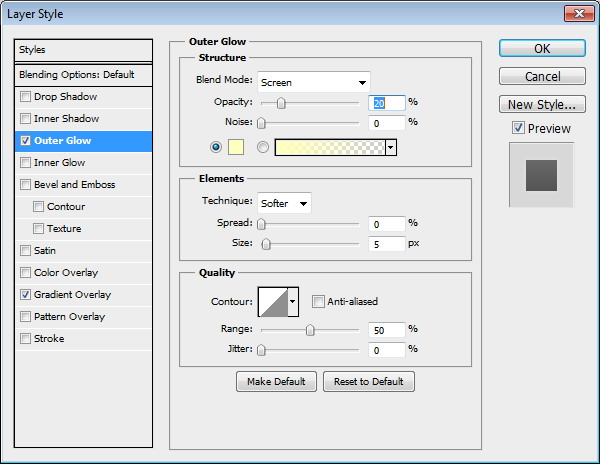
Gradient Overlay
 Duplicate the ventilation hole by switching to the Move Tool (V), holding down Alt/Option, and then dragging it to the other side.
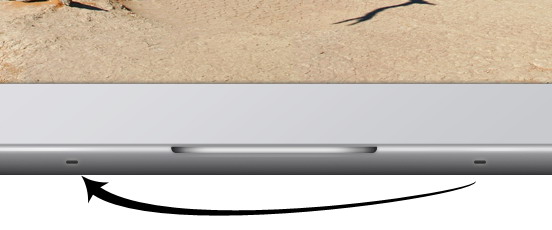
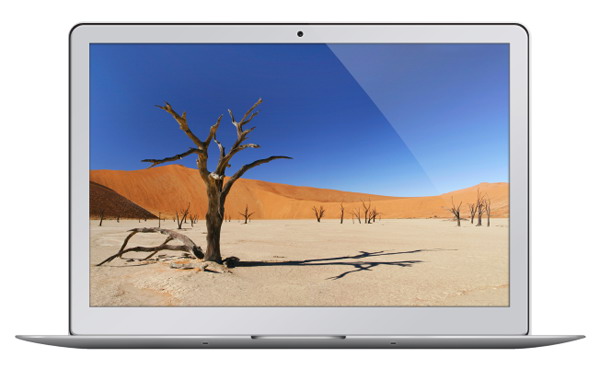
Step 12: Create a Screen Reflection
Use the Pen Tool (P) to draw the black shape that’s shown below. 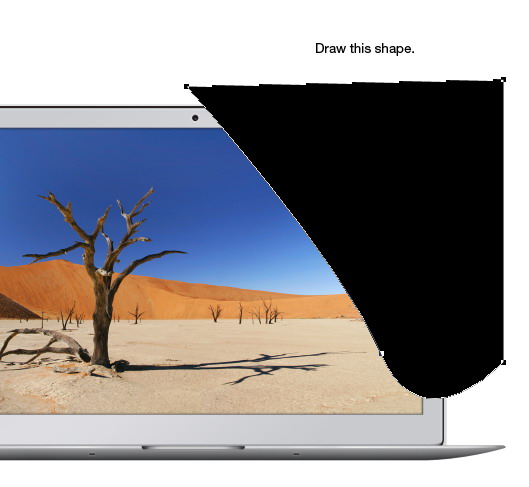 Duplicate the rounded rectangle we created in Step 1. Make sure that the duplicated shape and the black shape we drew are selected, then press the Intersect button at the Options Bar. Set the Opacity of the resultant shape to 6% and Fill to 0%.
 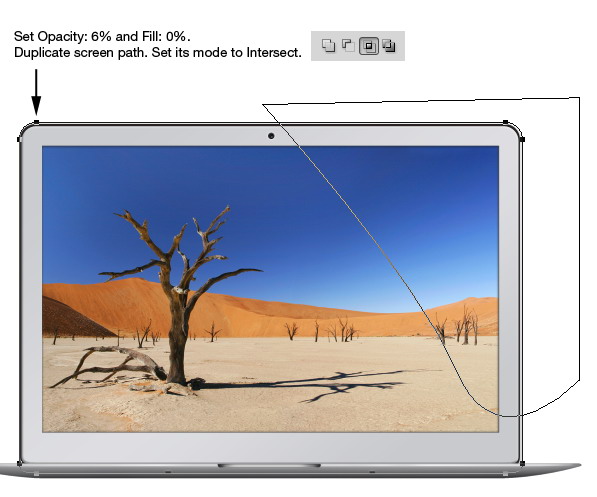 Give the shape a Gradient Overlay.
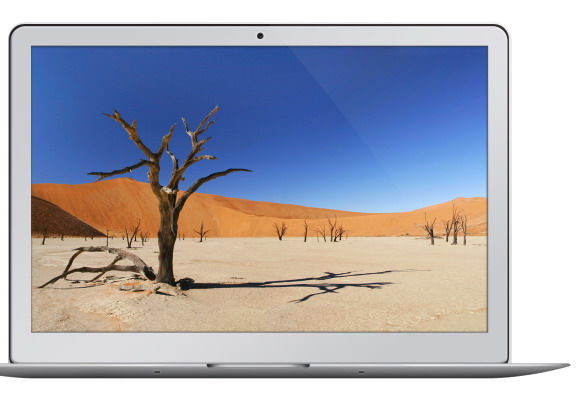
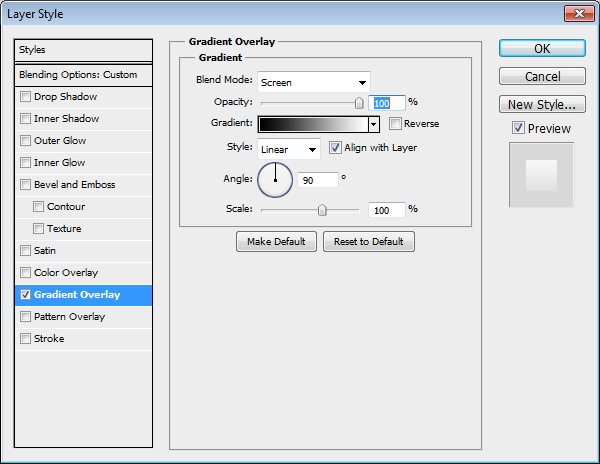 Here is the result:
  We need to strengthen the reflection a bit more. To start, duplicate it. Repeat the previous process on the duplicate shape, but this time, use the path from the inner screen.
Set its mode to Intersect, set the Opacity to 16% and Fill to 0%. 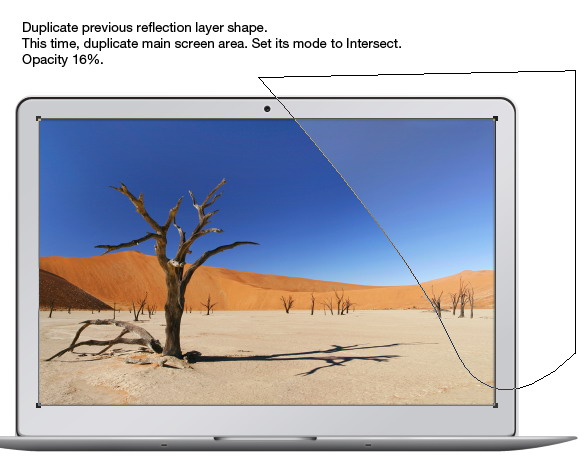 This is the result:
Step 13: Create a Thin Highlight
Next, we will add another subtle highlight. Draw a 1px line and erase both its ends using a soft eraser.
To help you see it, I have placed the line on a black background. 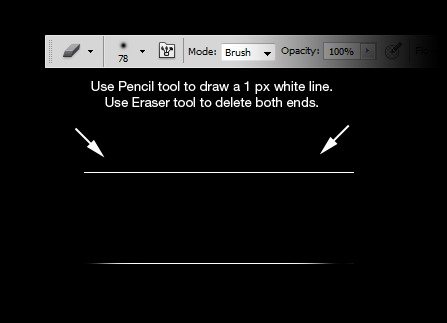 Place these lines in various areas of the laptop.
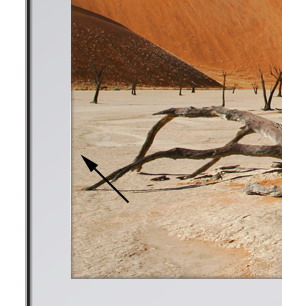
 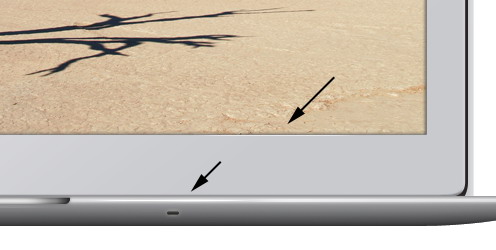 You can also rotate the 1px line by pressing Ctrl/Cmd + T, right-clicking on the shape, and then choosing Rotate 90o CCW or 90o CW.
Step 14: Create a Realistic Shadow
Draw an elliptical selection under the MacBook Air. Fill it with black on a new layer. Deselect the selection (Ctrl/Cmd + D).
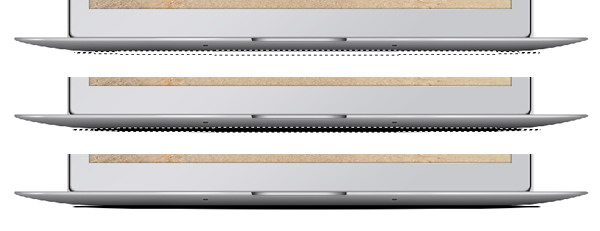 Soften the shadow by using the Gaussian Blur filter (Filter > Blur > Gaussian Blur).
 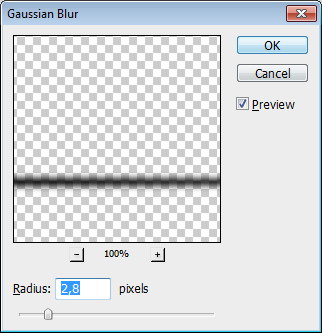 This is what the shadow looks like:
  Duplicate shadow we have just created by pressing Ctrl/Cmd + J. Hit Ctrl + T and resize it to create a bigger shadow.
Set its Opacity to 20%. 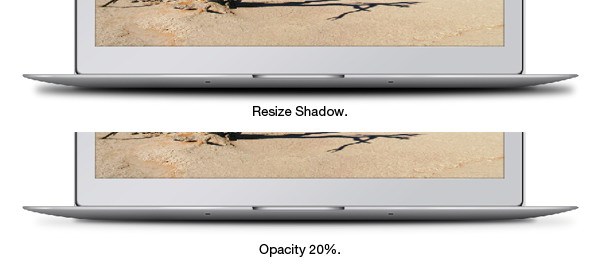
Step 15: Create a Reflection on the Floor
As the final step, we will create a reflection to mimic a glossy floor surface. In the Layers Panel, hide the background and the MacBook Air’s shadow temporarily.
Create a new layer and place it on top of all the layers. Go to Layer > Merge Visible to merge all the visible layers into the new layer without affecting the original layers. 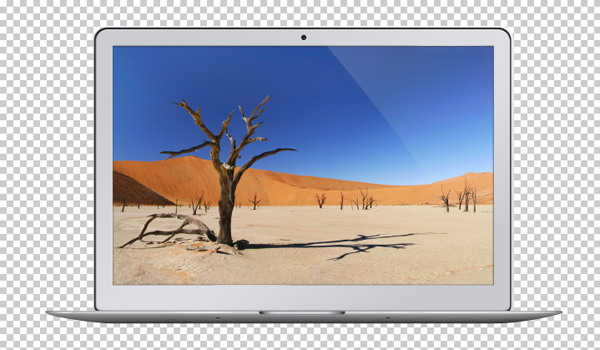 Hit Ctrl + T, right-click inside the transform box, and then choose Flip Vertical from the contextual menu.
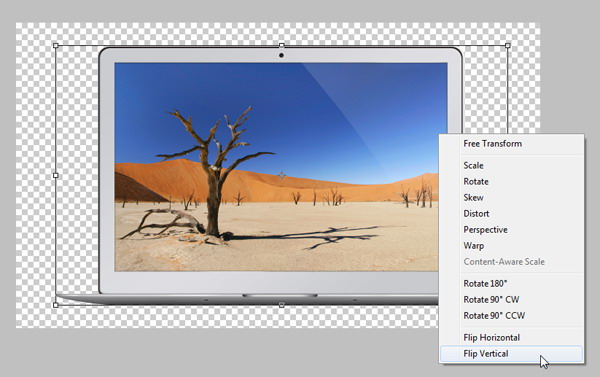 Move the reflection down until it touches the bottom of the MacBook Air.
 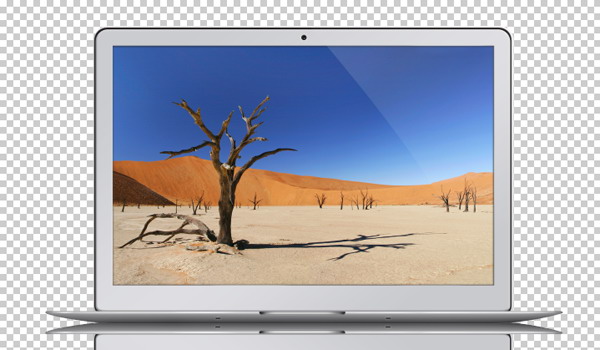 Add a layer mask on the reflection layer. Draw a linear gradient going from white to black to fade the reflection as we get nearer to the bottom of the canvas.
Now, you can turn on the visibility of the background and shadow again. 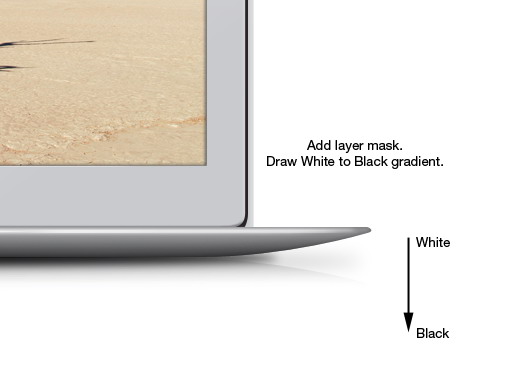
Tutorial Summary
We’ve reached the end. You can see that drawing a MacBook Air is very simple.
As is usually the case with my work, I showed you how even the smallest details (like in the highlighting of the FaceTime camera) can make a powerful impact in the realism of the graphics you create. We worked on lots of details, and some of them very subtle and almost unnoticeable. But, if you add all those details together, you’ll get yourself a highly realistic result.
I hope you enjoyed this Photoshop tutorial and have picked up some useful tricks and techniques! 
Download Source Files
- macbook_air (ZIP, 2.37 MB)
-
 Trevin serves as the VP of Marketing at WebFX. He has worked on over 450 marketing campaigns and has been building websites for over 25 years. His work has been featured by Search Engine Land, USA Today, Fast Company and Inc.
 -

WebFX is a full-service marketing agency with 1,100+ client reviews and a 4.9-star rating on Clutch! Find out how our expert team and revenue-accelerating tech can drive results for you! Learn more
Make estimating web design costs easy
Website design costs can be tricky to nail down. Get an instant estimate for a custom web design with our free website design cost calculator!
Try Our Free Web Design Cost Calculator
Table of Contents
- Preview
- Step 1: Create the Top Part of the MacBook Air
- Step 2: Create the Screen
- Step 3: Add a Desktop Wallpaper
- Step 4: Add the FaceTime Camera
- Step 5: Adding Details to the FaceTime Camera
- Step 6: Draw the Base of the MacBook Air
- Step 7: Give the Base a Layer Style
- Inner Shadow
- Inner Glow
- Gradient Overlay
- Step 8: Add Shadows at the Bottom of the Base
- Step 9: Create a Realistic Highlight on the Base
- Step 10: Draw a Groove in the Middle of the Base
- Step 11: Create Ventilation Holes
- Step 12: Create a Screen Reflection
- Step 13: Create a Thin Highlight
- Step 14: Create a Realistic Shadow
- Step 15: Create a Reflection on the Floor
- Tutorial Summary
- Download Source Files


Web Design Calculator
Use our free tool to get a free, instant quote in under 60 seconds.
View Web Design CalculatorMake estimating web design costs easy
Website design costs can be tricky to nail down. Get an instant estimate for a custom web design with our free website design cost calculator!
Try Our Free Web Design Cost Calculator


