
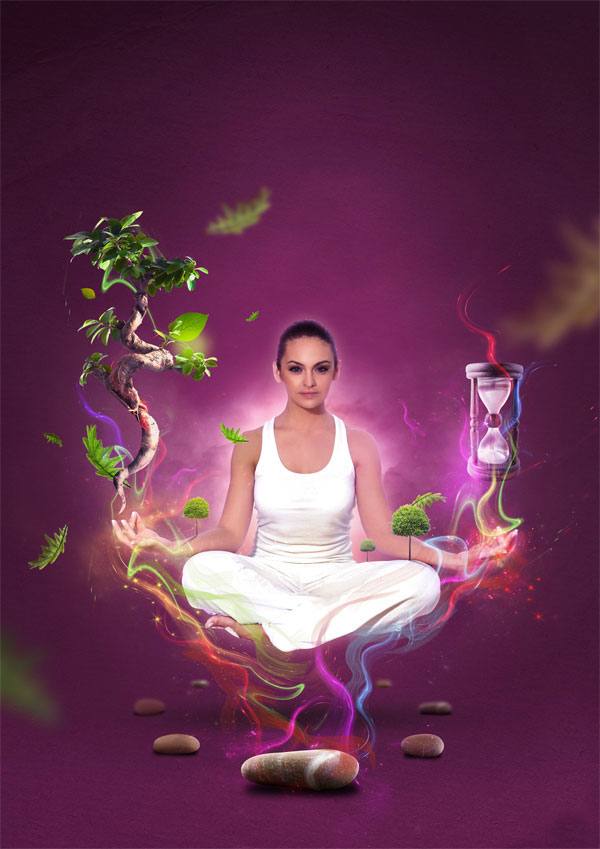
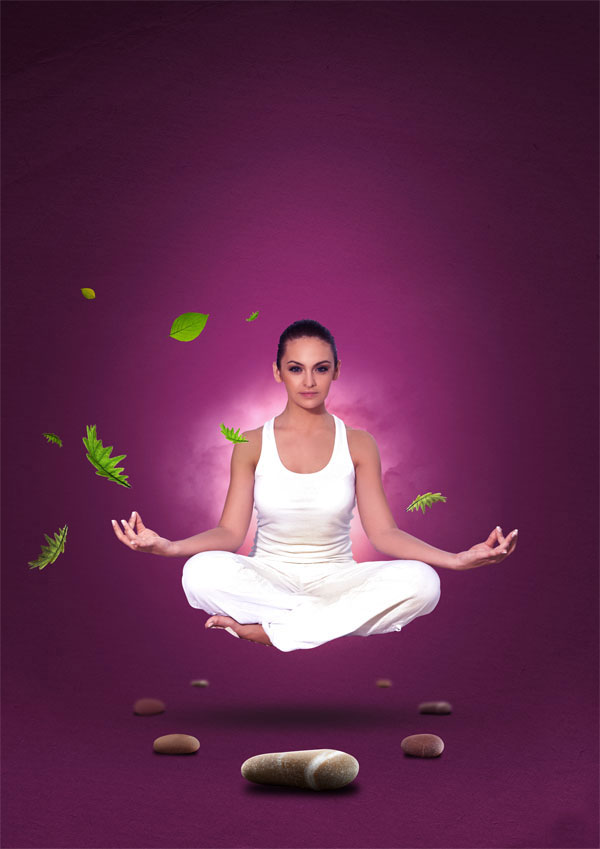
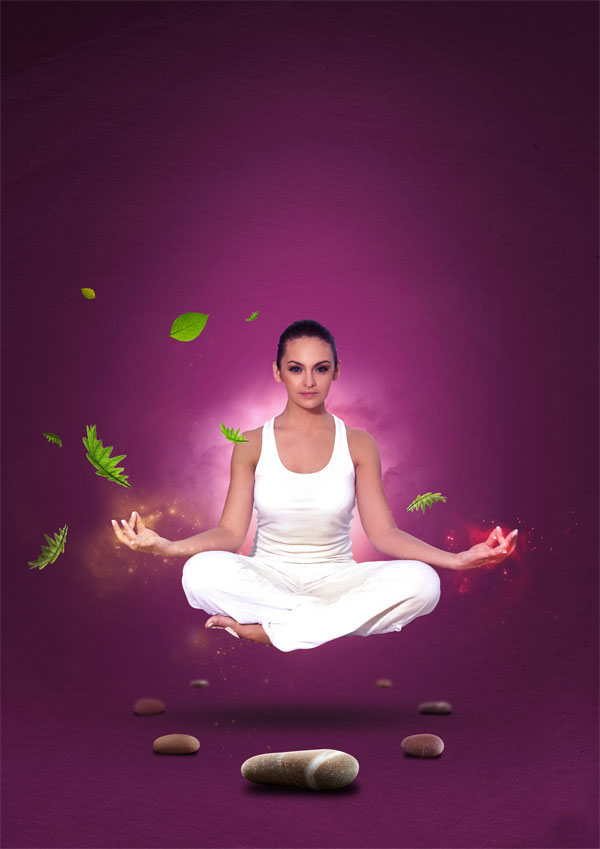
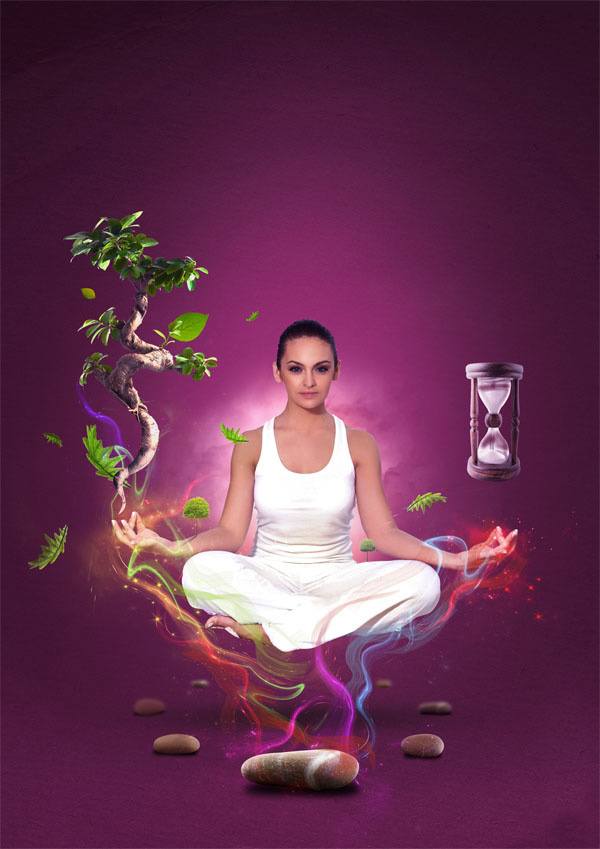
Preview
Tutorial Resources
- Stock Image: Yoga At Caribbean at Bigstock
- Stock Image: desaturated cloud
- Stock Image: hour-glass by Aleksandra P.
Step 1: Select and Prepare a Subject for the Scene
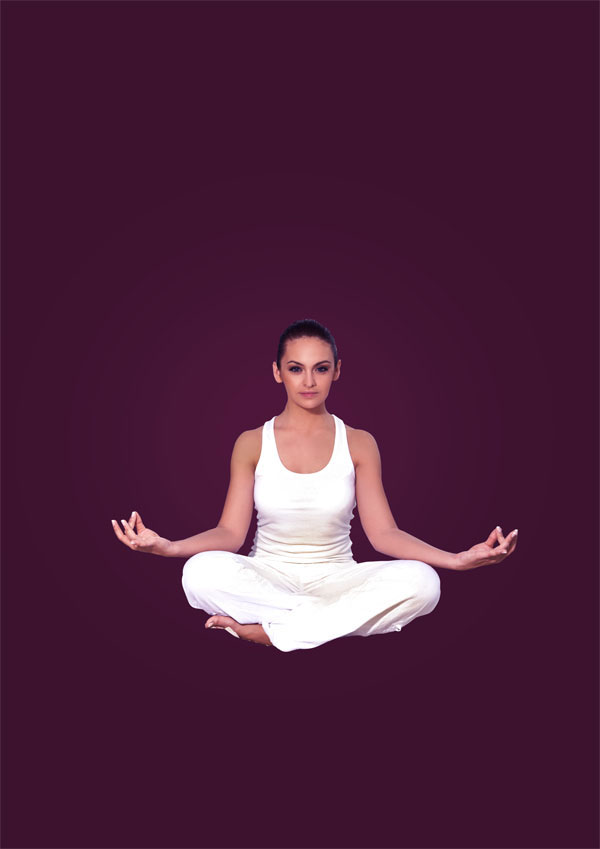
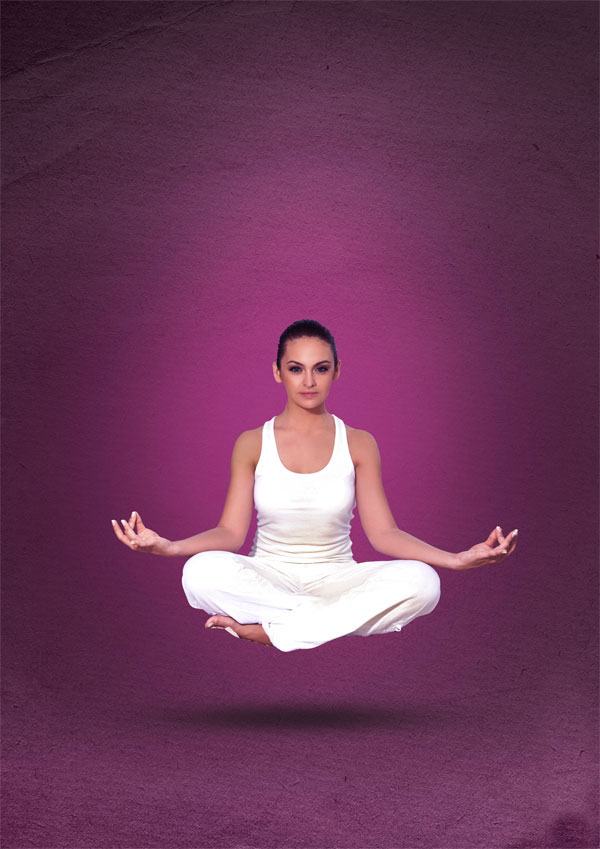
Start by searching for a stock photo of someone meditating or performing Yoga. I purchased this stock photo called Yoga At Caribbean from Bigstock.
Isolate the subject from the background using your favorite technique for removing backgrounds from photos. The particular stock image I chose had a complex background, so I used the Pen Tool (P) to select around the subject.
A white or solid background would be easier to work with, so keep that in mind when picking out a stock photo.
Step 2: Create the Basic Background
On a 1000x1415px Photoshop document, fill the Background layer with a purple color (#4f193d). Place the subject into the document, centered horizontally.
Get the Brush Tool (B) from the Tools Panel and select a big soft round brush. On a new layer above the Background layer, paint a white area at the bottom of the canvas.
Then switch your Foreground Color to black, create a new layer and paint on top of the white paint, creating a concave effect.
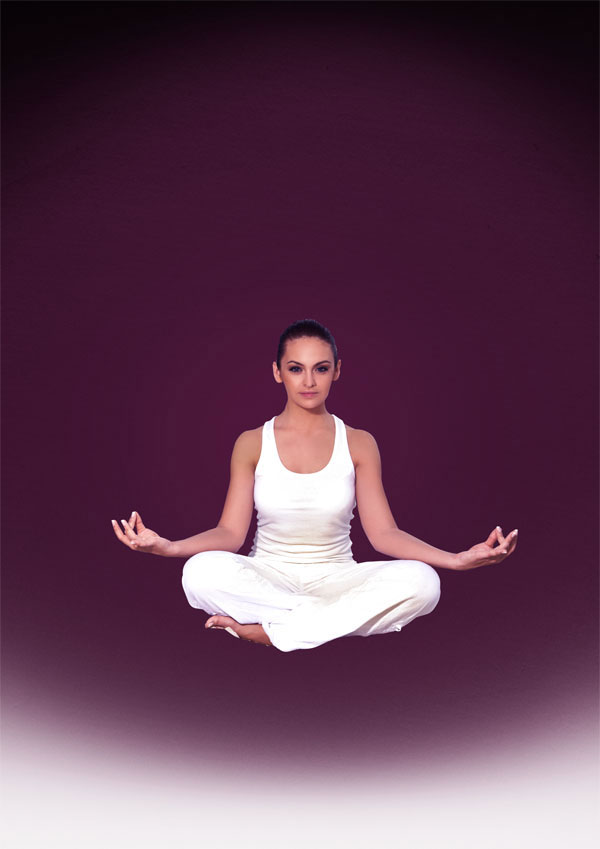
Switch the Blend Mode of the white paint layer to Overlay, 50% Opacity. Switch the Blend Mode of the black paint layer to Overlay, 50% Opacity.
Step 3: Giving the Background More Interesting Effects
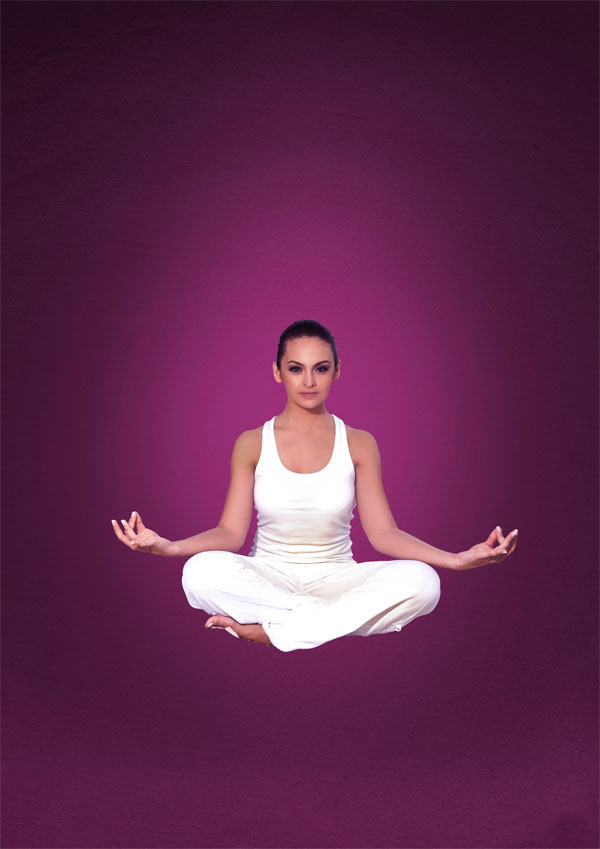
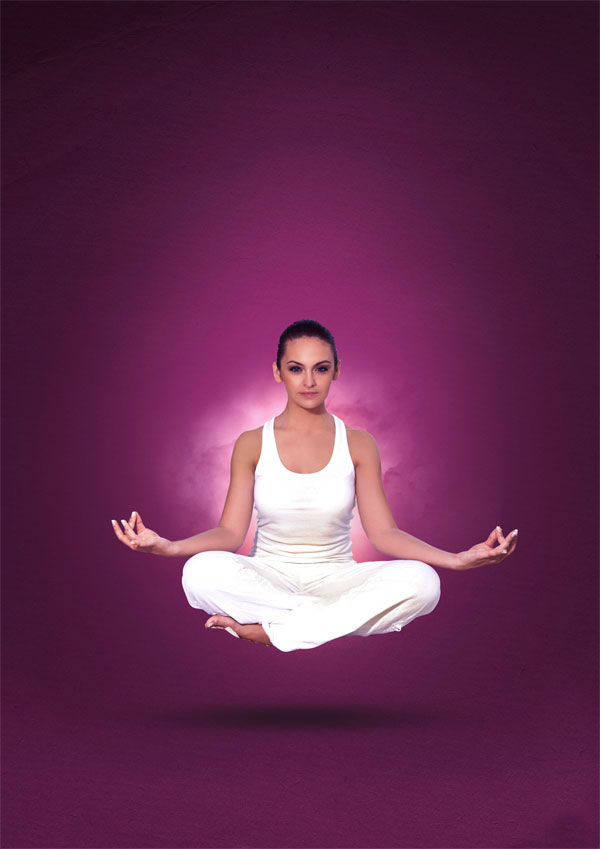
We need to work on our background further in order to make it more intriguing. First, we need to add a light spot behind the subject.
Create a new layer behind the subject, switch to the Brush Tool (B), set it to a soft round white brush, and then click once to apply the stroke. Set the layer’s Blend Mode to Overlay. This gives our background a nice variation, instead of having it solid purple.
Next, look for a suitable paper texture.
Maybe try the Cardboard: Texture Pack from Design Instruct. For whatever texture you pick, you should make it very subtle and unobtrusive by modifying its blending mode; try something such as Soft Light, 20% Opacity.
Step 4: Create a Shadow Beneath the Subject
Underneath the subject, we will create a shadow to give her the illusion that she is floating off the ground. On a new layer above the background layers, use the Brush Tool (B) with a soft round brush to create a round circle.
Use Free Transform (Ctrl/Cmd + T) to flatten the round circle. Once done, set the layer’s Opacity to about 70%.
Step 5: Create a Custom Cloud Brush
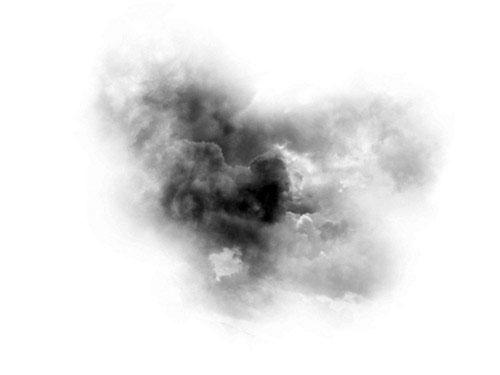
Now we have to create a brush ourselves. Look for a stock photo of some nice clouds (see this collection of clouds on Six Revisions).
Open the chosen cloud image in Photoshop and desaturate it by going to Image > Adjustments > Desaturate (Shift + Ctrl/Cmd + D). Also adjust the levels until you get something interesting; do this by going to Image > Adjustments > Levels (Ctrl/Cmd + L).
Here is what I came up with (you can download it if you wish).
Use the Rectangular Marquee Tool (M) to create a selection around parts of your processed cloud image that you like. Next, go to Edit > Define Brush Preset and save it with a name that you will remember.
Press F5 or go to Window > Brushes to open up the Brushes Panel.
Find your saved brush and make appropriate adjustments as you see fit (Shape Dynamics, Scattering, and the like).
Set your Foreground Color to white. Create a new layer for our cloud brush, behind the subject. Use the Brush Tool (B) with our custom cloud brush by clicking once on the canvas.
Step 6: Adding Magical Stones to the Scene
Look for interesting things and objects that fit the magical and vibrant theme that we are aiming for.
For example, find some stone stock photos that can work well with our scene. Here is an example of a stone stock image you could use: Stones at a Pier. Just cut out the stones you like by tracing around them using the Pen Tool (P) set at Paths mode, converting your paths into selections by right-clicking on them in the canvas, choosing Make Selection in the menu the shows up, and then copying them into the scene.
Place the stones at bottom of the subject, keeping in mind the point of view and depth of field.
Use the same technique we used for creating a shadow underneath the subject, on the stones (soft round black brush, Free Transform to flatten the brush stroke).
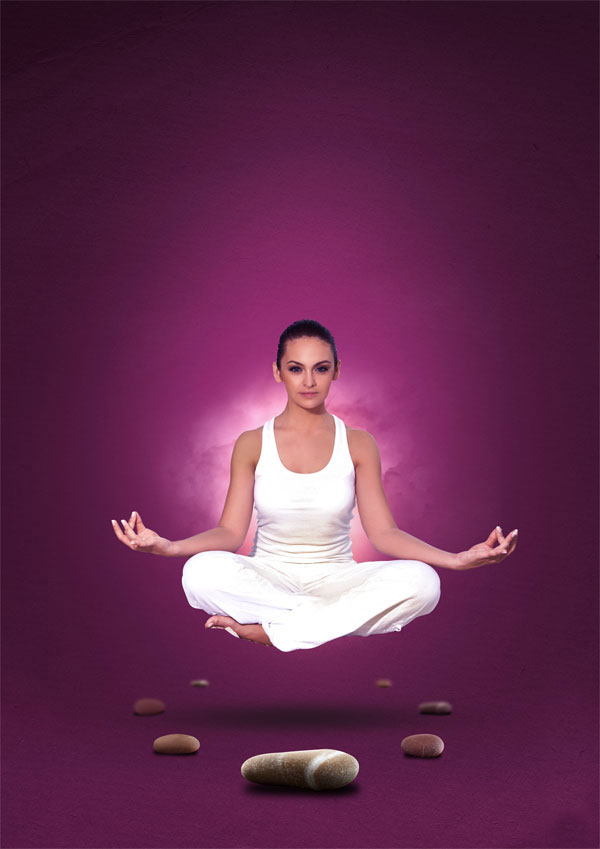
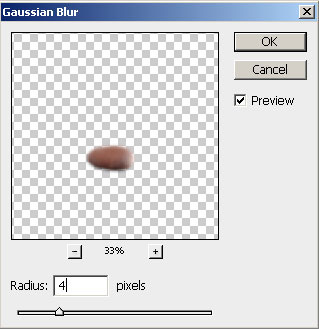
If the stone is farther from the frontal view, use Filter > Blur > Gaussian Blur at varying degrees of intensity to create the illusion that they are further away.
Step 7: Add Leaves to the Scene
Locate some stock photos of leaves and place them throughout the scene, close to the subject. The same principles apply here with the point of view and depth of field.
Step 8: Create a Cosmic Light Effect on the Hands of the Subject
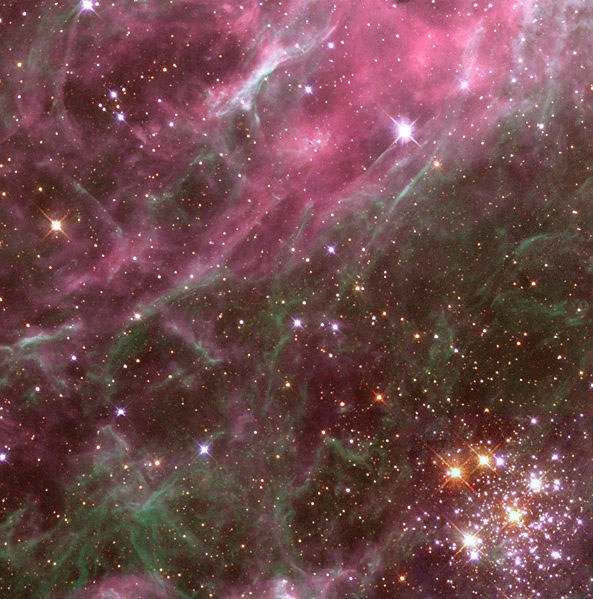
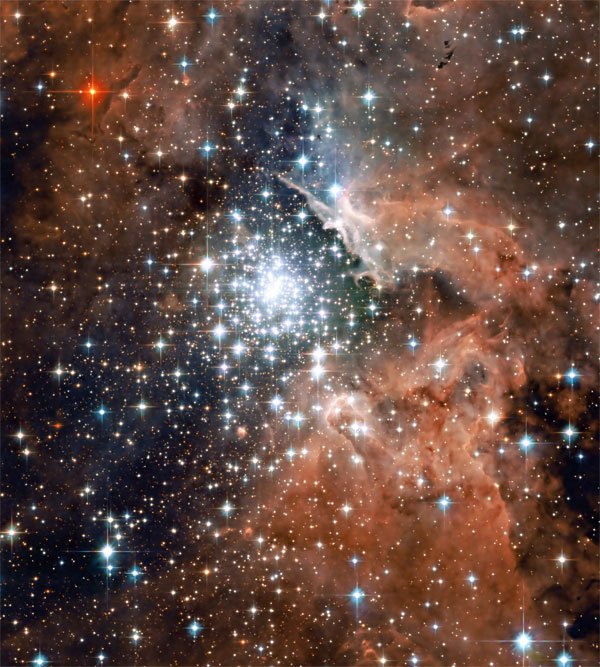
For the light effect on the hands of the subject, find a nice stock photo of a nebula or abstract space scene; for example, check this one out from Shutterstock. You might also try the following from Wikimedia Commons:
Tarantula nebula detail
NGC 3603 Nebula
Open up your cosmos/nebula/space stock photo and select a part of it with lots of visual interest.
Copy your selection on top of the subject’s hands. Switch the Blend Mode to Screen. There might be some sections of the light effect that look awkward, so you may have to use the Eraser Tool (E) or a layer mask to erase or mask away unwanted parts.
Step 9: Create a Cosmos Light Effect
We will create a cool, colorful and smoky light effect that sources from a stone beneath the subject, making it look magical and mystical.
We can use the same cosmos/nebula/space stock photo we used in the previous step.
Look for a part of the texture that has smoky lights and select around it. Place that part on top of the stone texture on another layer. Go to Image > Adjustments > Hue/Saturation, check the Colorize option, and adjust the color to a color you like, such as red, green, yellow, etc.
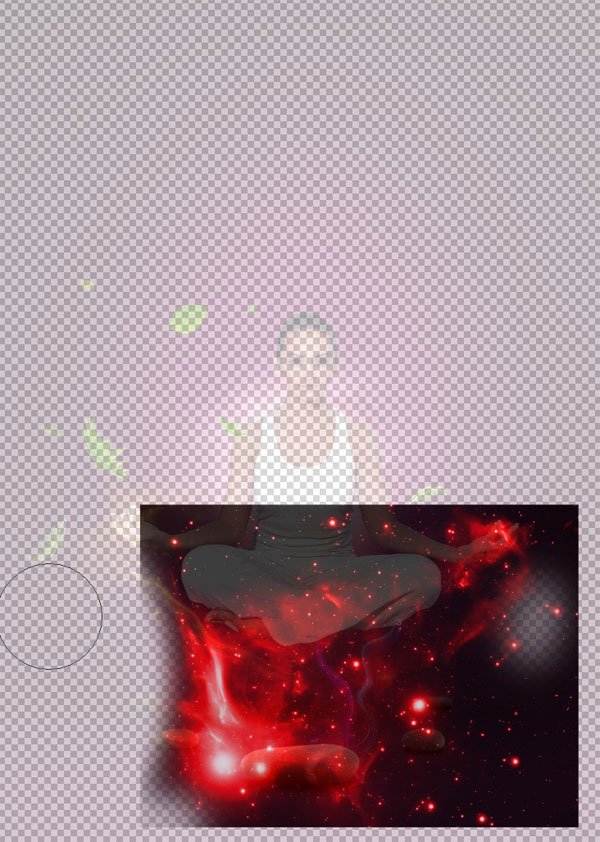
Set the layer’s Blend Mode to Screen.
Go to Filter > Liquify and modify the texture so that it looks as if it’s a magical light streak going up. Do this several times using different colors and transformations.
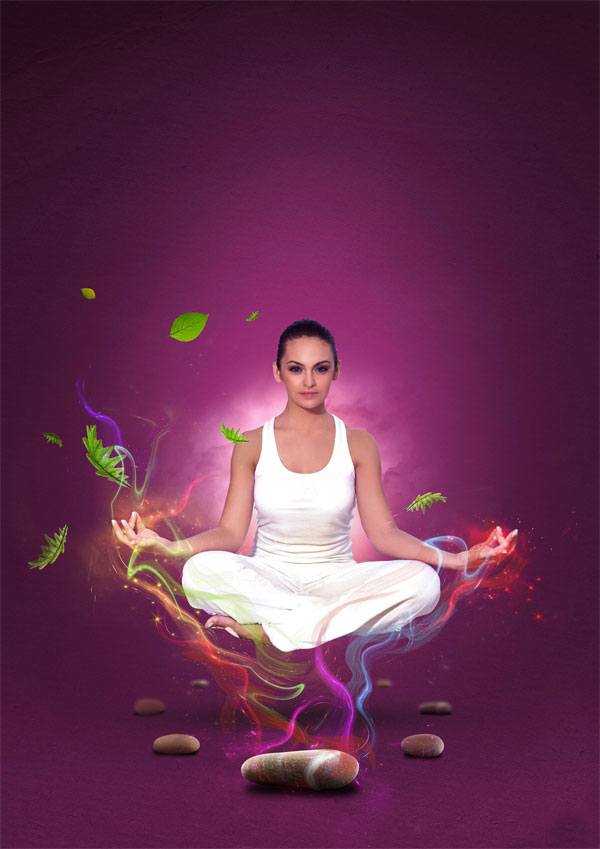
Step 10: Adding More Design Elements and Finishing Up
It’s time to finish up our magical scene. We can make the scene more visually appealing by adding more design elements into it.
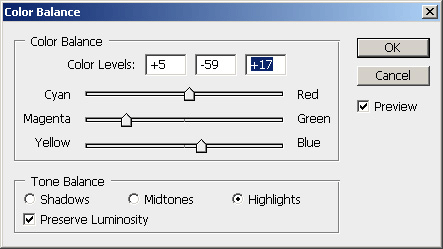
I chose to add a tree (on the left) and an hour-glass (on the right). For the hour-glass, first desaturate the stock image (Shift + Ctrl/Cmd + D). Then use Image > Adjustments > Color Balance (Ctrl/Cmd + B) to match the background — more blue tones, less green tones.
Use the same techniques we have done previously to add more leaves and cosmic light effects on the new design elements you bring in.
Tutorial Summary
This graphic design tutorial involved using various techniques to bring together several graphical elements into one harmonious piece.
We made an interesting background using methods that took advantage of the Brush Tool (B), blending modes, a custom cloud brush that we made ourselves, and so forth. We brought in stones and leaves and paid attention to the depth of field by modifying objects farther from the frontal view with the Gaussian Blur Filter. We used the Liquify filter and cosmic stock images to create interesting light effects.
-
 Trevin serves as the VP of Marketing at WebFX. He has worked on over 450 marketing campaigns and has been building websites for over 25 years. His work has been featured by Search Engine Land, USA Today, Fast Company and Inc.
 -

WebFX is a full-service marketing agency with 1,100+ client reviews and a 4.9-star rating on Clutch! Find out how our expert team and revenue-accelerating tech can drive results for you! Learn more
Make estimating web design costs easy
Website design costs can be tricky to nail down. Get an instant estimate for a custom web design with our free website design cost calculator!
Try Our Free Web Design Cost Calculator
Table of Contents
- Preview
- Tutorial Resources
- Step 1: Select and Prepare a Subject for the Scene
- Step 2: Create the Basic Background
- Step 3: Giving the Background More Interesting Effects
- Step 4: Create a Shadow Beneath the Subject
- Step 5: Create a Custom Cloud Brush
- Step 6: Adding Magical Stones to the Scene
- Step 7: Add Leaves to the Scene
- Step 8: Create a Cosmic Light Effect on the Hands of the Subject
- Step 9: Create a Cosmos Light Effect
- Step 10: Adding More Design Elements and Finishing Up
- Tutorial Summary
Share this article


Web Design Calculator
Use our free tool to get a free, instant quote in under 60 seconds.
View Web Design CalculatorMake estimating web design costs easy
Website design costs can be tricky to nail down. Get an instant estimate for a custom web design with our free website design cost calculator!
Try Our Free Web Design Cost Calculator


