

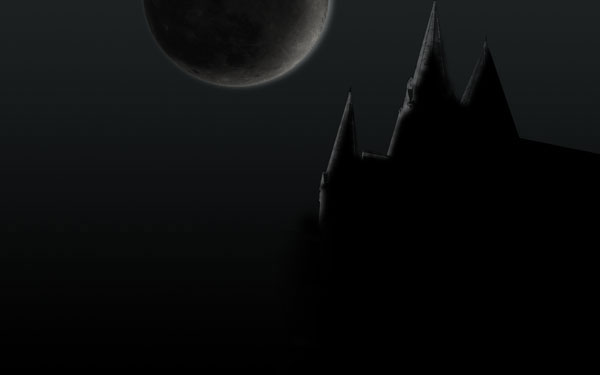
Preview
Click the image to see the final result in full scale. 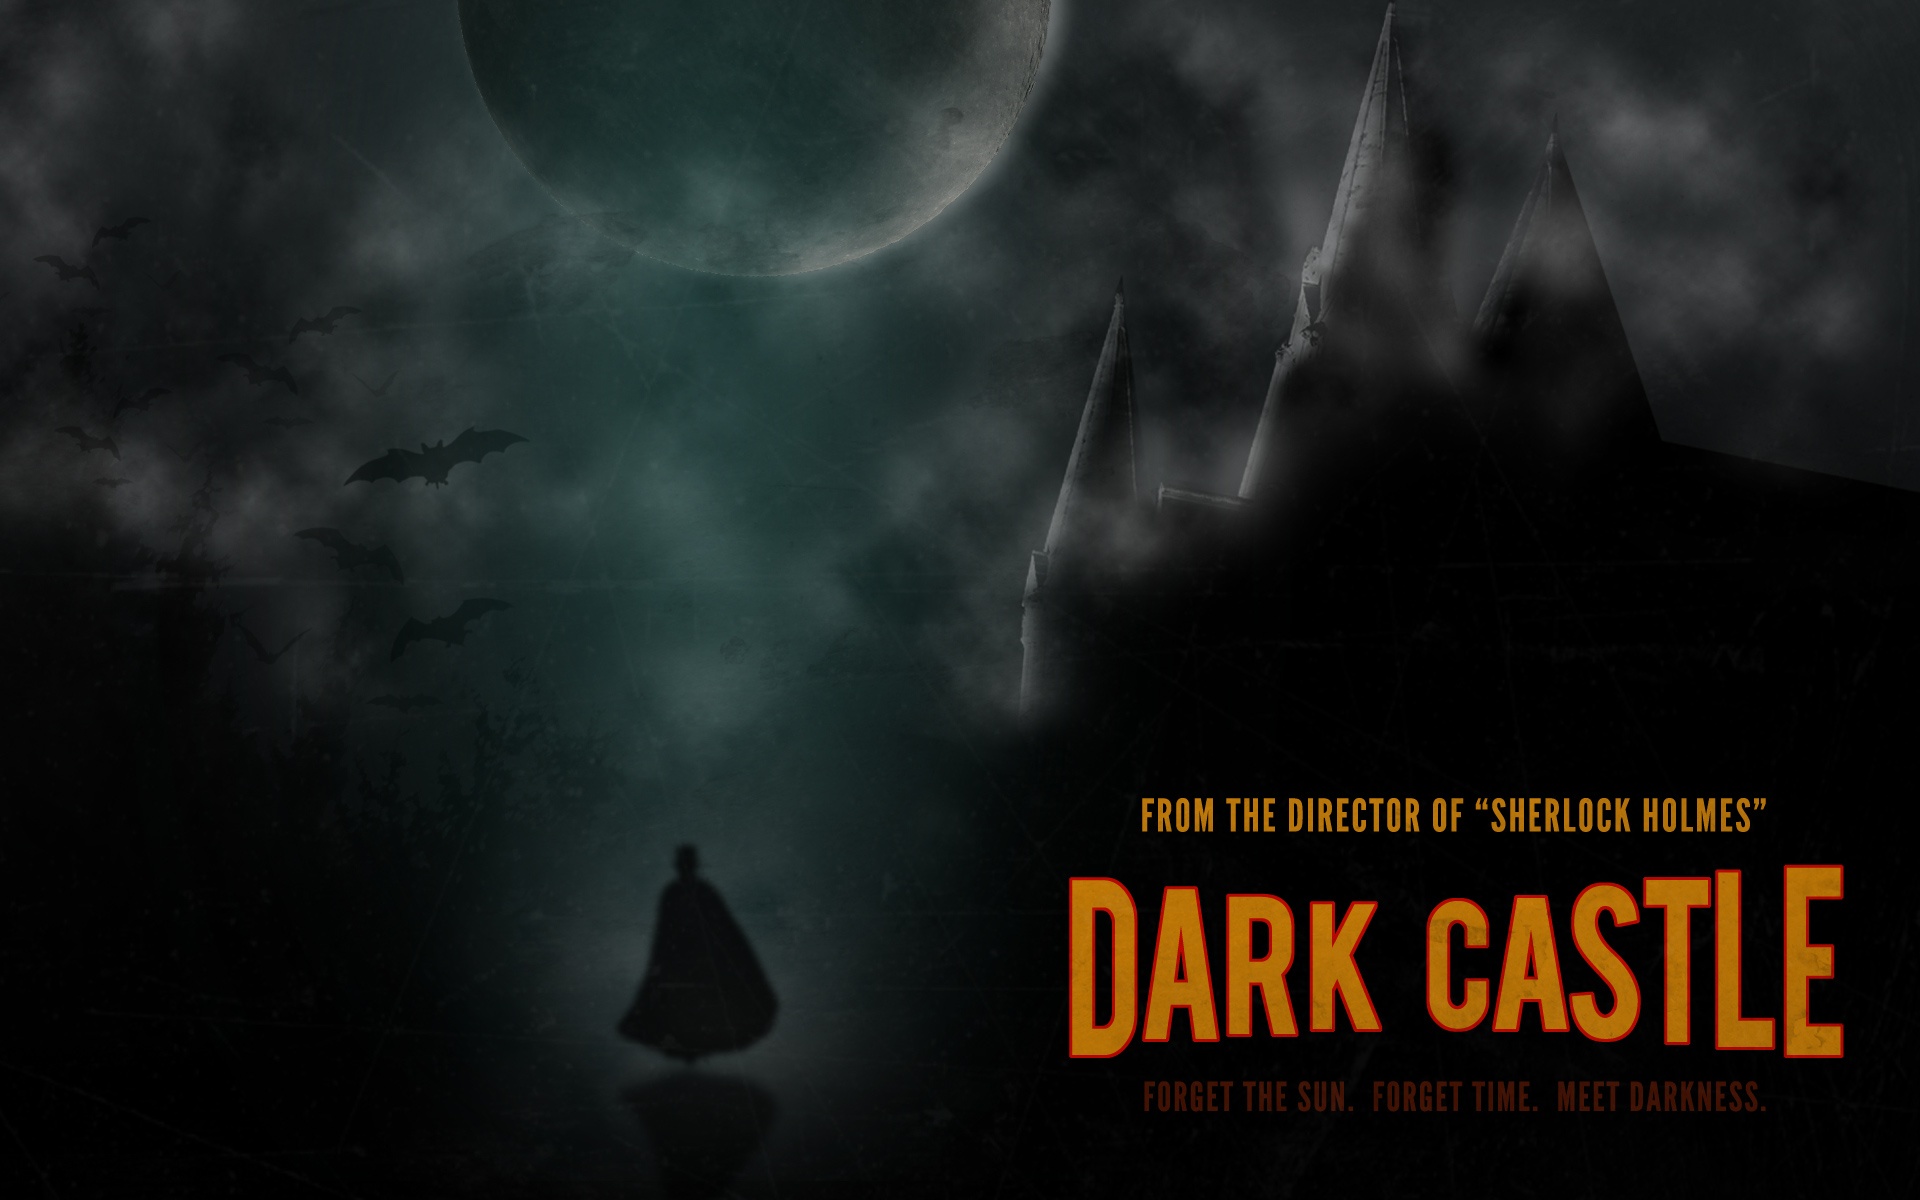
Tutorial Resources
- Image: Full Moon Luc Viatour
- Image: Hogwards Castle by Dominic Kamp
- Image: Stock photo: Join me in the abyss…
- Image: Victorian Gustov 39 by Falln-Stock
- Texture: Texture No.14 from the Lost and Taken Subtle and Light Grunge Textures
- Brushes: Halloween Vectors Photoshop & GIMP Brushes
- Brushes: CD Scratch
- Font: Bebas
- Font: League Gothic
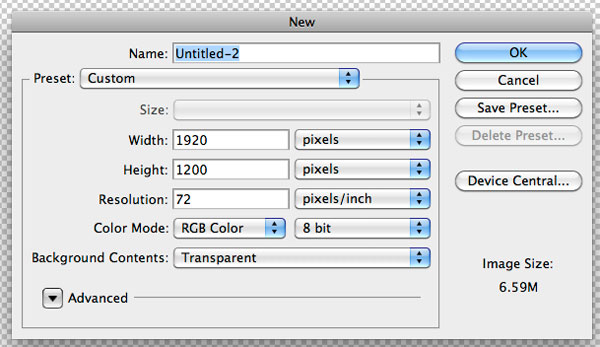
Step 1: Create the Photoshop Document
Start Adobe Photoshop and create a document with your desired poster dimensions (File > New). If you are planning to send your work to the printing press, use a high DPI (between 150-300dpi) and CMYK Color Mode (learn more in our guide on preparing files for print). For this tutorial, I created a document sized at 1920x1200px, RGB Color at 72dpi (for web use).
Step 2: Create a Dark Gradient Background
Set the Foreground color to a very dark gray color (#1c2021) and the Background color to black (#000000). With the Gradient Tool (G), fill the Background layer so that the very dark gray color is on top, and black is at the bottom. 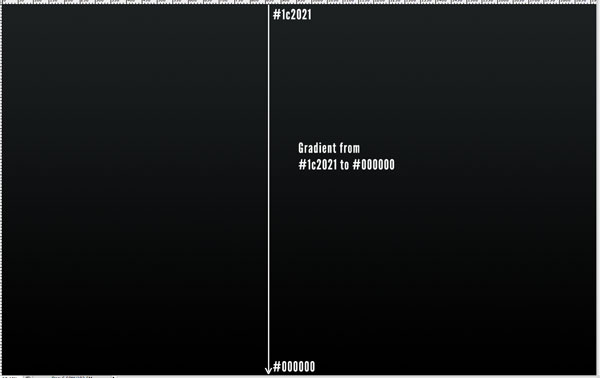
Step 3: Add the Moon
Grab the Full Moon Luc Viatour stock image and open it in Photoshop.
With the Magic Wand Tool (W), click on the Moon’s background, then invert the Magic Wand selection by either pressing Shift + Cmd/Ctrl + I or going to Select > Inverse. You should now have the outline of the moon selected. 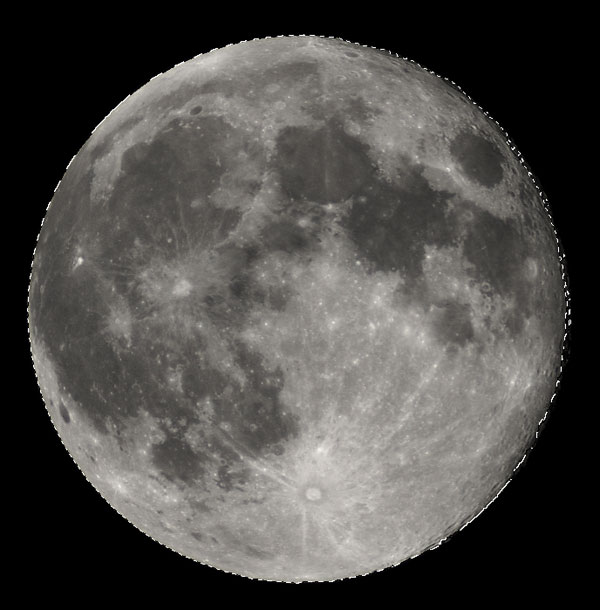 Copy (Cmd/Ctrl + C) and paste (Cmd/Ctrl + V) the moon into our scene.
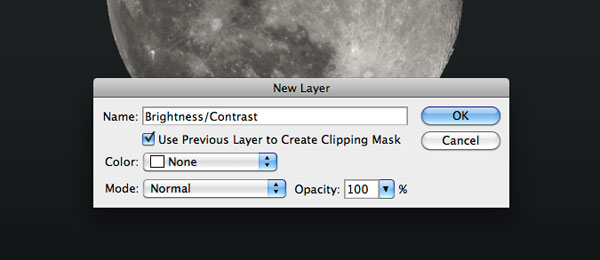
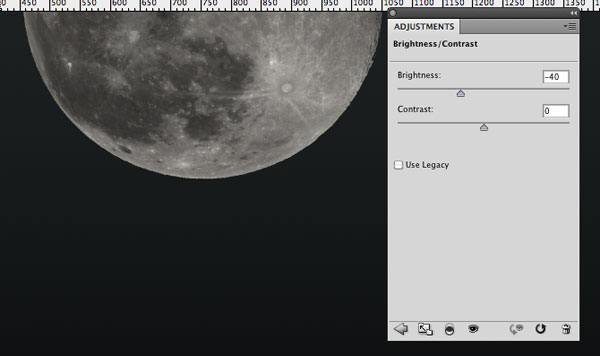
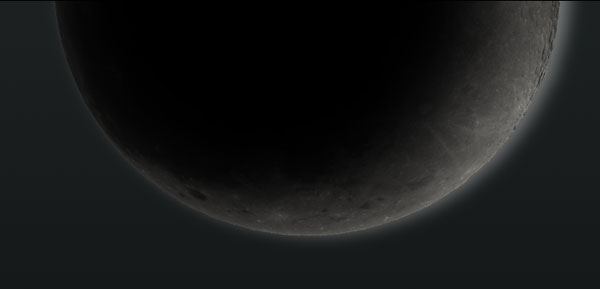
Place the moon at the top of the canvas, with parts of it spilling out of the canvas. 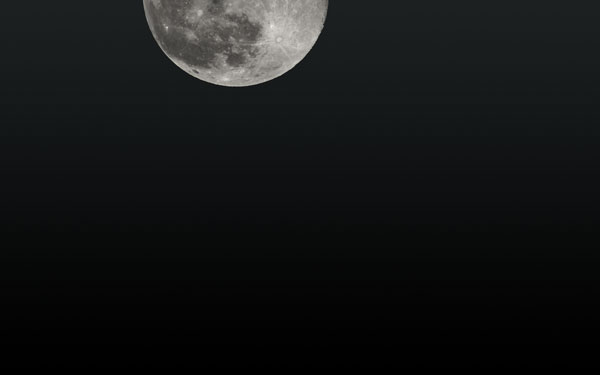 Go to Layer > New Adjustment Layer > Brightness/Contrast and lower the Brightness option to -40.
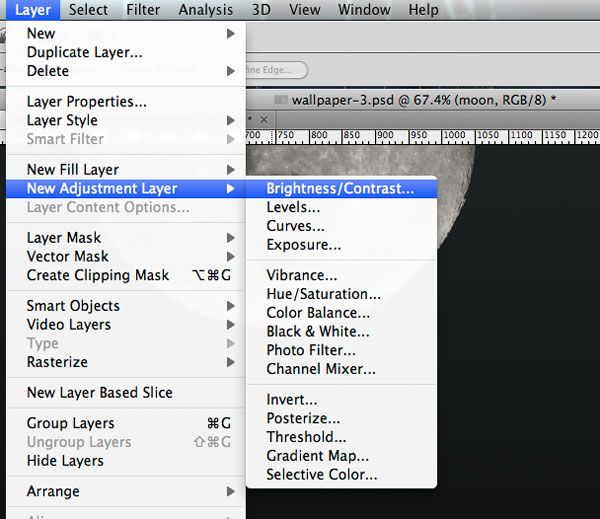
 Let us give the moon a subtle glow. Set the Foreground color to a light gray (#d0d0d0). Create a new layer (Shift + Cmd/Ctrl + N) and place it below the moon’s layer.
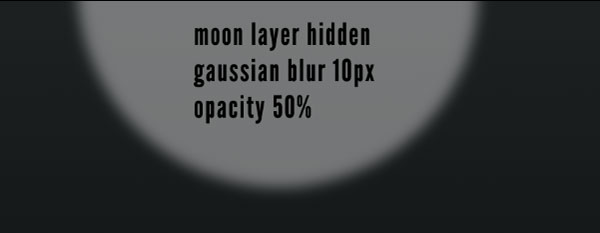
Cmd/Ctrl + click on the moon layer’s thumbnail to load a selection around the moon. 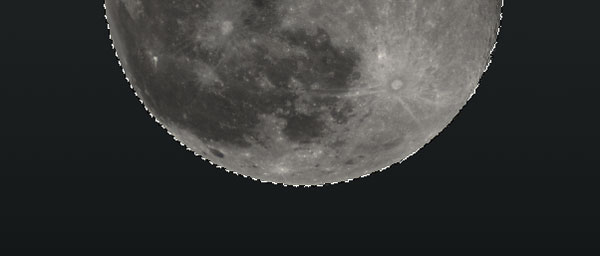 Make sure you’re on the new layer (below the moon layer), then fill the selection with the foreground color (Option/Alt + Del/Backspace) and then deselect the selection (Cmd/Ctrl + D).
 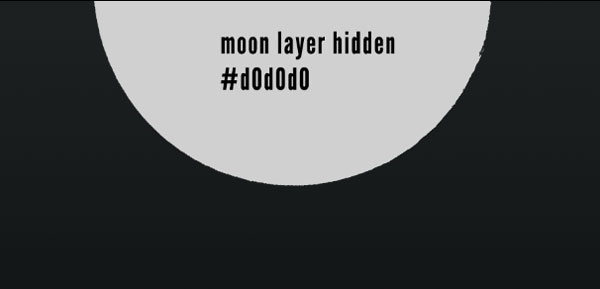 Apply Gaussian Blur with the Radius at 10px, then lower the Opacity of the layer to 50%.
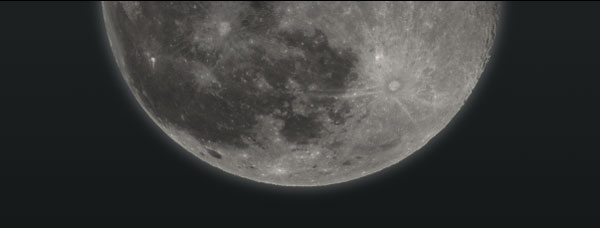 Move the glow a bit to the right and a bit to the top.
 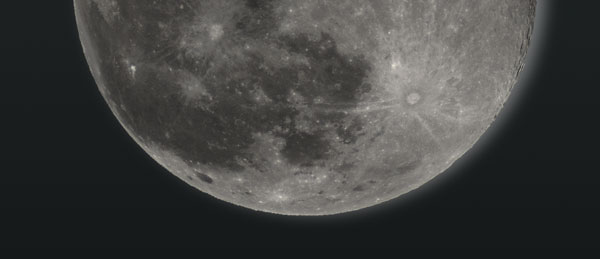 Let’s create a shadow over the moon. Cmd/Ctrl + click on the thumbnail of the moon layer to load a selection around it again.
Create a new layer and, on this new layer, fill the selection with black (#000000). 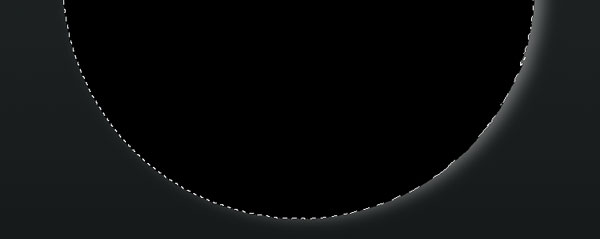 Apply the Gaussian Blur filter with Radius at 50px.
 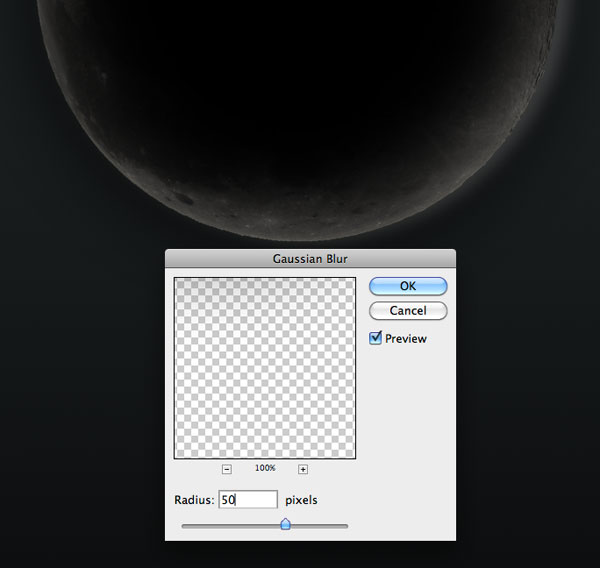 Move the shadow a little bit to the left.
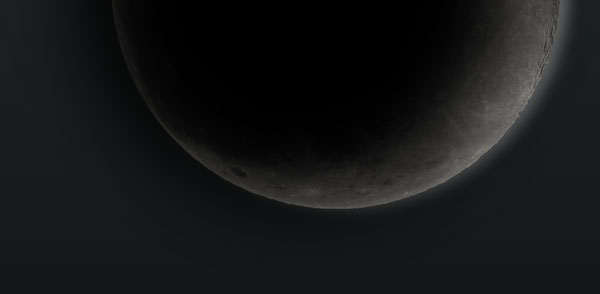 Since we need the shadow to be just on top of the moon, Cmd/Ctrl + click on the thumbnail of moon layer to load a selection around it, and, making sure the active layer is still the shadow layer, go to Layer > Layer Mask > Reveal Selection to apply a layer mask to the shadow layer.
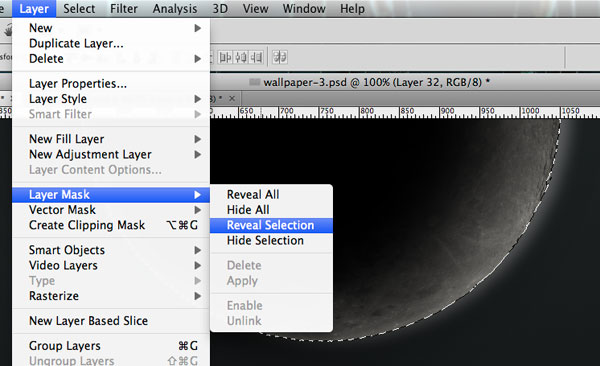
Step 4: Add the Castle
Download and open the image of the Hogwards Castle. Isolate the castle from its background by first using the Pen Tool (P) with the Paths option selected in the Options Bar to trace an outline of the castle, then, in the Paths Panel (Window > Paths), right-click on the path you drew and choose Make Selection.
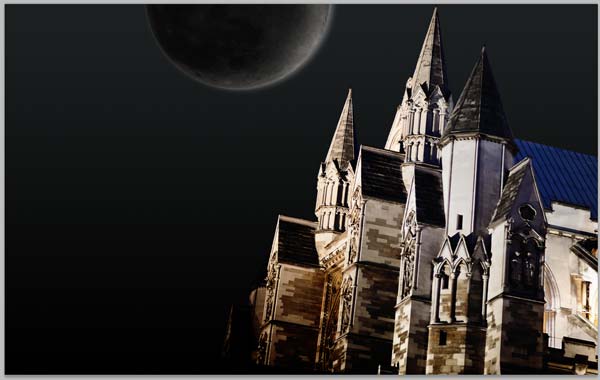
 Copy and paste the castle into our main document. Use Free Transform (Cmd/Ctrl + T) to make the castle a bit bigger and then rotate it a bit. Afterwards, move the castle in position; use the image below as a reference.
 Desaturate the castle layer by either pressing Shift + Cmd/Ctrl + U or going to Image > Adjustments > Desaturate.
 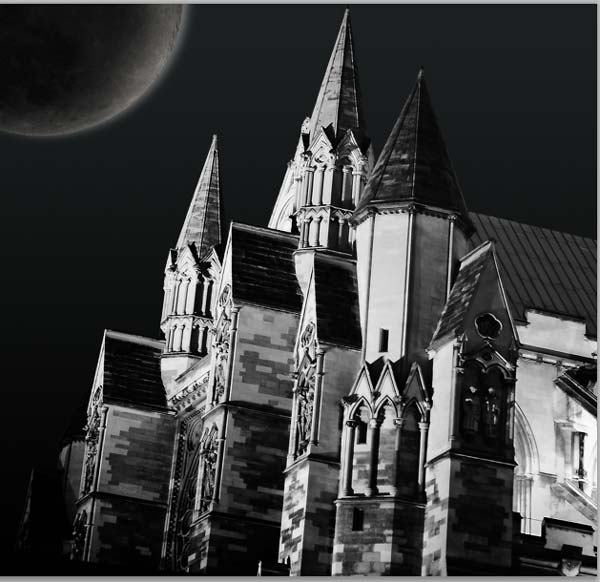 Then lower the layer’s Opacity to 35%.
 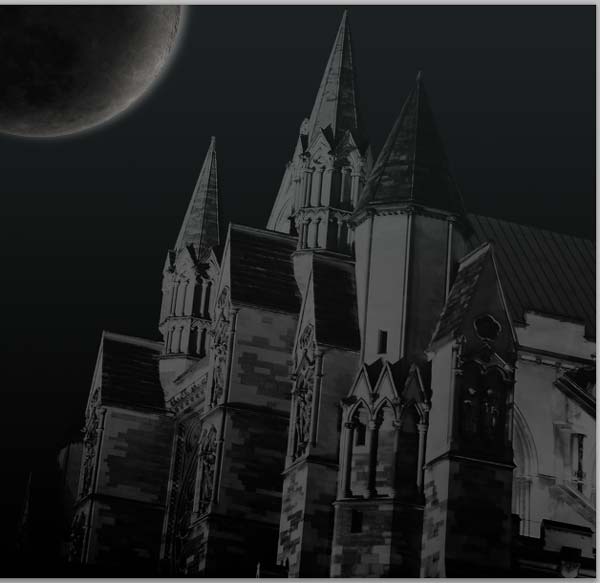 Cmd/Ctrl + click on the castle layer’s thumbnail to create a selection around it.
Create new layer above the castle layer, and fill this new layer with black. 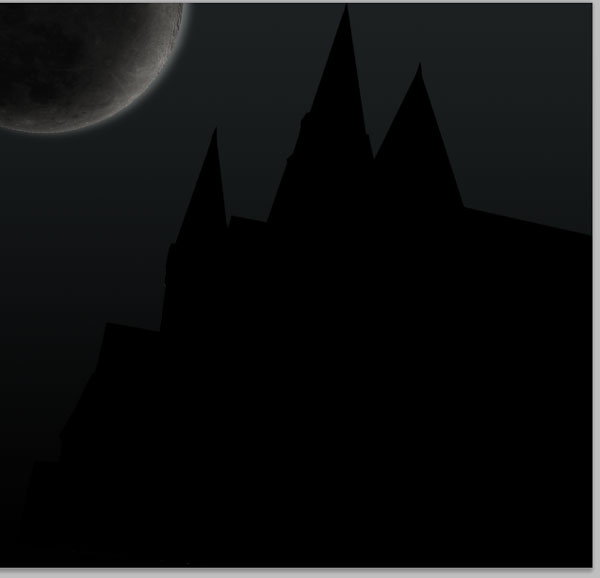 Use the Eraser Tool (E) with a very soft brush tip (0% Hardness) to slowly remove the black color from parts of the castle you want to be visible.
 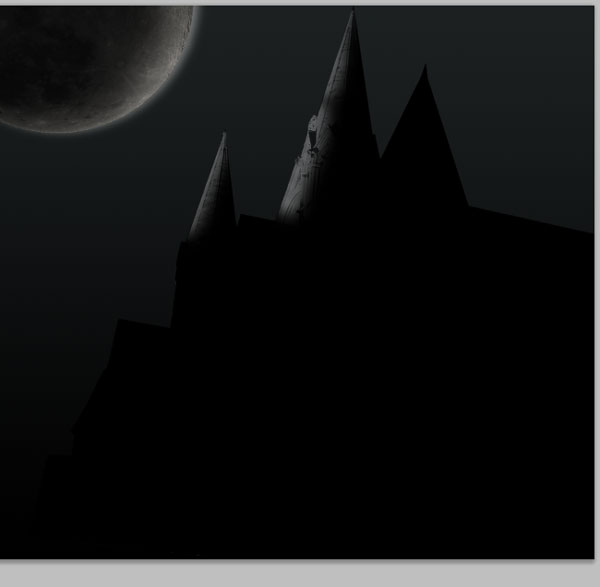 You should now have something like this:
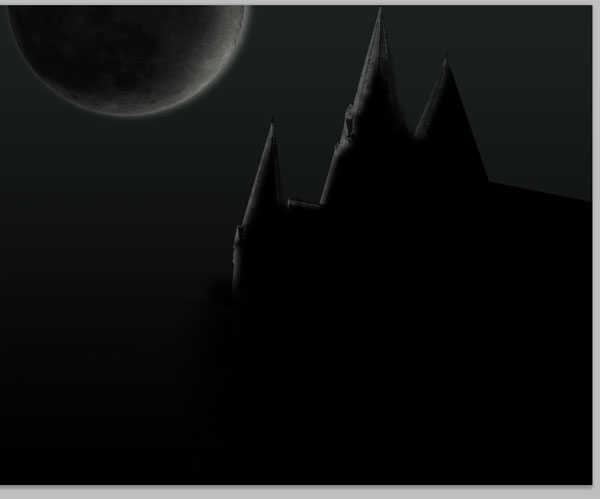
Step 5: Create Some Fog and Clouds
Add a new layer on top of all the other layers and then set the Foreground color to black and the Background color to white by pressing D.
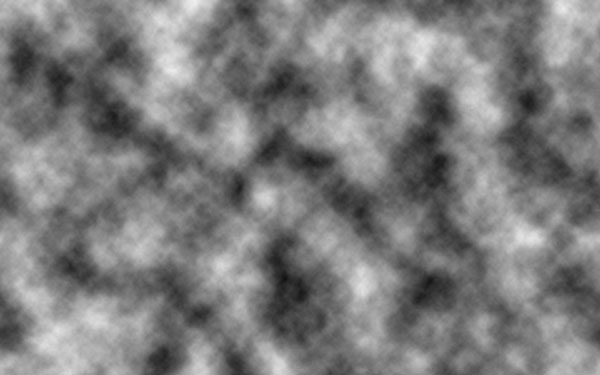
Afterwards, go to Filter > Render > Clouds. 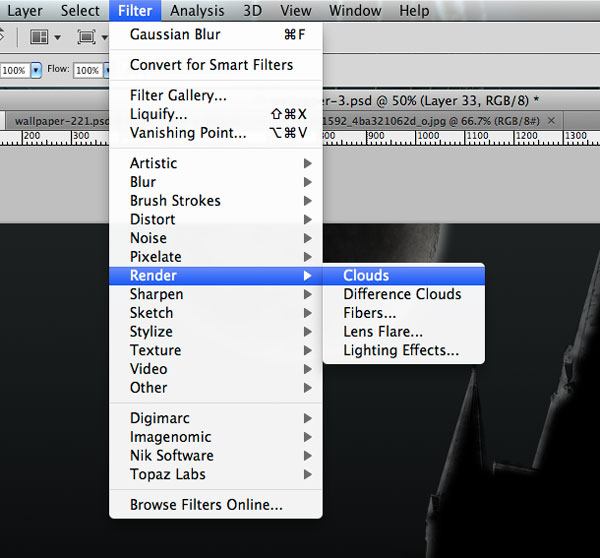
 Change the Blend Mode for this layer to Screen and lower the Opacity to 30%.
 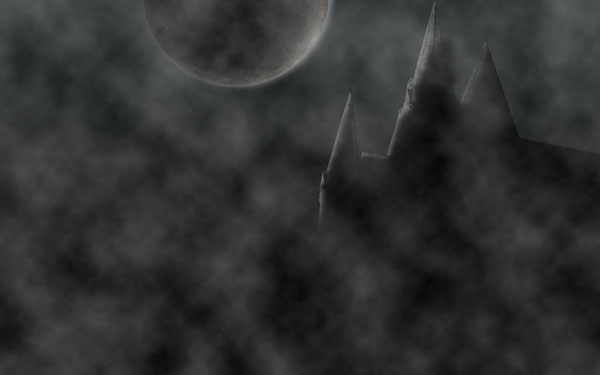 Go to Layer > Layer Mask > Hide All.
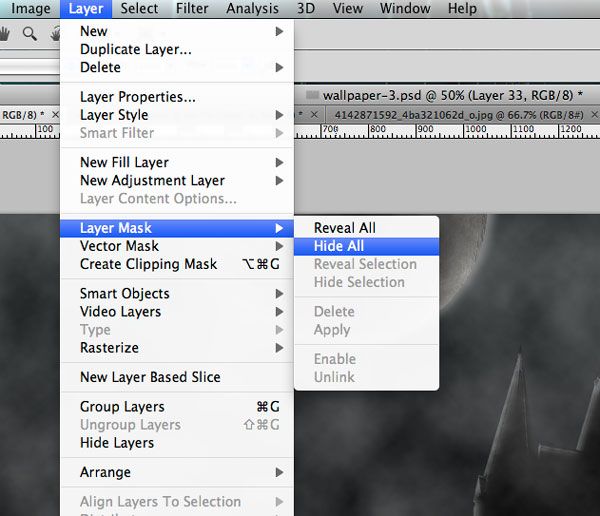 Set your Foreground color to white (#ffffff). With the Brush Tool (B) and a very soft brush (0% Hardness), paint white on the layer mask at areas where you want the fog/clouds to be visible; use the image below for reference.
 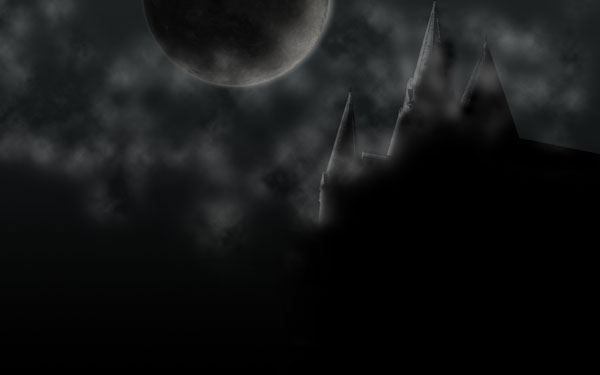 Click on the fog/clouds layer in the Layers Panel and then duplicate it (Cmd/Ctrl + J).
Change the Blend Mode of the duplicate layer to Multiply, and set the layer Opacity to 30%. 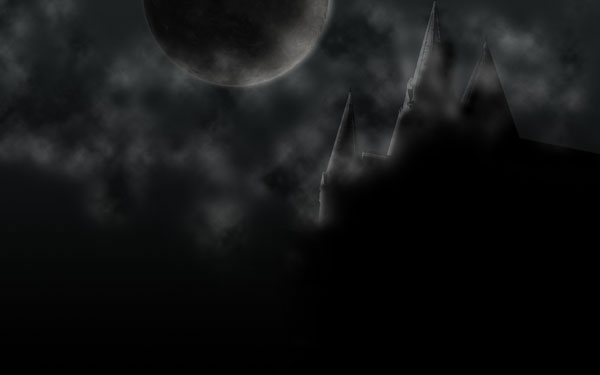 The fog/clouds reinforce our theme, giving it an eerie look.
Step 6: Creating Mysterious Light
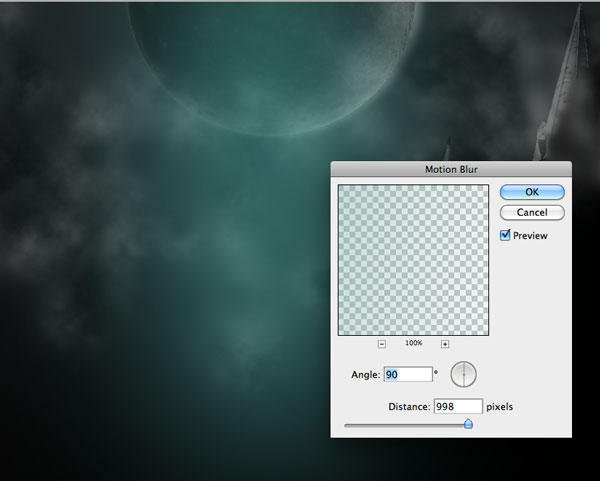
Create a new layer, grab the Brush Tool (B), select an aqua green color (#49a69e), and, with a large, soft brush (800-900px Master Diameter) apply a big spot by the moon (as shown below). 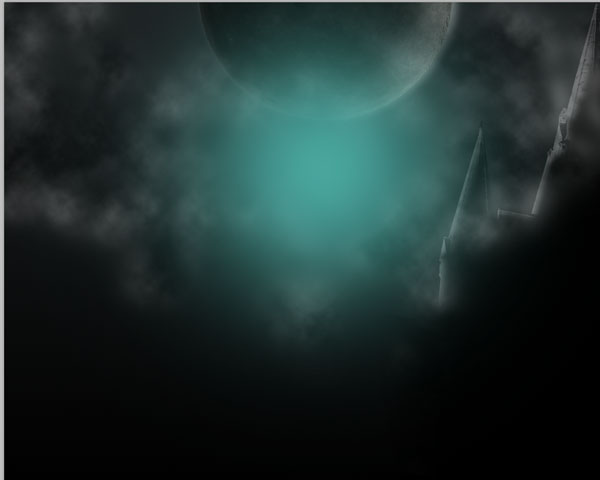 Apply the Motion Blur filter on this layer (Filter > Blur > Motion Blur).
 Change the layer’s Blend Mode to Lighten and lower the Opacity to 60%.
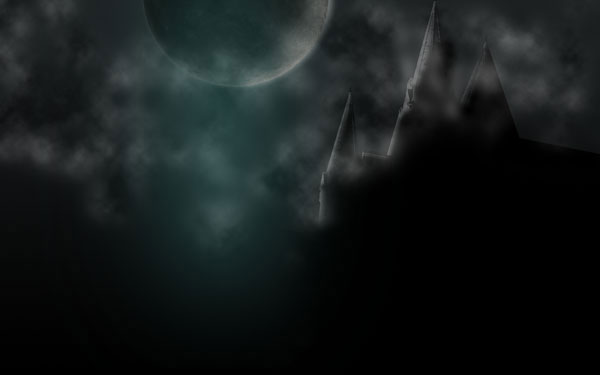
Step 7: Create a Human Silhouette
Open up the Victorian Gustov 39 image referenced in the Tutorial Resources at the top, and isolate the man from its background using your Pen Tool (P), similar to what we did with the castle in Step 4. 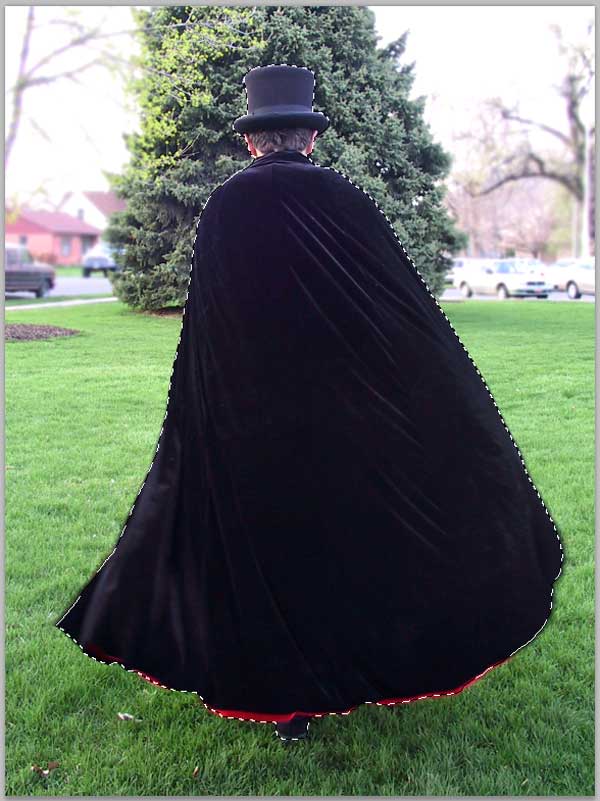 Place the man into our scene and scale him down with Free Transform (Edit > Free Transform).
 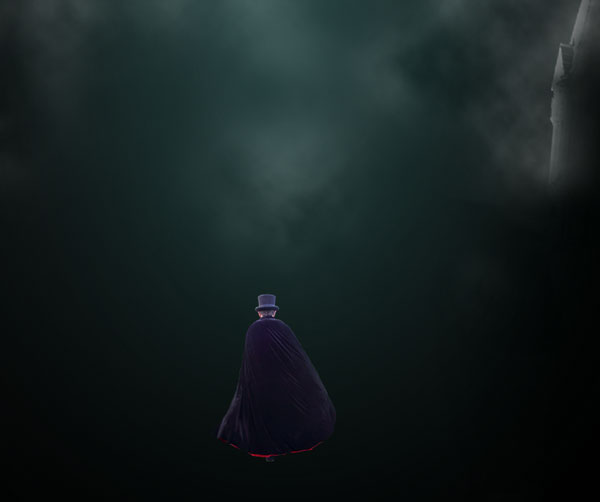 Open the Layer Style dialog window and apply a black Color Overlay to the layer.
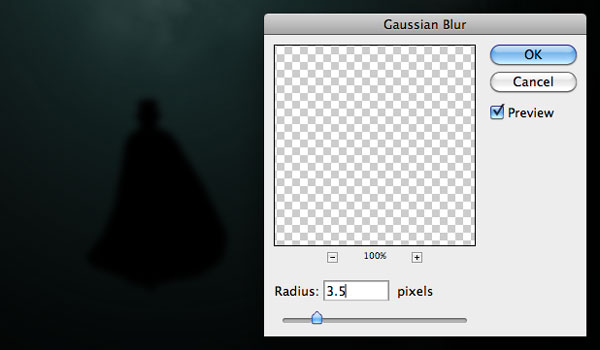
 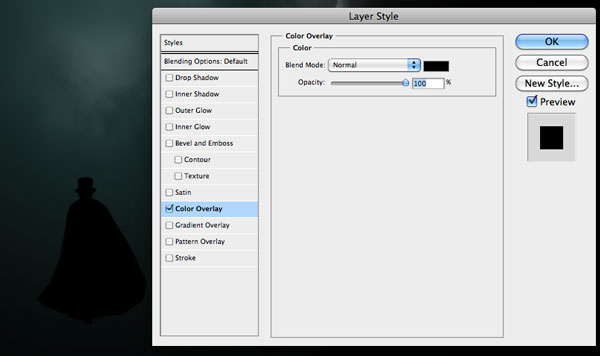 Soften the silhouette with Gaussian Blur (Filter > Blur > Gaussian Blur) and then lower the Opacity of the layer to 80%.
 Create a new layer below the silhouette layer. Switch your Foreground color to gray (#7a8384). Create a light spot behind the silhouette using the Brush Tool (B) with a large, soft brush (500px Master Diameter).
Lower the layer’s Opacity to 62%. 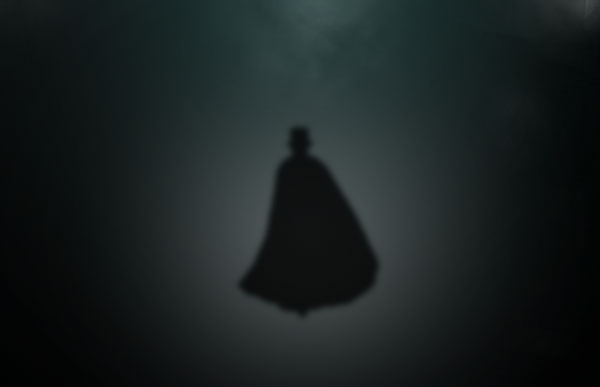 Create a new layer above the light spot layer. Set your Foreground color to a bluish gray (#7a8384) and your Background color to white (#ffffff), then go to Filter > Render > Clouds.
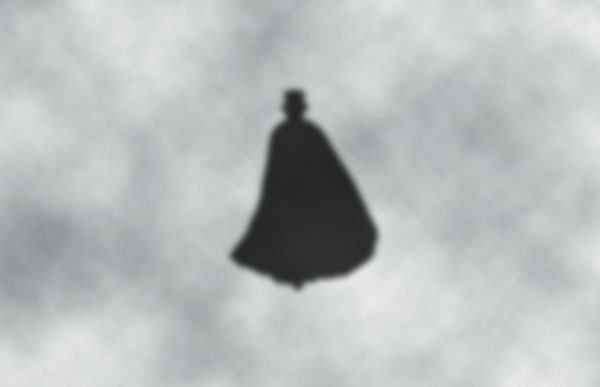 Give the clouds filter layer a clipping mask (Layer > Create Clipping Mask).
 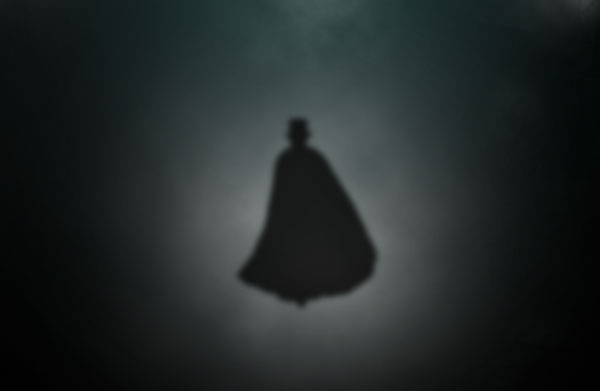 Then, change the layer’s Blend Mode to Color Burn.
 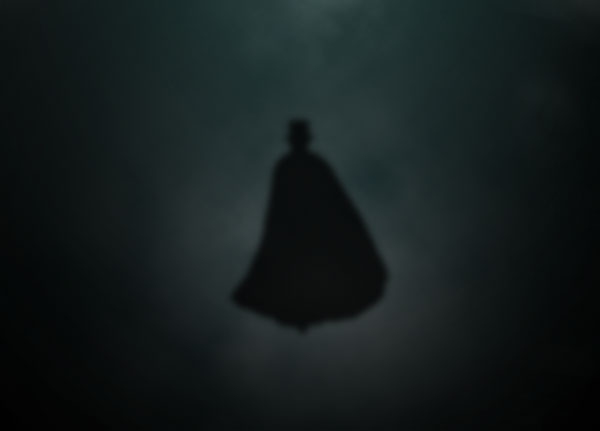 Click on the silhouette layer to make it the active layer, duplicate it (Cmd/Ctrl + J), then press Cmd/Ctrl + T to enter Free Transform mode.
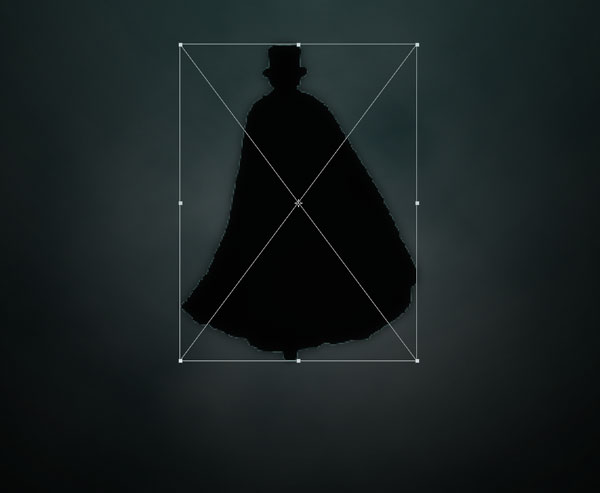 Hold down Cmd/Ctrl and pull the center-top transform control straight down until the duplicate silhouette is flipped vertically. This will become the silhouette’s shadow.
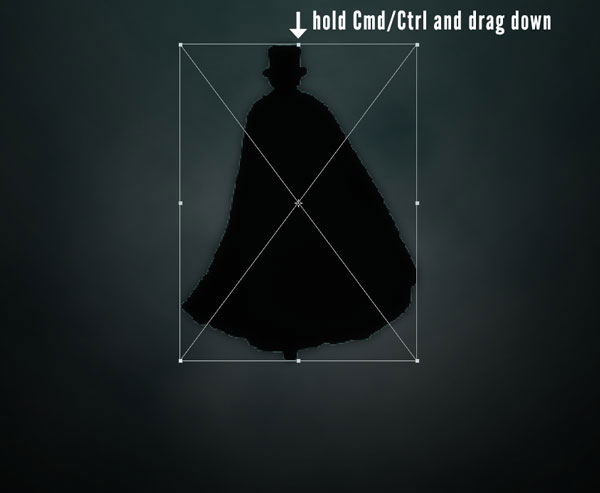
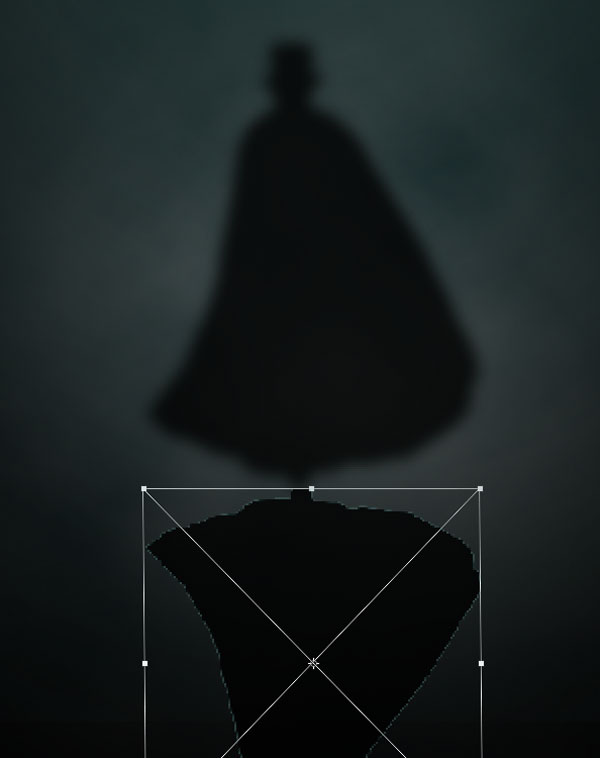 Move this shadow layer below the silhouette layer, apply Gaussian Blur with a 6px Radius, and then set the layer’s Opacity to 60% afterwards.
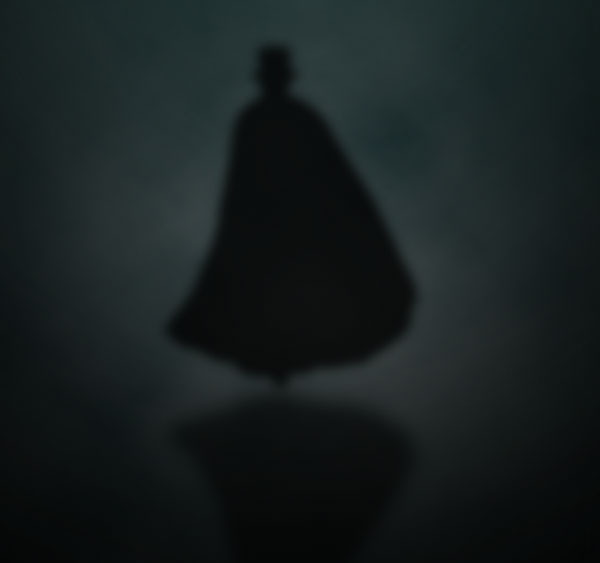 Here is a preview of where we are now:
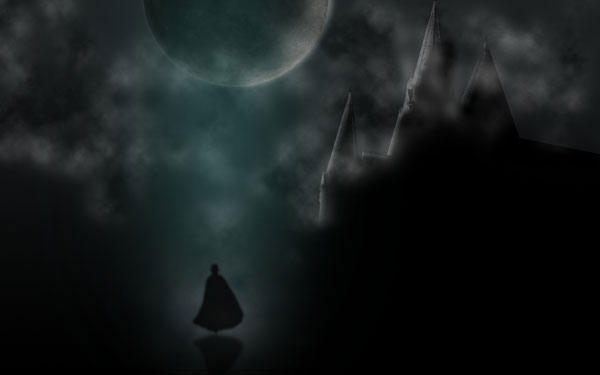
Step 8: Add Trees
Open the Join me in the abyss… stock photo, desaturate it (Shift + Cmd/Ctrl + U) and, with the Rectangular Marquee Tool (M), create a selection around the trees. 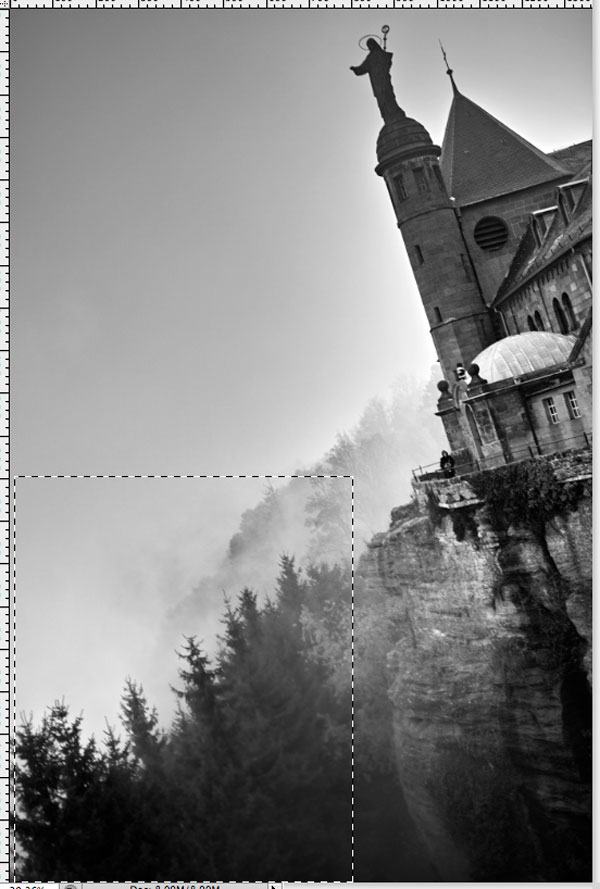 Copy and paste the selection into our scene.
Flip the trees horizontally (Edit > Transform > Flip Horizontal). 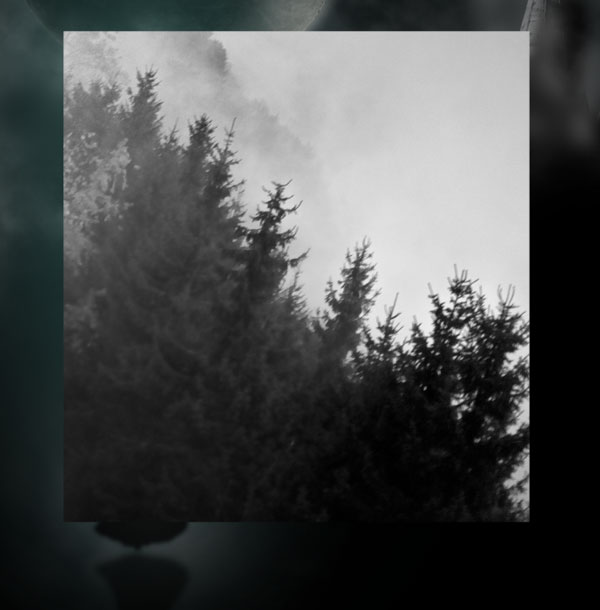 Next, adjust the levels to render the sky white (Image > Adjustment > Levels).
 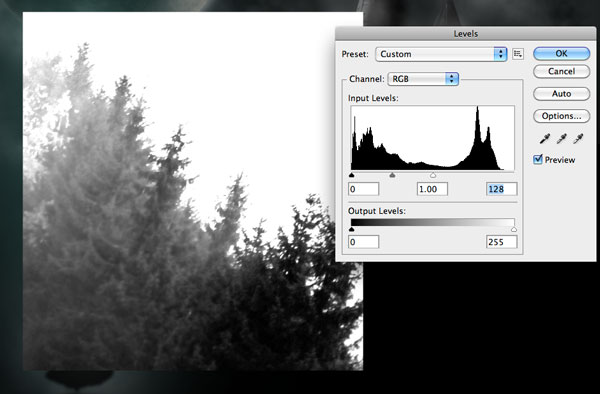 Position the trees to the left of the silhouette with the Move Tool (V).
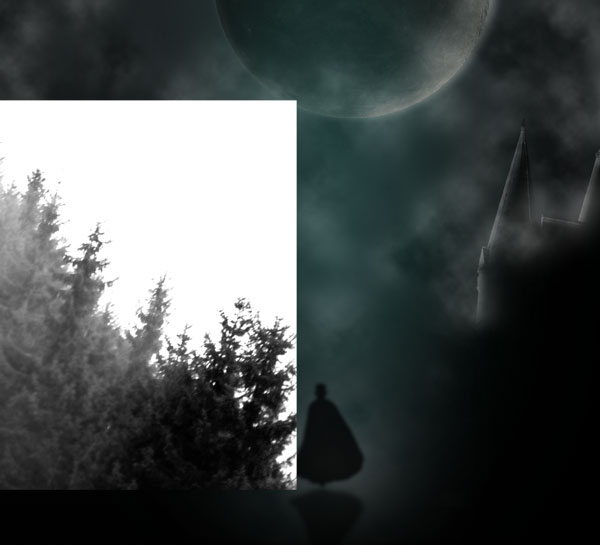 To blend the trees layer with the layers behind it and to hide the white areas, change the Blend Mode to Multiply.
 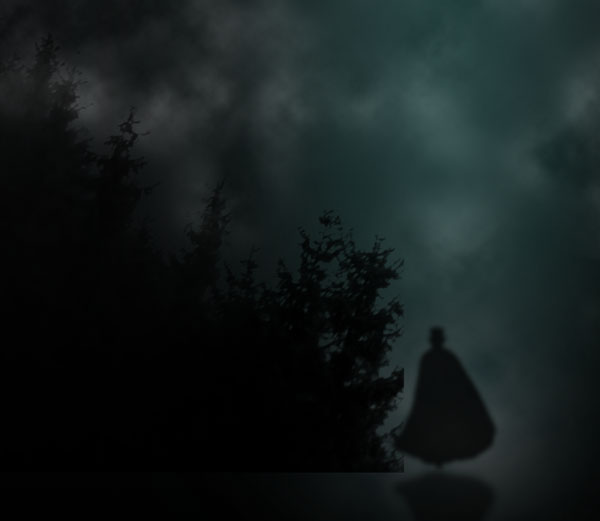 Move the trees layer below the fog/clouds layer, but keep it above the castle layer.
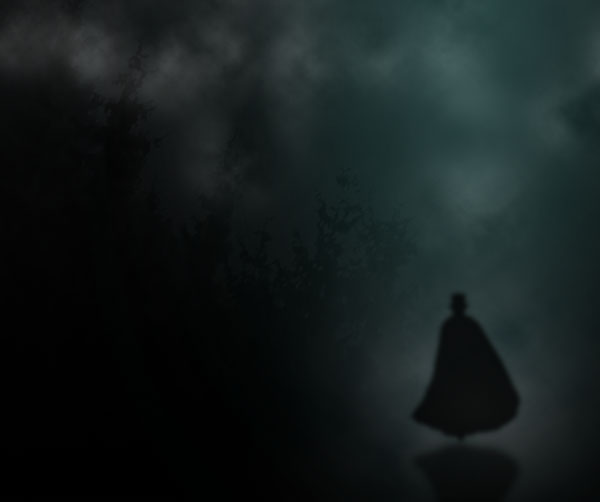
Step 9: Add Bats
In this step, we will add bats to the scene.
First, download and install these splendid Halloween Vectors Photoshop & GIMP Brushes. Create a new layer above the fog/clouds layer, but below the mysterious aqua green light layer. Set the Foreground color to black (#000000), switch to the Brush Tool (B), choose one of the bat brushes, and start adding bats.
I suggest that each bat should have its own layer. I know we will end up with a bunch of layers if we were to have one bat per layer, but it gives us freedom to adjust and modify each of them individually. 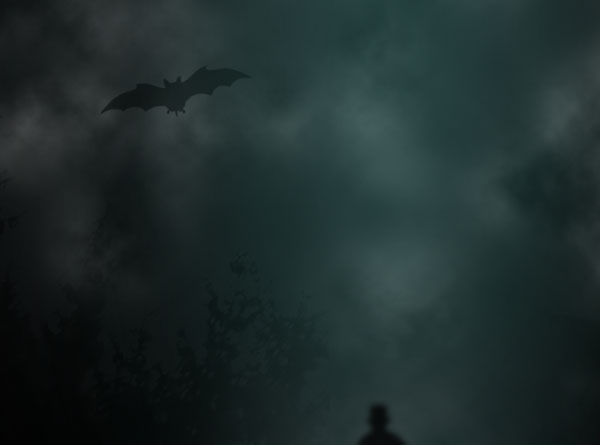
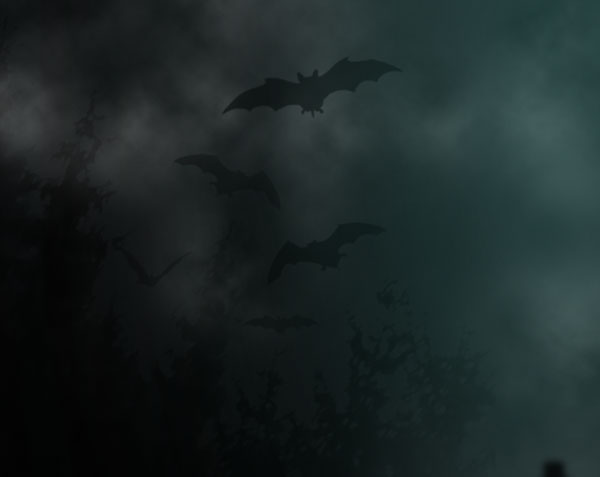 Reduce the Opacity of the bat layers so that bats father away into the distance are fainter.
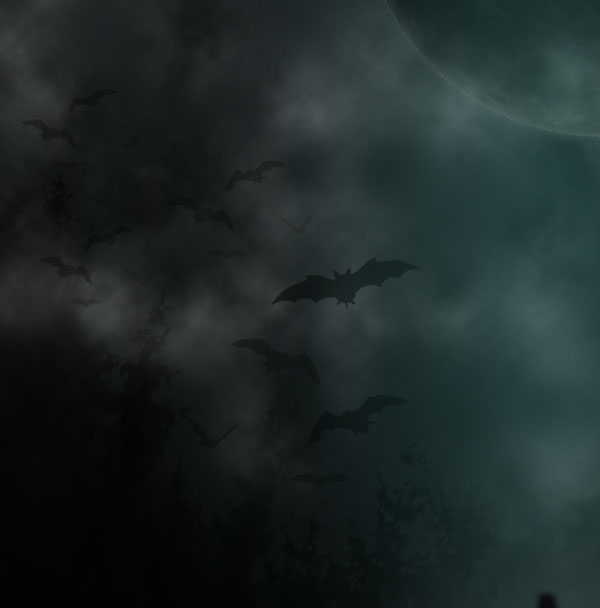 Once you are satisfied, select all the bats layers and group them into a layer group (Cmd/Ctrl + G) named “Bats”.
Step 10: Add Text to the Composition
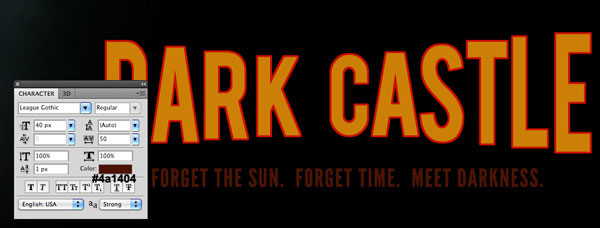
Download and install the Bebas font. With the Horizontal Type Tool (T), type “Dark Castle”, with each letter on its own layer. 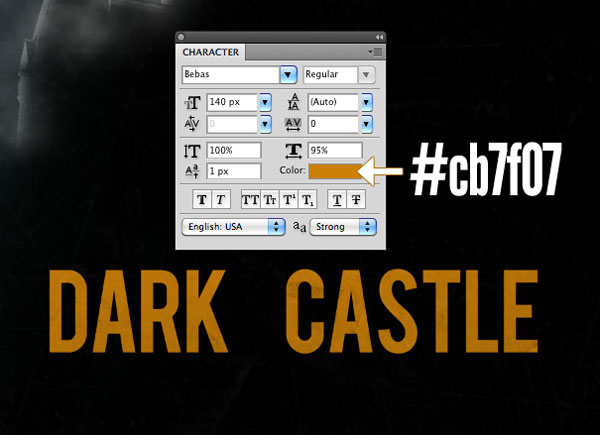 We are going to use the Character Panel (Window > Character) to modify each letter a bit so they have varying letter-spacing and font sizes; let’s start with letter “D”.
 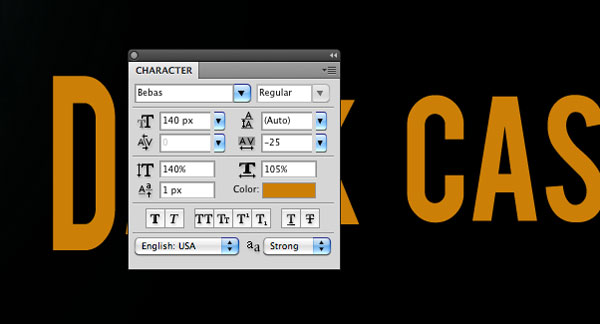 Next, modify the character options of “A”.
 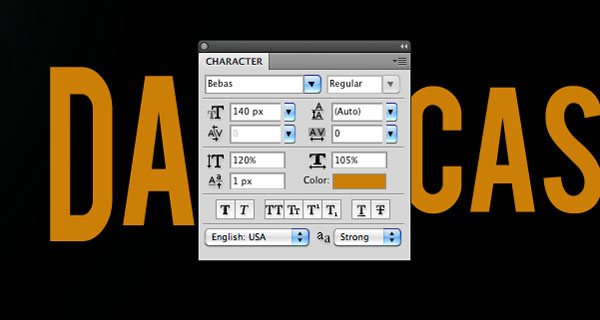 Then “R”.
 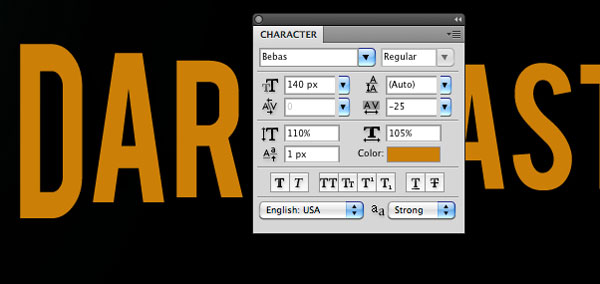 And then “K”.
 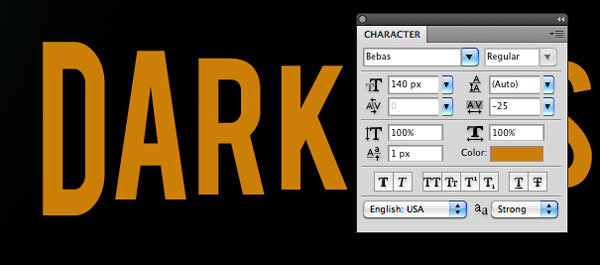 This is what we have after the character option modifications:
 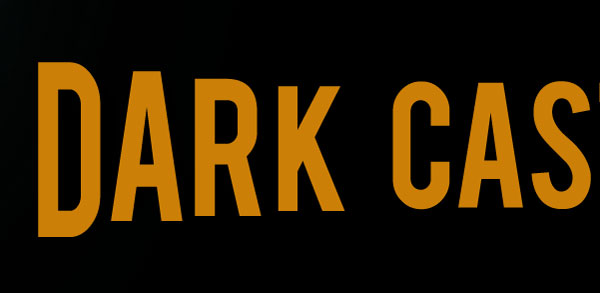 Do the same for each letter in word “Castle,” but do it in reverse order such that as you go towards the last letter, the letters get bigger.
 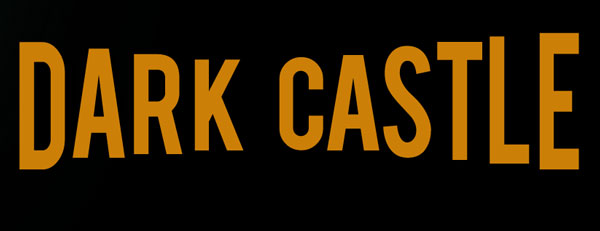 After making the character modifications, select all the text layers, Control-click/right-click, and then choose Rasterize Type in the menu that appears.
 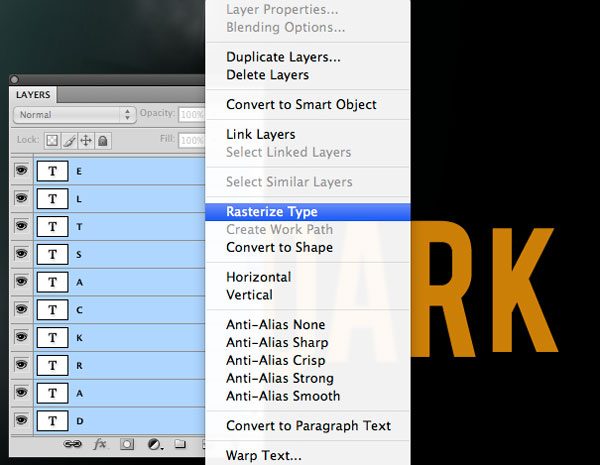 After rasterizing the text layers, make sure they’re still selected in the Layers Panel, then merge them into one layer (Cmd/Ctrl + E).
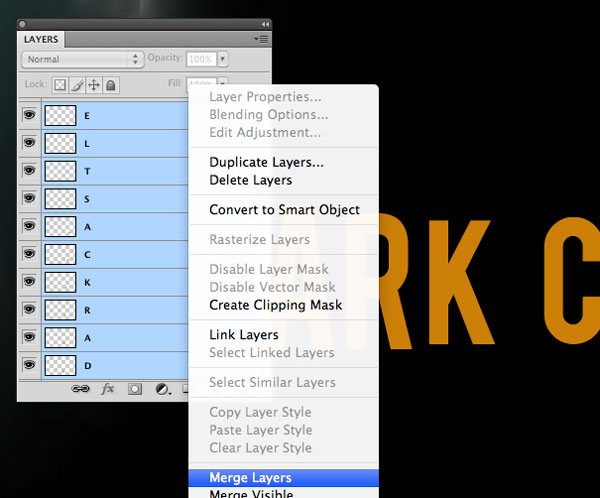 Cmd/Ctrl + click on the merged “Dark Castle” layer’s thumbnail to create a selection around the letters.
 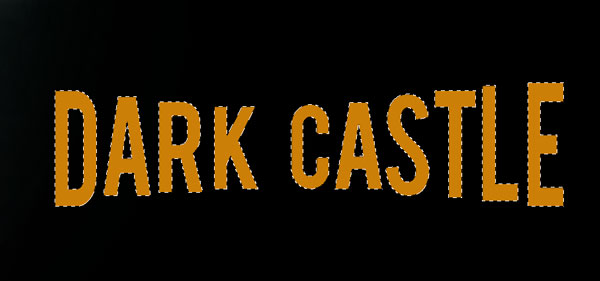 Create a new layer below the “Dark Castle” text layer, go to Select > Modify > Expand and expand the selection by 3px.
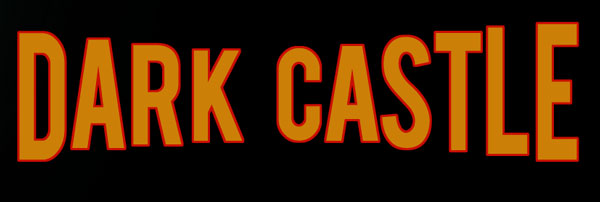
 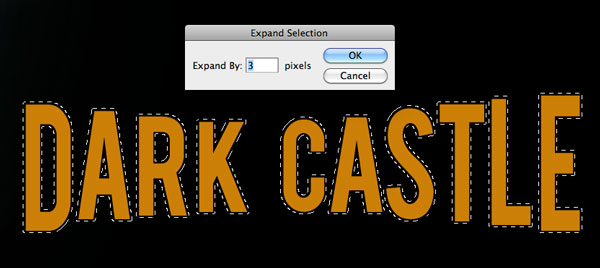 Fill the selection with red (#c90801).
 Let us add more text to our poster. Download and install League Gothic. Use the Horizontal Type Tool (T) to place some text above and below the “Dark Castle” text using the League Gothic font.
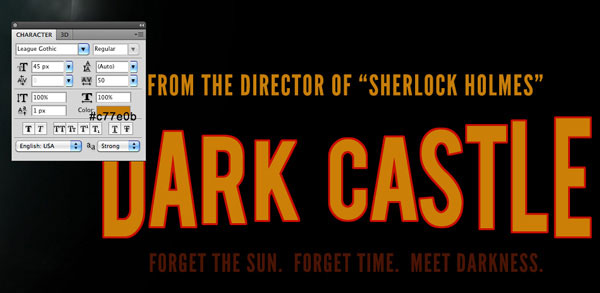 Here’s what we should have now:
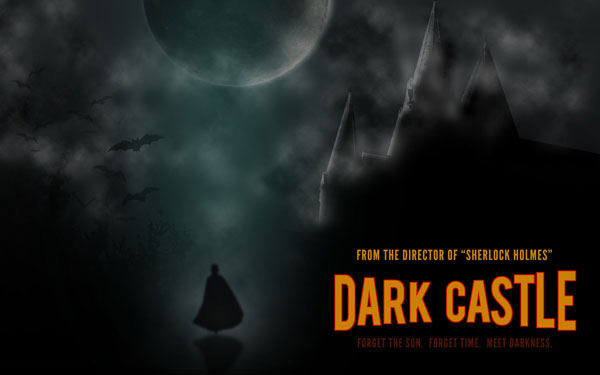
Step 11: Add Grunge and Scratch Textures
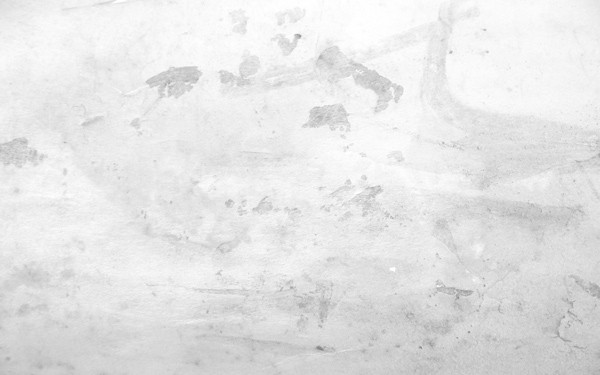
In this last step of the tutorial, we will distress the design a little bit using stock textures and a free Photoshop brush library. First, download Texture No.14 (or, alternatively, use one of the textures from the Grunge Grab Bag: Texture Pack here on Design Instruct) and place it on top of our composition. Desaturate the texture (Image > Adjustments > Desaturate) to remove its colors, then set the layer’s Blend Mode to Multiply at 70% Opacity.
 Next, add some scratches to the surface to give our design an aged, worn look. Download and install the CD Scratch brush pack for this. Create a new layer on top of the grunge texture.
Set the Foreground color to white (#ffffff), switch to the Brush Tool (B), choose one of the CD Scratch brushes, and then set the Brush Tool’s Master Diameter to something large (1920px) so that it will span the entire canvas. On the new layer, click once to apply the brush. Then, lower the Opacity of the layer to 5%.

Tutorial Summary
In this Photoshop tutorial, I showed you how to create a dark, mysterious horror movie poster design by mixing stock photos, textures, brushes, filters and blend modes. I hope you enjoyed this tutorial and I look forward to hearing your thoughts in the comments. Show your own final result by linking to it in the comments and posting it up on our community Flickr group pool.
Download Source Files
- horrormovie_poster_design (ZIP, 31.80 MB)
-
 Trevin serves as the VP of Marketing at WebFX. He has worked on over 450 marketing campaigns and has been building websites for over 25 years. His work has been featured by Search Engine Land, USA Today, Fast Company and Inc.
 -

WebFX is a full-service marketing agency with 1,100+ client reviews and a 4.9-star rating on Clutch! Find out how our expert team and revenue-accelerating tech can drive results for you! Learn more
Make estimating web design costs easy
Website design costs can be tricky to nail down. Get an instant estimate for a custom web design with our free website design cost calculator!
Try Our Free Web Design Cost Calculator
Table of Contents
- Preview
- Tutorial Resources
- Step 1: Create the Photoshop Document
- Step 2: Create a Dark Gradient Background
- Step 3: Add the Moon
- Step 4: Add the Castle
- Step 5: Create Some Fog and Clouds
- Step 6: Creating Mysterious Light
- Step 7: Create a Human Silhouette
- Step 8: Add Trees
- Step 9: Add Bats
- Step 10: Add Text to the Composition
- Step 11: Add Grunge and Scratch Textures
- Tutorial Summary
- Download Source Files
Share this article


Web Design Calculator
Use our free tool to get a free, instant quote in under 60 seconds.
View Web Design CalculatorMake estimating web design costs easy
Website design costs can be tricky to nail down. Get an instant estimate for a custom web design with our free website design cost calculator!
Try Our Free Web Design Cost Calculator


