- Home
- Blog
- Web Design Create a 3D Shipping Package Box Icon in Illustrator
Create a 3D Shipping Package Box Icon in Illustrator
-
 11 min. read
-
 Trevin Shirey
 VP of Marketing
- Trevin serves as the VP of Marketing at WebFX. He has worked on over 450 marketing campaigns and has been building websites for over 25 years. His work has been featured by Search Engine Land, USA Today, Fast Company and Inc.
Preview
Step 1: Draw a 3D Box
Open up a new document in Illustrator. Set it up in the manner you prefer. Select the Rectangle Tool (M) from the Tools Panel.
Draw a square object on the artboard; hold down the Shift key to make a perfect square. Fill the square with gray. 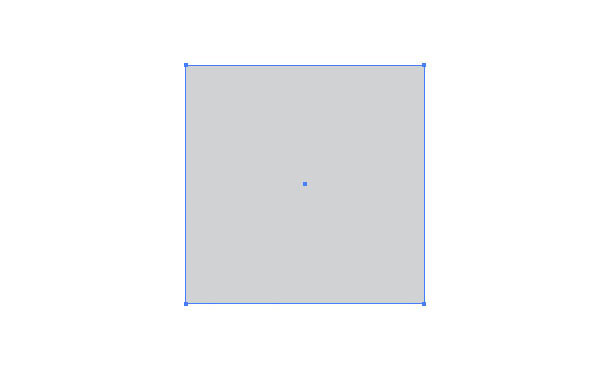 Next, we will convert the gray box into a 3D shape.
Make sure the box is selected (if not, use the Selection Tool) and then go to Effect > 3D > Extrude & Bevel. For the 3D Extrude & Bevel options, use the settings below. 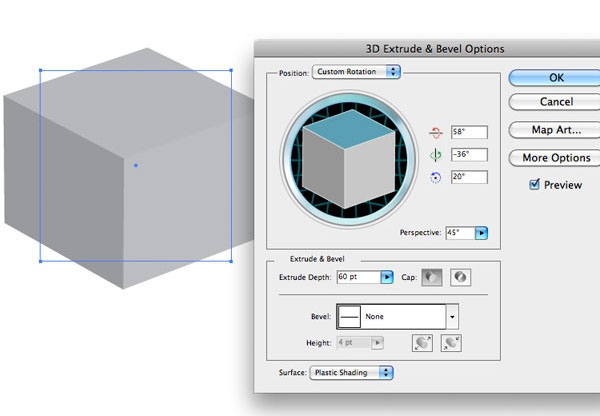 With the shape still selected, go to Object > Expand Appearance.
Now we have a simple 3D box shape. 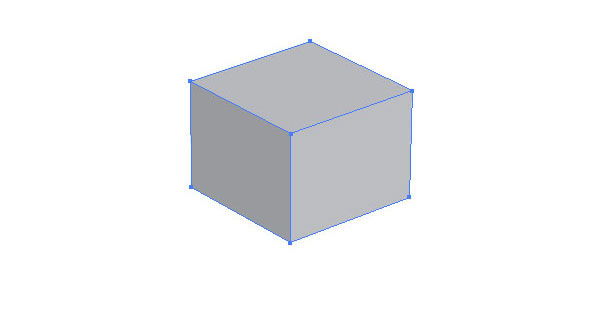
Step 2: Draw the Box’s Flaps
Select the top side of the box with the Direct Selection Tool (A). With the top side selected, copy it (Cmd/Ctrl + C) and then paste it in front (Cmd/Ctrl + F).
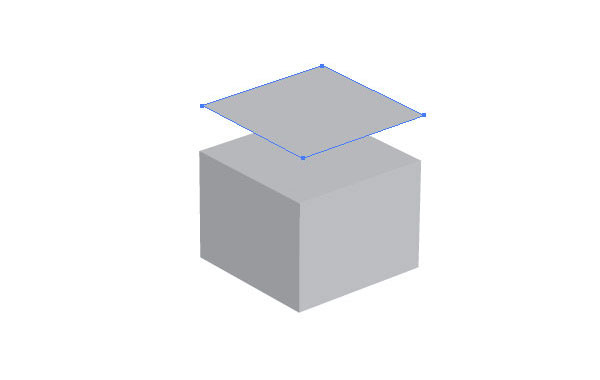 We want to increase the size of the copied top side proportionally. In order to do that, we can apply an Offset Path (Object > Path > Offset Path) of 25pt. We will end up with two objects, the original top side (inner shape) and the 25pt path surrounding it (outer shape).
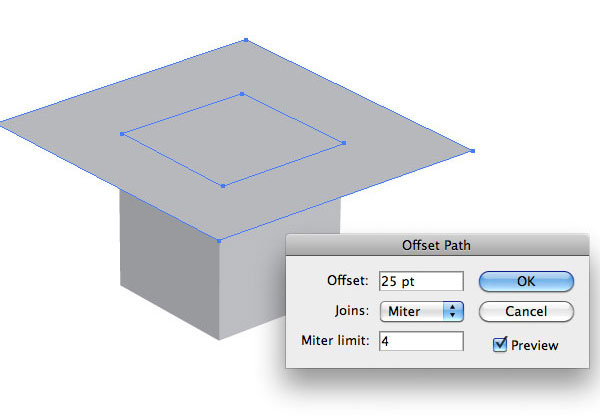 Now we want to subtract the inner shape from the outer shape. We will use the Pathfinder Panel (Shift + Cmd/Ctrl + F9) for this. Select the two objects and then click on the Exclude button in the Pathfinder Panel.
This will cut out the inner shape. 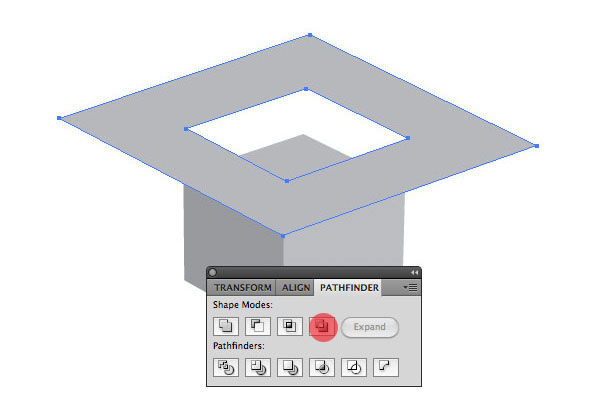 Make 4 copies of the top side of the box again and then align them with each corner of the shape we just made.
 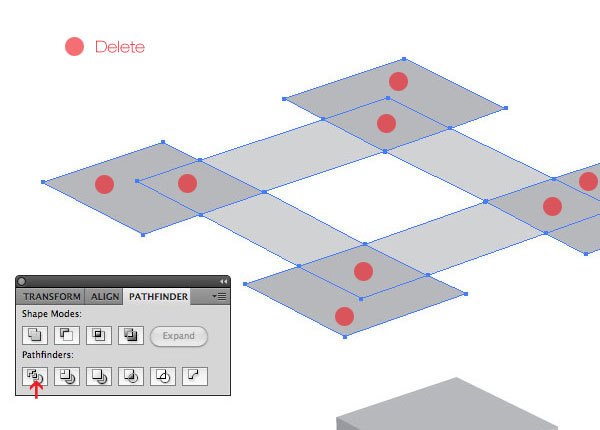 Select all shapes and apply the Divide option in the Pathfinder Panel.
Then with the Direct Selection Tool (A), delete all unnecessary objects. Make sure to delete the middle shape because we want to create a box that is open. 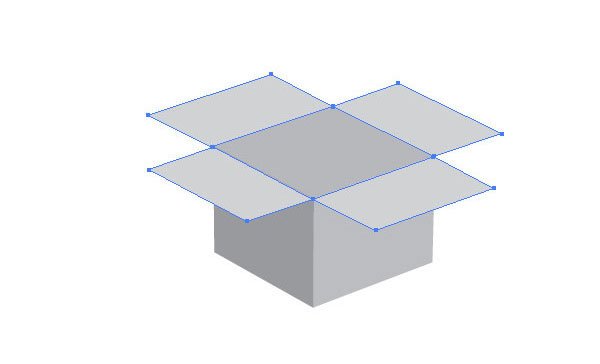
Step 3: Add Some Color
Since we are creating a cardboard box, we want to add some cardboard colors.
Select each shape and add the colors of your liking. For the lighter sides of the box, I used #c19862 and for the darker shade, #6f431e. 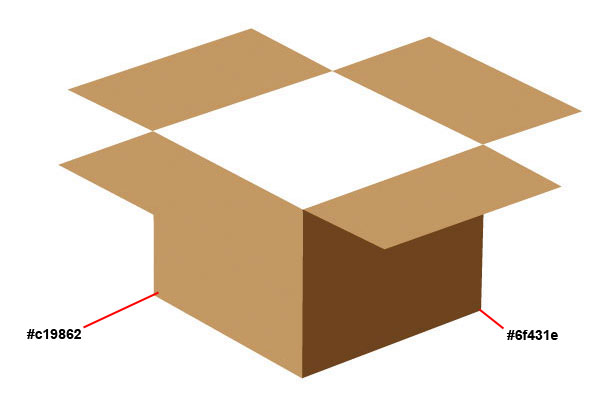
Step 4: Create an Edge for the Flaps
Select the flaps shape and make a copy of it underneath (Edit > Copy and then Edit > Paste in Back).
Fill the duplicated shape with a darker brown (#6f431e). 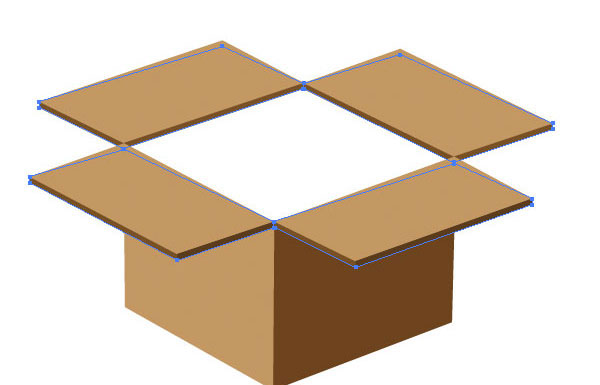
Step 5: Add the Inner Walls
Use the Pen Tool (P) to draw the inside walls of the box. Draw the paths below all the other objects to hide any awkward seams.
Make sure that each shape has a different brown color so that we can distinguish each shape and make our shipping box look three-dimensional. 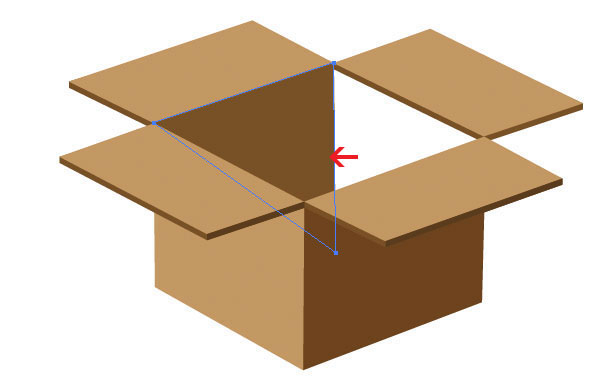 Since the box will have some shadows falling into it, we need to simulate that sort of lighting with some simple shapes.
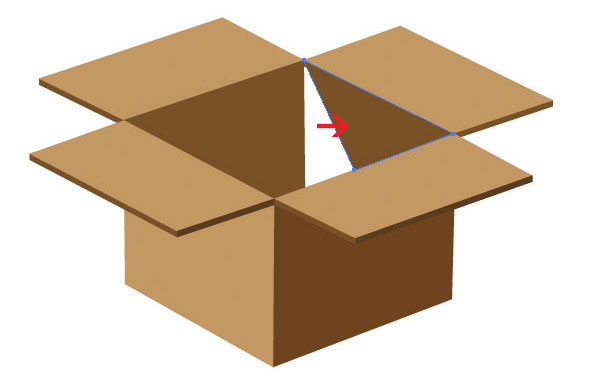
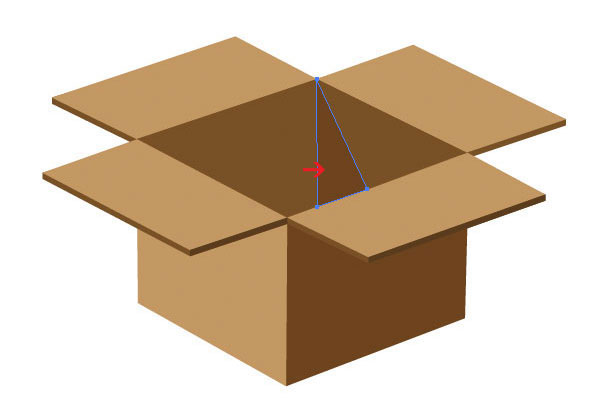
Step 5: Correcting and Enhancing the Box’s Flaps
In a previous step, we made a copy of the flaps and placed it underneath to support the 3D shape of our box.
However, the corners don’t look right. We need to fix that. 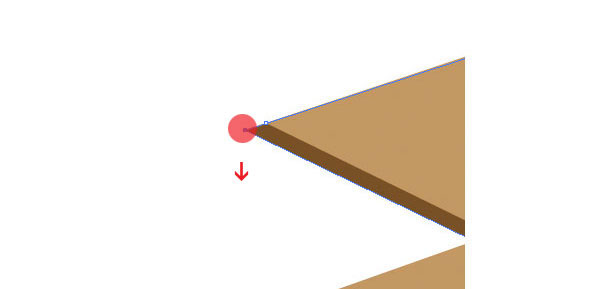 With the Direct Selection Tool (A), select the corner anchor of the bottom flap and drag it inwards so that it’s vertically aligned.
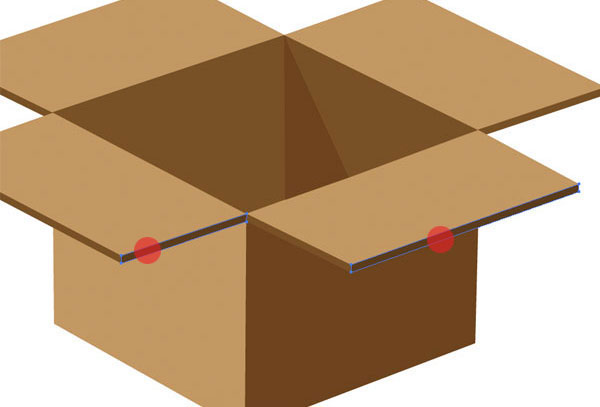
Repeat this with each corner where it’s necessary. 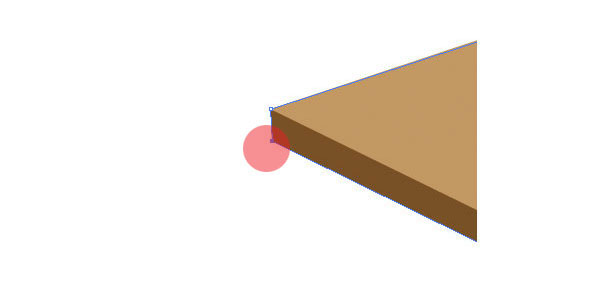 On the front-facing parts of the flap edge, we need to add some rectangle shapes so we get the thickness of the cardboard. Simply makes some rectangle shapes (shown in red) with the Pen Tool (P) and fill them with a darker brown color.
Step 6: Add Surface Highlights and Packing Tape
Let’s give our box surface a touch of detail. More specifically, we will give the left side a highlight that will help us keep our lighting consistent. Create a triangular shape and place it underneath the flap, and then fill it with a darker brown color.
We will tweak the transparency of the triangular shape using the Transparency Panel (Shift + Cmd/Ctrl + F10). In the Transparency Panel, set the Blending Mode to Multiply and reduce the Opacity to 30%. 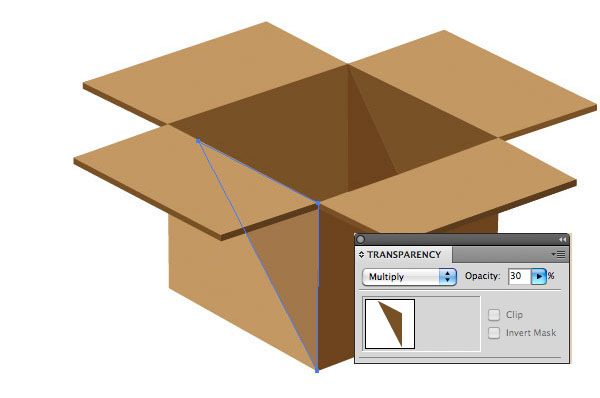 Shipping boxes will usually have tape on it to seal it up.
Let’s make a simple packing tape detail that goes vertically down the front of the box. Add a rectangle as a tape strip to the front. 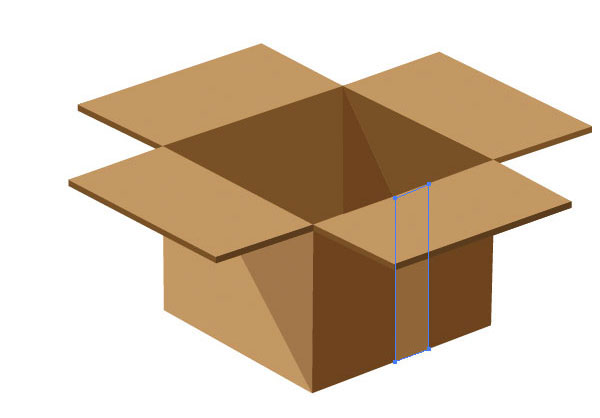
Step 7: Create the Box’s Shadow
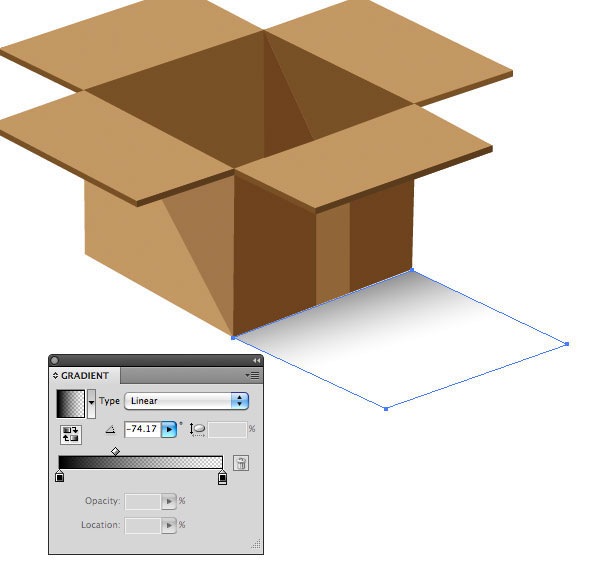
We will now cast a shadow on the floor.
Use the Pen Tool (P) to create a rectangular path at the front of the box (below where we placed the packing tape). We will use the Gradient Panel (Cmd/Ctrl + F9) to fill the path with a linear black-to-transparent gradient angled in such a way as to match the perspective of the box. Notice that since our light source comes from the top left, the shadow is slightly bigger on the right.
Step 8: Add Torn Packing Tape on the Flaps
Let’s reinforce the realism of our icon by having packing tape hanging off the flap to make it look like an opened box. Create a rectangular shape with the Pen Tool (P) that is aligned with the box’s flap on the left. Add some extra anchor points to the end so it looks like the tape is ripped off and dangling off the flap.
Then fill the packing tape’s path with a beige color. Make sure that you placed the shape underneath the flap; you can move it down by pressing Cmd/Ctrl + [ if you drew it on top. 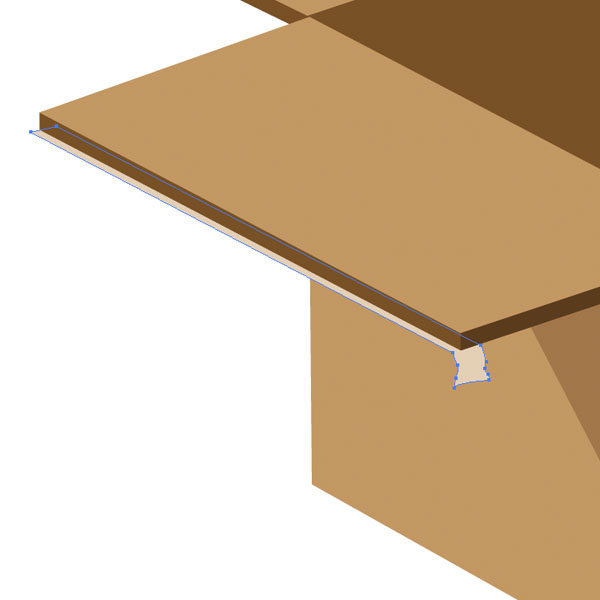
Step 9: Creating a “Fragile” Stamp
For an extra added bit of detail, let’s add a red stamp that says “Fragile.” Often, you’ll see this in situations where the contents of a parcel are easily breakable, such as computer parts or dishware (e.g.
porcelain plates). We’ll create a stamp from scratch quickly and easily. I picked a font called Portago ITC TT.
Any stenciled font should work well. All you want to do is use the Type Tool (T) to type out the text in all caps. Set the color to a red color.
Afterwards, just use the Rounded Rectangle Tool with a red stroke to draw a border around the “Fragile” text. 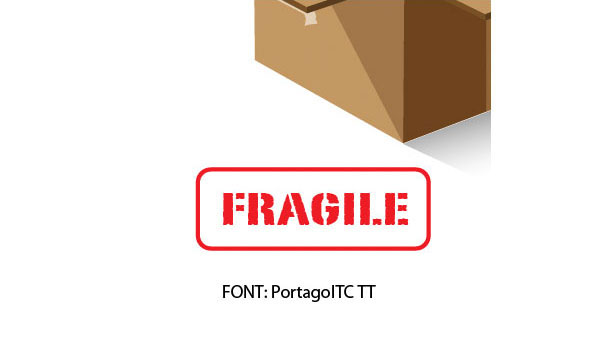 Then create outlines for the text (Type > Create Outlines or Shift + Cmd/Ctrl + O), select the text and the rounded rectangle, and then group them together (Object > Group or Cmd/Ctrl + G). Place the “Fragile” stamp on the side of the box.
Match the perspective/angle of our box by using Effect > Distort & Transform > Free Distort. 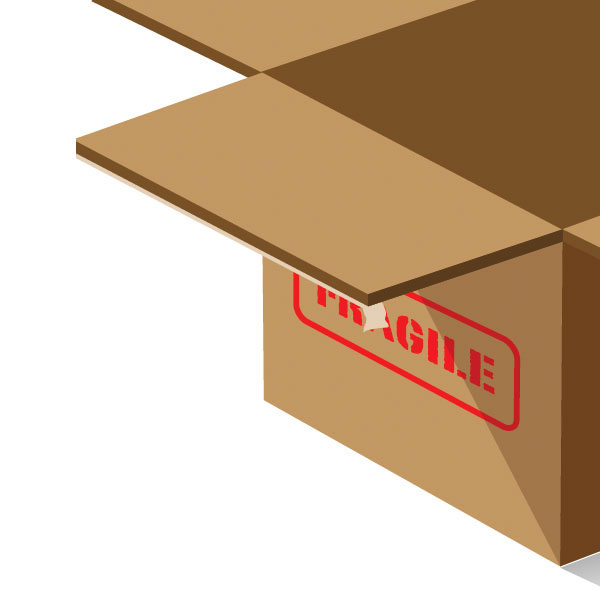
Step 10: Finishing Details
I thought the shipping box would look great on a beige background, so I just created a rectangle to serve as the background below the box and filled it with beige (#e4d0b5). 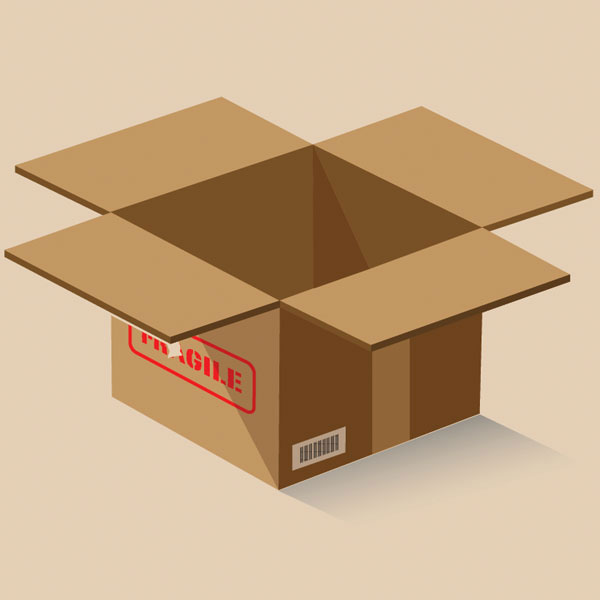 Feel free to add more details to the box.
For example, I added a barcode that was created using black vertical lines set on top of a beige rectangle (drawn with the Rectangle Tool). I used the same method (Effect > Distort & Transform > Free Distort) to match the angle and perspective of the box. 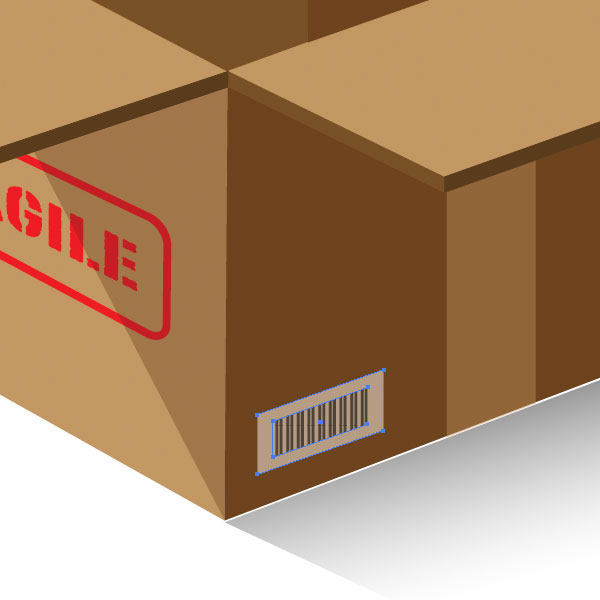
Tutorial Summary
This tutorial involved producing a 3D shipping box icon in Illustrator.
We used the 3D Extrude & Bevel effect to create the base shape. We used a nifty technique to draw the flaps using the Offset Path command. We detailed our box with things like packing tape, a red “Fragile” stamp, highlights and shadows.
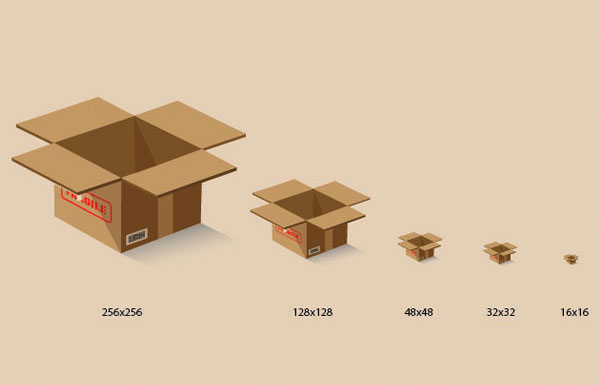
Below, I grouped all the shapes of the box, duplicated the group, and scaled them down in a variety of popular icon sizes. I hope you enjoyed this tutorial. 
Download Source Files
- shipping_package_box (ZIP, 1.07 MB)
-
 Trevin serves as the VP of Marketing at WebFX. He has worked on over 450 marketing campaigns and has been building websites for over 25 years. His work has been featured by Search Engine Land, USA Today, Fast Company and Inc.
 -

WebFX is a full-service marketing agency with 1,100+ client reviews and a 4.9-star rating on Clutch! Find out how our expert team and revenue-accelerating tech can drive results for you! Learn more
Make estimating web design costs easy
Website design costs can be tricky to nail down. Get an instant estimate for a custom web design with our free website design cost calculator!
Try Our Free Web Design Cost Calculator
Table of Contents
- Preview
- Step 1: Draw a 3D Box
- Step 2: Draw the Box’s Flaps
- Step 3: Add Some Color
- Step 4: Create an Edge for the Flaps
- Step 5: Add the Inner Walls
- Step 5: Correcting and Enhancing the Box’s Flaps
- Step 6: Add Surface Highlights and Packing Tape
- Step 7: Create the Box’s Shadow
- Step 8: Add Torn Packing Tape on the Flaps
- Step 9: Creating a “Fragile” Stamp
- Step 10: Finishing Details
- Tutorial Summary
- Download Source Files


Web Design Calculator
Use our free tool to get a free, instant quote in under 60 seconds.
View Web Design CalculatorMake estimating web design costs easy
Website design costs can be tricky to nail down. Get an instant estimate for a custom web design with our free website design cost calculator!
Try Our Free Web Design Cost Calculator


