

The Problem
“I want a camera that can take good photos and that I can carry with me at all times.” To try and solve this problem, I spent an entire afternoon trying to figure out how to fit my DSLR camera into my jeans pocket. 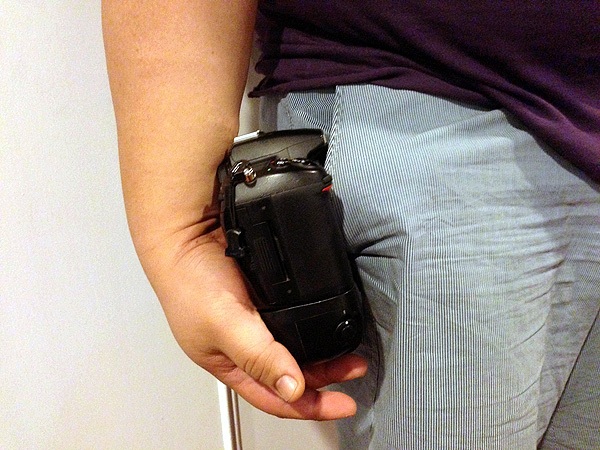 Trying to fit a DSLR camera in my pocket fail. I finally gave up, realizing that this might not actually be possible. After that failed attempt, I scoured the Internet for the best pocket-friendly camera (my) money can buy.
After a few mind-numbing hours of “reading” through gadget review websites, this thought suddenly came over me like a wave of heat: “Doesn’t your phone have a camera?” I already paid good money for this thing and even though no one ever calls me or sends me texts, I do have my phone with me at all the times to keep up the appearance of being a “normal”. And my phone does have an 8-megapixel camera. So maybe my search was over… It’s a fairly decent camera and it fits in my pocket.
But I knew that just like with any camera I was likely to buy, I would have to learn how to use it properly and work around its quirks (every camera has them). This was not a problem for me. The only real problem I’ve always had with cameras in phones was that they always felt like a poorly-thought-out feature that phone makers just needed to have in order to be competitive.
It wasn’t a central component, it just just had to be there. And for a while it seemed that that’s all the camera phone really was: A marketing tool. Camera phones, just a few years ago, took terrible-looking photos.
They weren’t easy to use, their performance was not great, and no one was going to take a photo from their phones that would make it to the cover of TIME magazine. I don’t think that’s the case anymore. So I decided to test out my camera phone seriously and see what kind of photos I could really produce with it. I’ll share what I’ve learned with you.
I’ll run through the steps I came up with that should help you take better photos with your camera phone.
Tip 1: Get to know your camera phone
Just like any other camera, your camera phone will have its own quirks. You must take the time to get to know how to use it properly.
Take note of how it behaves under different lighting conditions. Figure out how to hold it properly and how to shoot with it most effectively. Most camera phones that are made today don’t have manual controls for their exposure.
They are always in “auto” mode, which means that your phone’s camera sensor (not you) will choose the best exposure settings according to the lighting conditions surrounding you. The only way to take control of this process is to think ahead and know what your camera is going to do before it does it. When you know how your camera will behave, you’ll know just what kinds of photos you can take in any given situation. For instance, the photo below, from my iPhone 5, taken outdoors with good light was easy to take and produced a fairly sharp image; the sun was out and my phone had no trouble getting a good exposure.
The shutter speed was very fast and produced no motion blur.  The next photo below was taken from the same iPhone 5 when the sun was just about to set. In contrast, this photo looks a little brighter presumably because of the higher ISO and softer, more diffused lighting of the late afternoon sun.
I also had to hold the camera very still because the shutter speed felt a little slower. 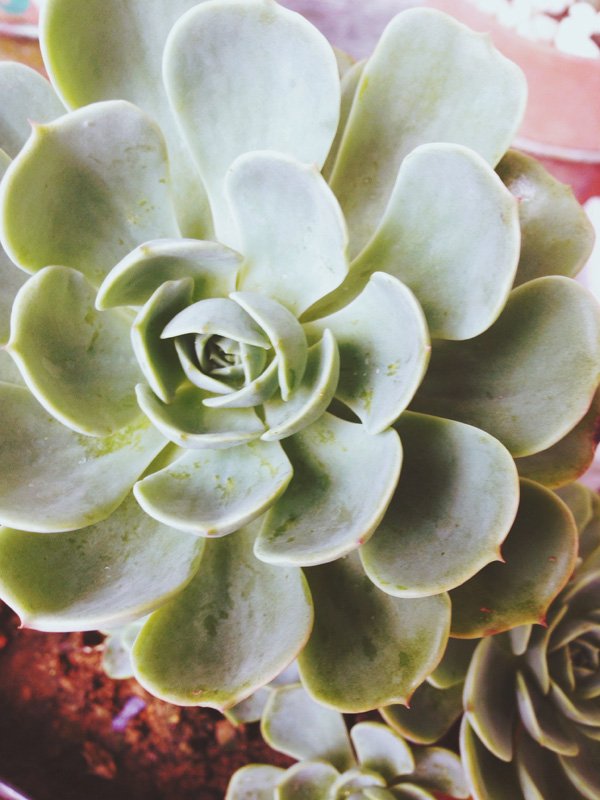
Tip 2: Focus on taking a good photo, not a good-looking photo
You probably won’t be capturing images for printing in a magazine or a billboard with your phone. You’ll be taking photos you can share online or — at the most — print them on your desktop inkjet printer.
Your camera phone can definitely do that. So stop worrying about quality. Stop pixel peeping and just take a photo.
Focus on taking an interesting image. That’s what photography is about anyway. No one really cares about the quality of your picture unless it’s for commercial work and other more important photographic endeavors.
But for that, we have DSLRs. 
Tip 3: Master the “quick tap”
Camera phones operated with a touchscreen (smartphones) suffer from shutter lag — yes, even the fastest, smartest of smartphones will have a bit of lag. Shutter lag is the lag that happens between the time you press the shutter release and when the camera actually takes a photo.
In my case, what I realized is that my camera phone will only take the photo when I released my finger from the shutter release button. I found that doing a quick tap on the shutter release button produced sharp and in-focus photos, while pressing on the button slowly caused some motion blur. As you’ll see in the photo below where I pressed on the phone’s shutter release much like you would on a camera. It’s blurry and not focused properly.
 This is the same scene where I quickly tapped on the camera phone’s shutter release:
  What I found was that while you have your finger pressed on the shutter release, the camera keeps focusing and refocusing on the subject. By quickly tapping on the button while the camera is in focus on your subject, you get rid of that problem.
Tip 4: Use auto-exposure lock and focus lock if you can
The more recent camera phones come with the ability to specify exposure (metering) points and focus points on your composition.
There are camera apps that give your phone this ability if your phone’s native camera app doesn’t already have it. What the auto-exposure (AE) lock and focus lock does is they allow you to manually pick a spot on your composition from which the camera will take its exposure settings (shutter speed and ISO sensitivity) and you can pick another spot to specify which part of your photo will be in focus. Knowing how to use this feature on your camera phone gives you some manual control over what parts of your image will be properly exposed as well as which parts of your image will be in focus.
As you can see in the image below, Michaelangelo (the best member of the Ninja Turtles), is in focus and the background has a lovely bokeh: 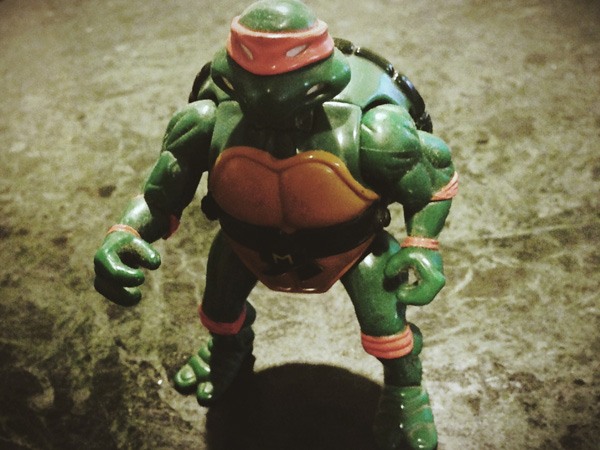
Tip 5: Edit your photos
In the “olden days” of film, one could argue that the real work of creating great photos happened in photographers’ dark rooms. Digital photos are no different except that instead of chemicals and confined dark rooms, we have photo-editing software. Knowing how to post-process your photos is just as important as knowing how to expose your photos properly.
This really applies to all digital images you take, whether it’s on your phone or on your DSLR. Taking the photo is only half the work, and it’s the fun and easy half. The hard part is making something awesome from the image you took through your post-processing work. There’s the misconception that a “good” camera is always going to produce a great image.
The truth is that a great photo is really born in the dark room or — digitally speaking — in your photo-editing software. That is where you accentuate colors, adjust exposure, and tweak the highlights and shadows; it is where your photo is given a soul. It is where you take an ordinary photo of a jar of mustard:  And make it a dark, ominous photo of a jar of mustard:
  Luckily, there are some great photo-editing apps to edit your photos right on your phone. These apps are easy to use and offer some amazing tools to help you get the best photo possible.
Here are a few great ones that I’ve used (Instagram filters don’t count):
- VSCO is a really great camera app with a very robust set of photo-editing tools built right in. VSCO is free and includes some really great presets which are a bit like the photo filters in apps such as Instagram, but they’re way more powerful.
- Snapseed is one of my most favorite photo-editing apps for iPhone. It has a lot of tools, it’s easy to use, and it’s free. I’ve lost untold amounts of time just experimenting with the great tools in this app.
Give it a try.
- Camera+ is really one of the great full-featured camera apps in an entire sea of full-featured camera apps in the Apple App store. It’s easy to use and it gives you pretty good control of your images.
Tip 6: If you think a photo is too noisy or grainy, convert it to black and white
The problem with the noise created on your smart phone is that it creates a lot color noise in low light conditions when your ISO sensitivity is way up. When you convert your noisy photos to black and white, you get rid of all that color noise and you’ll end up with some really great, moody, black and white photos; albeit with a fair amount of film grain, which could actually be a good thing in some instances, in terms of artistic composition.
Tip 7: Take control of your camera phone’s flash
When you’re in low light conditions, you might think that you’ll need to fire your camera’s flash.
But try using your camera’s flash only when you absolutely need it or use it only as a fill flash. Most camera phones today perform pretty well in low light and can produce some perfectly usable photos. Just remember to keep your camera still since, most of the time, your camera phone will almost always automatically choose a high ISO and a slow shutter speed in low light conditions.
Tip 8: Keep your arms as close to your body as possible
When people take photos with the camera phones, I often see them with their arms extended in front of them as though they are reaching towards their subject.
This makes for a very unstable camera since you have to use extra muscles to keep your hands steady. Instead, keep your arms as close to your body as possible. And then just walk closer to your subject if you want a closer shot.
You’ll see that your photos will have less motion blur and you’ll be able to focus on your subject much faster because your arms aren’t moving as much.
Tip 9: Always keep the lens of your camera phone clean
On the iPhone 5, the lens can get dirty really fast. The slightest smudge or fingerprint on the lens can lead to soft looking photos because your camera will have a hard time focusing through the smudge.
Final Thoughts
Photography is one of the most democratic creative disciplines. Almost anyone can get into it and anyone can be good at it with the right amount of work. All you have to do is want to take better photos.
The fact that a lot of people now have cameras in their phones can only be a good thing for photography. The simplicity of its process makes it easy for beginners to get into photography while also liberating the more experienced shooters from that constant call of always needing better gear. Now we can just focus on coming up with good ideas for our photos.
Will the camera phone replace your nuclear-powered, space-age, DSLR camera? Probably not any time soon. Especially if you’re a pro photographer and your work depends on it.
For the rest of us, however, I think the camera in our phones will do just perfectly for most of the everyday, spontaneous moments we’ll ever need them for. If you have you own camera phone photography tips please share them with us in the comments section below or tweet it to us.
-
 Trevin serves as the VP of Marketing at WebFX. He has worked on over 450 marketing campaigns and has been building websites for over 25 years. His work has been featured by Search Engine Land, USA Today, Fast Company and Inc.
 -

WebFX is a full-service marketing agency with 1,100+ client reviews and a 4.9-star rating on Clutch! Find out how our expert team and revenue-accelerating tech can drive results for you! Learn more
Make estimating web design costs easy
Website design costs can be tricky to nail down. Get an instant estimate for a custom web design with our free website design cost calculator!
Try Our Free Web Design Cost Calculator
Table of Contents
- The Problem
- Tip 1: Get to Know Your Camera Phone
- Tip 2: Focus on Taking a Good Photo, Not a Good-looking photo
- Tip 3: Master the “quick Tap”
- Tip 4: Use Auto-exposure Lock and Focus Lock if You Can
- Tip 5: Edit Your Photos
- Tip 6: if You Think a Photo is Too Noisy or Grainy, Convert It to Black and White
- Tip 7: Take Control of Your Camera Phone’s Flash
- Tip 8: Keep Your Arms As Close to Your Body As Possible
- Tip 9: Always Keep the Lens of Your Camera Phone Clean
- Final Thoughts
Share this article


Web Design Calculator
Use our free tool to get a free, instant quote in under 60 seconds.
View Web Design CalculatorMake estimating web design costs easy
Website design costs can be tricky to nail down. Get an instant estimate for a custom web design with our free website design cost calculator!
Try Our Free Web Design Cost Calculator


