

This tutorial will walk you through the process of making a 3D anaglyph image from a single image. It might not be quite a Hollywood-ready 3D effect but it’s still fun and might make for some interesting projects! What you’ll need:
- 3D glasses (the goofy looking ones with a red and cyan lens)
Step 1: Open Your Image in Photoshop
This method works extremely well with black and white images. However, I find that it works pretty well with color images too. For this tutorial, my friend Mia has graciously allowed me to use one of her photos from our photo shoot a few of months ago.

Step 2: Duplicate Your Image
Duplicate your background image 2 times (one layer for each eye). Name one layer “Left-red” and the other layer “Right-cyan” to avoid confusion later in the tutorial. Once you’ve duplicated and named your layers, turn off the visibility on your background layer.
We will manipulate each new layer so that the right and left eyes sees something a little different from one another. 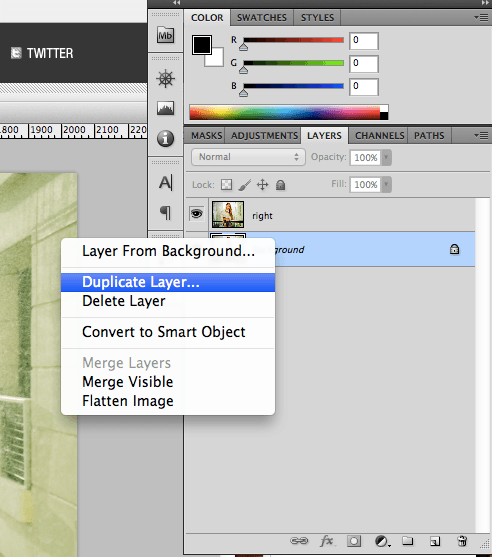
Step 3: Isolate the Color Channels and Change the Perspective
Here’s where the magic happens. 3D anaglyphs work by exploiting our natural ability to perceive depth using binocular vision.
Much like a camera, each of our eyes can only see in 2D. Our depth perception comes from the fact that each of our eyes sees a slightly different image from one another, from slightly different angles. When the images get processed in our brain — the slight difference in angles between the two images we get from our eyes — it gives us the perception of depth.
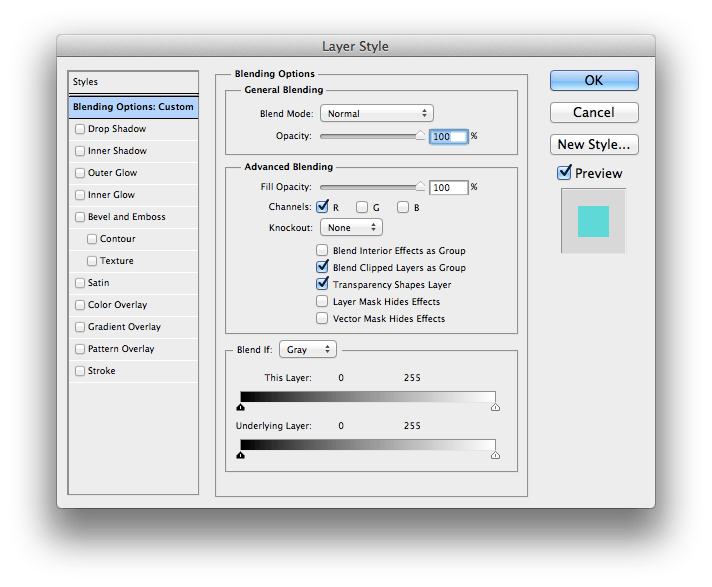
This is the basic premise of this technique I’m sharing with you now. We start by isolating the color channels on each layer. Go to your Layers panel and double-click the “Left-red” layer.
Most anaglyph 3D glasses come with red lenses for the left eye and blue or cyan lenses for the right eye. Since the red lens will only let in the red channel, we’ll turn off the green and blue channels for this layer. This can be done under the Advanced Blending dialog.
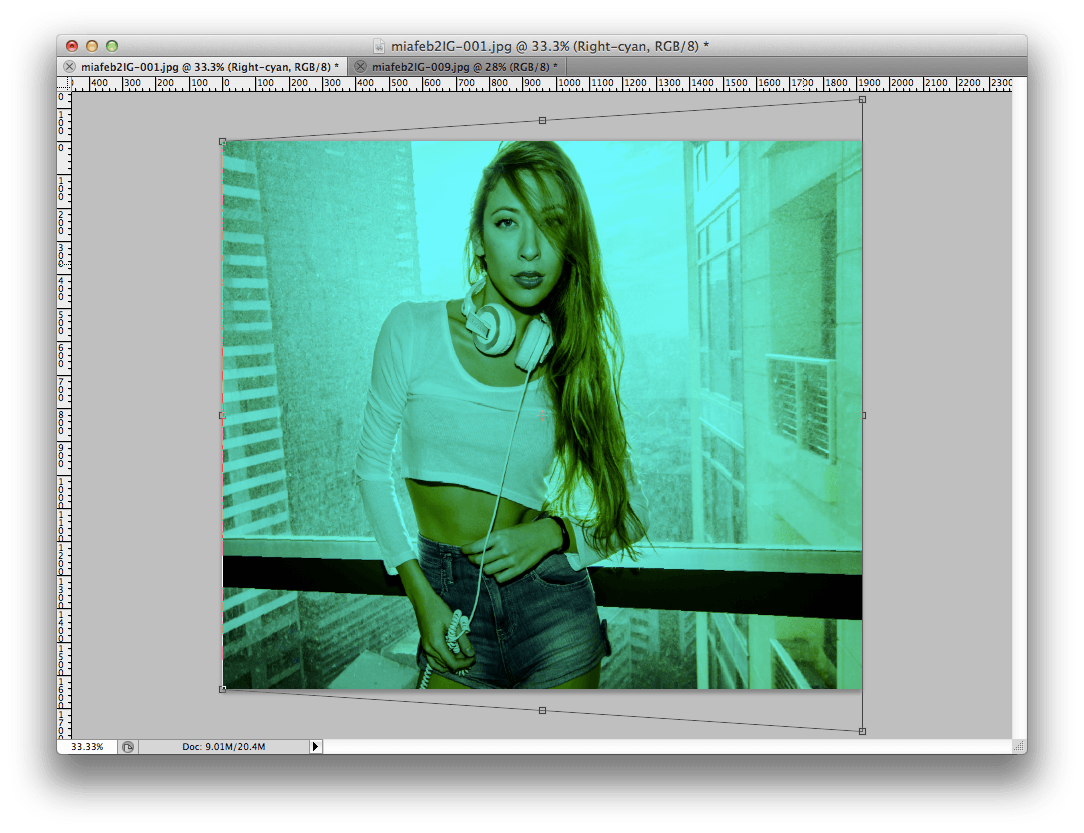
 Since our right eye will only be able to see the green and blue (cyan) channels through the cyan lens, we’ll turn off the red channel for the “Right-cyan” layer.
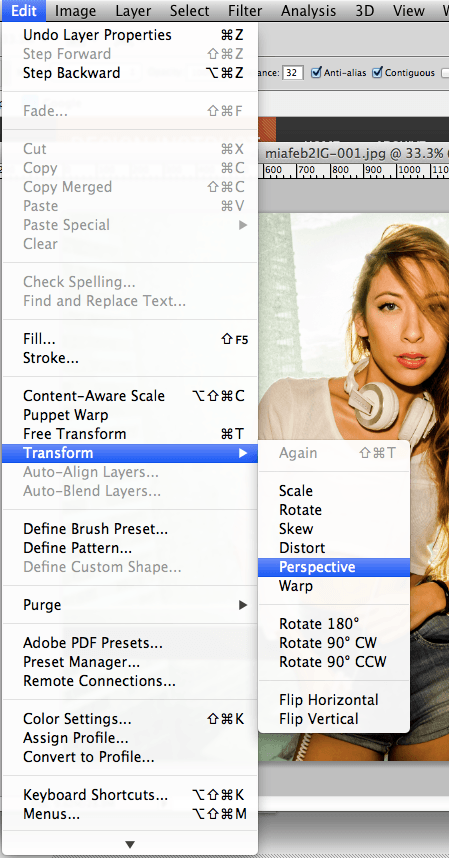
 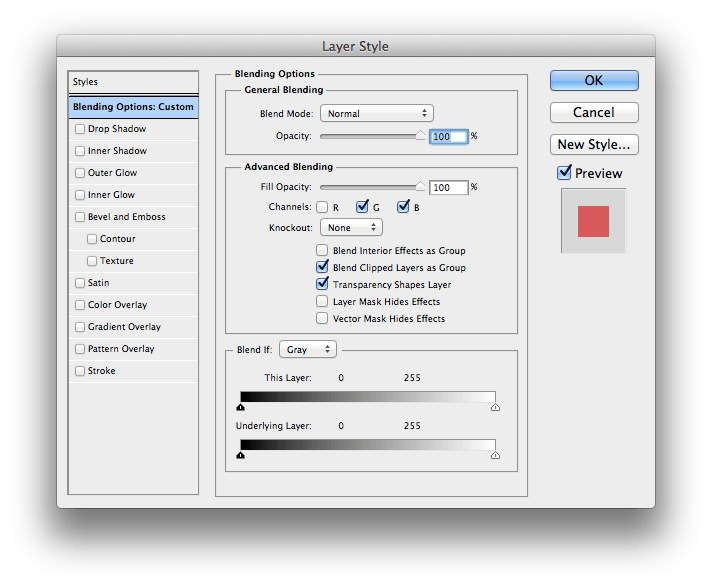 Now that we’ve isolated which image will go to which eye, we simulate depth by changing the perspective of each layer. Starting with the “Left-red” layer, we change the perspective by going to Edit > Transform > Perspective.
 Drag the top left corner of the image upward about 50-100 pixels, depending on how large your image is. Drag it more for a more pronounced effect.
 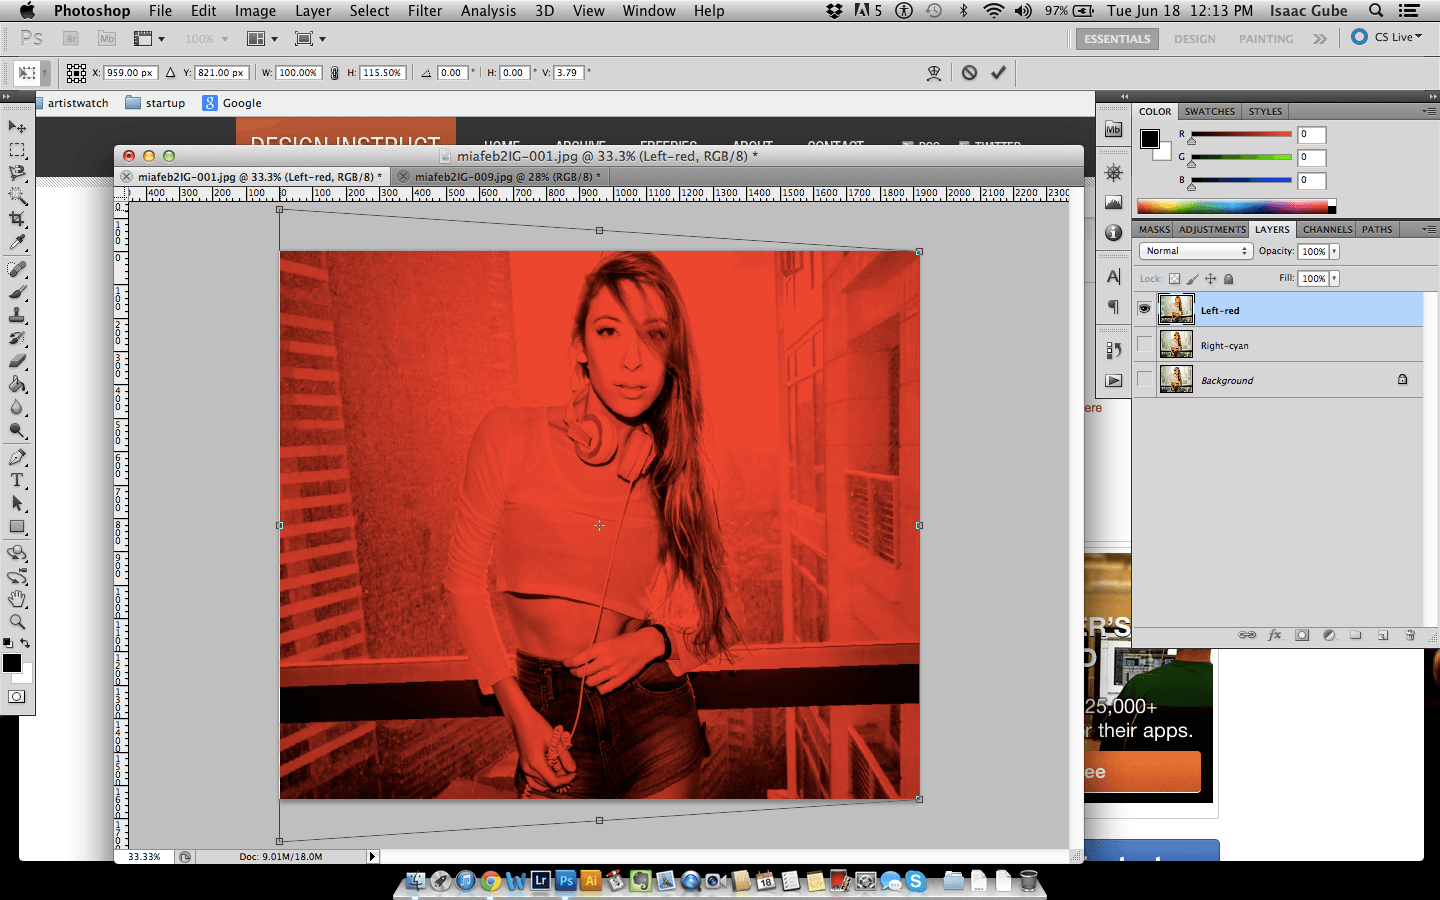 Do the same on the “Right-cyan” layer on the top right corner of the image.
 Once you’re done transforming both layers, you should have an image similar to this.
 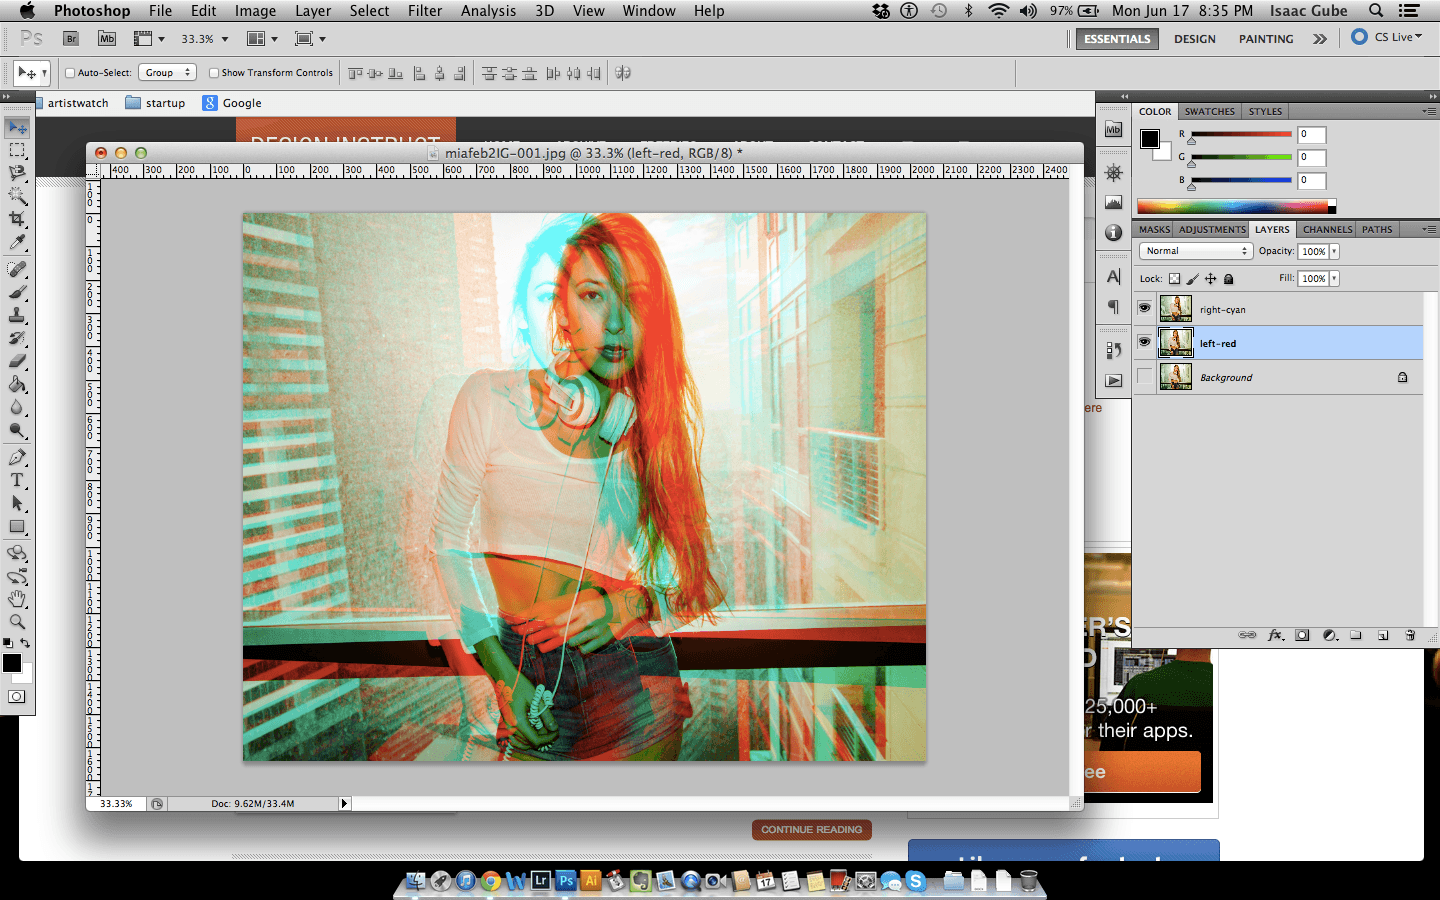 We have just effectively “hijacked” our brain into thinking that it’s processing 2 different images giving a perception of depth when viewed through 3D anaglyph glasses.
Step 4: Adjusting the Depth
Put your 3D glasses on and see what you’ve accomplished.
With the Move tool selected, press the left and right keys on your keyboard until the two layers are aligned in the middle. I used the model’s face as a reference of where the middle would be. 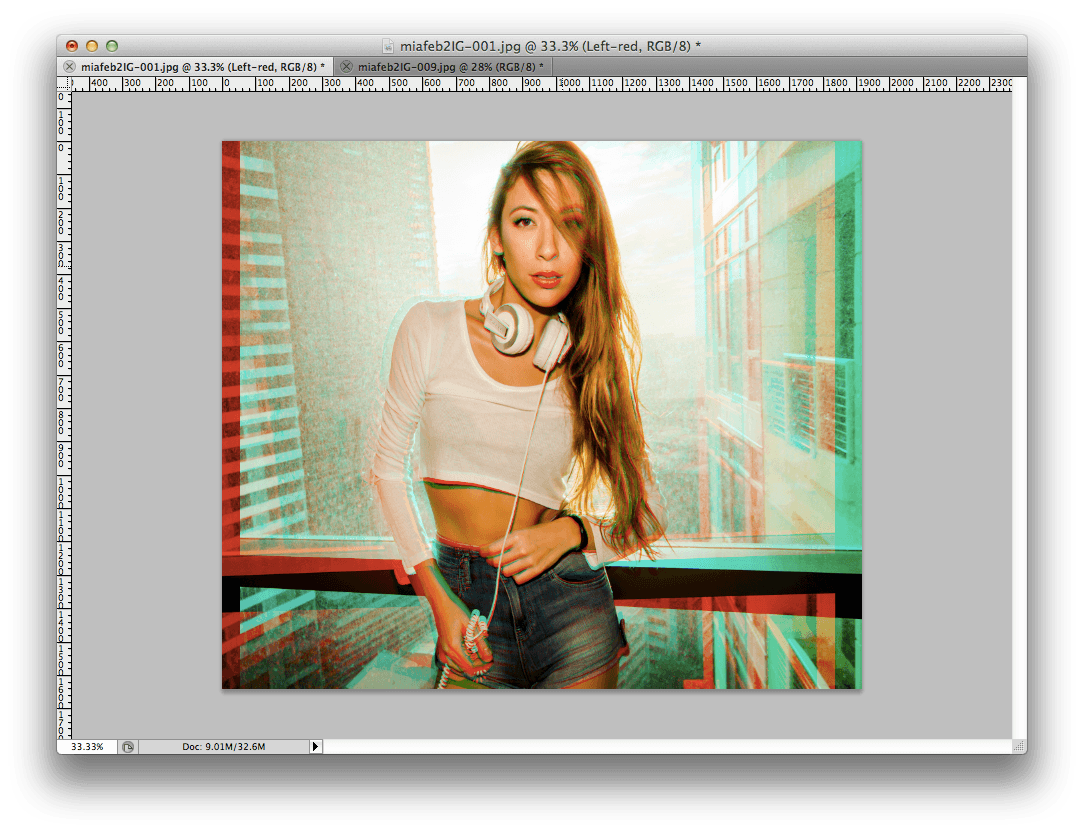
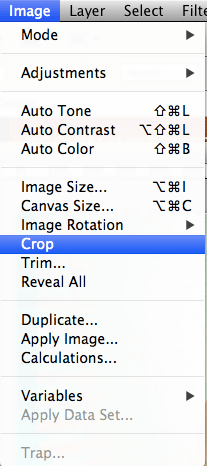
Step 5: Crop
You’ll need to crop out the edges of the photo where the layers don’t align.
Do that by using the Rectangular Marquee tool and by selecting the area of the photo you want to keep and then go to Image > Crop. 
Step 6: Save Your Image
You can now save your photo in any image format you want (JPG, PNG, etc.) by going to File > Save As… You’ve just created a 3D anaglyph from a single photo!  While this technique isn’t exactly like creating a real 3D anaglyph photo because it isn’t using two different photos from 2 different perspectives, we’ve achieved a somewhat similar effect using just one photo.
It’s a simple and easy effect that you can use when you want to add that extra “wow” factor to your photos! Now, all you’ll need are some 3D glasses…
-
 Trevin serves as the VP of Marketing at WebFX. He has worked on over 450 marketing campaigns and has been building websites for over 25 years. His work has been featured by Search Engine Land, USA Today, Fast Company and Inc.
 -

WebFX is a full-service marketing agency with 1,100+ client reviews and a 4.9-star rating on Clutch! Find out how our expert team and revenue-accelerating tech can drive results for you! Learn more
Make estimating web design costs easy
Website design costs can be tricky to nail down. Get an instant estimate for a custom web design with our free website design cost calculator!
Try Our Free Web Design Cost Calculator
Share this article


Web Design Calculator
Use our free tool to get a free, instant quote in under 60 seconds.
View Web Design CalculatorMake estimating web design costs easy
Website design costs can be tricky to nail down. Get an instant estimate for a custom web design with our free website design cost calculator!
Try Our Free Web Design Cost Calculator


