
If you have an Internet marketing strategy, you know the importance of adding original content to your website on a regular basis. But do you regularly integrate graphics into your content? If you’re not, it’s not as interesting as it could be, and you’re missing an opportunity to engage visitors and increase the time they spend on your site.
If you don’t have an in-house design team, or coworkers with design experience, you may think that custom graphics aren’t an option – but that’s where Canva comes in. Along with this blog, we’ve also created a video with some design tips (see below) and a PowerPoint, which you can find in the second half of the post, to visually explain each of our topics of discussion.
What is Canva?
Canva is an online tool that makes designing custom graphics easy for just about anyone. Its user-friendly interface offers many options to create graphics for your website, with absolutely no design experience necessary.
 They offer premade templates for a variety of purposes, including like social media, presentations, posters, email, and blog graphics, just to name a few. It also allows you to select the exact dimensions of your canvas if you’re making a graphic from scratch, using inches, millimeters, or pixel measurements. If you’re unfamiliar with Canva, keep reading for a basic overview of how to use it to create designs both from premade templates and from scratch.
And if you already have some experience with the platform, scroll down for a few specific tips to make your designs more professional.
Premade designs
Canva’s premade designs make it easy to quickly create graphics for your website and other online campaigns. These templates are already organized, but customizable to fit your website’s color scheme, fonts, and branding. When you select a premade design, you’ll be able to edit the color of every element in the design, and the font of text that is included.
Then, you can edit the text to include your own content. 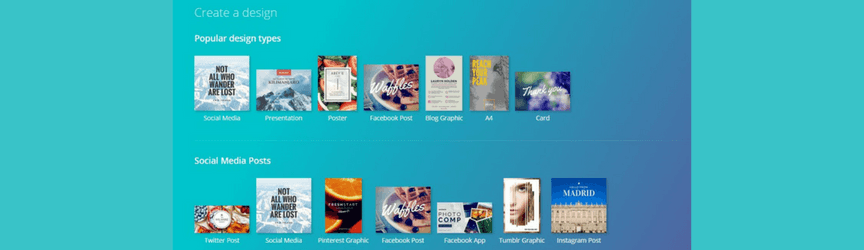 You can move and delete any of the template elements to suit your needs, and you can even change the opacity of elements to add extra design flare. The user-friendly process allows you to add to and take away from any design as much as you choose – giving you plenty of opportunities for customization while starting you off with the initial “skeleton”.
Custom designs
If you’re ready to take on a design without any help, you can create any sized canvas you choose and get to work.
The navigation panel on the left of the screen has a plethora of different commands that allow you to create any vision that you can imagine.
Search
The search tab allows you to search Canva’s extensive collection of photographs and illustrations to find the perfect visuals for your design. Most of them are free, but some cost $1. For a modest price, most of these illustrations can be edited to be any color that you choose.
Layouts
The layouts tab is great for organizing photos in a design. They keep your photos evenly spaced and arrange them in ways that are cropped to fit your chosen canvas size.
Elements
The elements tab is the jack of all trades in Canva. 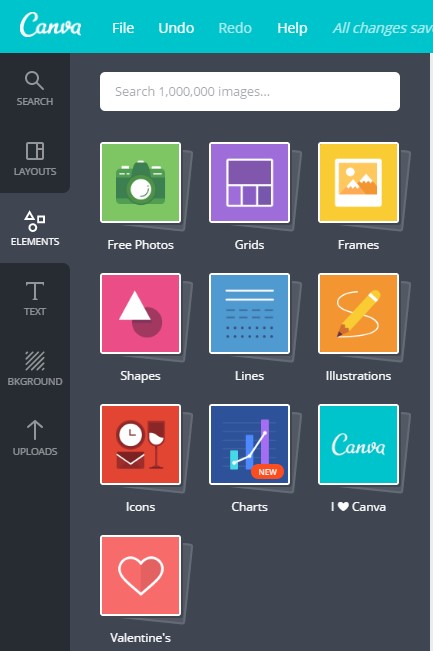 This tab holds everything you need to make the most unique graphic for your website and other campaigns.
The categories within the elements tab include free photos, grids, frames, shapes, lines, illustrations, icons, charts, “I love Canva”, and usually a seasonal category.
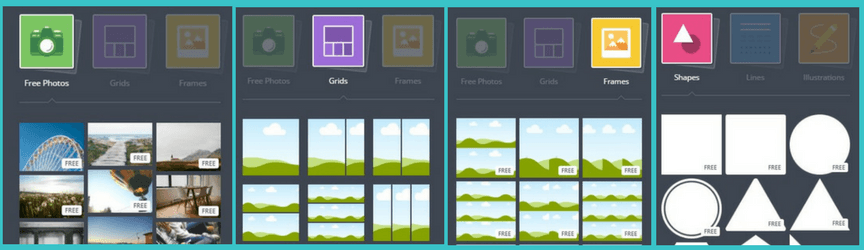
The free photos tab is just what it sounds like – a collection of free photos that you can search by subject. The grids category is much like the layout tab, in that you can use it to organize your photos in a design. You can control the spacing, and the color of the lines that space your photos, and there are over 90 grid designs to select from.
The frames category allows you to choose a frame for your design in any color you choose.
There’s everything from funky overlays to frames that slice your picture into pieces, and of course, just your standard frame.
Shapes offers you just about every shape in existence to take your design to the next level. You can adjust the size of each shape to fit your canvas, decrease the opacity and use it as an overlay, or use the shape outlines to add some fun to your design. You can resize each shape and make it any color that you see fit.
 Lines allow you to separate elements on a page, underline important elements, or add a border to the sides of your design.
Canva’s huge selection of line styles allow you to create nearly any vision you can think up, and you can change the color, and length of all of them. The illustrations tab provides you with tiny graphics that you can use to bring your custom graphic to life.
Just search what you’re looking for, and Canva likely has an illustrated version! For many of the illustrations, you can also change the colors to fit your specific color scheme.
Icons are simplified versions of illustrations, and offer outlines of familiar shapes.
They can all be sized to your specific dimensions, and the color is customizable as well. Charts are a great way to illustrate statistics or findings that relate to your topic. You can select a graph from the wide selection offered, including bar graphs, line graphs, pie charts, and Venn diagrams.
For charts that require numerical values, like bar graphs, you can name each bar, and edit the values so that it illustrates the exact numbers that you want to share. 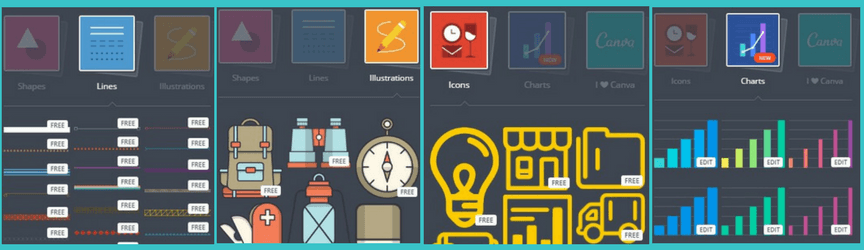 The “I love Canva” tab includes all of Canva’s logos, if you choose to place one on your graphic. At special times of the year, Canva also offers a seasonal tab to create holiday graphics.
The tab includes icons, illustrations, photos, borders, and text that fit the specific holiday.
Text
The text tab is self-explanatory, and offers a long list of customizable text designs. Designs can arrange your text in a square, envelop it in a striped circle, or hang it from a shopping tag. If you’re looking for just a plain text box, Canva offers that as well.
You can edit the text size, color, spacing, and justification, and can create headings, subheadings, or “a bit of body text.”
Background
The background tab allows you to choose from a huge selection of patterned backgrounds that you can change the color of, or select a solid colored background.
Uploads
The uploads tab is where you can access photos that you have uploaded to Canva. Whether you upload a screenshot that you want to use in a design, or a photo that you took yourself, you can find them all in the uploads tab.
Make your designs look professional
Although Canva makes it easy to create graphics in a matter of minutes, you should take the time to make each one look in line with your company’s brand. Here are a few key strategies that will ensure that your designs look clean and professional:
Limit your color palette
When you’re first starting to design a graphic, you may want to include as many of the color options as you can. You might try to pick your favorites, or use a combination of colors to create the perfect look. However, you should try to limit your color palette as much as possible.
It keeps your design clean, simple, and less scattered for viewers. When choosing a color palette for your graphics, you should also try to stick with your brand’s colors, and be consistent with your palette across most of your designs.
Use one font
When you create a design that is mostly text, you should keep the font consistent. Though it may be appropriate to change the heading font to make it pop, most of the time, bolding a heading that is the same font as the body text is enough to set it apart.
When you use an excess of different fonts, you risk making your design appear too busy or unprofessional.
Don’t forget about white space
White space is one of the most underrated elements of design. In order to fit all of your design elements in a small space, many users will crowd their elements together. But for viewers to get the most out of your graphics, it’s crucial that you leave enough white space for your elements to breathe.
You need to make sure that your elements are large enough to be read properly, but also allow for plenty of space around each one.
Fill up your design’s background
If you’re using a photo as the background for a design, make sure that you stretch it the whole way across the canvas. It makes one cohesive background that is much easier for viewers to read and comprehend.
Utilize grids
The grid function is there for a reason – to help you organize your photos, so you don’t have to. If you’re using multiple photos on one graphic, stay away from arranging them at angles, or on top of each other.
Instead, use the grid function to space them appropriately.
-
 Sam has been writing for WebFX since 2016 and focuses on UX, crafting amazing website experiences, and digital marketing In her free time, she likes to spend time on the beach, play with her cats, and go fishing with her husband.
 -

WebFX is a full-service marketing agency with 1,100+ client reviews and a 4.9-star rating on Clutch! Find out how our expert team and revenue-accelerating tech can drive results for you! Learn more
Try our free Marketing Calculator
Craft a tailored online marketing strategy! Utilize our free Internet marketing calculator for a custom plan based on your location, reach, timeframe, and budget.
Plan Your Marketing Budget
Share this article
Maximize Your Marketing ROI
Claim your free eBook packed with proven strategies to boost your marketing efforts.
Get the GuideTry our free Marketing Calculator
Craft a tailored online marketing strategy! Utilize our free Internet marketing calculator for a custom plan based on your location, reach, timeframe, and budget.
Plan Your Marketing Budget


