

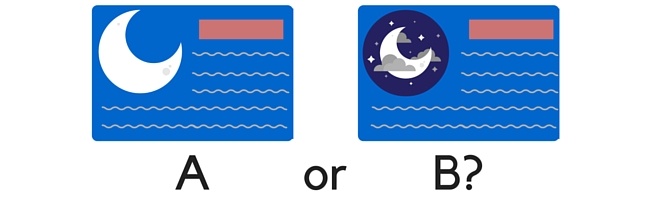
Split testing (also known as A/B testing) is the practice of running multiple variations of the same element in order to see which one performs better. The winner can then be split test against a different variation, and so on. While the process can be repeated ad infinitum, even the most basic split testing efforts can result in increased ROI.
So if you’re not split testing your Facebook Ads, you’re losing money. It’s as simple as that.
Exploring the A/B split test
Like I said above, an A/B split test involves measuring the performance difference between variations of the same element. In the case of advertisements, there are many things you can change.
Typically, you begin by mocking up an ad that you think will perform well. Then, you duplicate that ad, but change something about it. You can split test just about anything: Images, headlines, ad copy, targeted demographic, bidding practices…the list goes on.
 When working with split tests, you should only change one element per ad variation. Changing more than one element at a time can get confusing fast, and it may become unclear why one variation is out- or under-performing your initial control ad. It’s best to start split testing more general elements, working towards the minutiae as you narrow down what constitutes your “ideal” ad along the way.
I’ll go into this in more detail later on. One last important note: There are many different metrics to compare when split testing. CTR, CPC, clicks, spend, and conversion rate are all valid metrics to track.
However, in order to split test successfully, you’ll want to pick a single metric that you’ll use to compare ad performance. Comparing different metrics to each other won’t do you much good.
Understanding the structure of Facebook Advertising
In order to split test optimally, you need to understand the best “level” at which to do so. The Facebook advertising process is structured like this: 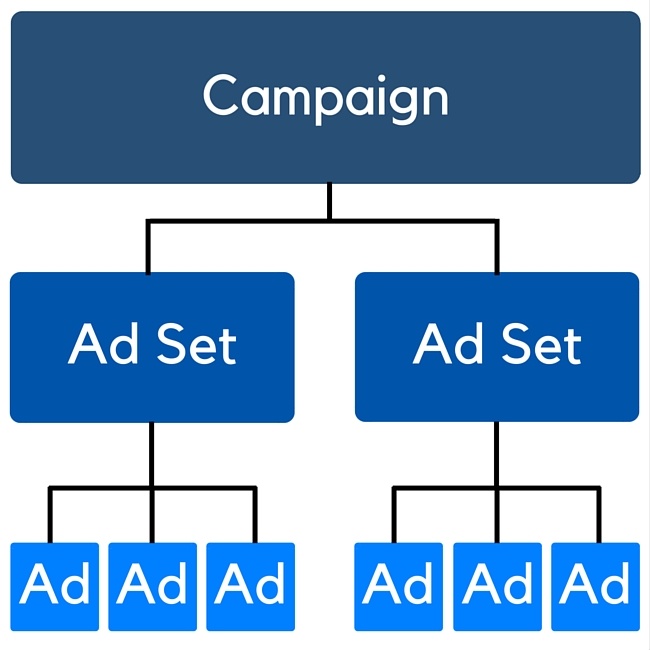 Each level of the advertising structure lends itself to different things:
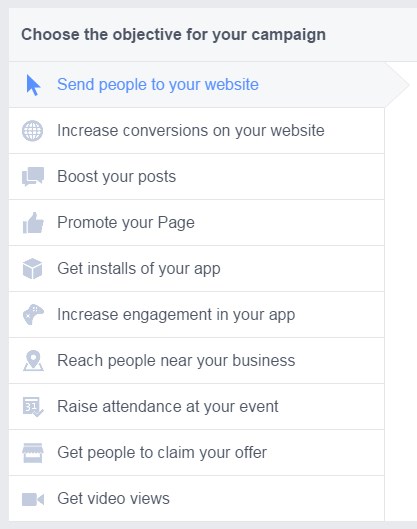
- Campaign level: In general, split testing should not be conducted at the campaign level. Instead, you should have each campaign set up to track different goals. These can be whatever you’re aiming to accomplish, like website conversions, page post engagement, and so on.
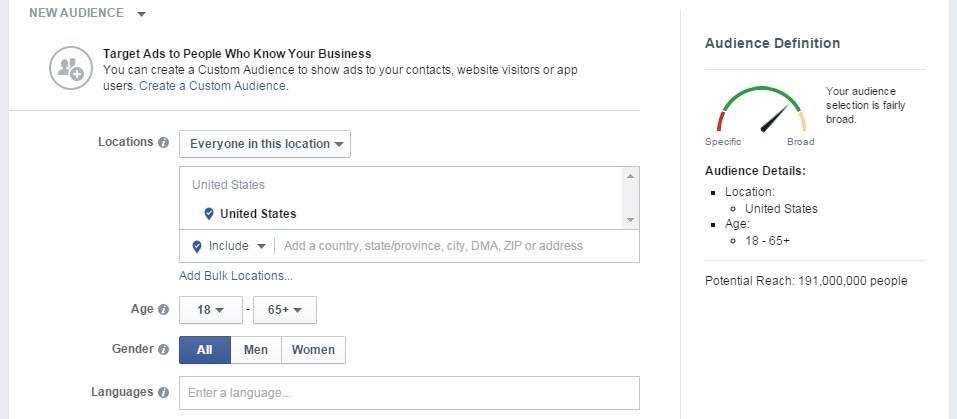
- Ad set level: The Ad Set level is where you define your audience, budget, and schedule. You’ll be doing all of your demographic split testing at this level, from age, to gender, to interests, and so on. Most of your initial testing should take place here, as optimizing your ad creatives won’t matter if they’re not being served to the right audience.
- Ad level: This is where your creative split testing will happen. You’re setting up individual ads, and can test images, headlines, ad copy, and anything else you might include in an ad.
Example split tests
Now that you understand what split testing is and how it functions at the different levels of Facebook Advertising, it’s time to give it a shot! I’ve put together a few demonstration split tests so you can check out the process before you get started yourself.
Demographic split testing
Like I mentioned before, it’s important to start general and work your way down to the specifics. The following is a very general example, but you should be going into your split testing with a much narrower and more accurate view of your target audience to begin with (based on your specific business and industry).
Let’s say I know that my target demographic is males who live in the United States, and I’ll be measuring click-through rates. If I want to find out what ages respond best to my ads, I would create two ad sets targeting different age ranges. Each ad set would contain the exact same ads, so the final campaign would be structured like this: 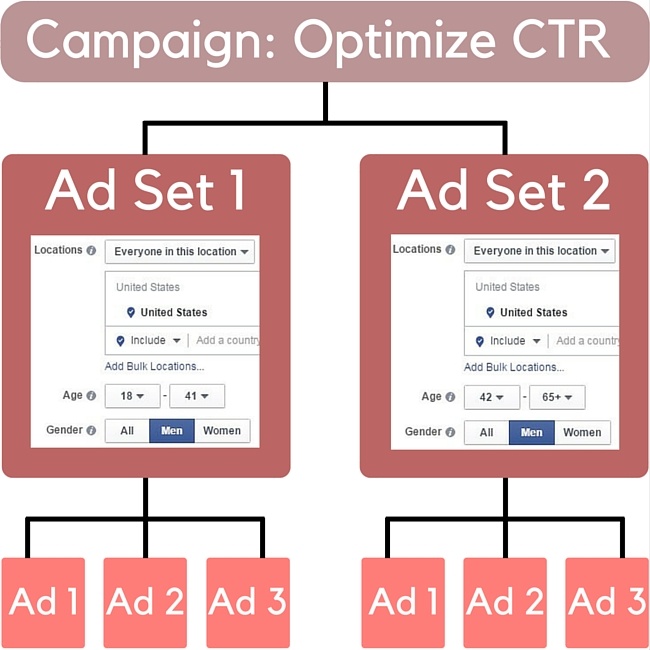 After each set has been served a few thousand impressions, I’ll have a pretty good idea which age range has the higher CTR.
The winning age range could then be broken up into more ad sets of additional age ranges in order to further define my optimal target demographic. Like I said before, this general level of split testing is just an example to demonstrate how the process works. Most businesses already know the general age range their target demographic falls into, and wouldn’t benefit very much from such a broad test.
It could also be more efficient to structure this sort of split test to utilize 3+ ad sets from the start, with each broken up into more specific age ranges (say, 18-35, 36-50, 51-65+).
Headline split test
Below is a very straightforward split test, again comparing CTR. These are examples of ads that would appear in the right-hand column of Facebook’s desktop site. Both ads have the exact same targeting and use the same image and body copy.
I would run each ad until they both receive a few thousand impressions, and see which version has the higher CTR:  vs
vs 
Other suggestions
While these are a few very general examples of split testing, you can test just about every element of your ads. Here’s a basic list of some good starting points for your split tests:
- Gender
- Age
- Location
- Relationship status
- Targeting specific interests vs. broader targeting
- Image
- This includes using the same image with slight variations like a border, drop shadow, etc. (just make sure your changes fall within Facebook’s advertising guidelines!)
- Ad headline
- Ad body copy
- Landing pages
A quick note on ad sets
Facebook’s ad algorithm can be overly aggressive in choosing a “favorite” ad from an ad set. If one ad within an ad set seems to be doing better than the others, Facebook will funnel most traffic (and most of your budget) to that “favorite” ad. Facebook often jumps the gun in doing so, deciding on a “winner” well before there’s enough data to make an accurate decision.
This will result in skewed analytics for you, as the other ads in the ad set won’t receive the impressions necessary for meaningful analysis. Facebook has taken steps to address this by implementing the ad set model and allowing budget allocation at the ad set level, but the issue can still crop up if you’re split testing ad designs within an ad set. You can remedy this in one of two ways.
The first is to pause the “favorite” ad long enough for the others to catch up with received impressions. However, pausing will likely result on Facebook picking another ad to favor. This means you’ll have to keep a close eye on your campaign, pausing ads as they emerge as the “favorite” until all of your ads have enough data for proper analysis.
The second solution is to create an entirely different ad set for each individual ad, so you can effectively allocate a budget for each ad variation you’re testing. This obviously involves more work upfront, as it can get quite tedious to create numerous ad sets each containing only one ad (especially if you’re testing many different variations). However, after the initial set-up, this solution is much more “set it and forget it” than having to pause specific ads for even traffic distribution.
If you run into this issue, it’s best to try a few different solutions to see which works best for your specific campaign.
…and a quick note on budgeting
When split testing ads, you may lose money in the short-term on ads that don’t perform well. This is actually a good thing. It means you’re identifying and pruning underperforming ads so that your live-campaign budget will fund the cream of the crop.
This is one instance where the adage “you have to spend money to make money” holds true. Many people will also ask “how much should I spend on split testing?” Unfortunately, there isn’t a magic number. In general, a higher budget means more data acquired faster, which means more accurate, actionable testing.
But don’t worry: you can even get data trickling in from a small budget of $5 a day. It may take longer to hit the impression benchmarks you need for statistically relevant data, but it’s still split testing and can provide helpful information for an extremely low cost.
So, you’ve split tested your ads and have some winners. Now what?
Keep testing! Set your winning ads loose with an increased budget, but never stop testing additional variations.
Most Facebook ads tend to have a relatively short lifespan before banner blindness sets in, so it’s always smart to have a repository of successful ads even if you don’t plan on running them immediately. After you’re comfortable with basic split testing, you can begin to scale up your process. While testing a few different variations of an ad may seem simple enough at first, there’s really no upper limit to the complexity of split testing.
Below is a visualization of a slightly more extensive split test setup that’s structured to determine the best image, headline, and body copy combination. This example would work by using one image per ad set: 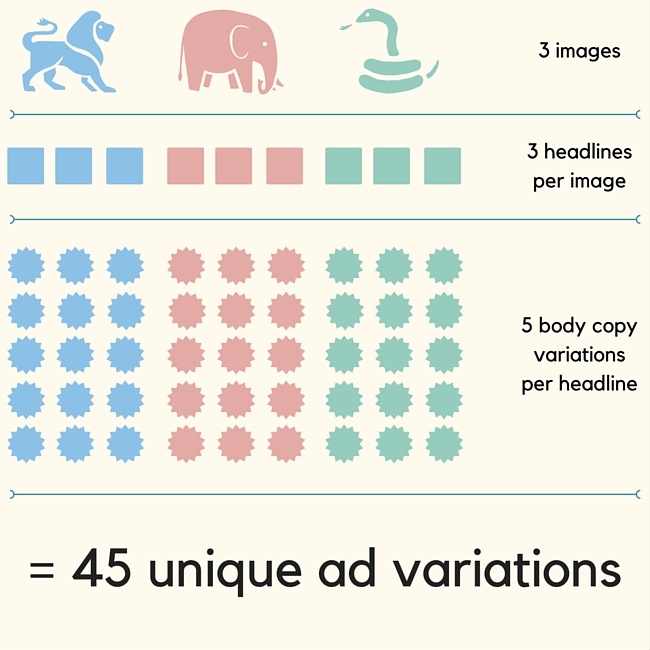 The three different headlines are the same for each image, and the 5 different copy variations are the same for each headline (as in, while headlines 1, 2, and 3 are different from each other, you’ll be using the same three for each image, and the same five body copy variations for each headline). Even this example isn’t particularly involved compared to what some experienced social media marketers do – but it does show just how quickly testing can go from simple to complex.
Does your company split test Facebook ads?
If not, I hope I’ve provided you with enough information to get started!
If you do have experience split testing, I’d love to hear your strategies and personal tips/tricks in the comments below!
-
 Ryan is a Lead Marketing Consultant at WebFX. Follow him on Twitter @rmaake107!@rmaake107
 -

WebFX is a full-service marketing agency with 1,100+ client reviews and a 4.9-star rating on Clutch! Find out how our expert team and revenue-accelerating tech can drive results for you! Learn more
Try our free Marketing Calculator
Craft a tailored online marketing strategy! Utilize our free Internet marketing calculator for a custom plan based on your location, reach, timeframe, and budget.
Plan Your Marketing Budget
Share this article

Maximize Your Marketing ROI
Claim your free eBook packed with proven strategies to boost your marketing efforts.
Get the GuideTry our free Marketing Calculator
Craft a tailored online marketing strategy! Utilize our free Internet marketing calculator for a custom plan based on your location, reach, timeframe, and budget.
Plan Your Marketing Budget


